Sana
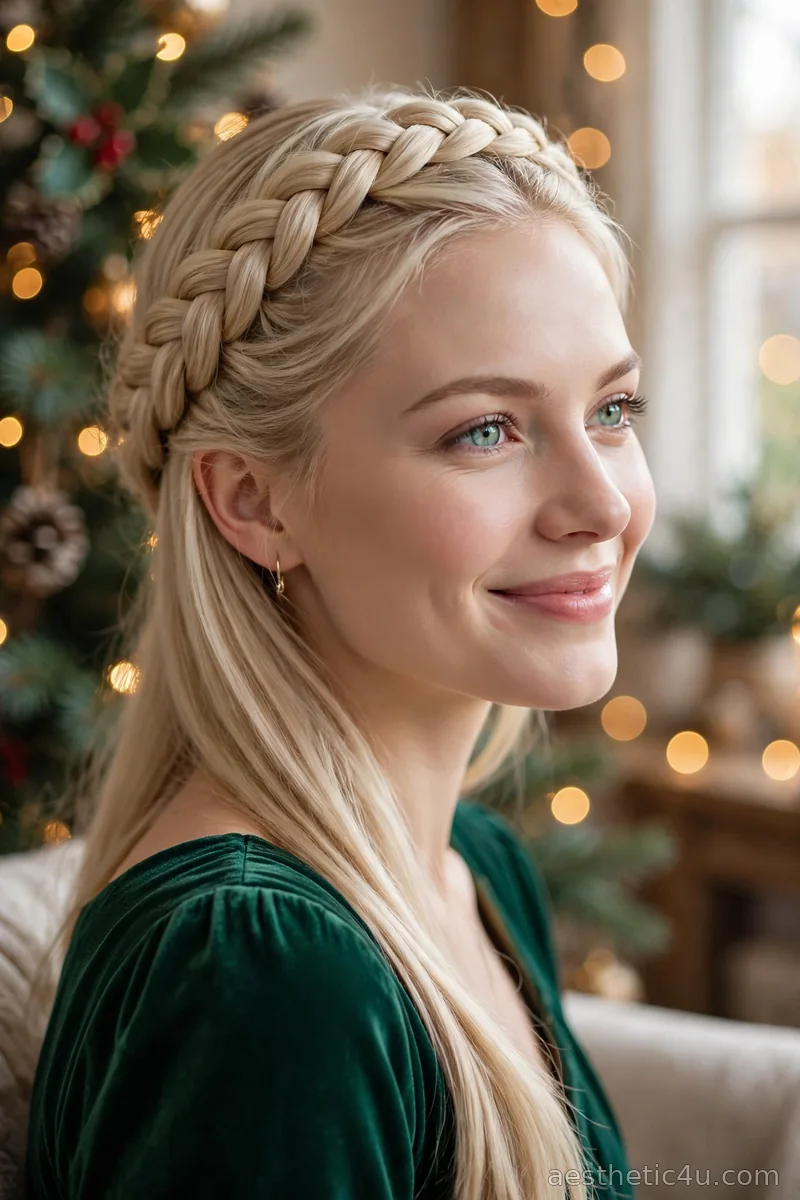
Running late for the Christmas party? These last minute christmas party hairstyles take minutes, not hours, and still look like you planned them all day. No stress, no panic, just fast and pretty. Every December the same thing happens: the party starts at seven, you are still in a towel at six-forty, and your hair is doing whatever it wants. That is exactly who this list is for. These are not “easy” styles that secretly need a salon; they are genuinely fast styles built for real life, tangled hair, and a clock that will not slow down. Most take under ten minutes, several take under two, and all of them look intentional in photos.
I built this list for real life: tangled hair, ten minutes on the clock, and a party to get to. Every style here is quick, simple, and party-proof, and you will learn the small tricks that make fast hair look expensive, like wrapping an elastic, choosing one statement accessory, and prepping a tiny emergency kit. I have done my own hair in moving cars and office bathrooms more times than I will admit, so trust me when I say speed and polish are not opposites. You just need the right five-minute plan. Let us get you out the door looking amazing.
1. Five-Minute Sleek Low Ponytail
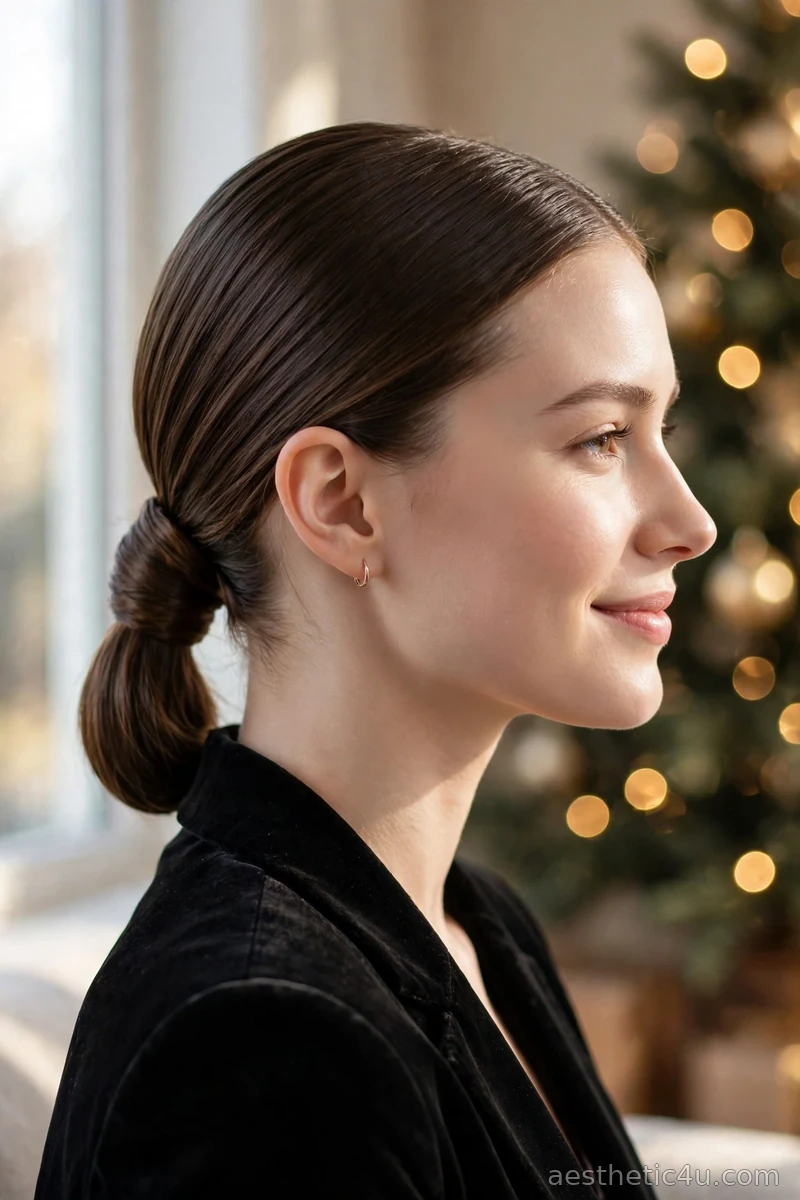
The hair is brushed smooth and gathered into a low ponytail at the nape, and a small section of hair wraps around the base to hide the elastic. That wrapped base is the entire trick: it turns a basic ponytail into something that looks deliberately styled. To build it, brush thoroughly with a paddle brush, smooth a pea-sized amount of serum over the top layer, secure low with a strong elastic, then take a half-inch section from underneath the ponytail, wrap it tightly around the elastic, and pin underneath. It takes five minutes and the difficulty could not be lower.
I would choose this when you have almost no time but want to look put-together. The wrapped base is what makes it look planned, and it works with every outfit. It suits every face shape and every hair type. One honest caveat: on very slippery hair the wrap can unwind, so pin it with two crossed bobby pins, not one. My pro tip: do this on slightly damp or day-old hair; both grip better than freshly washed, squeaky-clean hair.
2. Messy Top Knot in Sixty Seconds
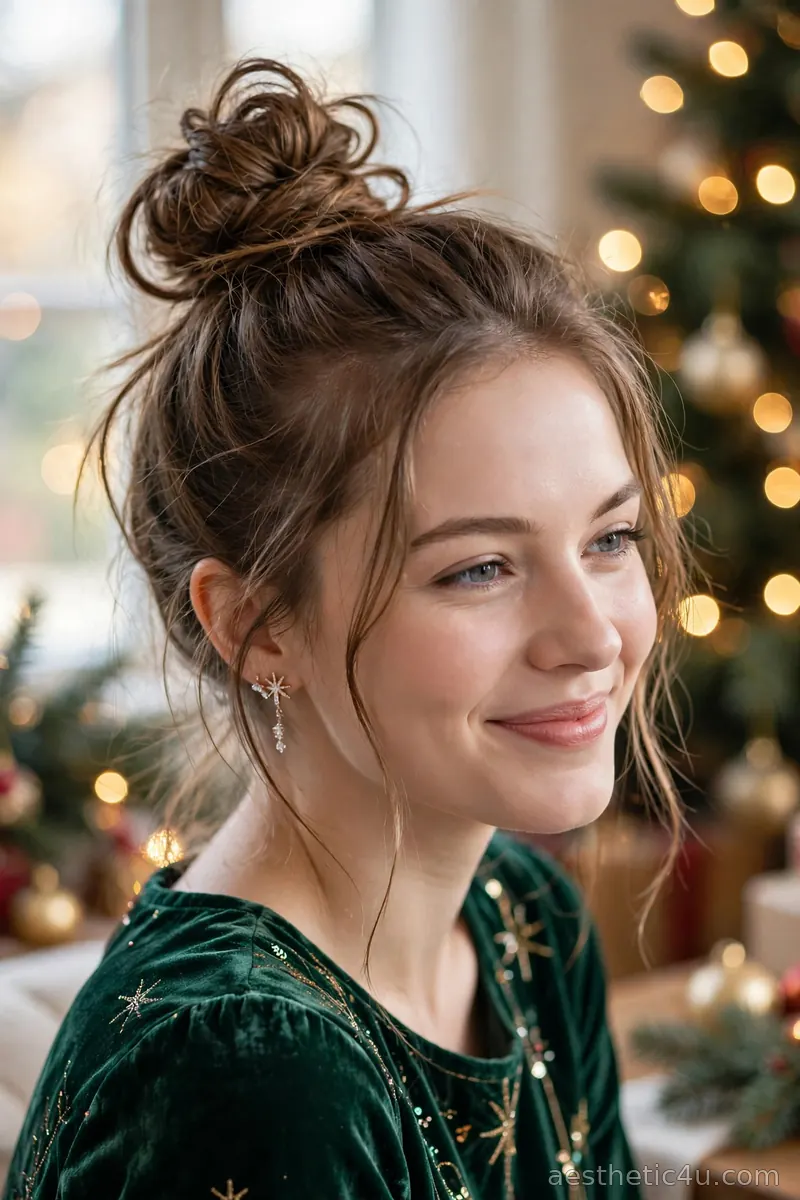
The hair is flipped forward, twisted loosely, and pinned into a high messy knot, with a few pieces pulled loose around the face for texture. The messier the better is the whole philosophy here: perfection would ruin it. To build it, flip your head upside down, gather everything high, twist the length once or twice, wrap it around the base, and secure with a large elastic or a few bobby pins. Tug at the knot to loosen it and pull out face-framing strands. It is done in about a minute, and there is genuinely no wrong way to do it.
I love this for its speed and attitude. It looks effortless and suits oval and heart faces, since the height elongates. Add bold earrings and nobody will guess it took sixty seconds. One honest caveat: on very fine hair the knot can look tiny, so tease the ponytail before twisting or use a small donut as a base. My pro tip: a spritz of texturizing spray before you twist gives the knot that perfectly undone grip instead of sliding apart.
3. Quick Half-Up Twist with a Bow Clip
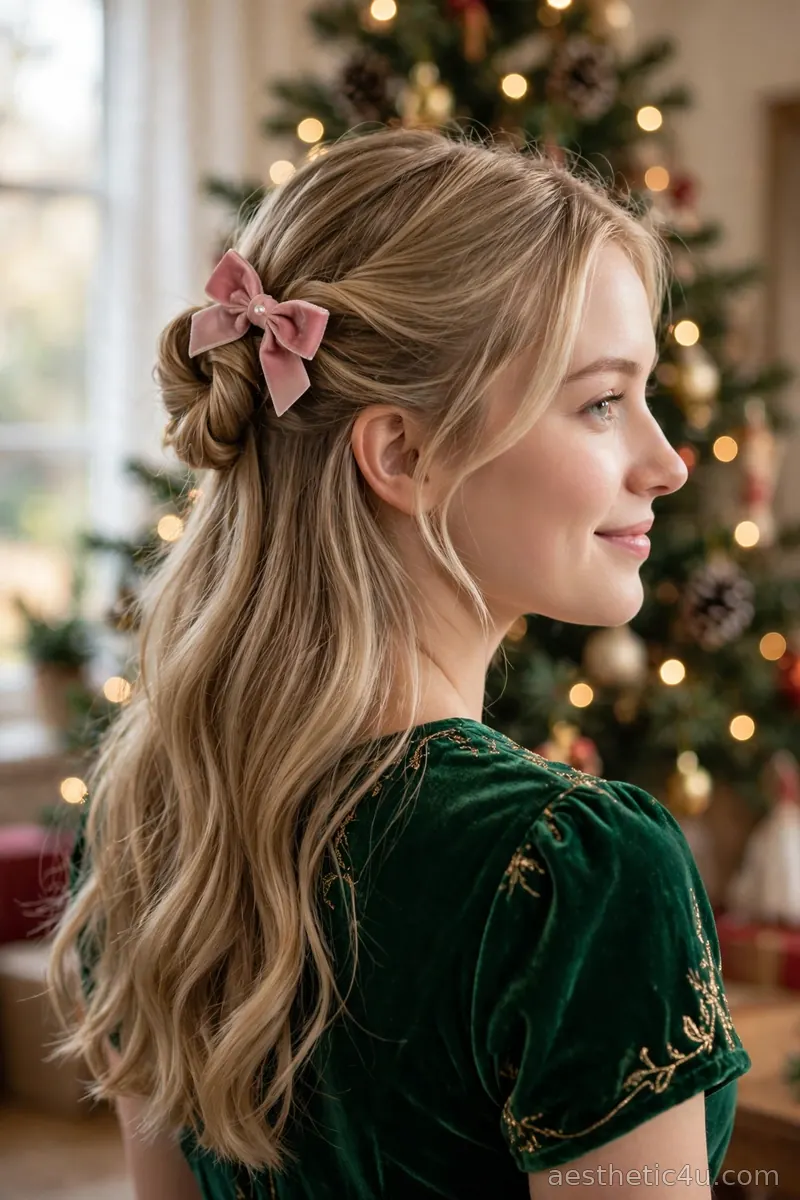
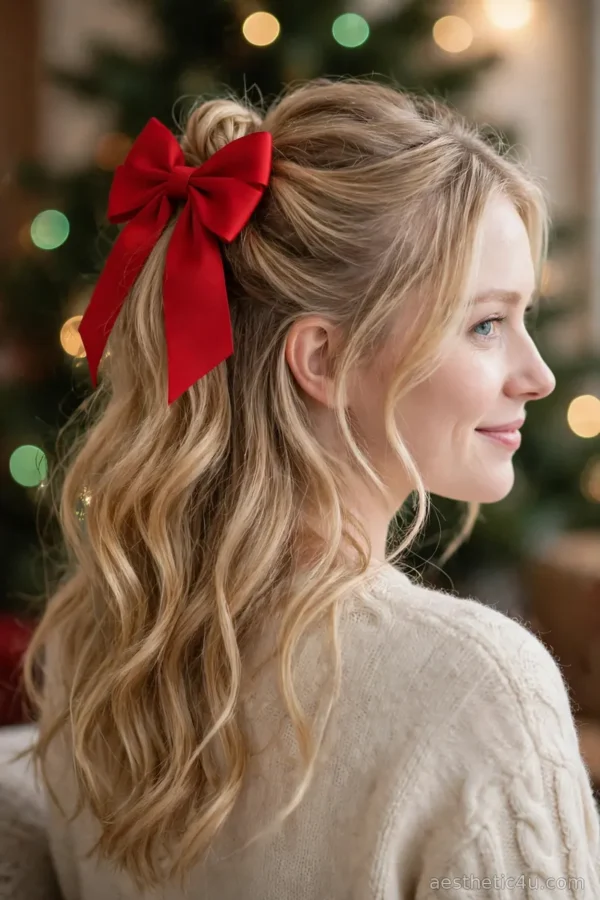
Two front sections of hair are twisted back from the temples and clipped together at the back of the head with a bow clip, while the rest of the hair stays down. The twists take ninety seconds: grab a two-inch section from each side, twist away from the face, and bring them together. The bow clip then does all the festive work in one move, covering the join and adding instant Christmas charm. Choose a velvet or satin bow in red, green, or black for holiday impact. The whole thing takes three minutes and is as beginner-friendly as styling gets.
I would pick this if you want festive with zero effort. The bow clip does all the holiday work, and it suits every face shape because the twists open up the face while the length stays soft. One honest caveat: cheap bow clips pop open, so test the clasp before the party and carry a bobby pin as backup. My pro tip: twist the sections loosely rather than tightly; a soft twist looks romantic, a tight one looks severe.
4. Fast Low Bun with a Velvet Scrunchie
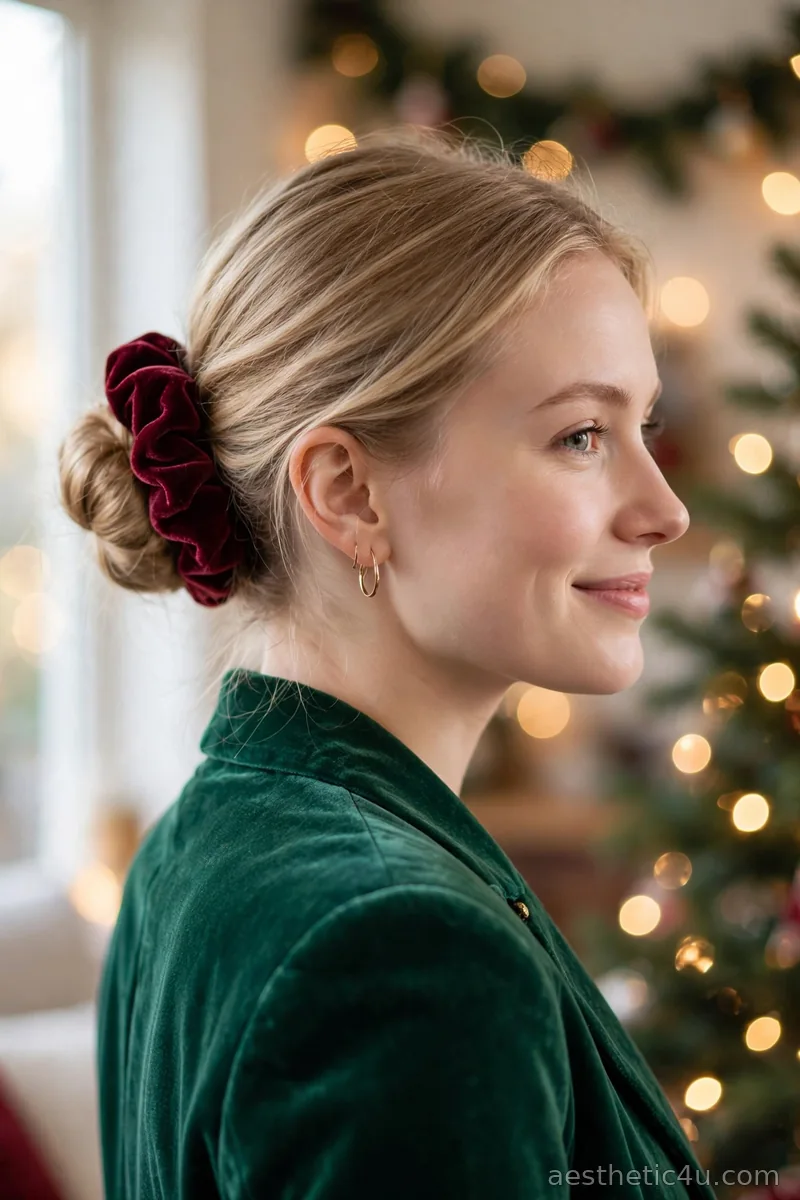
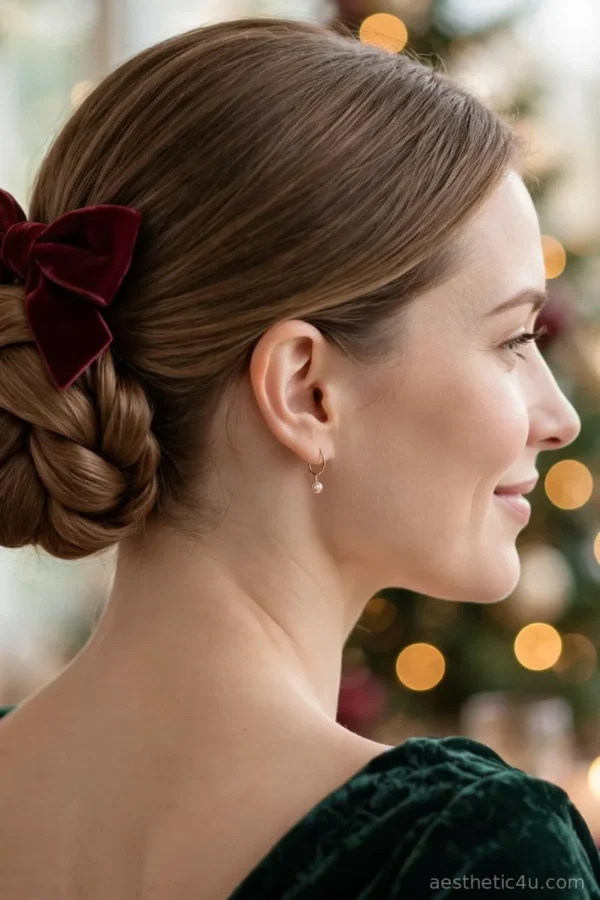
The hair is twisted into a low bun at the nape and secured with a velvet scrunchie, which doubles as both the holder and the accessory. Velvet reads Christmas instantly, so the scrunchie is doing the festive styling while the bun stays simple. To build it, gather hair low, twist the length into a loose coil, wrap it around the base, and slide the scrunchie over the whole bun twice. Pull a few soft pieces loose at the front. Two minutes, done. It works on every hair texture and is one of the most forgiving styles on this list.
I recommend this when you need something that looks soft and seasonal in almost no time. It suits round and square faces, since the low placement keeps things relaxed, and it holds securely through a long night. One honest caveat: a thin, stretched-out scrunchie will not hold a bun, so use a thick, new one with real elastic. My pro tip: pick a scrunchie in burgundy, emerald, or champagne; the color is the entire Christmas statement, so make it count.
5. Two-Minute Side Braid
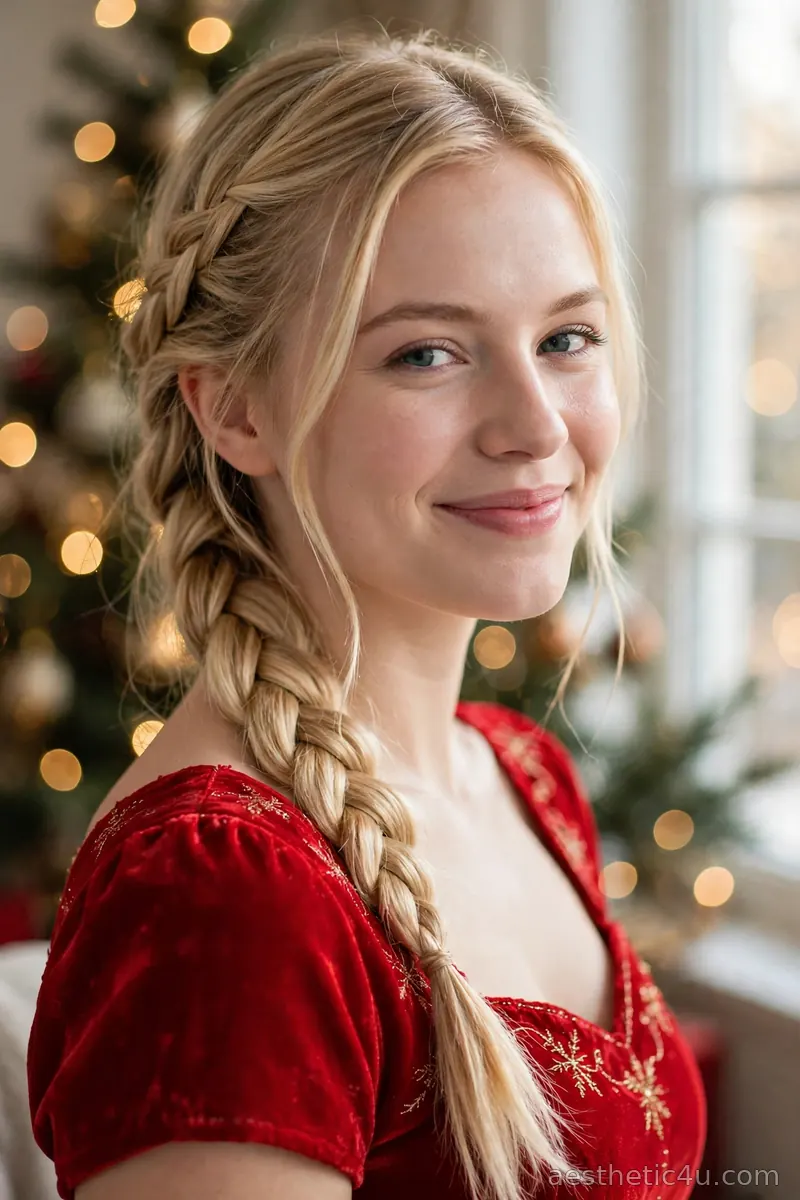
All the hair is swept over one shoulder and loosely braided into a side braid, then gently pancaked by tugging the edges outward for fullness. The side placement is what makes a basic braid feel special and party-ready. To build it, sweep everything to your preferred side, braid loosely, secure with a small elastic, and tug each loop outward starting from the bottom. Pull out a few face-framing pieces and curl them lightly if you have thirty seconds to spare. It takes two minutes if you can braid without thinking, and the difficulty is easy.
I would choose this if you can braid on autopilot. The side placement makes it feel romantic, and it suits oval and heart faces. It is great for very long hair. One honest caveat: pancake from the bottom up, not the top down, or the top loosens and the braid slides apart. My pro tip: tie the end with a thin velvet ribbon instead of an elastic for an instant festive upgrade that costs you ten extra seconds.
Keep exploring: 25 Easy Christmas Hairstyles for When You’re Running Late
6. Sleek Straight Hair with a Statement Clip
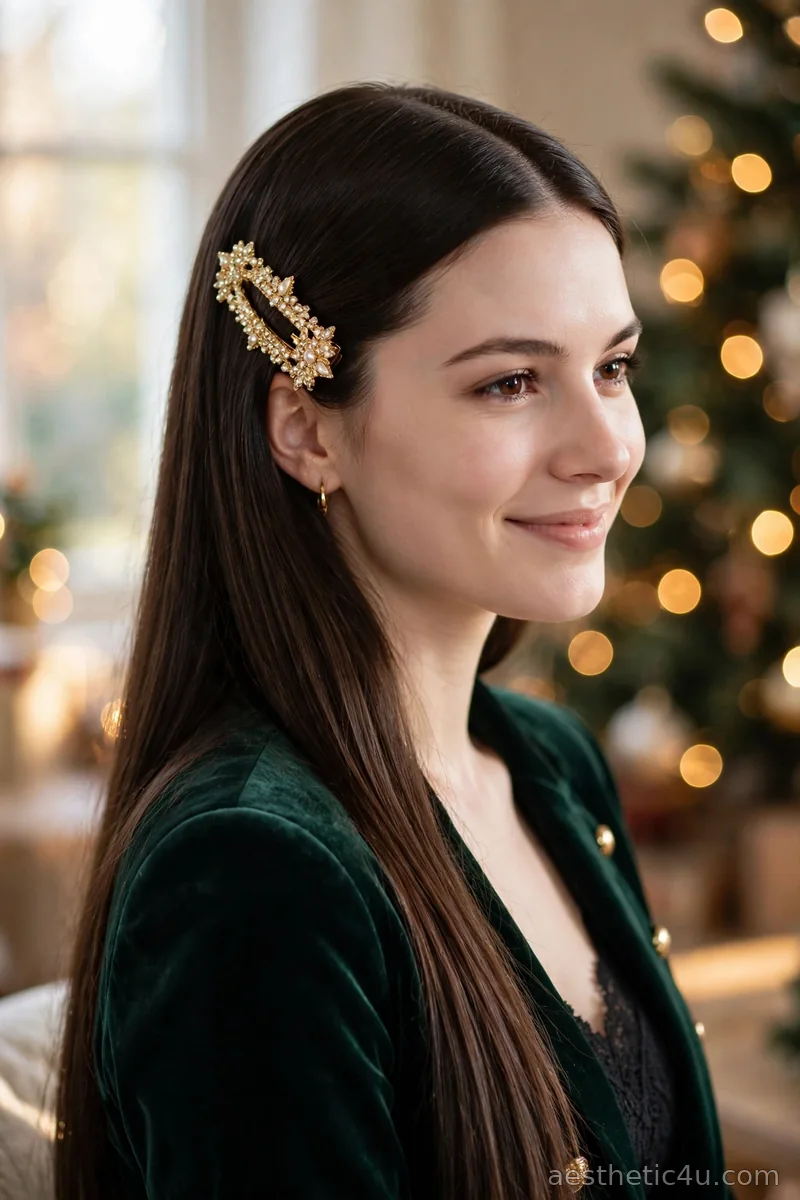
The hair is straightened quickly, or brushed smooth if already straight, and a bold statement clip pins back one side. The clip is the entire styling plan here: crystal, pearl, or jeweled, it turns plain hair into party hair in one motion. To build it, smooth the top layer with a brush and a drop of serum, create a side part, sweep the smaller side back, and clip just above the ear. If you have five minutes, run a flat iron over the top layer for polish. It takes three to eight minutes and could not be simpler.
I love this for its simplicity. One accessory can save any bad hair day, and it suits every face shape and hair length. Pick a crystal or pearl clip and you look instantly dressed up. One honest caveat: the clip needs to be statement-sized; a tiny pin disappears and the trick fails. My pro tip: slide the clip in at an upward angle and anchor it with a crossed bobby pin underneath so it stays put through hugs and dancing.
7. Quick Braided Crown
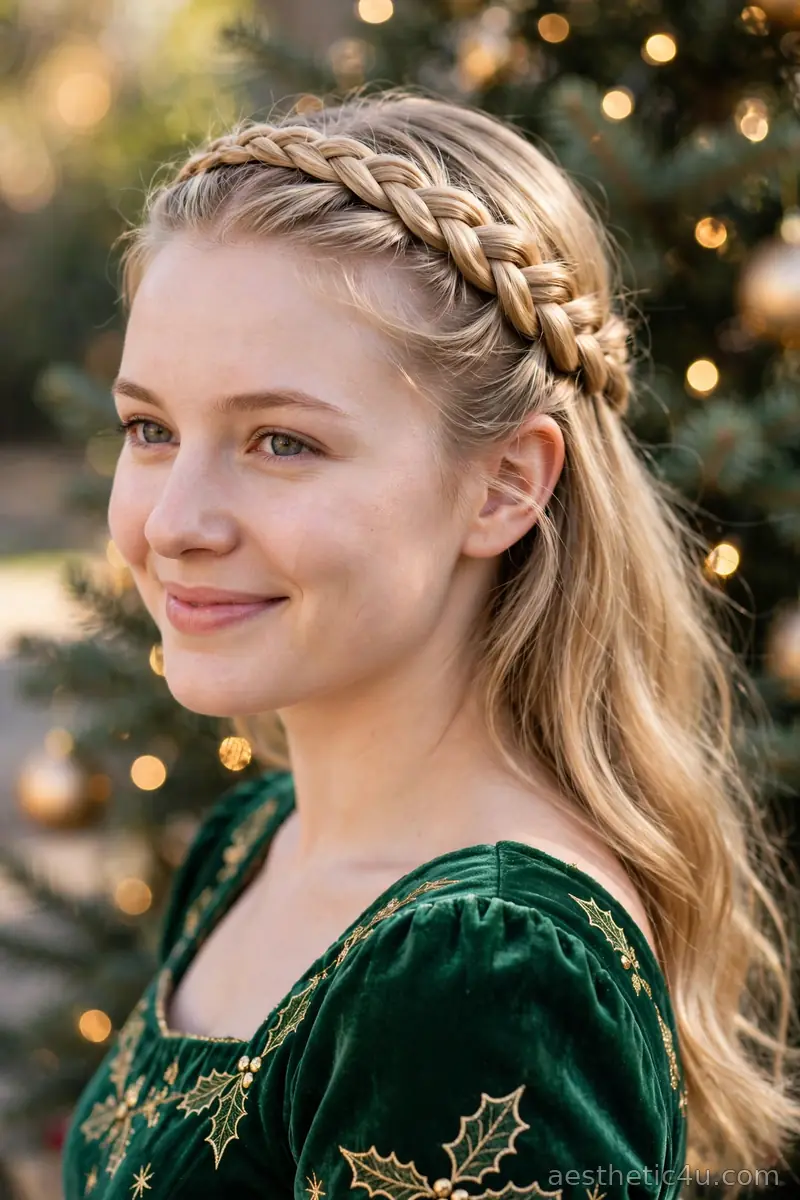
Two chunky braids are worked from each side of the head and wrapped up and over the crown, pinned where they meet for a crown effect in under ten minutes. The rest of the hair falls loose in soft waves. To build it, part hair in the middle, braid a thick three-strand braid along each side starting above the ear, and wrap both braids across the top of the head, pinning them under the opposite braid. Tuck the ends for a clean finish. A light mist of texturizing spray beforehand keeps the braids from unraveling. It works beautifully on second-day hair.
I would pick this if you want something more styled than a ponytail. The braided crown looks intricate but takes minutes, and it flatters round faces, since it pulls hair back cleanly while keeping softness at the sides. One honest caveat: on silky hair the braids loosen fast, so pin each braid twice and finish with hairspray. My pro tip: pancake each braid by tugging the edges outward before wrapping; fat braids make the crown look fuller and expensive.
8. High Pony with a Ribbon Tie
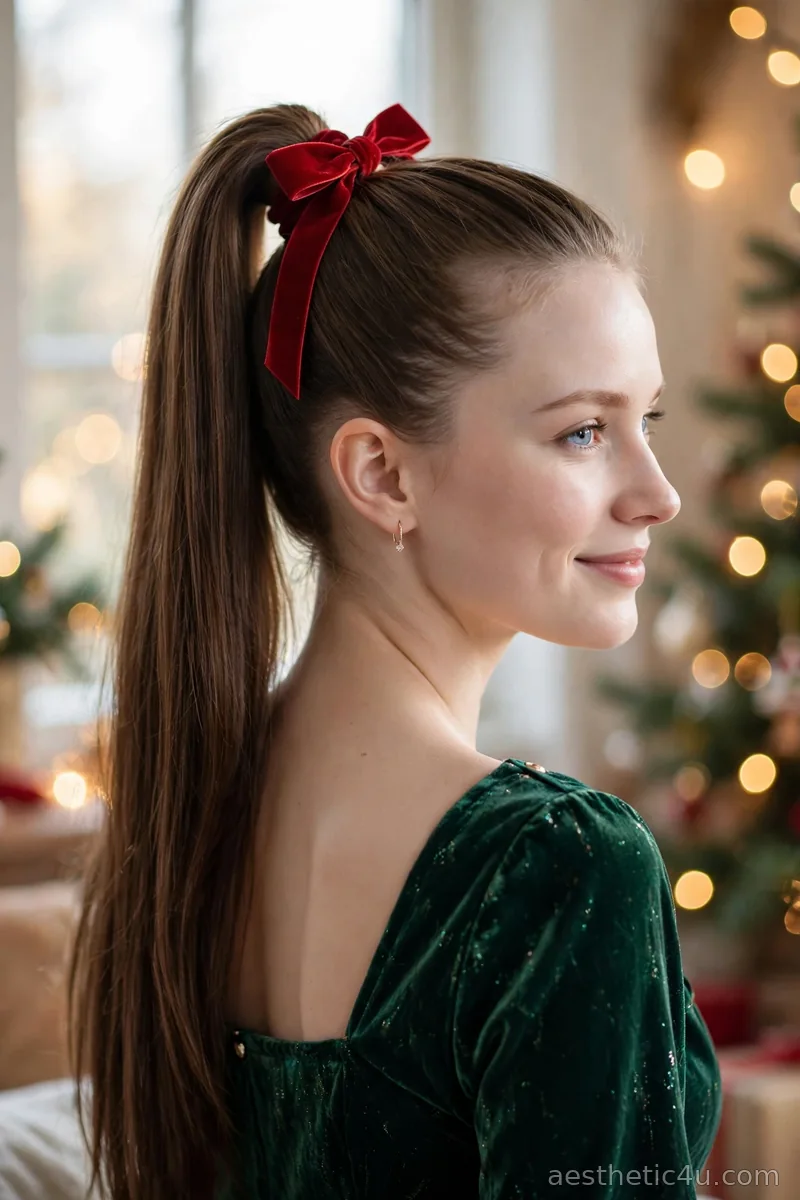
The hair is pulled into a high ponytail and tied with a long ribbon instead of an elastic, the ribbon tails left hanging for a festive, gift-wrapped feel. The ribbon is the whole upgrade: wrap it around the base two or three times and tie it in a bow or a knot, letting the ends fall to different lengths. To build it, gather hair high with your head flipped forward for natural volume, secure with a strong elastic first for hold, then add the ribbon over it. Five minutes total, and the difficulty is as easy as tying a shoelace.
I recommend this for instant party energy. The ribbon makes it feel fun and very Christmas, and it suits oval and heart faces with its face-lifting effect. One honest caveat: satin ribbon slips, so tie it over the elastic rather than instead of it, or the ponytail will sag. My pro tip: choose a ribbon at least an inch wide in red, green, or gold; skinny ribbon reads as an afterthought, wide ribbon reads as a statement.
9. Loose Pancaked Side Braid
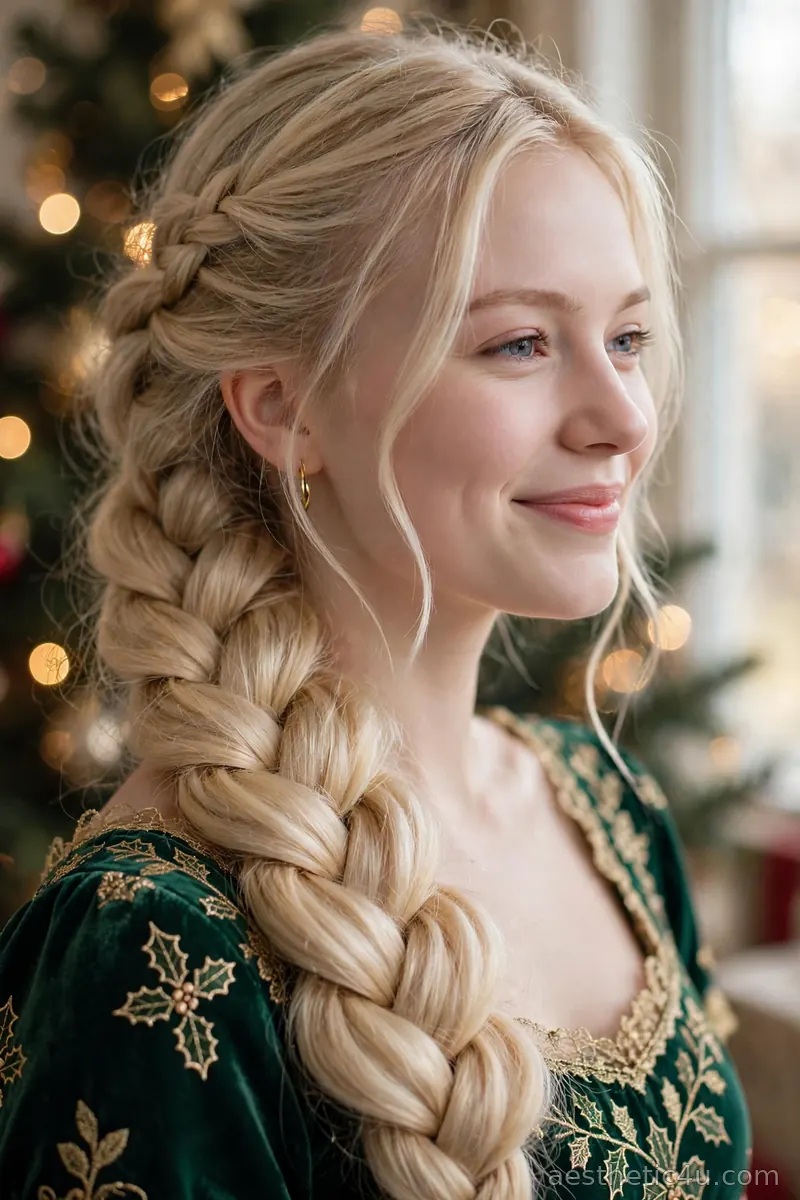
All the hair is swept over one shoulder and loosely braided into a chunky three-strand side braid, then pancaked by tugging the edges outward for fullness. The side placement is what makes a basic braid feel special and party-ready. To build it, sweep everything to your preferred side, braid loosely without pulling tight, secure with a small elastic, and tug each loop outward starting from the bottom. Pull out a few face-framing pieces and curl them lightly if you have thirty seconds to spare. It takes five minutes once you can braid without thinking, and the difficulty is easy.
I would choose this if you want texture without any heat styling. The loose pancaked braid looks romantic and soft, it photographs beautifully, and it suits every face shape. One honest caveat: do not braid it tight; a tight braid looks severe and takes twice as long, while a loose one looks romantic. My pro tip: pancake the braid aggressively, pulling each loop outward, because a fat, loose braid looks ten times more expensive than a skinny tight one.
10. Two-Minute French Twist Hack
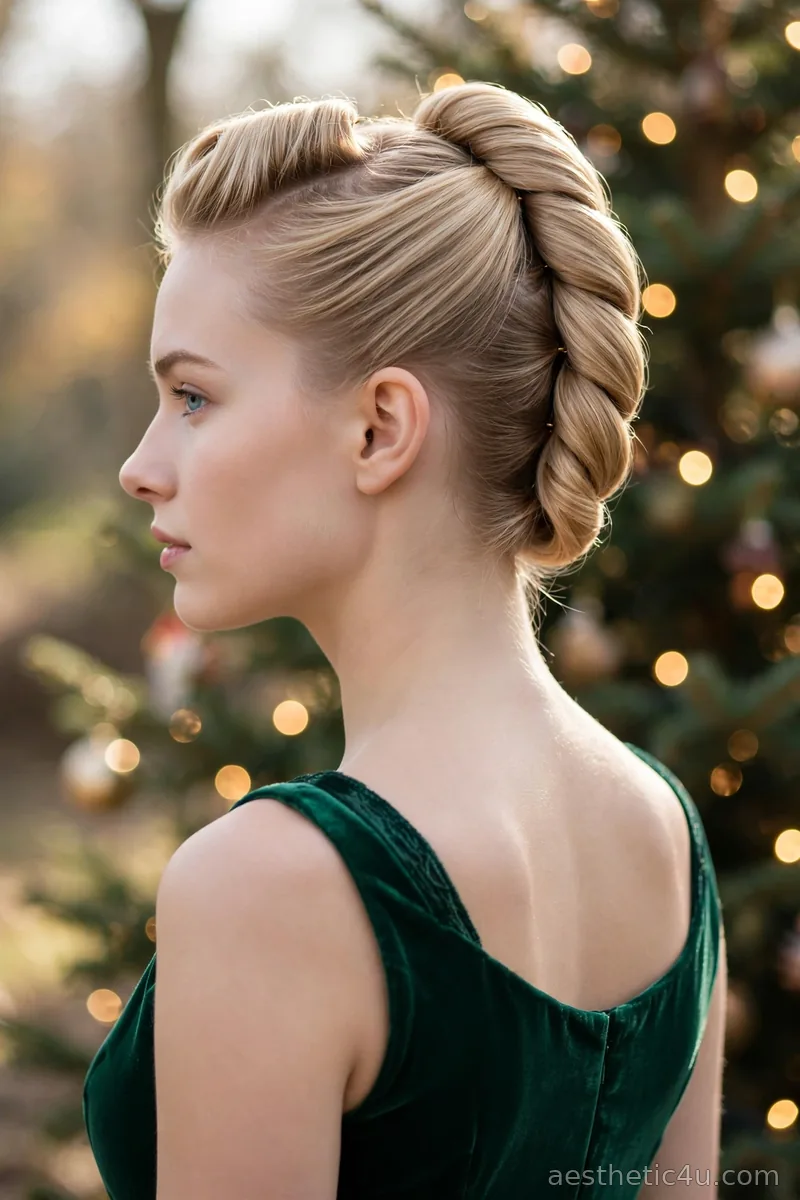
The hair is gathered low, twisted upward against the head, and pinned in place for a faux French twist that looks far harder than it is. The hack is that you never roll a proper twist: you gather everything into a low ponytail without an elastic, twist the whole thing upward, press it flat against the back of the head, and pin along the seam with bobby pins. Tuck the ends under and pin again. Bobby pins do all the work. It looks like a salon updo, takes two minutes, and the difficulty is easy once you try it once.
I love this hack for last-minute elegance. Nobody will believe it took two minutes, and it suits cocktail dresses and formal parties perfectly. It flatters petite frames especially, since the vertical line adds height. One honest caveat: you need at least six to eight bobby pins, so check your stash before you start. My pro tip: pair it with a statement earring and a bold lip; the sleek updo is the perfect quiet background for loud accessories.
Keep exploring: 20 Simple Christmas Hairstyles That Look Anything But
11. Quick Curled Ends with a Headband
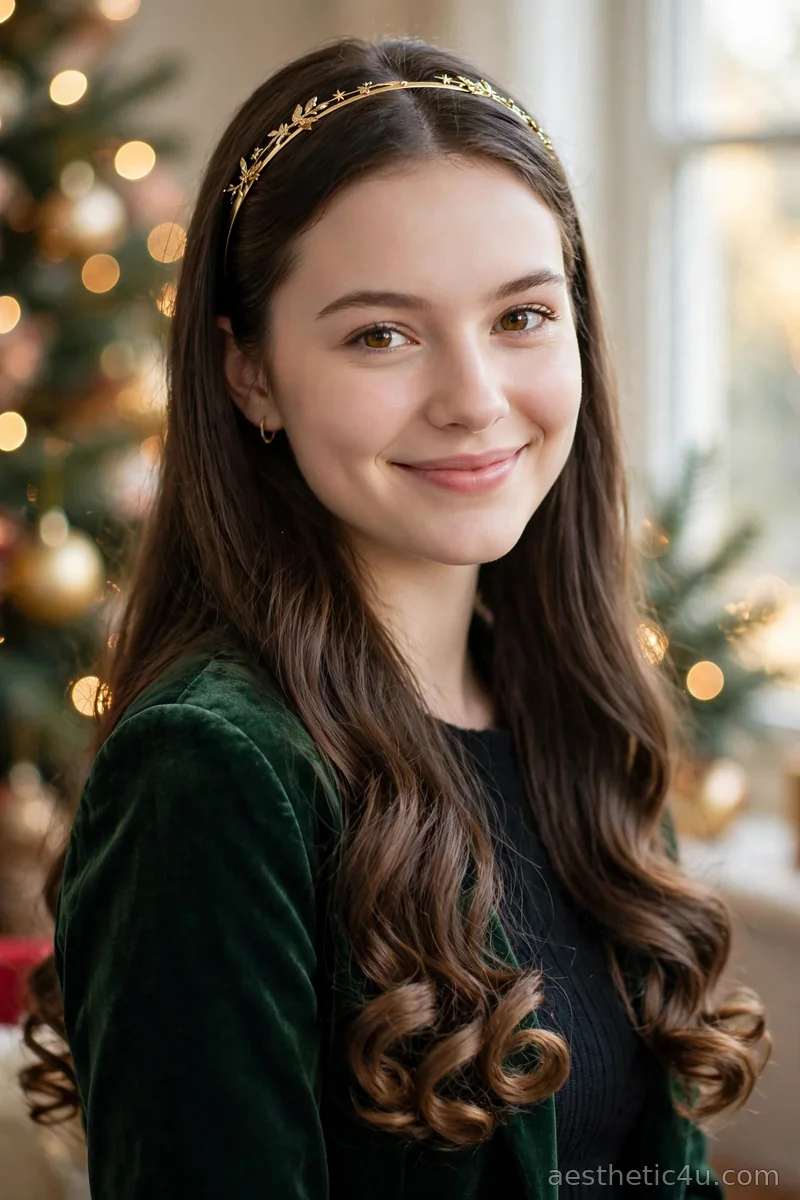
Only the ends of the hair are curled for fast bounce and movement, and a festive headband goes on to finish the look and hide any unstyled roots. This is the smartest shortcut on the list: curling just the bottom four to six inches takes a fraction of the time of a full curl but delivers most of the visual impact. Use a 1.25-inch iron, curl the ends under in large sections, and brush through once. The headband sits about an inch behind the hairline in velvet, satin, or jeweled. The whole style takes under ten minutes and is easy.
I would pick this if your hair is fine but the ends look flat and lifeless. Curling just the ends changes everything, and the headband hides roots that did not get attention. One honest caveat: the headband must have grip, velvet lining or inner teeth, or it will slide back within the hour. My pro tip: tease the crown lightly before placing the headband; it gives the band something to hold and adds party volume at the same time.
12. Fast Bubble Ponytail
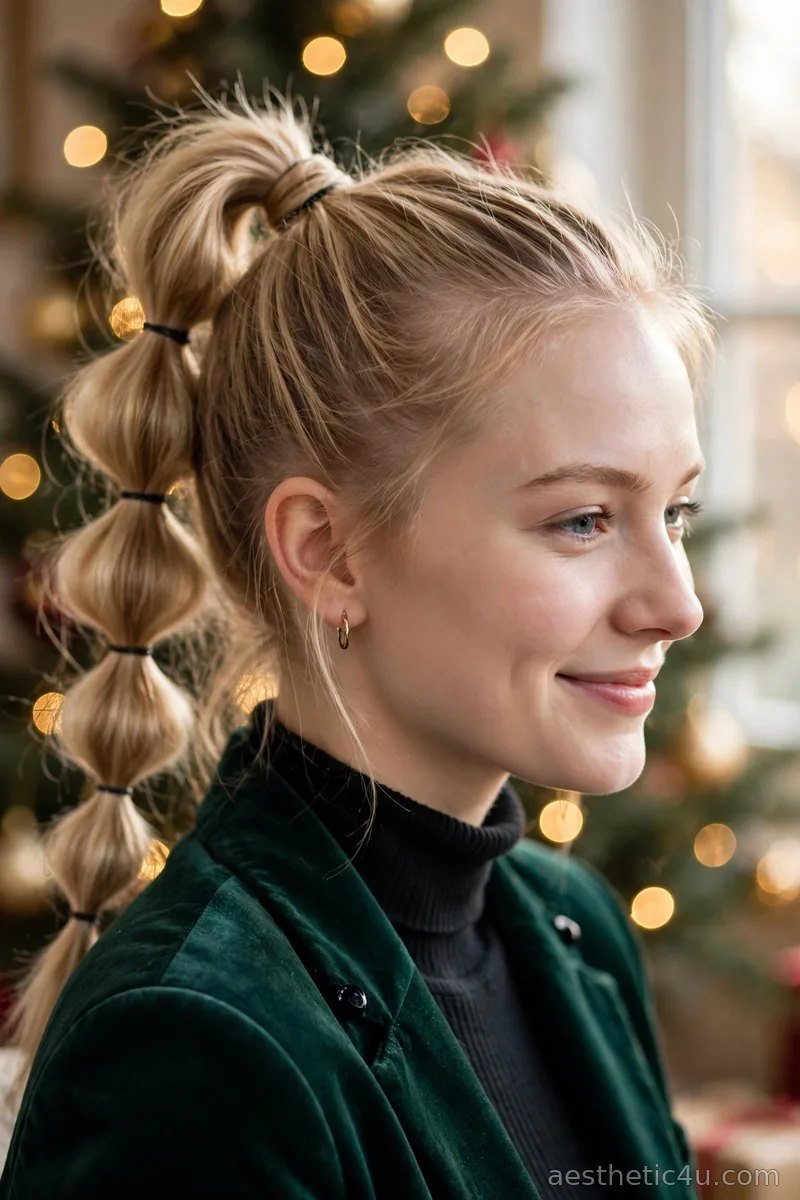
The hair goes into a ponytail, then small elastics are spaced down its length to create bubble sections, each one tugged gently for fullness. The method is foolproof: secure the ponytail, add an elastic two to three inches down, tug the hair between the elastics outward to puff it, and repeat to the ends. Use clear mini elastics so the hardware disappears. It takes five minutes, needs no heat and no skill, and looks far more impressive than the effort suggests. It works best on medium to long hair where the bubbles have room to show.
I recommend this for a fun, playful party look. It is almost impossible to mess up, it suits oval and heart faces, and it holds up well through an evening. One honest caveat: on very fine hair the bubbles can look sparse, so tease each section lightly before tugging it out. My pro tip: wrap a strand of hair around the top elastic and pin it underneath; hiding that one elastic makes the whole style look custom instead of crafty.
13. One-Minute Claw Clip Updo
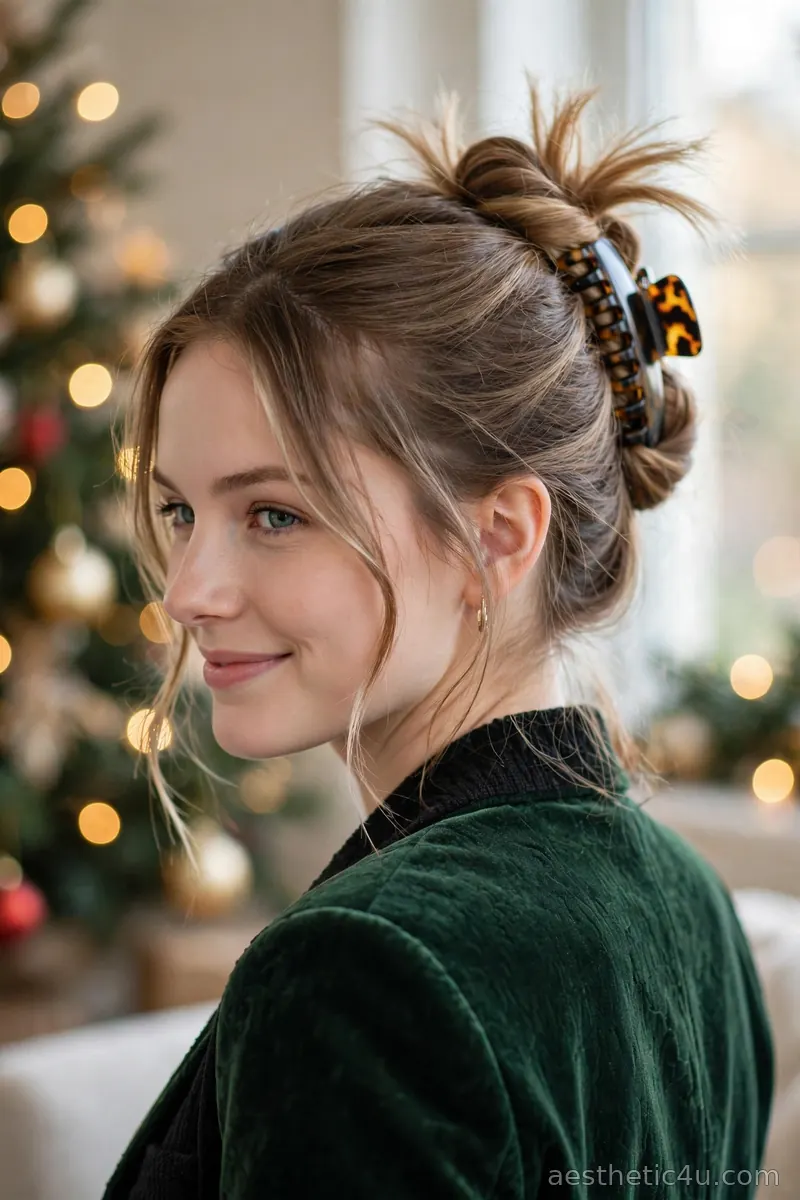
The hair is twisted up the back of the head and clamped with a large claw clip, with a few strands left out around the face for softness. It is the fastest updo that exists: gather, twist once, clamp, done. The trick that makes it look intentional instead of lazy is the clip itself: choose a pretty one in tortoiseshell, matte black, or festive gold rather than a plain plastic claw. Twist the hair snugly so the clip has real tension to grip. It takes one minute, works on medium to long hair, and the difficulty is zero.
I would choose this when you have one minute. A pretty claw clip makes it look deliberate, and it is relaxed and modern. It suits every face shape. One honest caveat: on very thick or long hair a single clip may not hold, so use an extra-large clip or double up with two. My pro tip: leave the ends fanned out over the top of the clip, not tucked under; the casual fan makes this look styled instead of rushed.
14. Quick Double Twist Buns
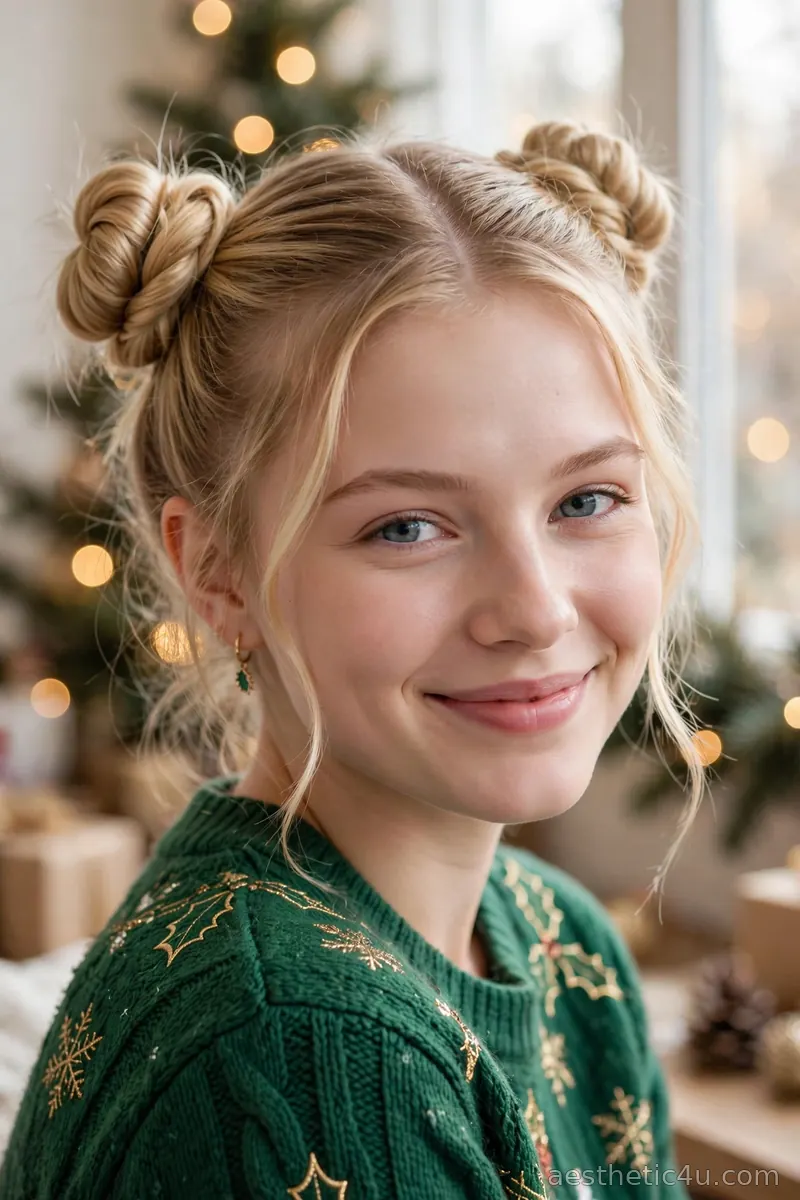
The hair is parted down the middle and each side is twisted into a small bun, sitting at the crown or the nape depending on your mood. The method is simple: part, twist each half away from the face, coil into a mini bun, and pin or elastic each one. The symmetry does the styling work, so the buns do not need to be perfect; slightly messy reads as intentional. Add tiny bows to the bun bases for extra Christmas charm. Five minutes for the pair, and the difficulty is easy for anyone who can twist hair.
I love this for a cute, youthful party vibe. It is playful without being childish, and it suits oval and heart faces best. One honest caveat: keep the buns small and neat; oversized buns tip this from cute into costume. My pro tip: part with a rattail comb for a crisp center part, because a clean part is what keeps double buns looking chic instead of messy.
15. Speedy Slicked-Back Bun
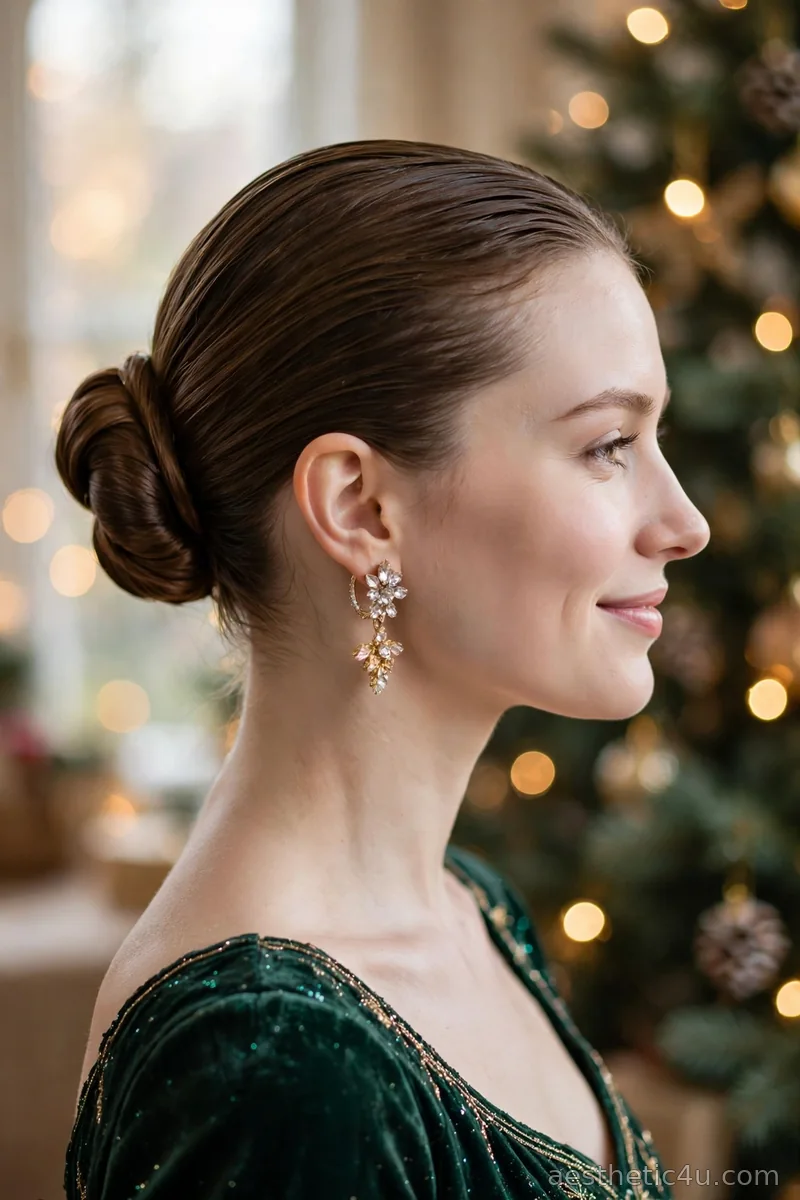
The hair is slicked straight back with a little gel or serum and twisted into a low bun, the slicked finish making it look intentional and chic. This is the ultimate bad-hair-day rescue: slicking turns grease into gloss and frizz into sleekness. To build it, brush everything back with a smoothing gel or a strong-hold serum, twist into a low coil at the nape, and pin. Use a fine-tooth comb for a glassy surface and tame the hairline with a toothbrush misted with hairspray. Three minutes tops, and the difficulty is easy.
I would pick this if your hair is having a rough day. It is sleek, modern, very forgiving, and it suits oval and oblong faces especially. One honest caveat: go easy on the gel; too much looks wet rather than sleek, so start with a pea-sized amount and add only if needed. My pro tip: this is the perfect base for dramatic earrings and a bold lip, since the scraped-back hair puts your whole face on display.
Keep exploring: 19 Christmas Hairstyles Ponytail Ideas That Aren’t Boring
How to Choose the Right Last Minute Christmas Party Style for You
When the clock is your enemy, choose by time first and face shape second. With under two minutes, your options are the claw clip updo, the messy top knot, or the slicked-back bun: all of them rely on one strong hold and zero precision. With five minutes, you unlock the wrapped ponytail, the bubble ponytail, and the ribbon pony, where one clever detail does the styling. With ten minutes, you can curl ends, add a headband, or build the twisted crown. For face shape: round faces benefit from the height of a top knot or high pony, square faces soften with the side braid or loose twists, and oval faces can take any of these without worry.
Then match the style to the party and be honest about your hair that day. A formal dinner wants the French twist hack or the sleek low ponytail; a casual office party is perfect for the velvet scrunchie bun or the bubble ponytail. If your hair is freshly washed and slippery, skip anything that needs grip and go for the slicked-back bun or the headband style instead. Keep one statement accessory in your bag at all times during December: a velvet bow clip, a jeweled barrette, or a wide ribbon can rescue literally any of these styles. And remember the golden rule of fast hair: one polished detail beats five rushed ones every time.
Styling Tips & Common Mistakes to Avoid
Speed styling has its own rules, and here are mine. First, keep a December emergency kit in your bag: clear mini elastics, four bobby pins, a travel hairspray, and one statement clip or velvet scrunchie. With that kit you can build half this list anywhere. Second, work with your hair, not against it: second-day texture grips pins and holds twists far better than freshly washed hair, so plan washes the night before a party. Third, always hide your hardware: wrap one strand around every visible elastic and cross your bobby pins in an X, because visible elastics are what separate “rushed” from “effortless.” Fourth, finish every fast style with one deliberate detail, a bow, a ribbon, a jeweled pin, so the eye lands on intention, not speed.
The mistakes I see most when women are rushing are all avoidable. Mistake one is choosing a style you have never tried before under time pressure; the fix is to pick from styles you already know and save experiments for a calm evening. Mistake two is overloading product in a panic, which turns hair sticky and heavy; use half what you think you need, because you can always add more. Mistake three is forgetting the back of your head entirely; do a quick phone-photo check of the back before you leave, because guests and cameras see it all night. And the biggest one: skipping the accessory. A bare rushed style looks rushed, but the same style with one bow or jeweled clip looks like a choice.
Final Thoughts
Being late does not mean looking rushed. Pick one of these quick styles, add a festive accessory, and walk in like you planned it for weeks. The truth I have learned after years of December parties is that confidence covers many styling sins: nobody at the party knows your updo took sixty seconds unless you tell them. So choose the style that feels most like you, pin it, clip it, ribbon it, and forget about it. The party is waiting, the photos will be wonderful, and your hair will look like it had all the time in the world.
Follow Us On Pinterest: Easy To Find Next Style