Sana
Every October, my clients ask me the same question: what can I do when I do not have a costume, but I still want to look like I planned this for weeks? My answer is always face paint. A good painted design does the job of an entire outfit. It photographs beautifully, it works on every face shape, and most of the looks in this list need only three or four colors and a couple of brushes. That is why face paint ideas explode on Pinterest every Halloween season, and why the Catrina sugar skull alone pulled in hundreds of saves this year.
This guide is for you whether you are a total beginner holding a brush for the first time or someone who already owns a full paint palette. I have ordered the ideas from the most iconic to the most artistic, and for every single one I tell you exactly what the design is, how to paint it, what products you need, and who it suits best. I also share the small mistakes I see every year, like skipping the base or forgetting to set the paint, so your design survives the whole party. Pick the one that makes you smile, practice it once on your hand, and trust me, your face will carry the night.
1. The Catrina Sugar Skull Everyone Saves First
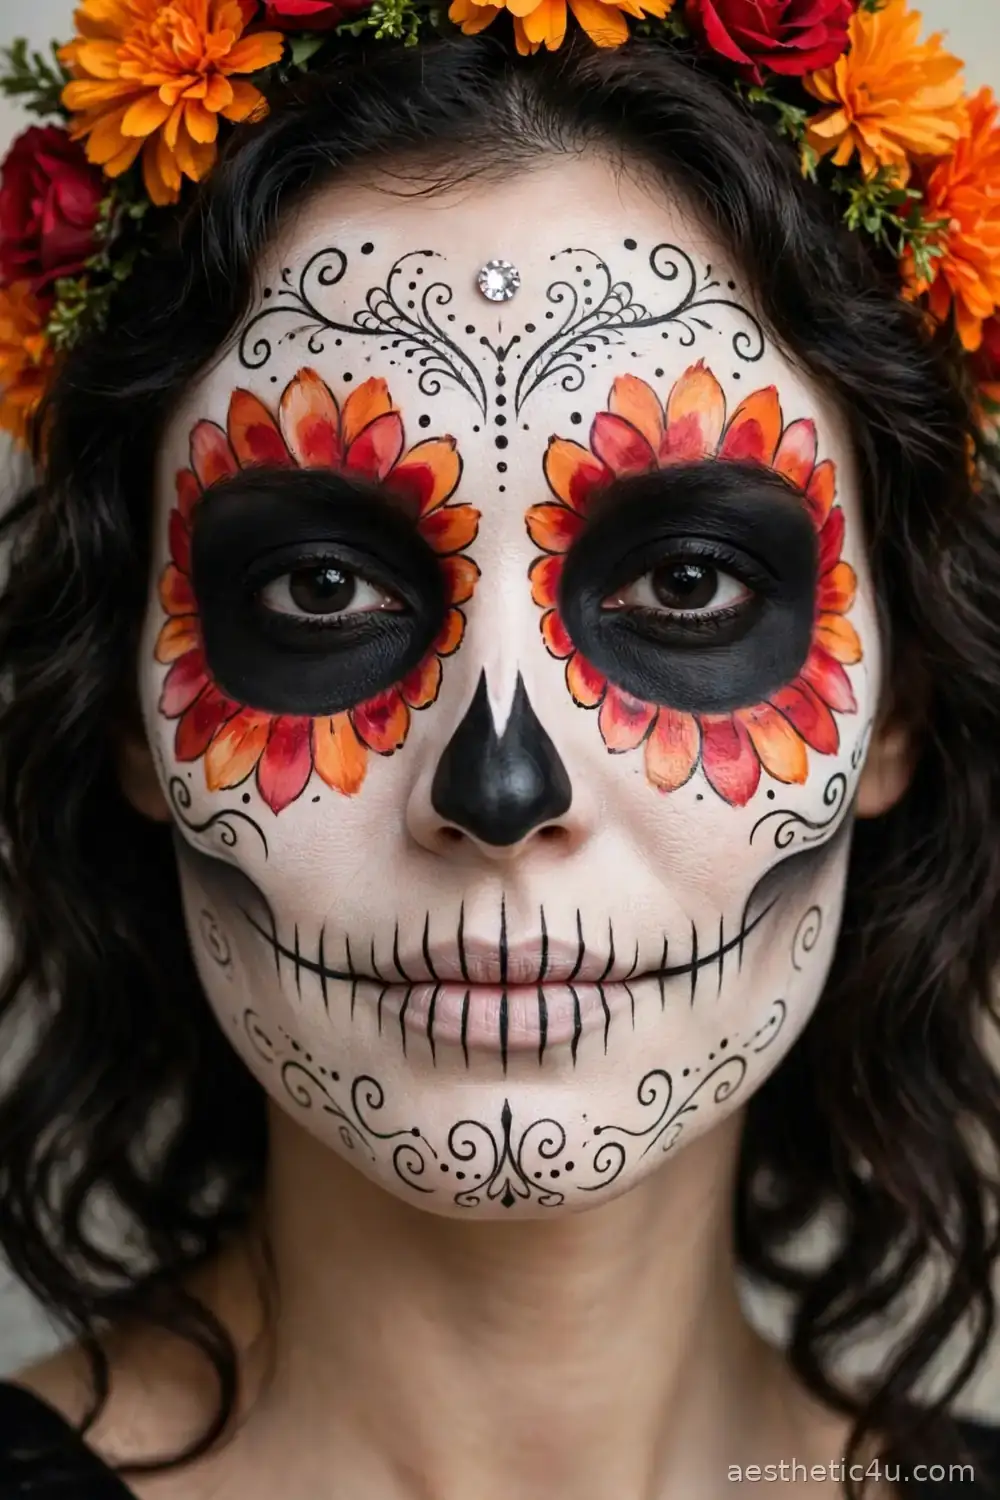
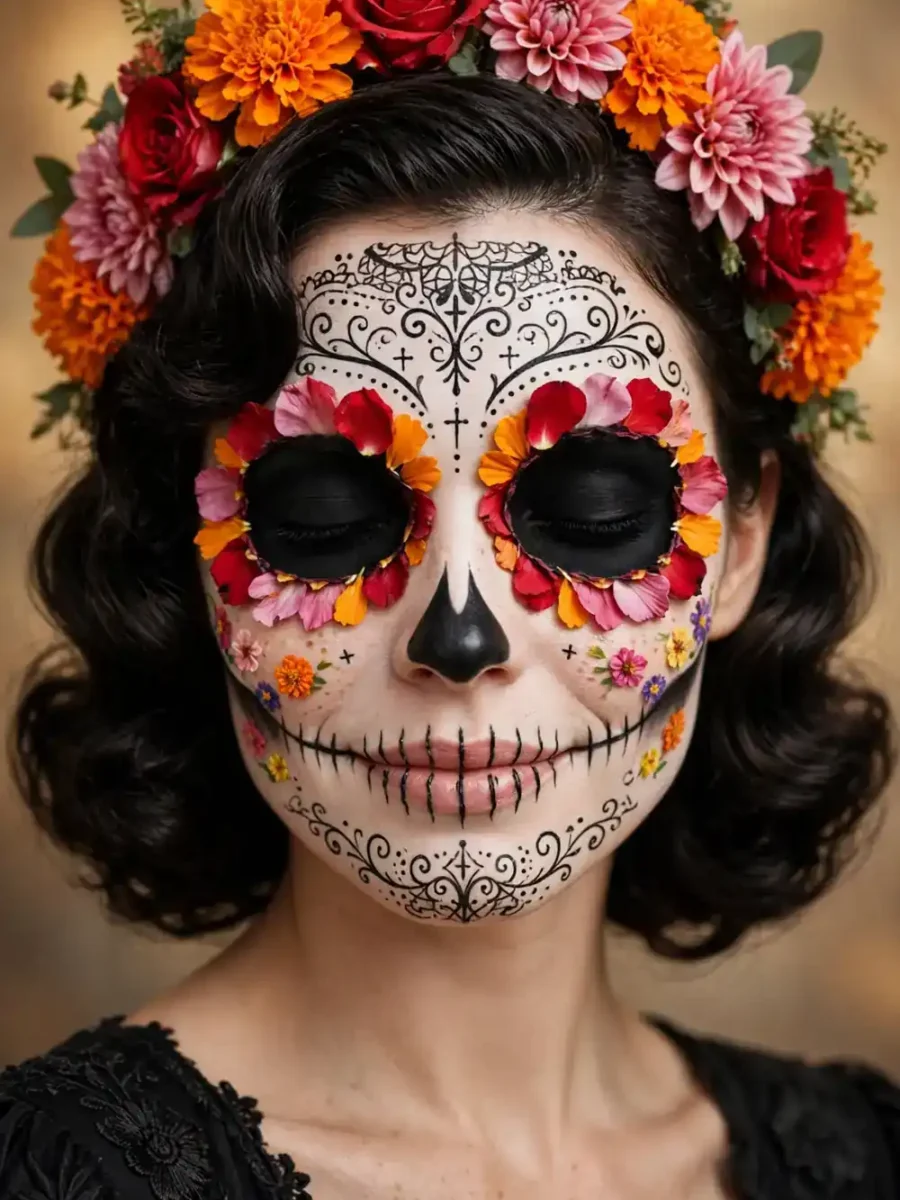
This is the elegant Day of the Dead design that tops every save list. Start with a smooth white base over the whole face, leaving the eye area for last. Paint large black circles around both eyes, then ring them with petal strokes in red, orange, or pink so each eye looks like a flower. Add an upside-down black heart on the nose, fine swirls and dots across the forehead and chin, and vertical lines over closed lips to copy a skull’s teeth. A fine liner brush does all the detail work, and the base takes about fifteen minutes.
I reach for this one when a client wants beautiful instead of frightening. It suits every face shape because the eye circles can grow or shrink to match your features, and it honors a real tradition, so wear it with respect and learn a little about Dia de los Muertos before the party. My honest tip: a flower crown of marigolds or red roses finishes it perfectly, and rhinestones on the forehead jewel spot take it from pretty to unforgettable in photos.
2. A Full-Face Jack-O’-Lantern That Glows in Photos
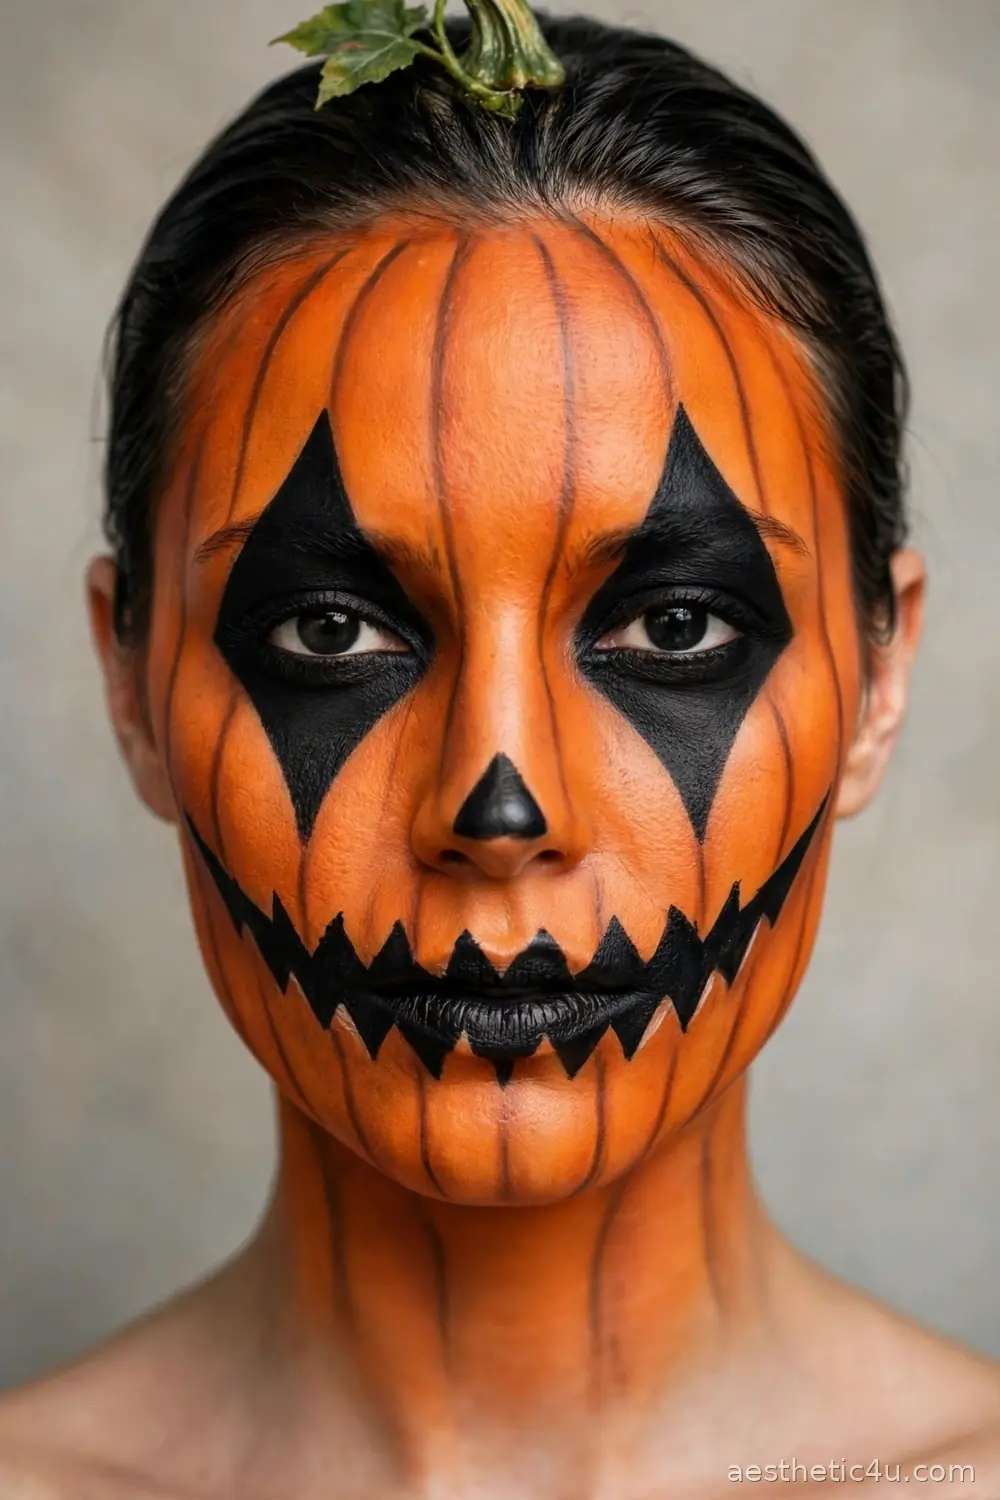
This design turns your whole face into a carved pumpkin. Sponge a bright orange base from hairline to jaw, then blend a slightly deeper orange around the edges to fake the round pumpkin shape. Paint two black triangles over the eyes, a small triangle on the nose, and a wide jagged mouth across your lips and cheeks. Add thin curved lines running from forehead to chin to copy the pumpkin’s ridges, and finish with a green stem painted at the hairline or a real leaf tucked into your hair. The full face takes about twenty minutes.
I love suggesting this to anyone who wants maximum Halloween with minimum skill, because the shapes are big and forgiving. It suits round and oval faces especially well since the design follows your natural curves. It is also the friendliest option here for pairing with kids, if you are matching a little pumpkin. One caveat from me: orange paint can stain pale skin for a day, so apply a barrier moisturizer first and remove it with an oil cleanser, not scrubbing.
3. The Black-and-White Split Face Nobody Can Ignore
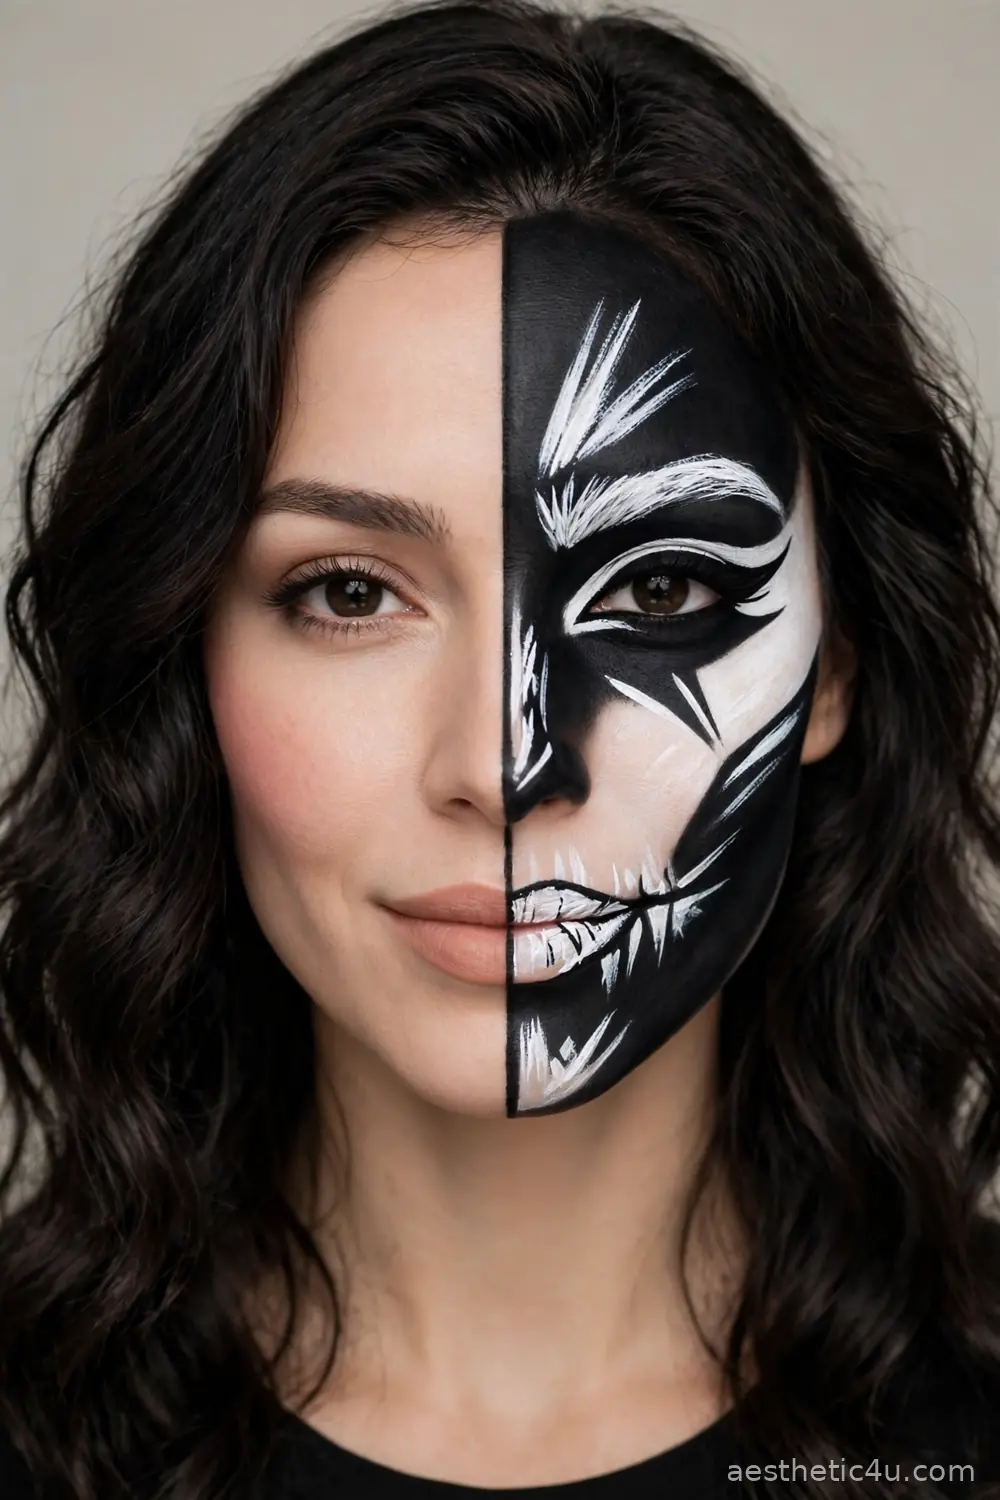
Half your face stays soft and glamorous while the other half becomes a stark black-and-white painted mask. Draw a straight or slightly jagged line down the center of your face with white paint. On one side, paint a bold black base around the eye and cheek, then add white highlights on the brow, nose, and lip. Keep the other side as your prettiest normal makeup: foundation, blush, and a nude lip. The contrast between the two halves is the whole effect, and the line work takes roughly fifteen careful minutes with a flat brush.
I choose this for clients who want artistic and strange without covering their whole face, and it is brilliant if one eye gets irritated by paint because that side stays clean. It suits confident personalities and photographs incredibly well from the painted side. My pro tip: decide your line before you start, because wiping and redrawing the center ruins the base. Take your photos slightly turned toward the painted half and the effect doubles instantly.
4. A Spider Web Over One Eye, Finished in Ten Minutes
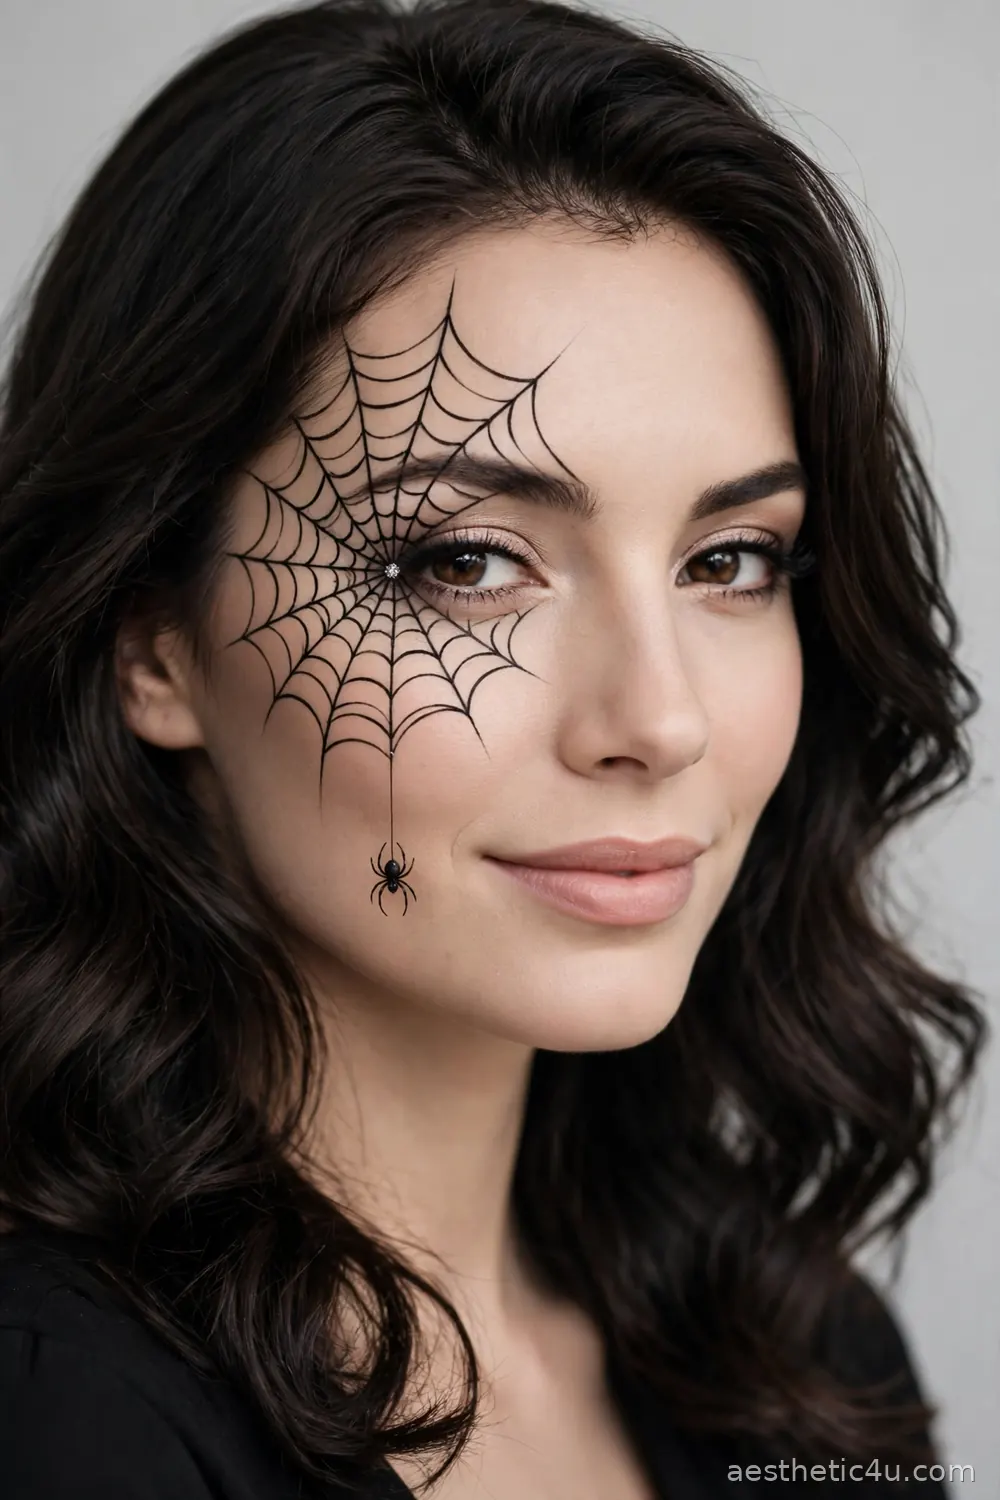
This is the fastest design in the whole list. Keep your normal makeup on, then take a fine brush and black paint. Draw curved lines fanning out from the outer corner of one eye, like rays, then connect them with soft U-shaped strokes to build the web. Add a tiny spider hanging from a thread line down your cheek, with eight little legs and a round body. A dot of silver glitter in the web’s center catches the light beautifully. From start to finish, most people need only ten minutes and one brush.
I recommend this to every beginner and every last-minute partygoer, because it sits on top of makeup you already know how to do. It suits all ages and all face shapes, and it pairs with literally any black outfit you own. My one warning: draw the web with a light hand and build slowly. Thick, rushed lines look like cracks instead, and that is a completely different costume, as you will see later in this list.
5. The Black Cat Paint That Never Goes Out of Style
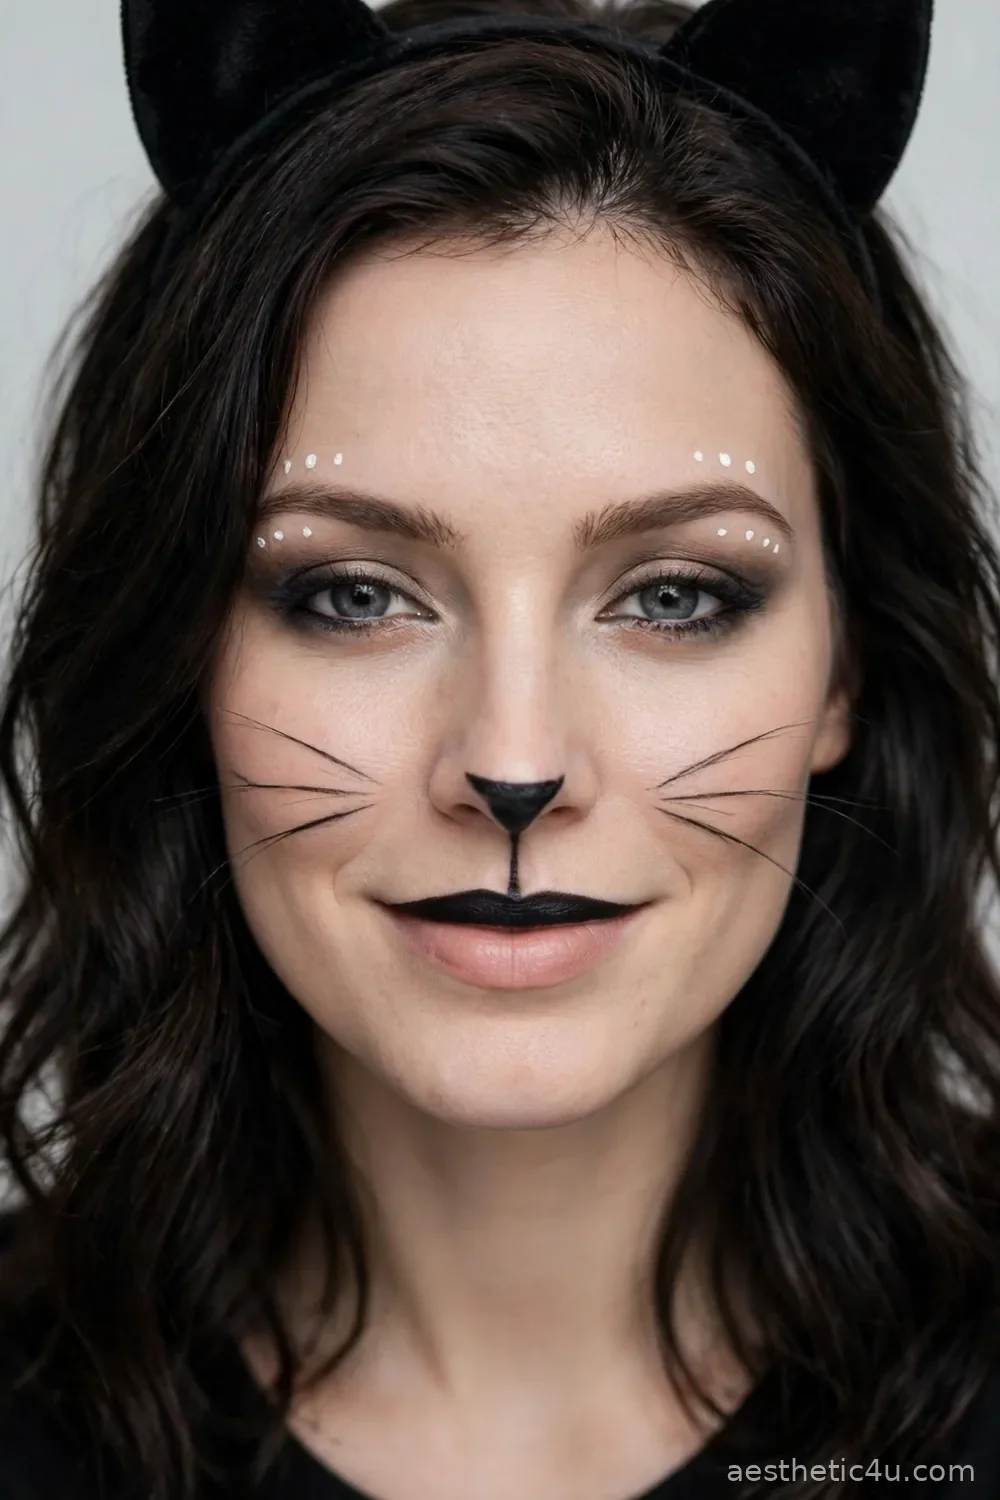
This classic uses black paint on the brow line, cheeks, and upper lip to build a sleek cat face. Fill in a small black triangle or heart on the tip of your nose, draw a thin line down to your lips, and paint your top lip black. Add three whiskers on each cheek, a soft smoky eye, and white or silver dots above the brows for detail. Finish with ears on a headband and an all-black outfit. The painting itself is beginner level and takes around ten minutes with a sponge and one detail brush.
I have painted this look on clients from sixteen to sixty, and it flatters everyone because the whiskers and nose draw the eye to the center of the face. It suits people who want cute with a little edge, and it is my top pick for office parties where scary is not allowed. My tip: keep the whiskers thin and slightly curved upward. Straight, thick whiskers read more like a cartoon, while fine curved ones look elegant and feline.
Keep exploring: 24 Scary Halloween Makeup Ideas That Will Haunt Everyone’s Night
6. The Green Wicked Witch, Scary or Glamorous
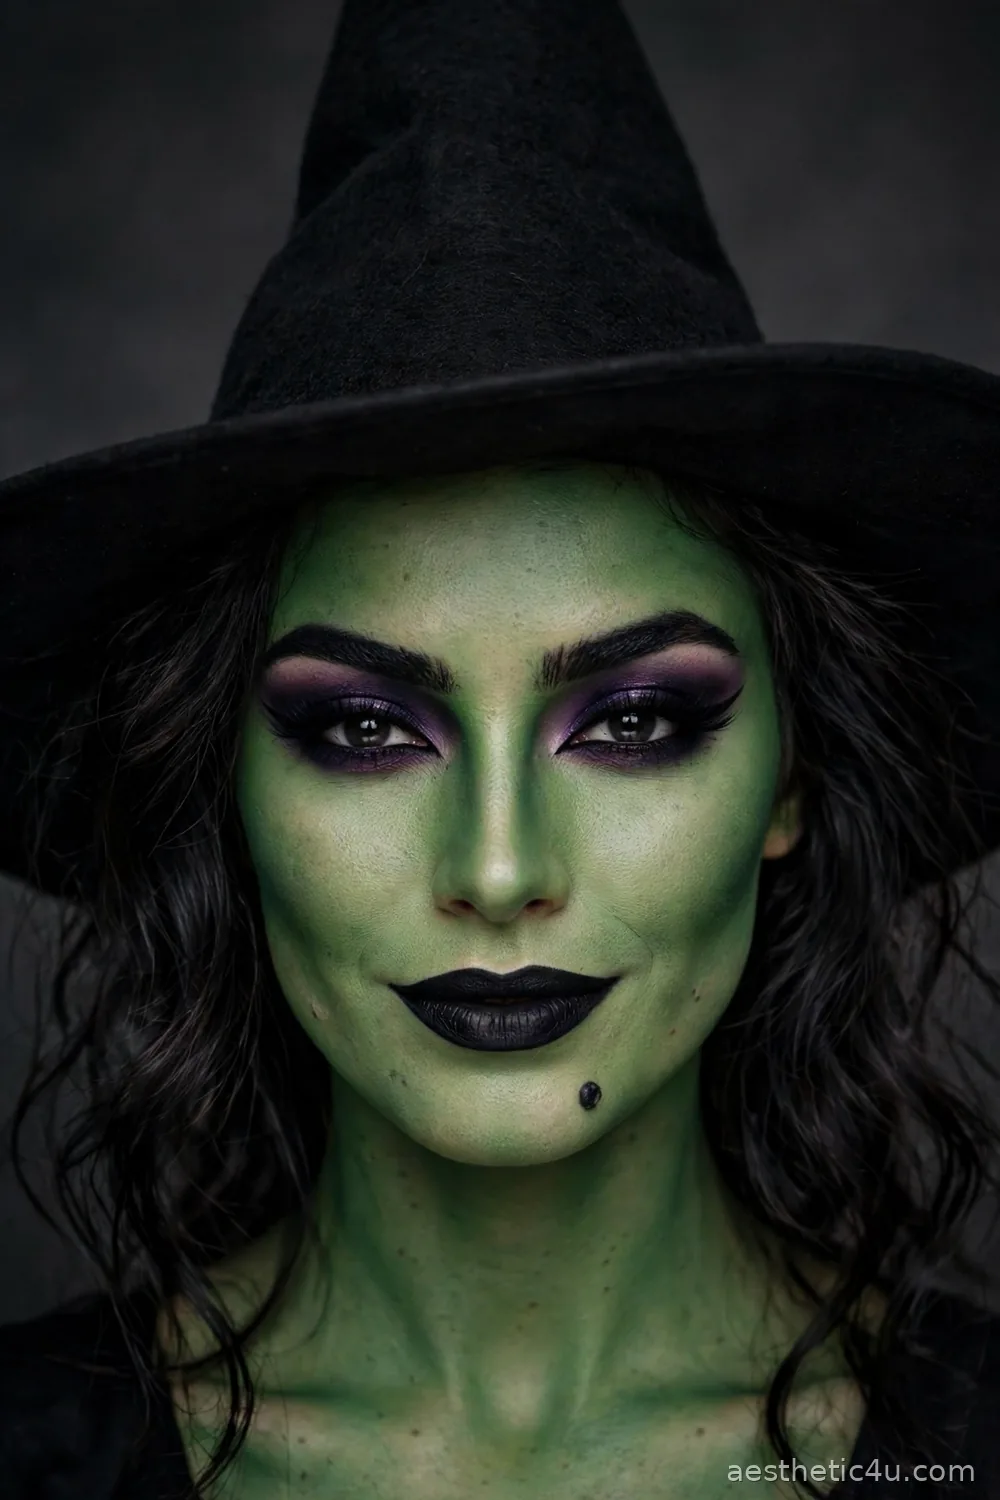
Sponge a green base over the entire face and neck so you do not get a floating head effect. Build drama with black or deep purple around the eyes: heavy shadow, sharp liner, and a strong brow. Paint the lips black or dark purple, and add one famous detail, a small wart or mole on the chin or nose with black paint and a dot of highlight. You can keep it glamorous with lashes and shimmer, or go full wicked with shaded hollows under the cheekbones. The base and details take about twenty minutes.
I pick this for women who love being the villain and own the room with it. It suits strong features and anyone wearing a pointed hat, because the green reads instantly even from across a dark room. My honest caveat: green is the hardest color to remove, so expect a faint tint the next morning and use a proper cleansing balm. Test your green shade on your jaw first too, since some greens photograph much brighter than they look in the pan.
7. A Rotting Zombie That Actually Looks Fresh From the Grave
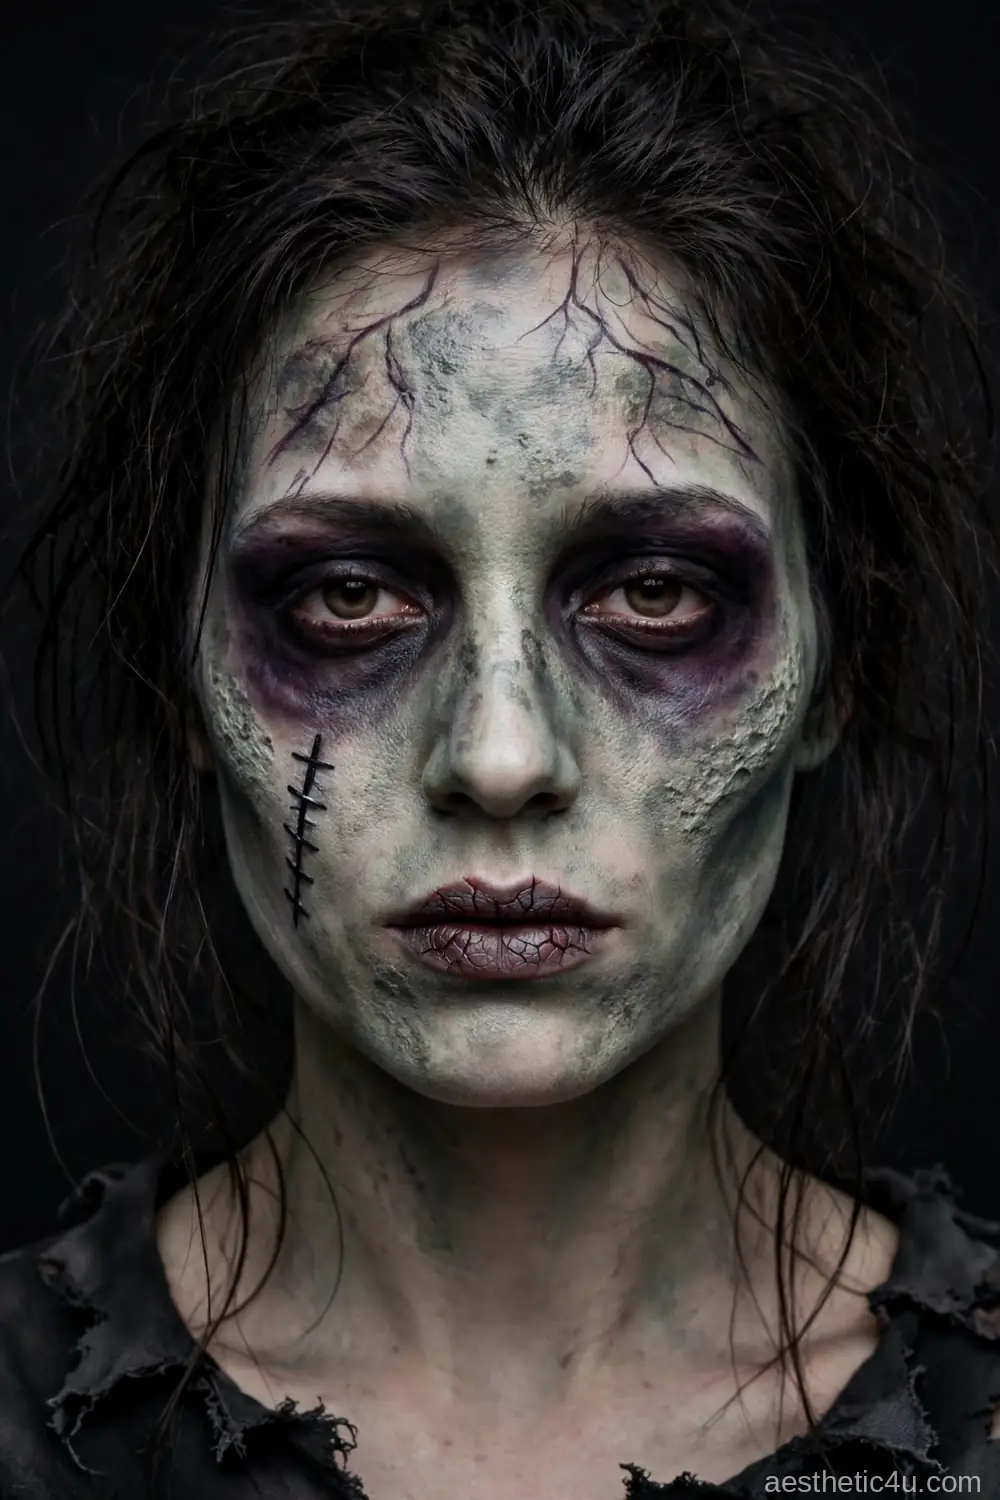
Start with a gray, pale green, or white base, sponged on unevenly so the skin looks lifeless. Ring the eyes with black and purple shadow, blended outward like bruising, and darken the lips to a dull gray-red. The decay comes from texture: stipple darker green-gray patches across the cheeks and forehead, and paint a few clean closed stitch marks along one cheek. Add dark veins with a thinned purple paint and a fine brush. Tattered clothes complete it, and the painting takes about twenty-five minutes including the texture work.
I save this one for the true horror fans, the people who want gasps instead of compliments. It suits haunted house staff, horror party hosts, and anyone whose costume is already ripped and dirty. It is not my pick for events with small children, and I will say that plainly. My pro tip: add the darkest mottling last and sparingly. Too much dark paint hides your detail work, and patchy shadows look far more real than a flat dark face.
8. Sally’s Stitched Face, Straight Out of Halloween Town
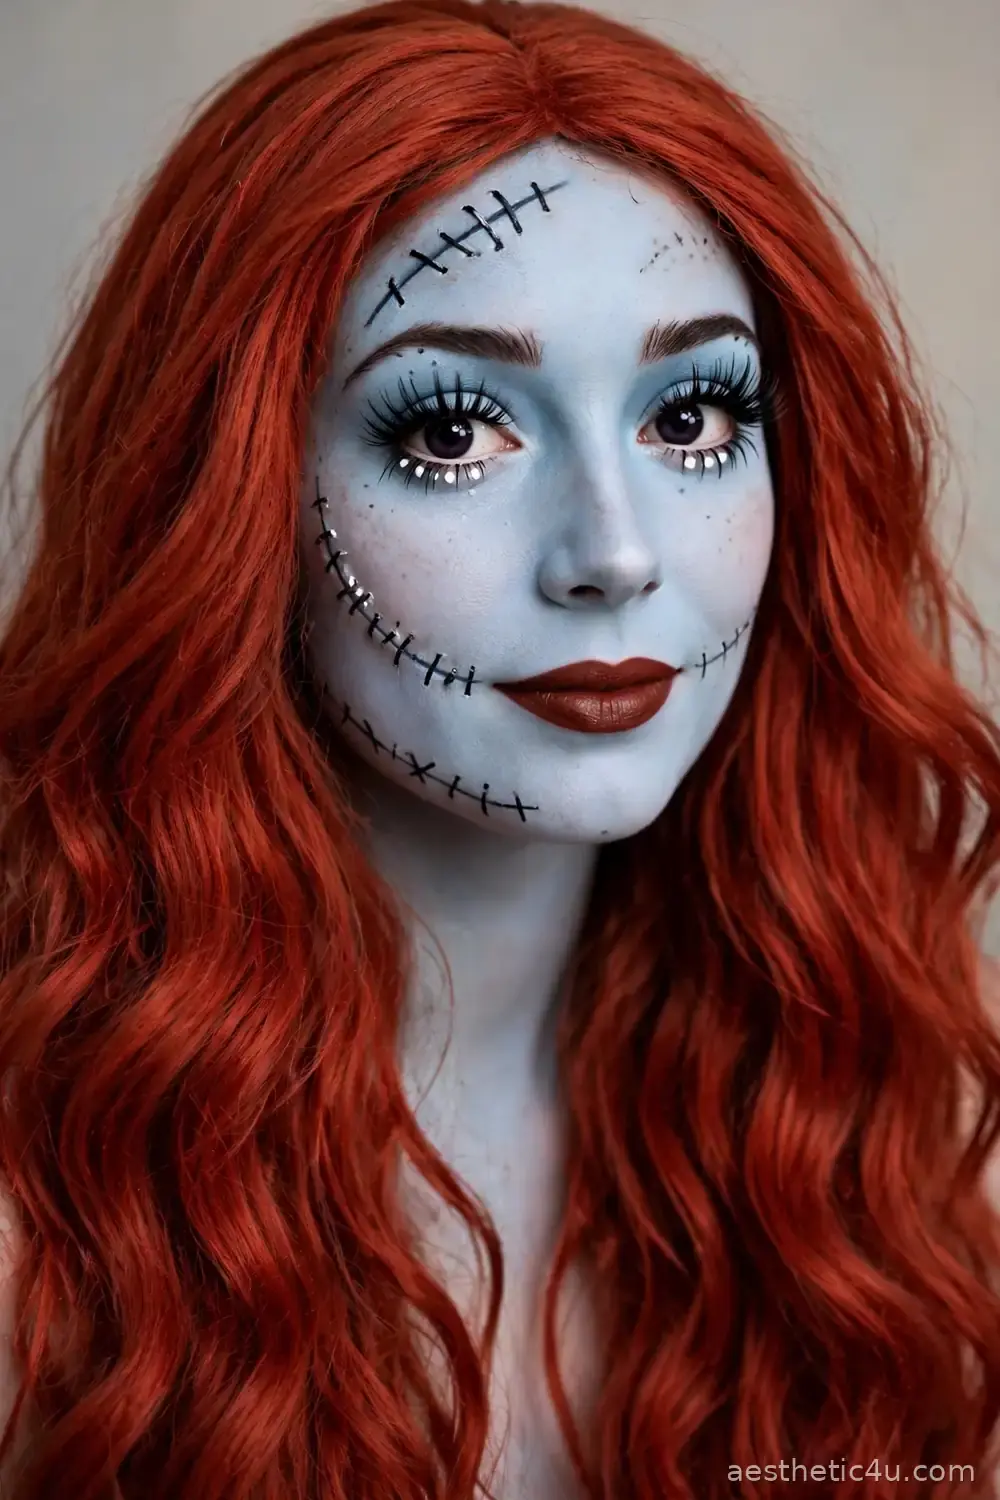
Paint your whole face a pale, dusty blue, the color of Sally’s patchwork skin. With black paint and your finest brush, draw her signature stitches: a long stitched line across one cheek, small crosses along the jaw, and a stitched scar over the forehead. Add big, soft eyes with heavy lashes and white space below the lower lash line to copy her wide doll gaze, then finish with a deep red-brown lip. The base is quick, but the stitch detail is slow work, so give yourself thirty minutes and a steady hand.
I suggest this to anyone who loves Tim Burton’s world, because people recognize Sally instantly and adore her. It suits gentle, artistic personalities and pairs perfectly with a patchwork dress or even a red wig alone. My tip from experience: draw the stitches in gray first, then trace over them in black. That shadow underneath each stitch is what makes them look raised and real instead of flat lines drawn on skin.
9. Frankenstein’s Monster With Stitches You Can Paint in Minutes
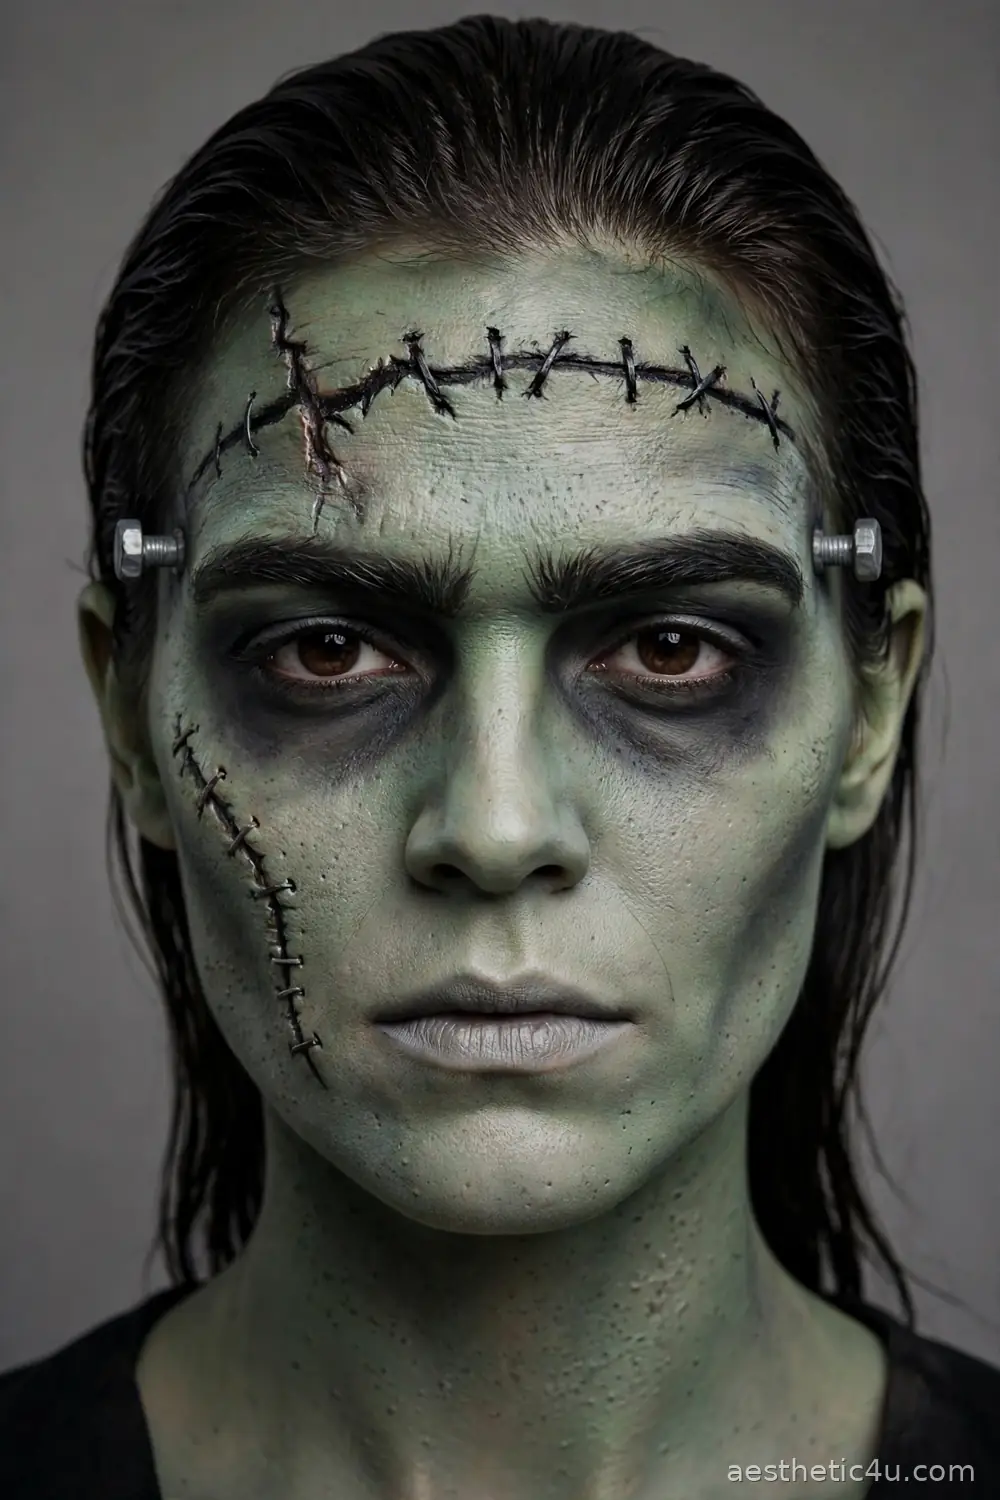
Cover the face in a flat green base, slightly grayer than the witch green, and let it dry fully. Paint a jagged stitched scar across the forehead and another down one cheek using black paint and short cross strokes. Darken the eye sockets with gray shadow, flatten your brows with paint for that heavy monster brow, and add two silver-gray bolts at the temples or on the neck. Keep the lips pale and dull. The whole design is sponge and brush basics, and most people finish in about twenty minutes.
I like this for clients who want a famous monster that is more classic than terrifying. It suits tall costumes and group themes, especially if a partner goes as the Bride. It is also a kind choice for anyone whose skin dislikes heavy prosthetics, because everything here is flat paint. My caveat: the forehead scar placement matters. Too high and it hides under hair; right above the brows is the spot everyone notices first in photos.
10. A Tiger Face With Stripes That Roar
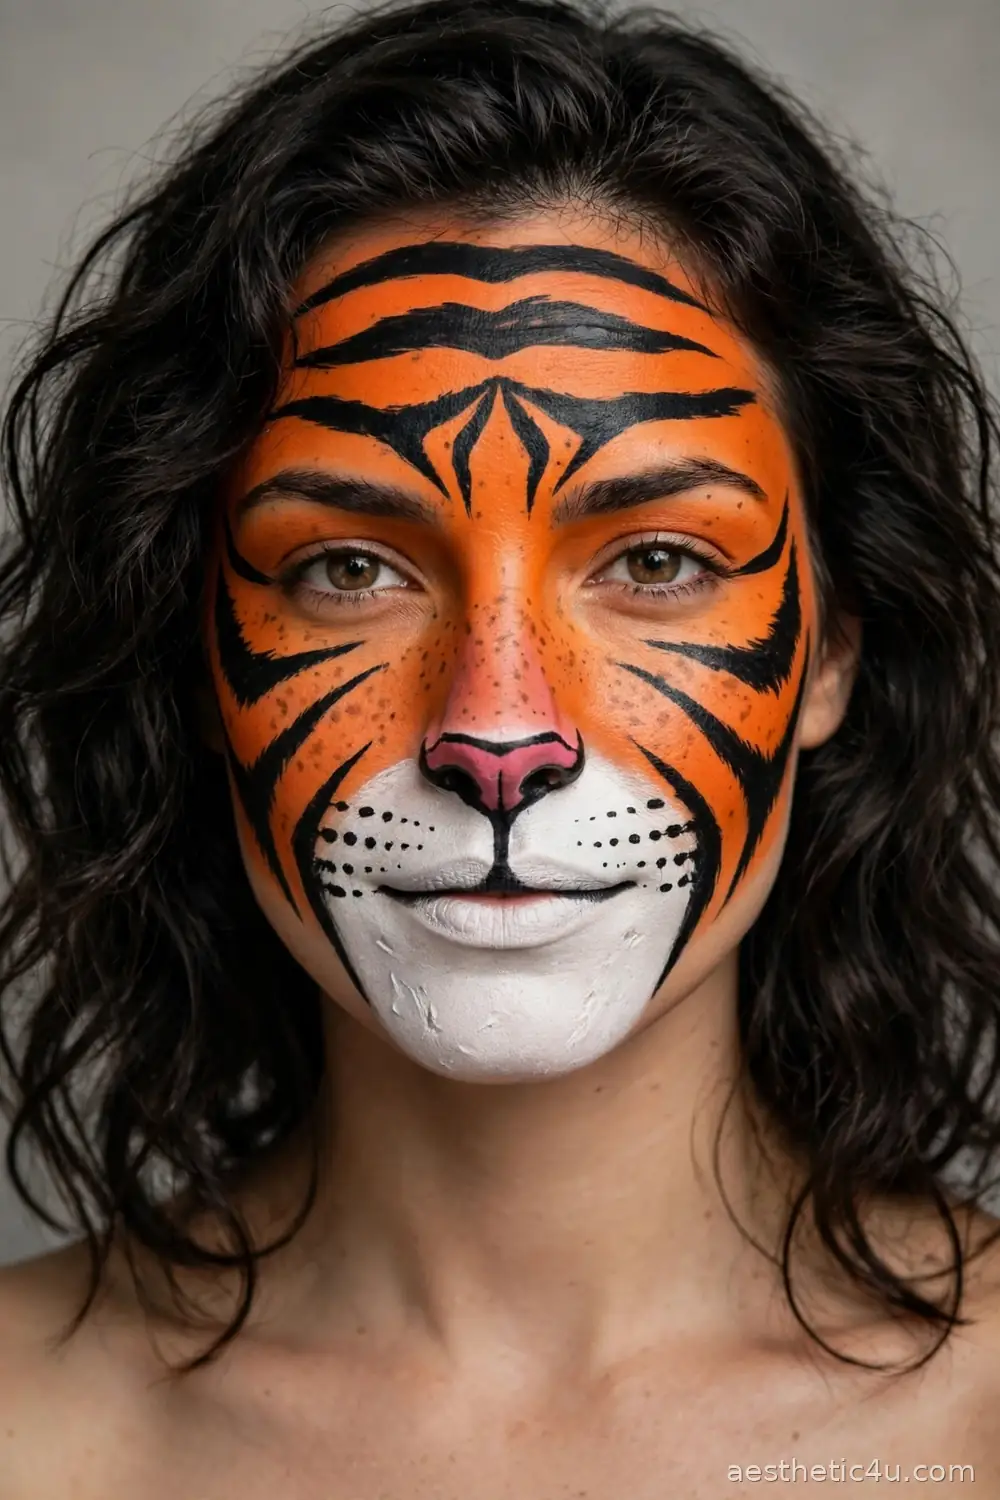
Sponge an orange base over the whole face, leaving the muzzle area around your mouth and nose for white paint. Blend the white down over the chin, then take black paint and a medium brush and draw bold stripes: thick at the edges of the face, tapering to points as they reach the center. Add stripes across the forehead, a pink or black nose, whisker dots, and a few painted teeth at the corners of the mouth if you want a snarl. Expect about twenty-five minutes, mostly on the stripes.
I recommend the tiger to anyone who wants an animal look with real power behind it. It suits confident wearers and orange or black outfits, and it is a favorite for parents matching energetic kids. My honest tip: paint the stripes on one side, then copy them loosely on the other without chasing perfect symmetry. Real tigers are not symmetrical, and slightly uneven stripes look more natural and take half the time.
Keep exploring: 24 Stunning Halloween Makeup Ideas for Women Who Want All Eyes on Them
11. Mermaid Scales You Stencil On With a Fishnet Trick
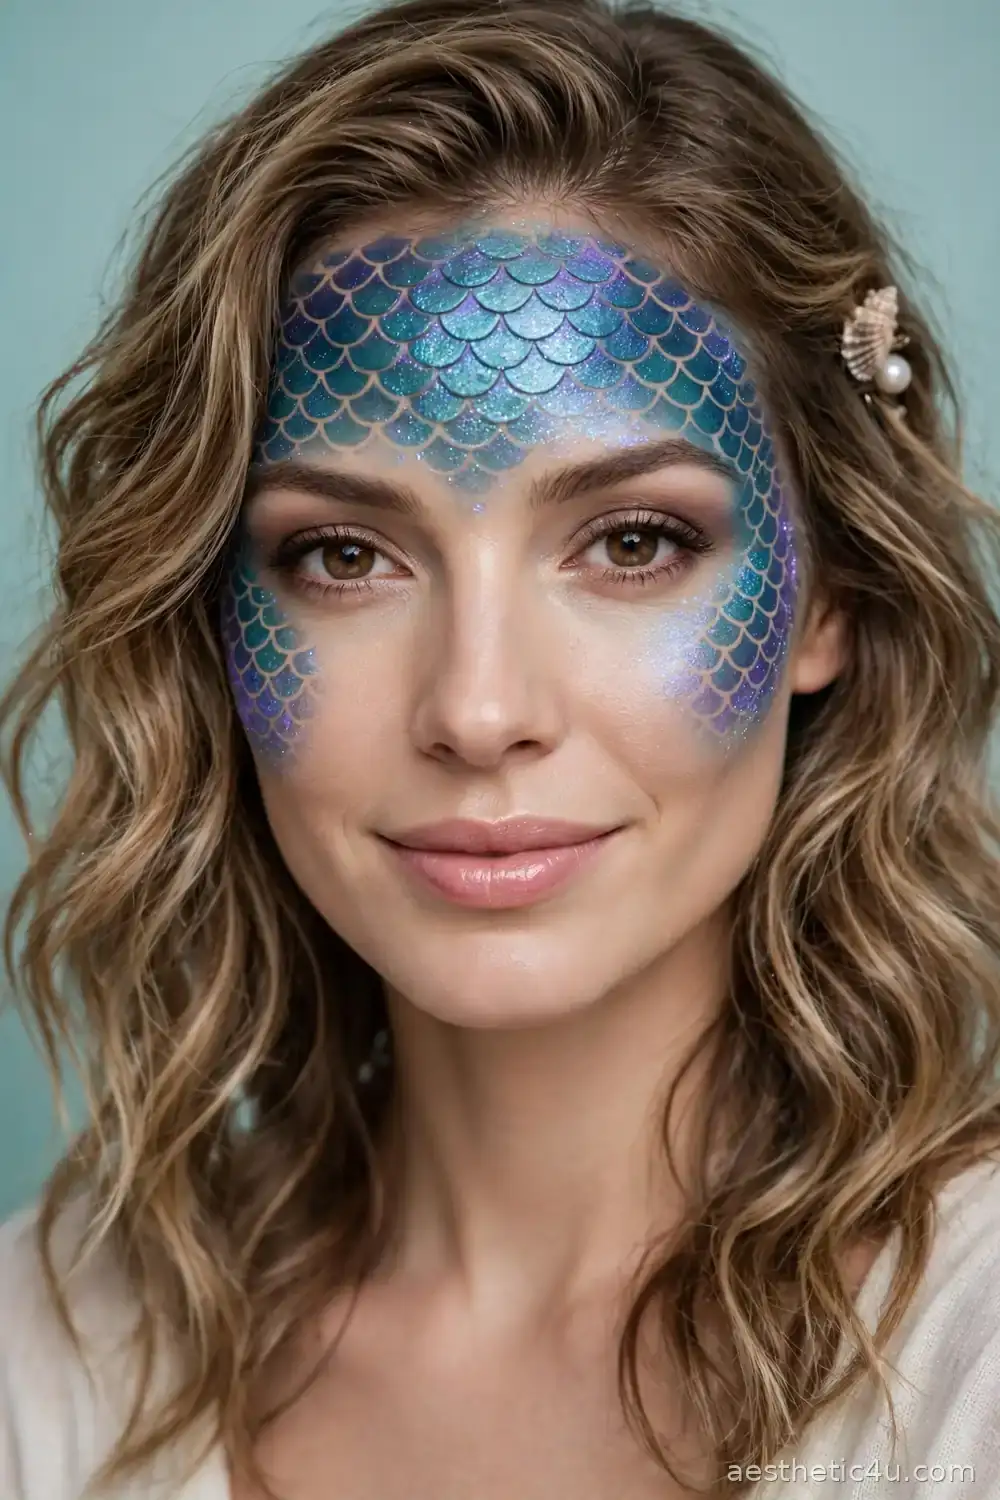
This is the cleverest technique in the list. Stretch a piece of fishnet stocking over one side of your face and hold it firm. Sponge teal, blue, and purple paint through the net across your forehead, temple, and cheekbone, then lift the net away to reveal perfect scales. Repeat on the other side, add shimmer highlighter over the scales, and finish with a glossy lip and a pearl or shell hair clip. The stenciling takes minutes once the net is in place, and the whole look lands in about twenty minutes.
I bring this one out for clients who want fantasy instead of fright, and it never fails to get compliments. It suits anyone with a beachy or jewel-toned outfit and works beautifully on deeper skin tones where the teal and purple truly glow. My pro tip: practice the net pressure on your forearm first. Pressing too hard smears the scales, while a light, even dab gives you those crisp edges that make people ask how you painted them freehand.
12. The Sunflower Scarecrow With the Sweetest Stitches
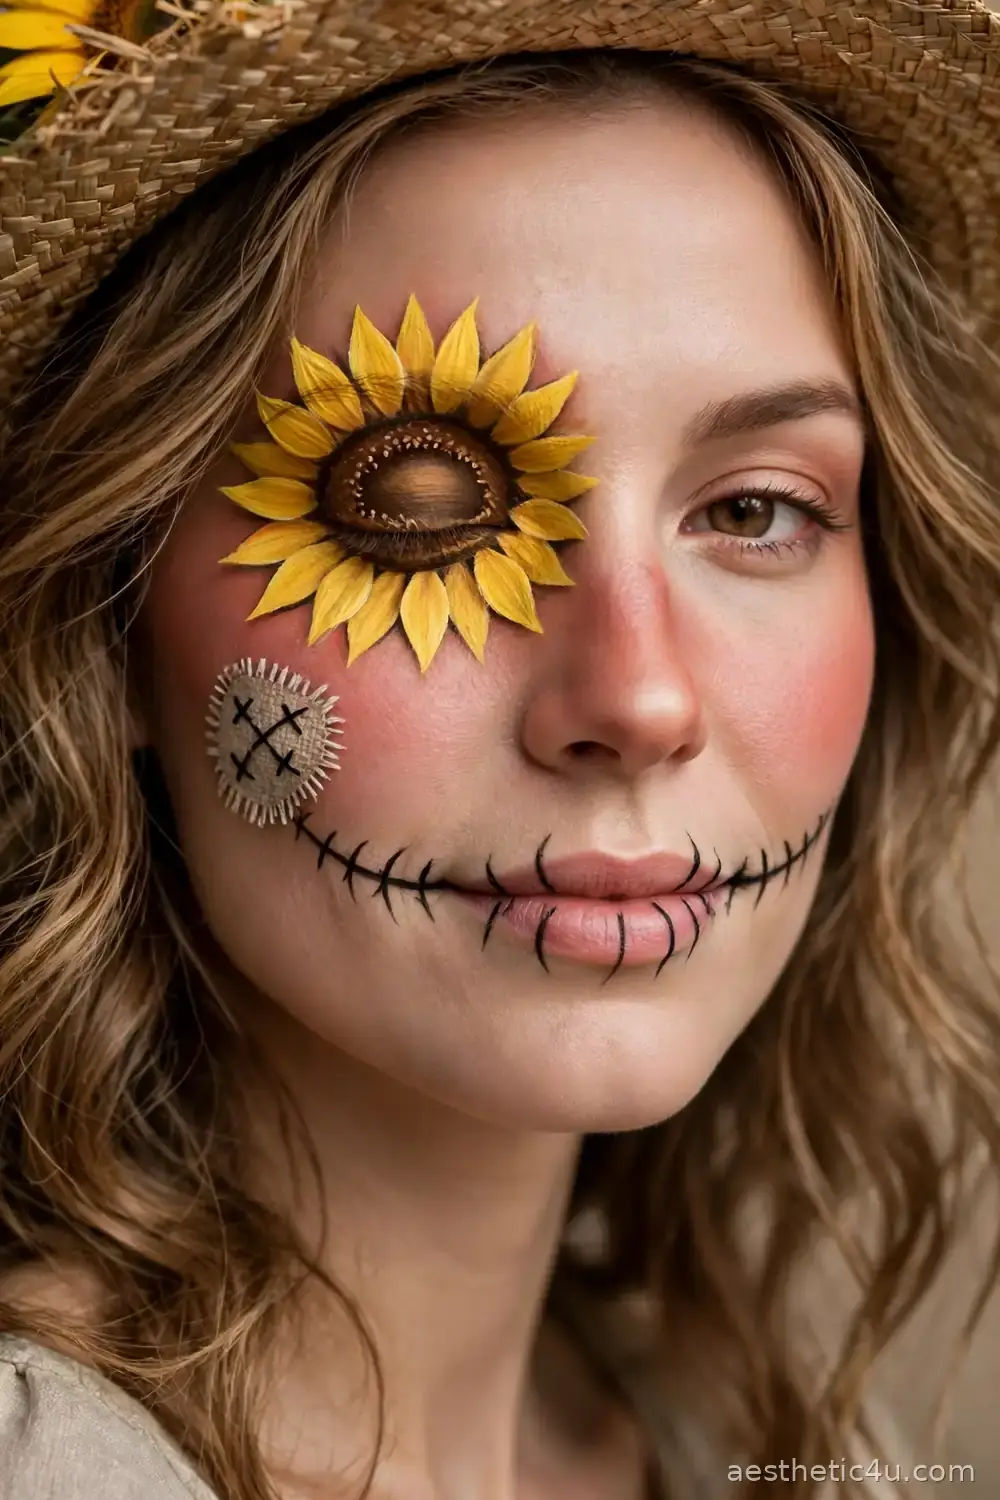
Build a warm, rosy base with extra blush on the cheeks and nose, like a face that works outdoors. Paint a big sunflower over one eye: yellow petals radiating out, a brown center sitting on the lid itself. Then add the scarecrow details with black paint: stitched lines extending your smile, a patch painted on one cheek with cross stitches, and a few straw-like strokes at the jaw. A straw hat with a sunflower tucked in finishes it. Expect around twenty-five minutes, with the flower taking the longest.
I choose this for the warm-hearted people who want Halloween without a single scary note. It suits fall festivals, school events, and family parties, and it flatters softer features beautifully because everything about it is round and friendly. My tip: use two shades of yellow for the petals, a deep gold at the base and a pale yellow at the tips. That tiny gradient is what makes the flower look painted by an artist instead of stamped on.
13. The French Mime, For People Who Own Only Two Colors
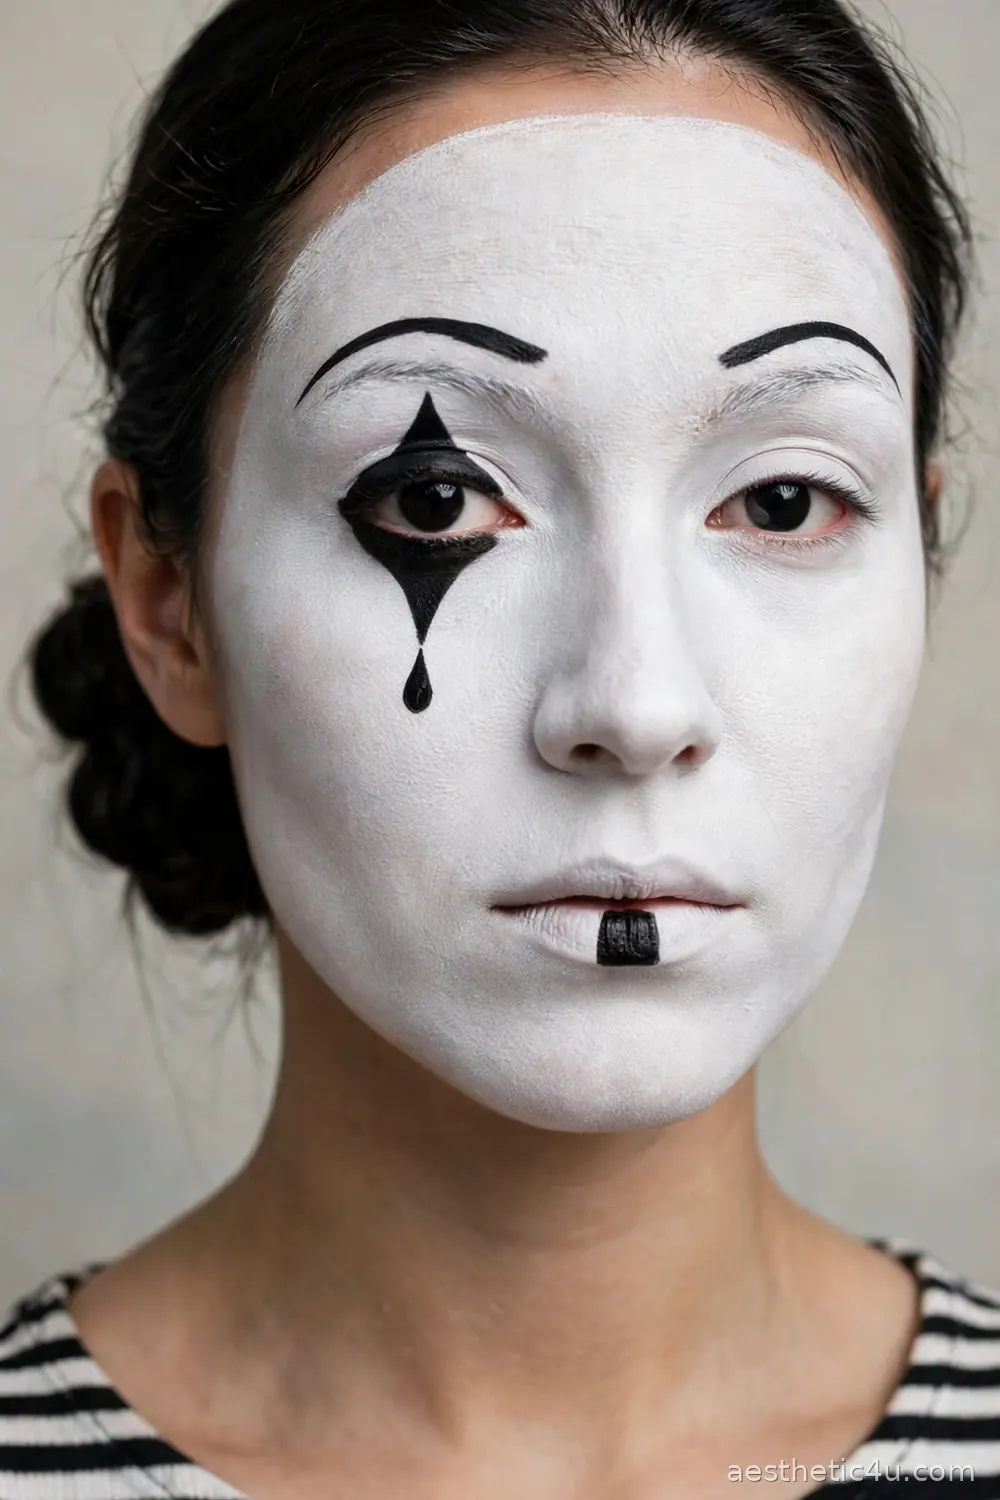
Paint your whole face an even matte white and let it dry. Then, with black paint, draw two diamonds or teardrop shapes over the eyes, arch your brows high and thin, and paint a small, neat mouth in black or deep red at the center of your lips. Add a single painted tear under one eye if you like the classic sad mime. That is the entire design. With a striped top and black trousers, which most people already own, you are done in fifteen minutes flat.
I keep this in my back pocket for clients who tell me at 5 p.m. that they have a party at 7. It suits quick thinkers and anyone who performs for a living, because the white face makes every expression huge. It is also the most comfortable full-face paint here since the layer is thin. My honest caveat: white paint cracks at the smile lines first, so carry the tube for one tiny touch-up and avoid heavy moisturizer underneath, which makes it slide.
14. A Fox Face in Just Orange, White, and Black
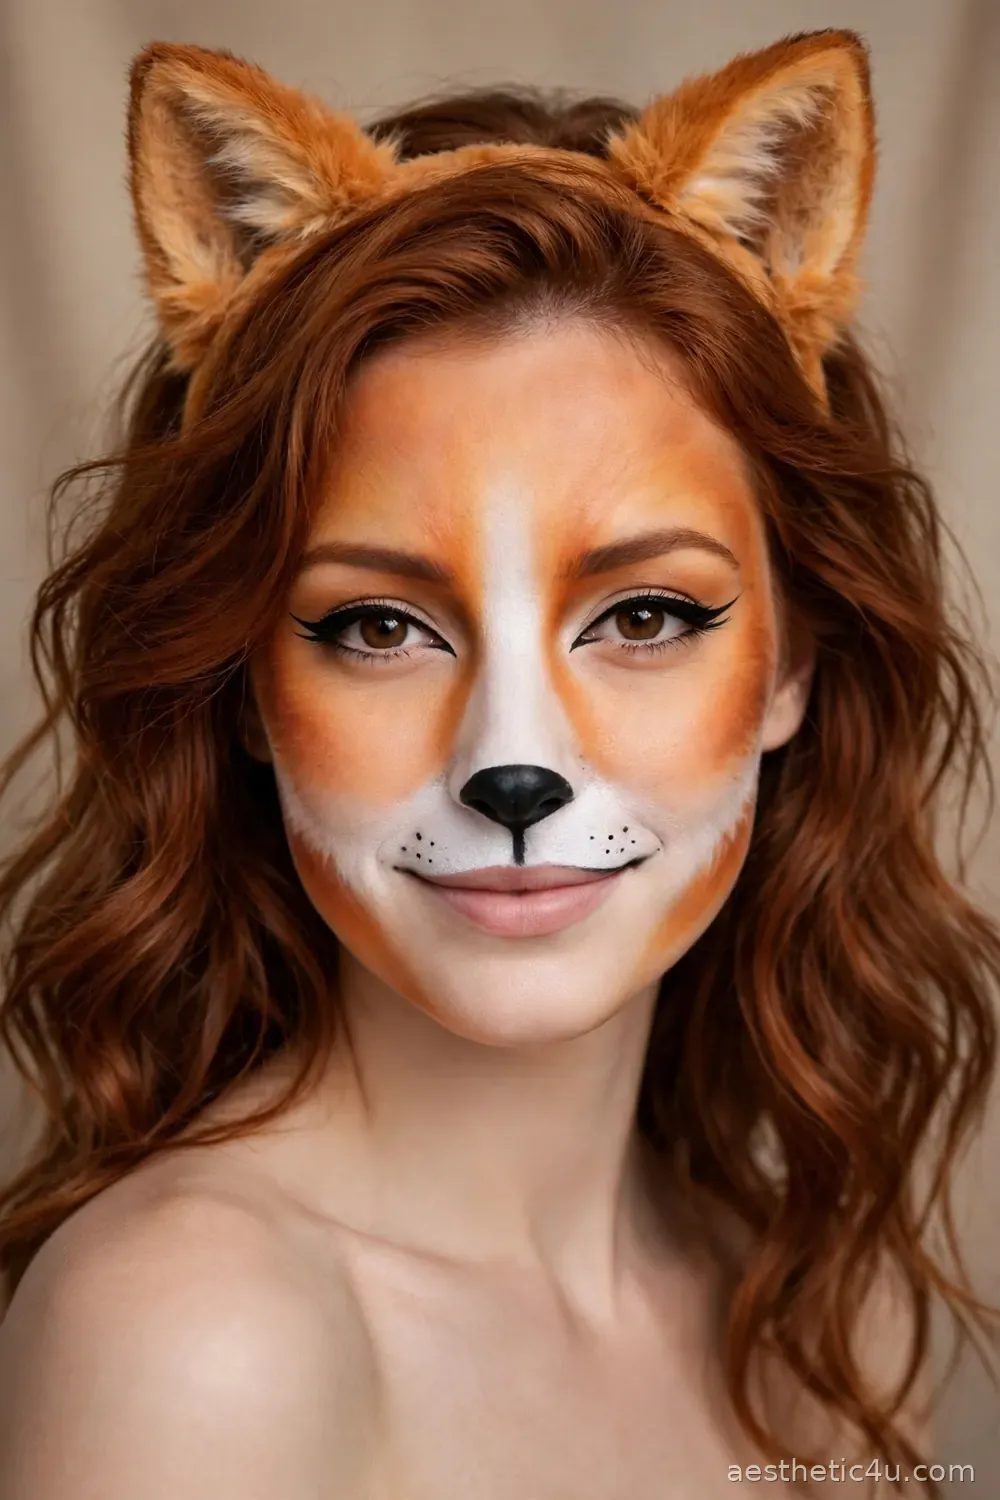
Sponge orange across the forehead, cheeks, and jaw, keeping the center of the face for white: a white muzzle around the mouth and chin, and white blending up between the eyes. Add a black nose, black whisker dots, and sharp black flicks at the outer eyes to copy that clever fox gaze. Blend the orange into your hairline so there is no hard edge, and darken the ears area with a touch of brown if you wear a headband. Three colors and about twenty minutes is all this takes.
I suggest the fox to people who find cats too common and want something a little more original at the animal end of the list. It suits redheads and warm skin tones especially, since the orange family is already in your colors, and it pairs with rust, cream, or brown outfits you may already own. My tip: keep the white muzzle soft at the edges. A hard white circle looks like a mask, while a blended one looks like fur catching the light.
15. Butterfly Wings Painted Across Both Eyes
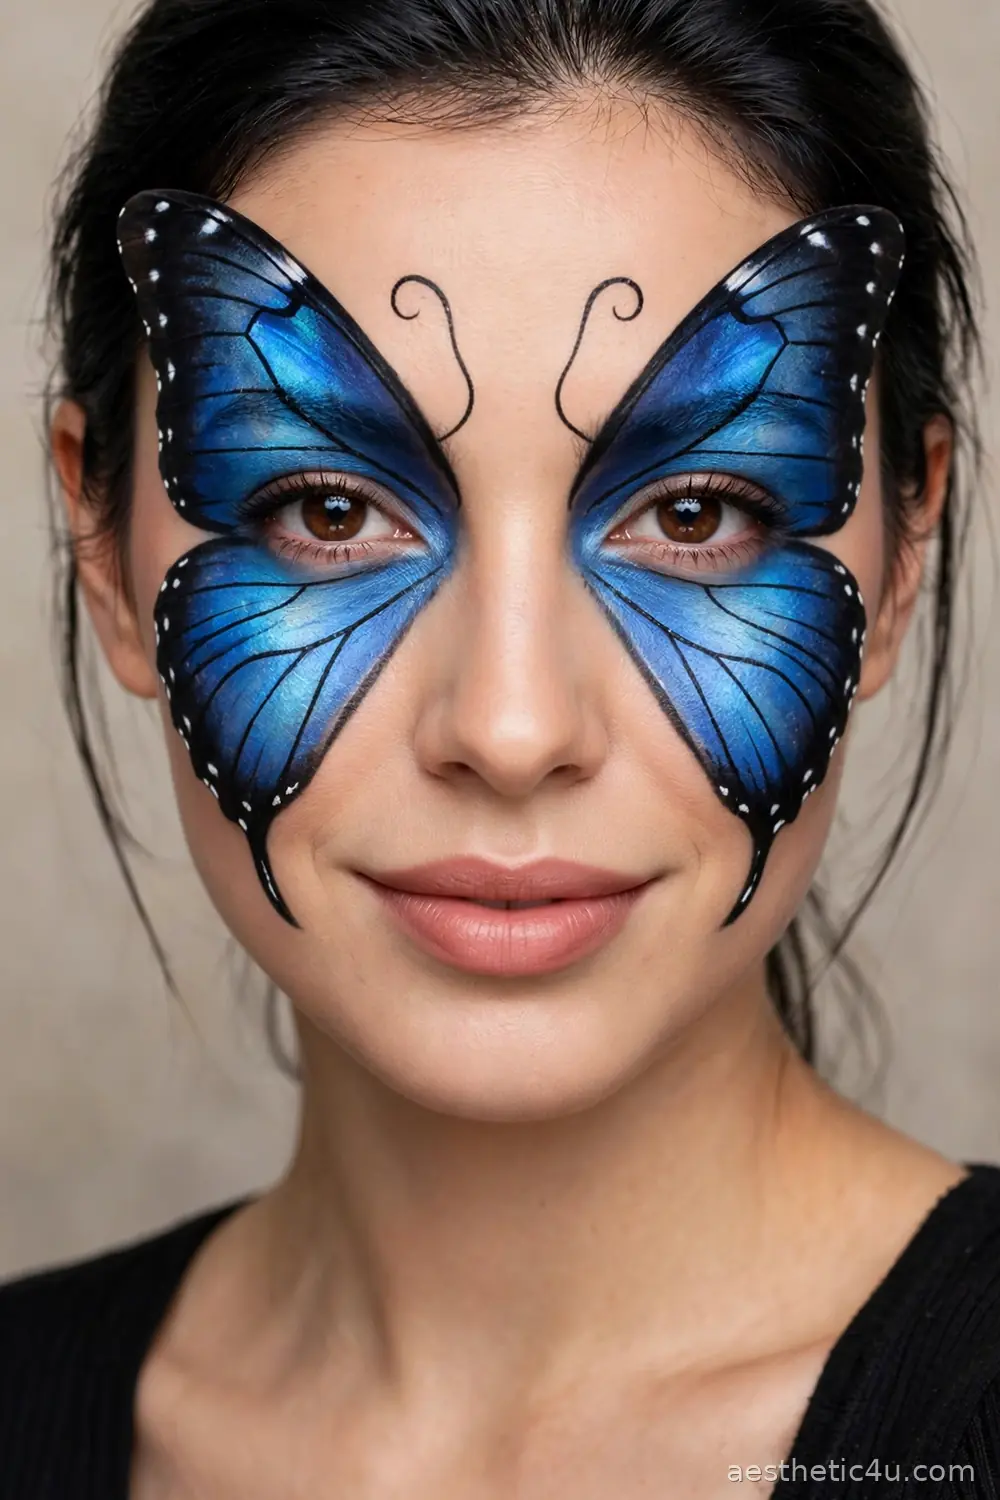
This is the artist’s pick of the list. Choose a wing color family, monarch orange or blue morpho, and paint one wing shape over and around each eye, sweeping up to the temple and down the cheek. Layer the colors from dark at the edges to bright at the center, add black outlines and veins, and dot white spots along the wing borders. Antennae can be drawn curling up from between the brows. This is slow, detailed brushwork, so give yourself forty minutes and paint one eye fully before copying it to the other side.
I reserve this for clients who truly love the painting process itself, because the result is wearable art. It suits patient people, festival lovers, and anyone whose outfit is simple enough to let the face be the statement. It is honestly not a beginner design, and I will not pretend otherwise. My pro tip: sketch the wing outline in pale pencil first and check both sides in the mirror before any color goes on. Fixing symmetry at the sketch stage takes seconds; fixing it in paint takes forever.
Keep exploring: 24 Witch Makeup Ideas So Bewitching, No Costume Could Compete
16. A Fire-Breathing Dragon With Scales and Horns
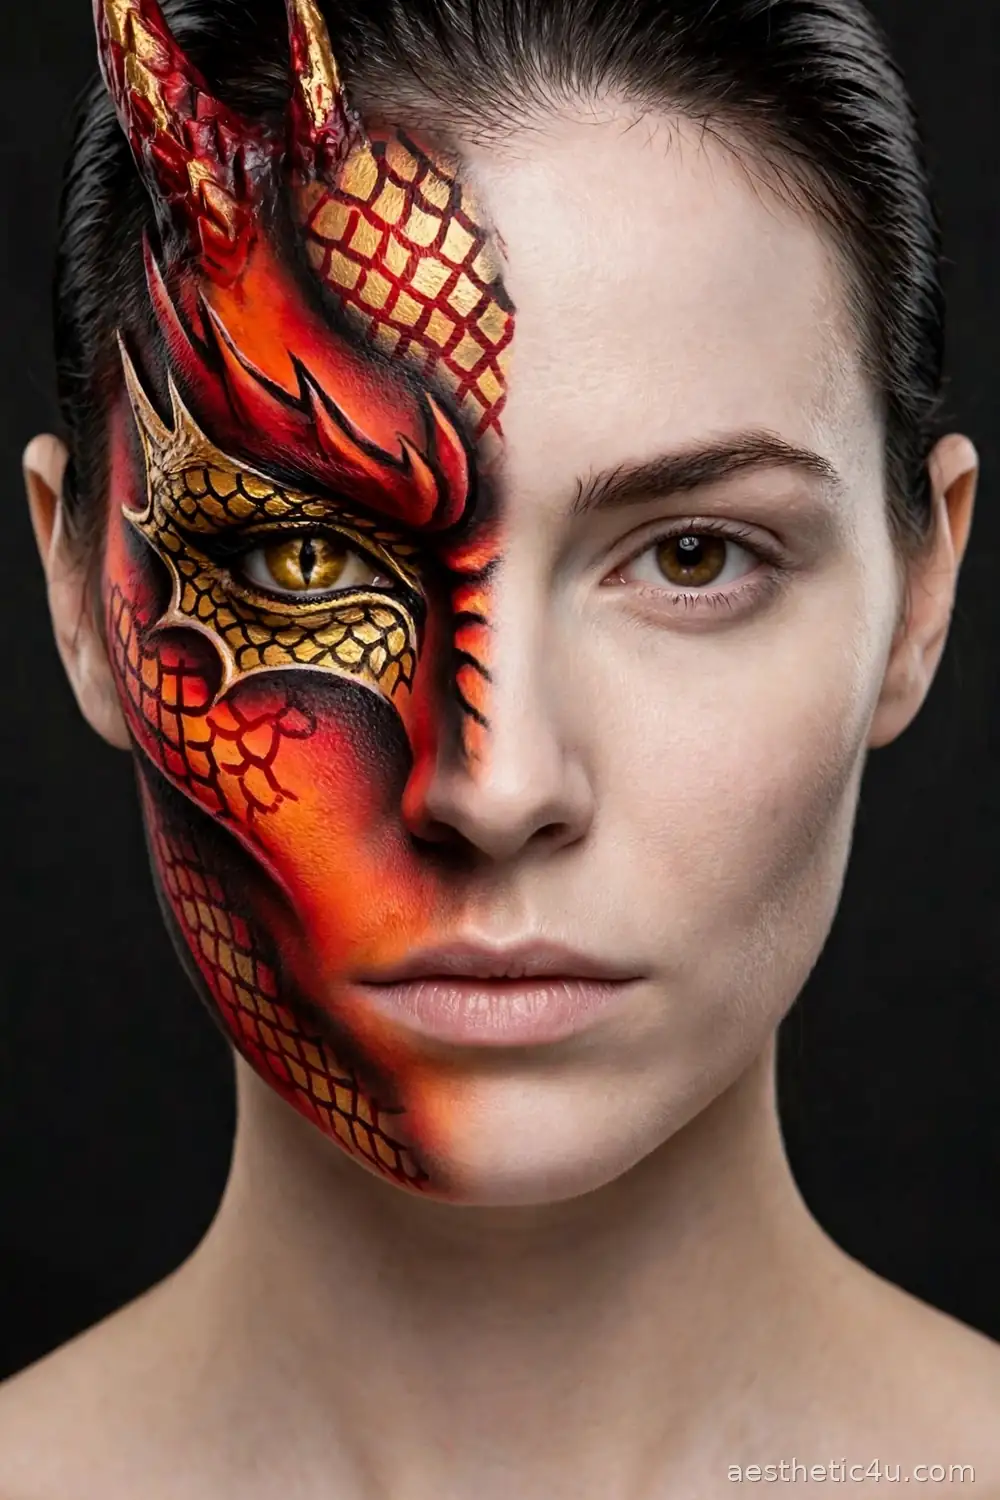
Start with a red or orange base on one side of the face, or go full-face if you are feeling bold. Build scales with the fishnet trick from the mermaid idea, this time in gold and deep red, and shade one side darker to fake the curve of a dragon’s head. Paint a fierce brow, a slitted dragon eye outline over your own eye, and small horn shapes rising into the hairline. A flat brush loaded with two colors at once gives you the fiery gradient in single strokes. Allow about thirty minutes for the full effect.
I point dragon lovers to this one because it is rare at parties and people remember it. It suits strong, dramatic personalities and anyone in red, black, or gold. My honest note: this design reads best in person and in motion, slightly less in flat photos, so take your pictures at a three-quarter angle where the shading shows. And keep the nostril smoke trick for photos only: a tiny wisp of gray paint curling from one nostril is charming, but repaint it after every drink.
17. A Pirate Face With the Eye Patch Painted On
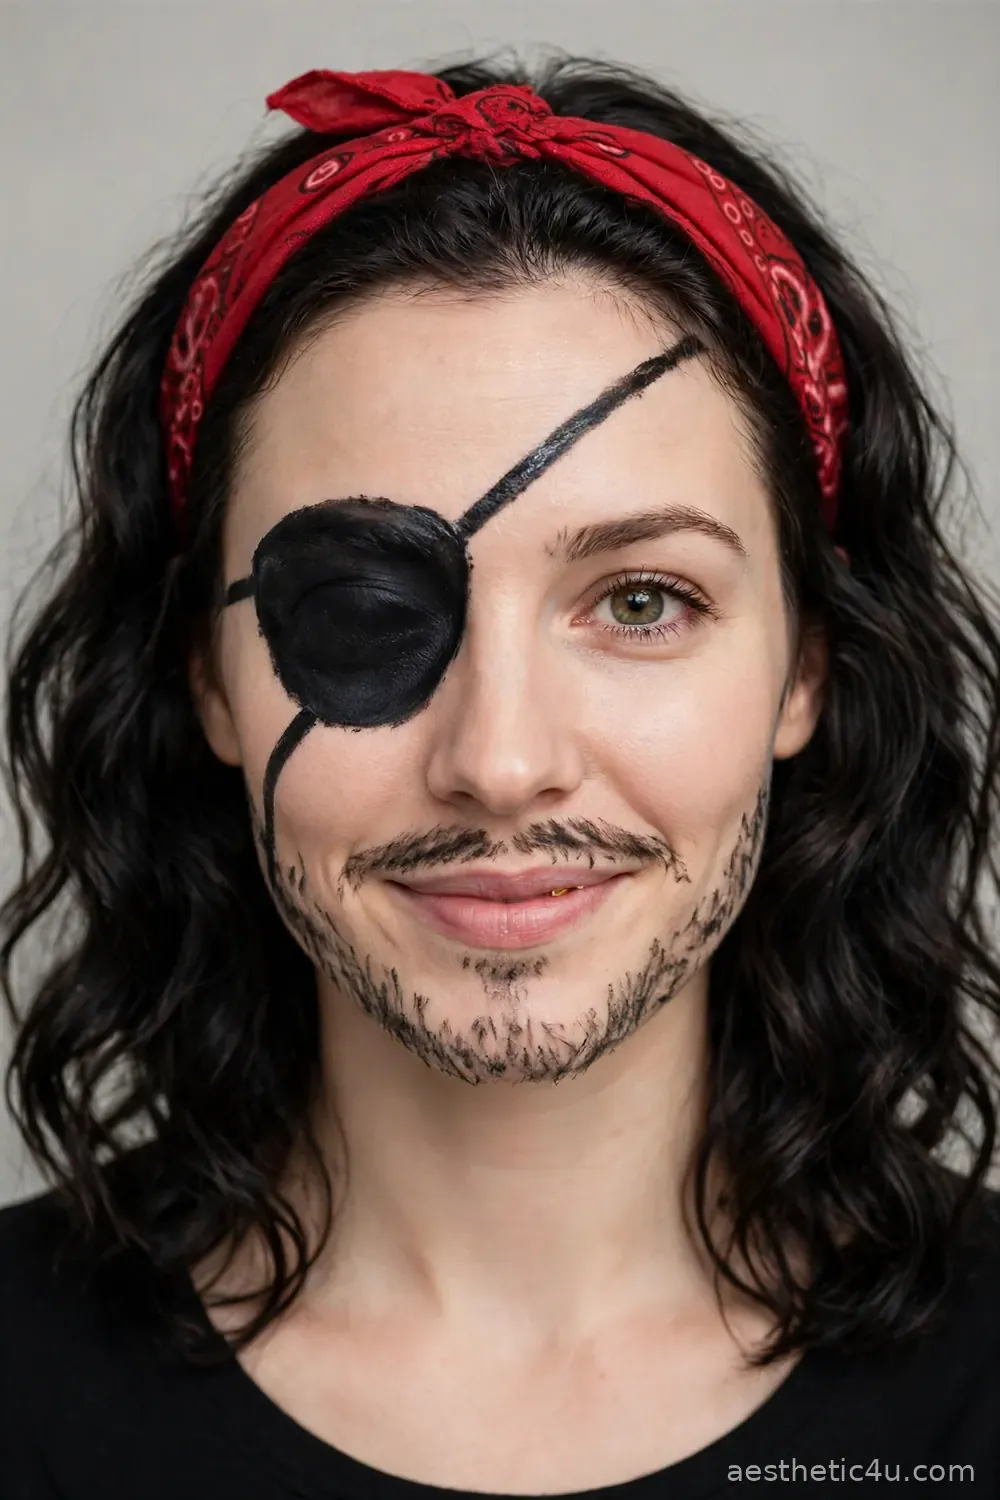
Here is the trick I love most in this list: instead of buying an eye patch, you paint one. Draw a black patch shape over one eye with a strap line running diagonally across the forehead and cheek, all in black paint. Add a painted mustache and scruffy beard shading along the jaw, a red band painted or a real scarf at the hairline, and one gold tooth painted on your smile if you are feeling cheeky. The whole face takes fifteen minutes and needs no props at all.
I recommend this to anyone who hates wearing accessories that slip around all night. It suits group pirate crews and people with great expressive faces, since the painted patch never covers your actual vision like a real one does. My tip: paint the patch strap first and the patch second, and keep the strap line thin. A thick strap reads as a stripe across the face, while a thin one with the round patch sells the whole illusion instantly.
18. Pop Art Paint That Turns You Into a Living Comic Panel
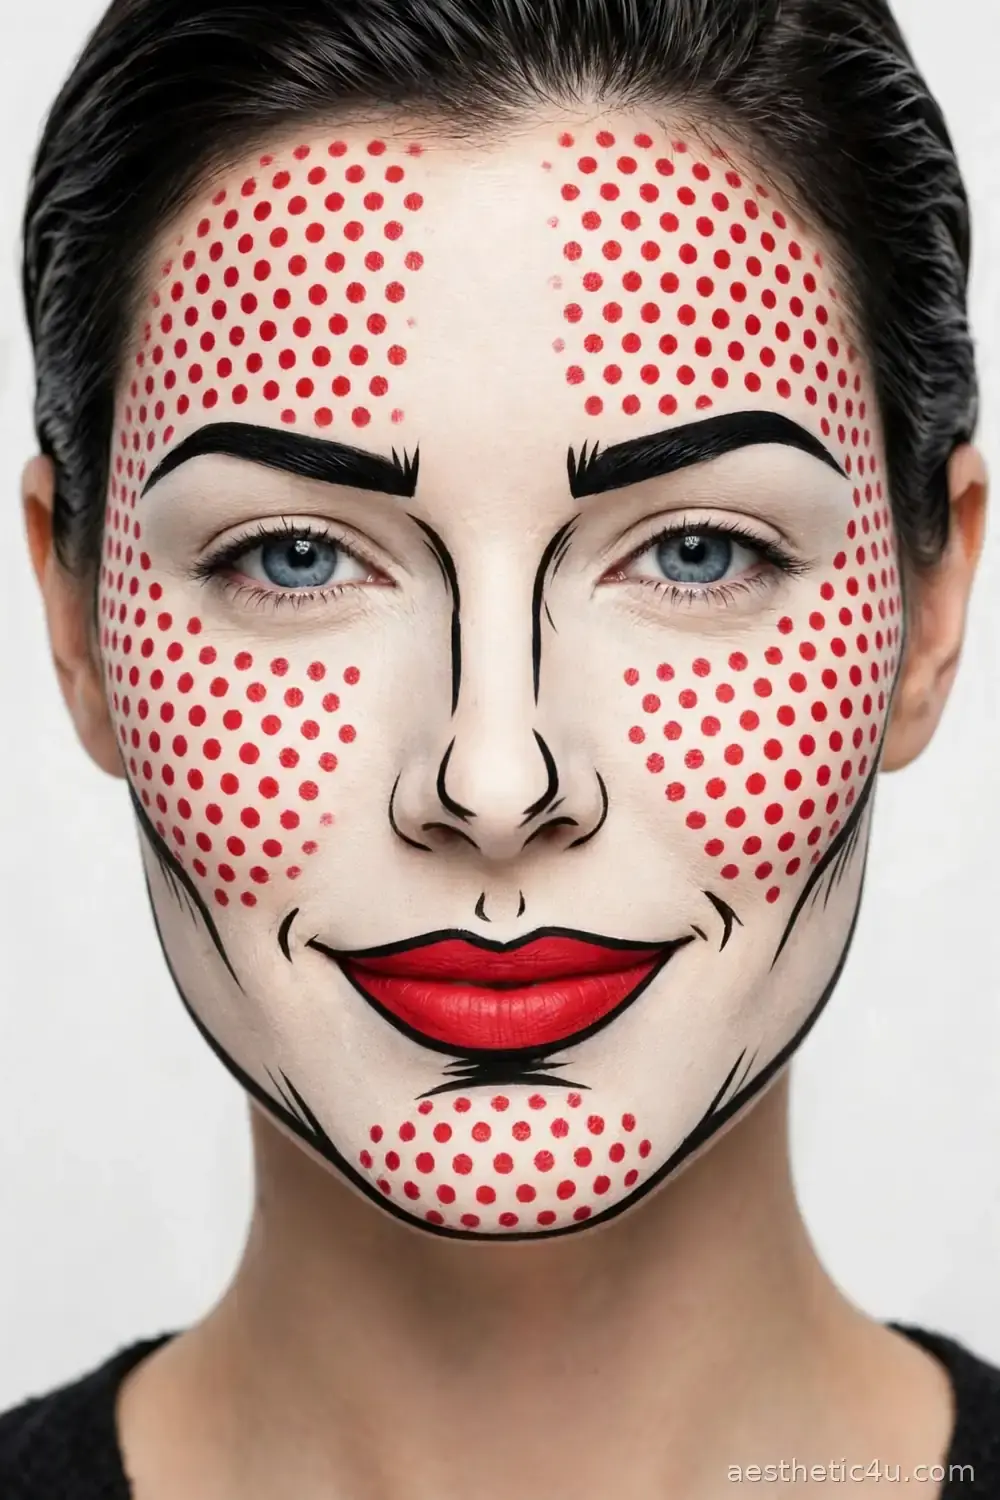
This design copies the old comic book printing style. Outline your features with bold black lines: trace the jaw, the nose, the brows, and the lips so your face looks drawn. Then cover your cheeks, forehead, and chin with neat red dots, the famous Ben-Day printing dots, using the end of a brush handle dipped in paint. Keep your base slightly pale and matte, and finish with a bright red lip outlined in black. The dots are slow but simple, and the full face takes about thirty-five minutes.
I give this one to the art lovers and the pop culture fans, because it gets photographed more than almost any look I paint. It suits bold personalities and bright outfits, and it works on every skin tone since you choose your own dot and base colors. My pro tip: make the dots in even rows on the cheeks but let them scatter naturally on the forehead. Perfectly even dots everywhere look digital, while slight variation looks like real vintage print.
19. The Queen of Hearts With a Heart Painted Over One Eye
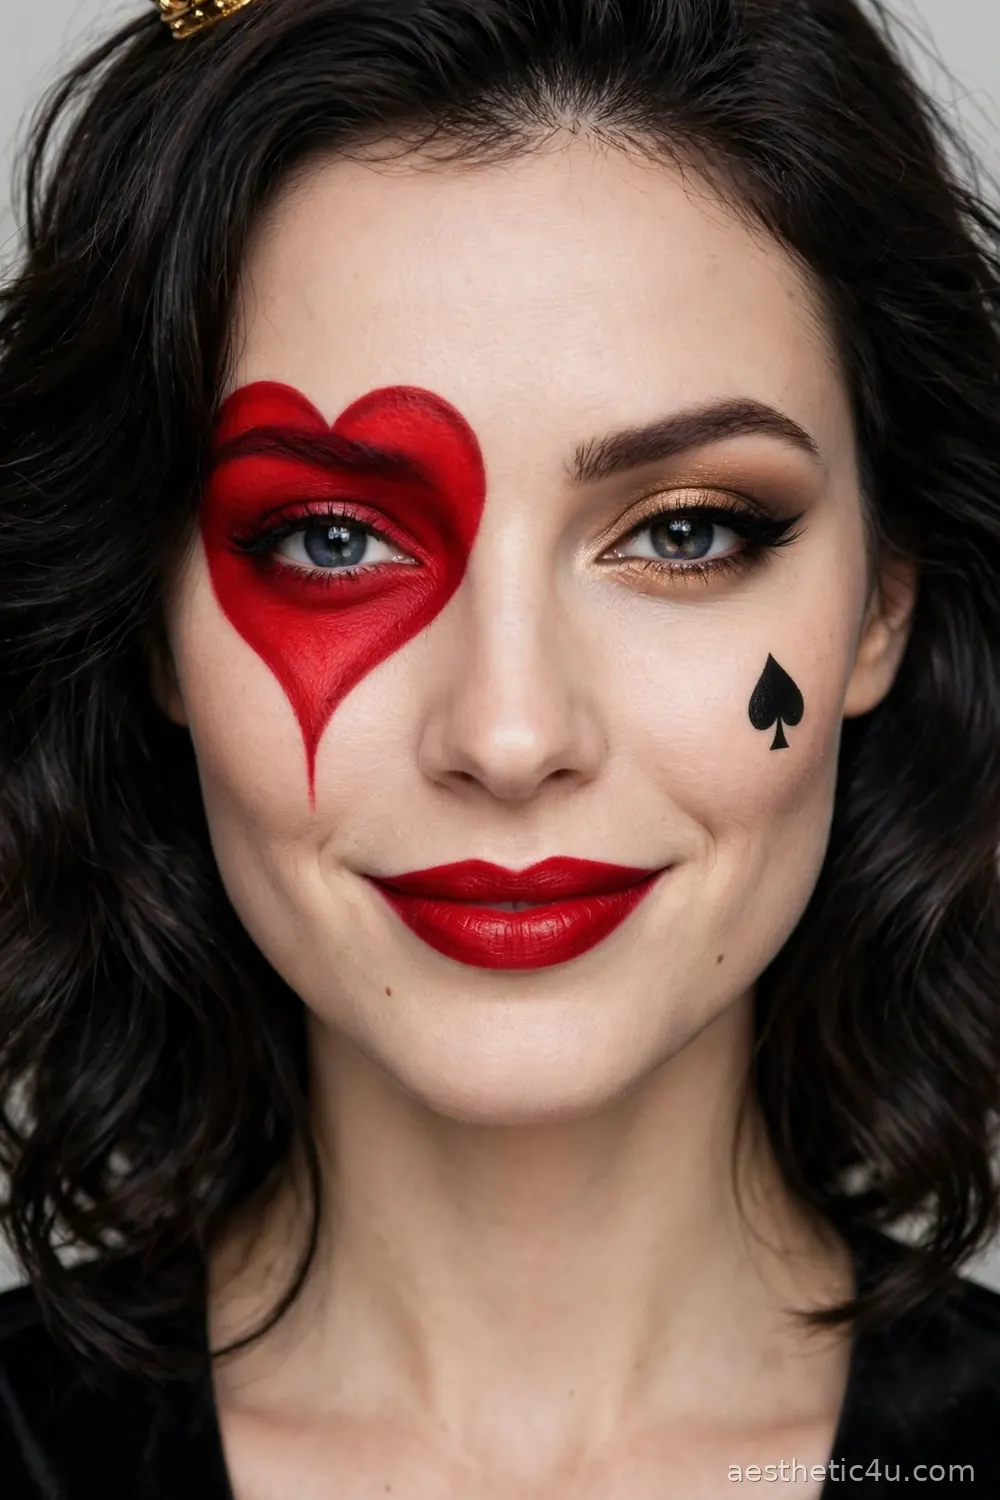
Begin with a pale, polished base and your most glamorous eye makeup on one side. On the other eye, paint a large red heart shape framing the eye completely, with the point ending on the cheek. Add a small black spade or club symbol on the opposite cheek, a beauty mark, and the reddest lipstick you own, shaped into a sharp cupid’s bow. A crown or a deck-of-cards hair clip finishes the royal theme. The heart is the only hard part, and the look takes about twenty-five minutes.
I choose this for clients who want glamorous and themed at the same time, because the heart eye is pure theatre. It suits Valentine-soul romantics, Alice in Wonderland group costumes, and anyone wearing red or black. My honest tip: draw the heart in red lip liner first and check it with your eye open and closed before filling it in. A heart that looks perfect on a closed eye can warp strangely when you blink, and the liner lets you fix it for free.
20. A Neon Outline Face That Glows Under Party Lights
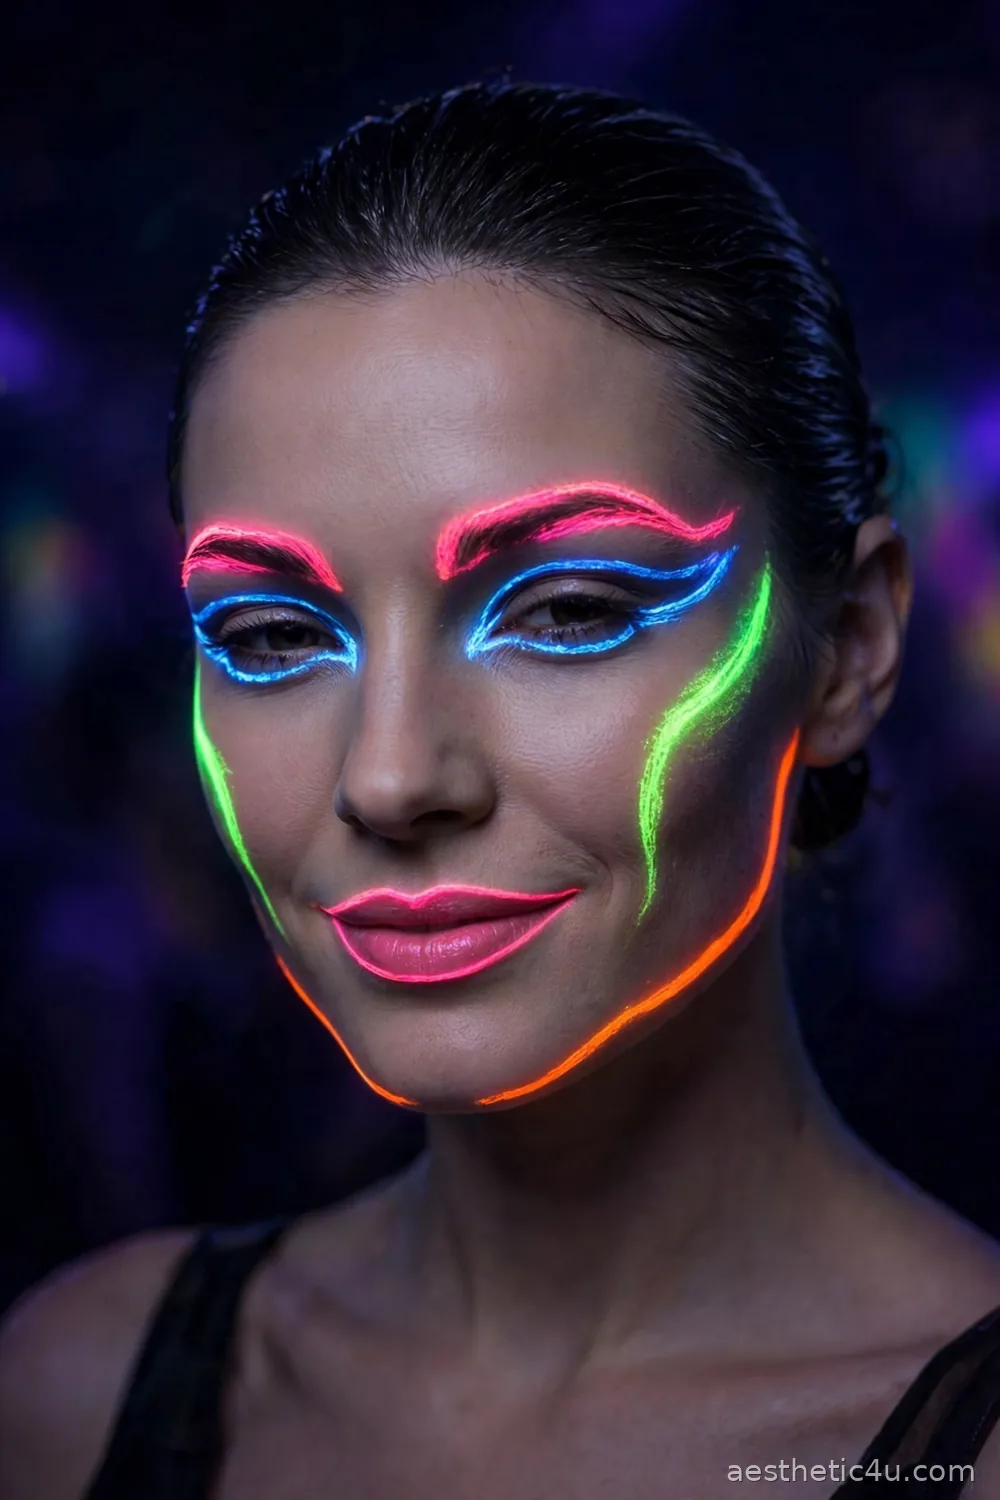
Instead of filling your face with color, you trace it like a neon sign. Using neon face paints that react to UV light, draw clean outline lines along your jaw, cheekbones, brow bones, and around your eyes and lips, each feature in a different electric color: pink, green, blue, orange. Keep the skin between the lines bare or lightly based. Under normal light it looks like colorful liner art; under blacklight at a party, your whole face lights up like signage. The line work takes about twenty minutes with a steady hand.
I save this for the rave and club crowd, because no other design here depends on the venue lighting quite like this one. It suits minimalists who hate the feeling of full paint, since most of your skin stays clean. My caveat, honestly: if your party has no UV lighting, the effect is much quieter, so check the venue first. And buy proper UV-reactive cosmetic paint, never craft glow paint, because your face deserves products made for skin.
Keep exploring: 24 Deer Makeup Ideas So Cute, They Are Practically a Halloween Shortcut
21. Harlequin Diamonds For a Vintage Theatre Soul
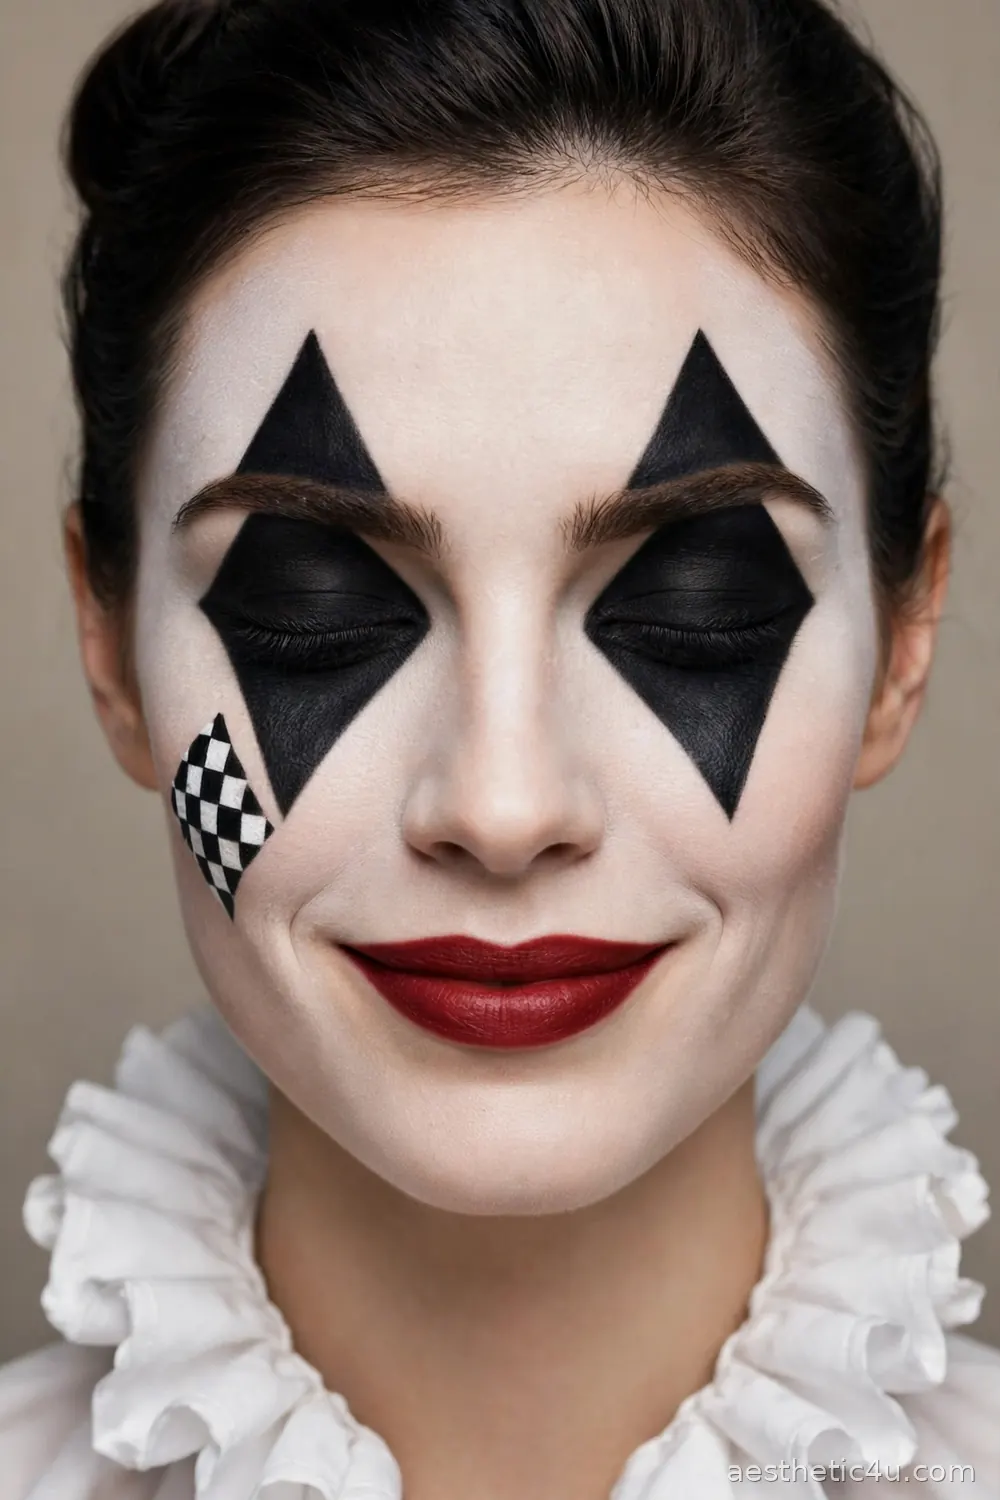
Paint a clean white or pale base, then draw large black diamonds over both eyes, points reaching up to the brow and down to the cheek. Add a second smaller diamond or a checkered pattern along one cheek, strong arched brows, and a deep red or black lip. The harlequin is the clown’s elegant ancestor from old Italian theatre, so keep the lines crisp and the colors limited to black, white, and red. With a ruffled collar or a diamond-print top, the design is complete in about twenty-five minutes.
I suggest this to clients who find modern clowns too loud but love the theatrical family they come from. It suits dancers, theatre people, and anyone with a black-and-white outfit, and the symmetry flatters oval and heart-shaped faces. My tip: measure the diamonds with your fingers before painting, marking the top and bottom points with tiny dots. Freehand diamonds almost always end up two different sizes, and this is one design where the matching pair really matters.
22. A Creepy Clown Painted in Dark, Moody Colors
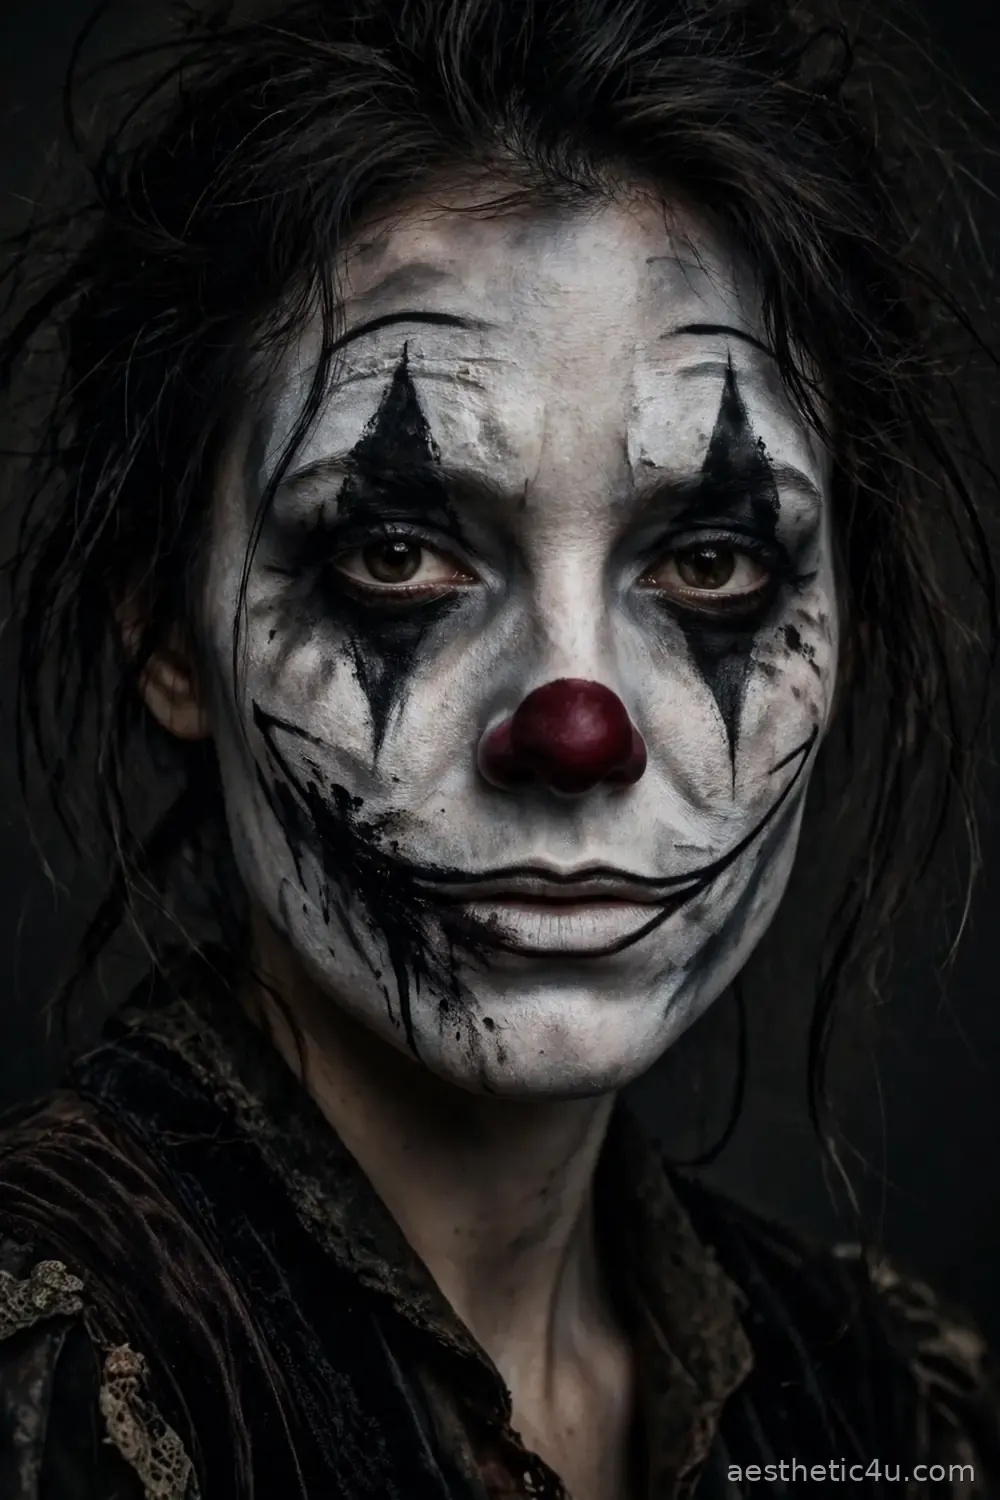
Take the clown shape but drain away the cheerful colors. Use a gray-white base instead of bright white, ring the eyes with smudged black diamonds, and paint the classic round nose in deep burgundy instead of red. The smile is the scary part: extend it too far up the cheeks with thin black lines and let one side smear downward. Darken everything with gray shading at the temples and jaw. The painting takes about thirty minutes, and the mood comes from restraint, not detail.
I paint this only for adults who ask for genuinely frightening, and I am clear about that up front. It suits horror fans and haunted attractions, and it pairs with dark, old-fashioned clothing rather than bright costume colors. It is not for children’s parties, full stop. My pro tip: keep the base slightly uneven and matte. A perfect, shiny white base looks like a mask from a shop, while a patchy gray one looks like something that has been wearing that face for a very long time.
23. Cracked Porcelain, the Broken Doll Paint Everyone Asks About
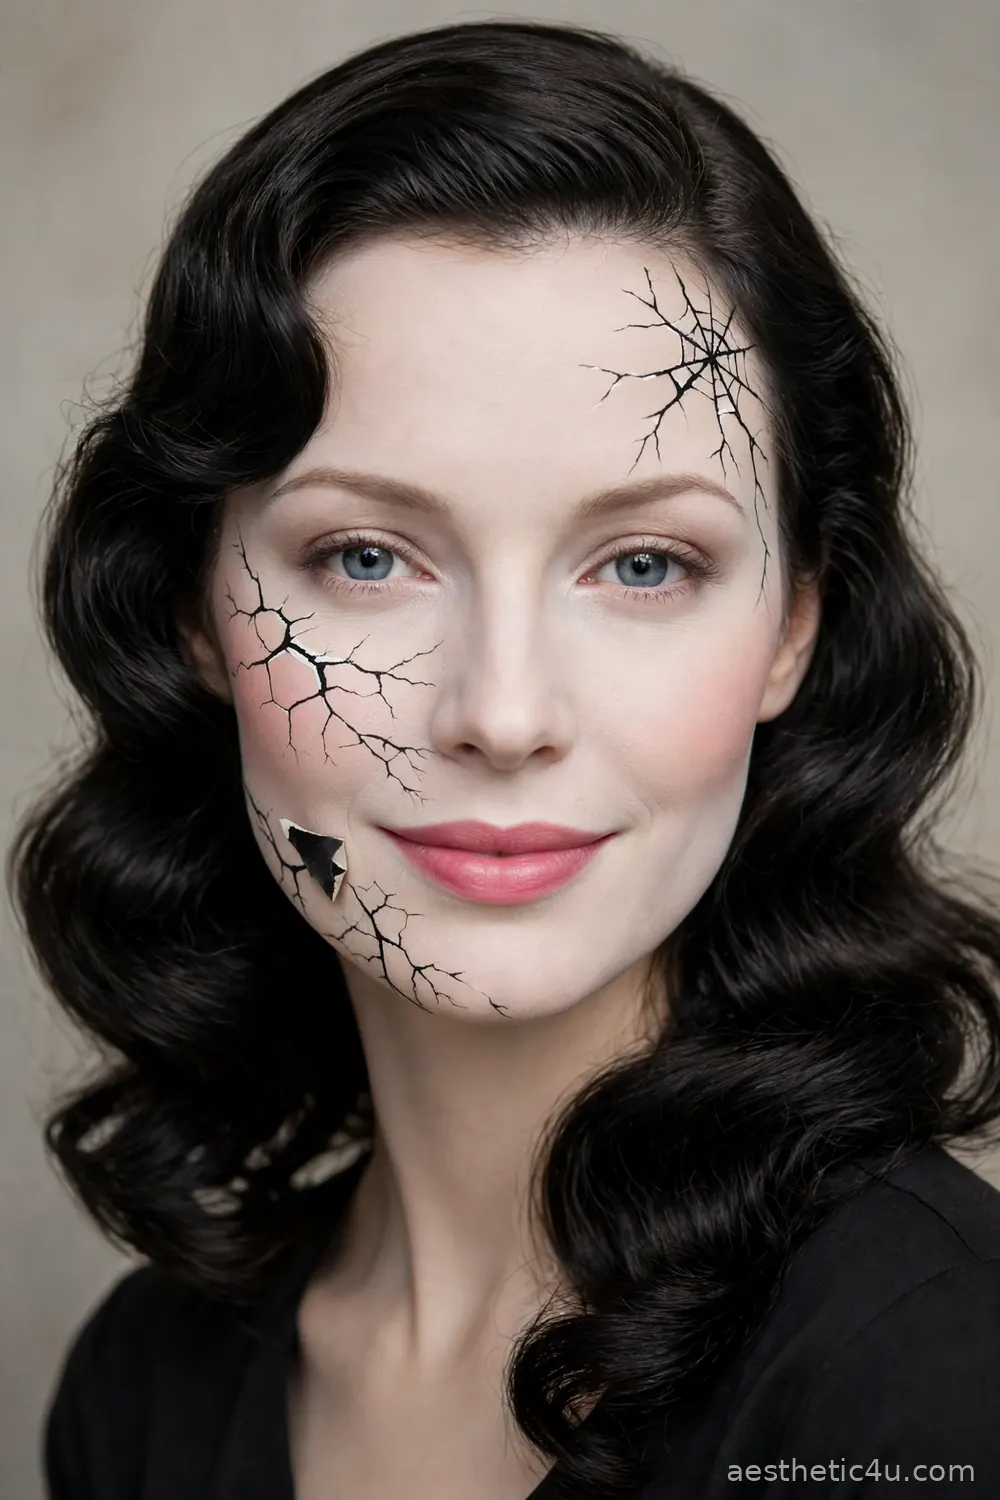
Start with a flawless porcelain base: pale, smooth, and pretty, with soft blush and a doll-like lip. Then take a fine brush and black paint thinned with a drop of water, and draw your cracks. Build a main crack line across one cheek or the forehead, then branch smaller lines off it, and paint one small triangular shard completely black, as if that piece of porcelain has fallen away. Keep the cracks sharp and thin. The pretty base takes fifteen minutes; the cracks take patience more than time.
I recommend this to clients who want scary and beautiful in the same face, because the contrast is the entire magic. It suits detail lovers and anyone in a vintage dress or doll costume. My honest tip: fewer cracks, placed well, beat a face covered in them. Three crack clusters maximum, one at the temple, one at the cheek, one at the jaw. More than that and your face reads as a dry riverbed instead of broken porcelain, and I have seen that mistake many times.
24. A Vampire Painted in Blood-Red and Bone White
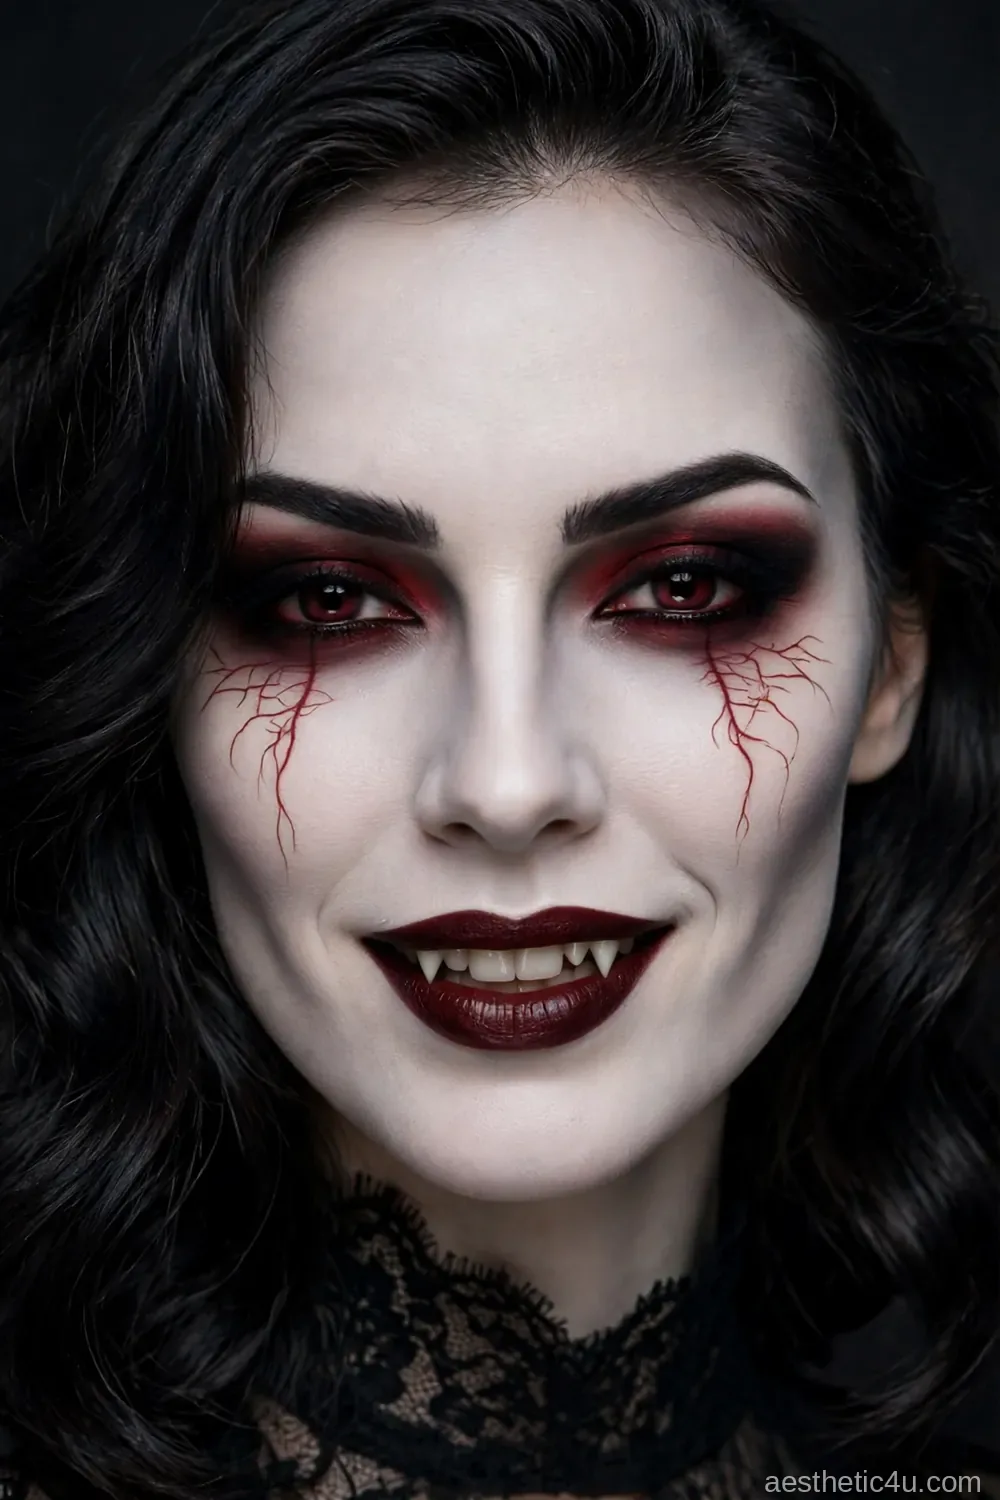
Finish the list with a full painted vampire. Lay down a bone-white base, shade the eye sockets deep with black and red blended together, and draw fine red veins trailing from the lower lids. Paint your lips a deep glossy red, parted in a slight, elegant smile that shows the bright white teeth. Darken the brows into a sharp, hungry arch and add two small fang points in white on your lower lip if you skip prosthetic fangs. Thirty minutes, start to finish.
I choose this for clients who want the vampire look with zero plastic teeth and zero costume budget. It suits evening parties and gothic outfits, and the white base photographs dramatically after dark. My tip: blend a little gray into the white base at the temples and under the cheekbones. Flat white alone can look like a mime who got lost, but those gray shadows are what sculpt the face into something undead and elegant at the same time.
Keep exploring: 24 Clown Halloween Makeup Ideas for Women, From Cute and Sweet to Truly Scary
How to Choose the Right Face Paint Style for You
Start with your honest skill level, not your ambition. If this is your first time holding a face paint brush, choose from the fast designs: the spider web, the black cat, the mime, or the fox. They forgive shaky hands because their shapes are bold and simple. If you have painted before and you enjoy detail, go where the brushwork shines: the Catrina, the butterfly, the pop art dots, or the cracked porcelain. Next, think about your night. A design you will wear for six hours of eating and dancing should sit mostly on the upper face, like the dragon or scarecrow, so your mouth area stays comfortable. Full bases like the zombie and tiger are stunning but warmer to wear. Match the mood to the event too: family parties call for the pumpkin, fox, and scarecrow, while adult horror nights are where the gory zombie and creepy clown belong. Finally, check your colors against your outfit and your skin. Warm designs like the tiger and fox glow on warm skin tones, jewel brights like the mermaid scales sing on deeper tones, and everyone can wear the black-and-white family. When I am unsure for a client, I paint one test design on their forearm a week early. Ten minutes of testing saves a whole party of regret.
Styling Tips & Common Mistakes to Avoid
Here is what years of painting faces have taught me. First, always start with clean, moisturized skin and let the moisturizer sink in for ten minutes before any paint touches your face; paint over fresh cream slides and cracks. Second, work in thin layers and let each layer dry before adding the next, especially white bases, because one thick layer cracks while two thin layers flex with your expressions. Third, set finished paint with a light dusting of translucent powder or a setting spray, and your design will survive hugs, snacks, and warm rooms. Fourth, carry a small kit: your main color, a fine brush, and makeup wipes, because one thirty-second touch-up at 10 p.m. keeps you looking freshly painted in every photo. Now the mistakes. The biggest one I see is skipping the patch test with new paints; test on your inner wrist a day before, every time. The second is using craft paint or acrylic anywhere near a face, which can irritate skin and crack painfully; cosmetic face paint exists for a reason. The third is painting right up to the waterline of the eye with strong colors, which can sting and water, and watering eyes will carry your beautiful web or scales right down your cheeks.
Final Thoughts
Face paint is the hardest-working costume I know. One small palette can turn you into a porcelain doll, a glowing neon sign, a tiger, or the most elegant skeleton at the party, and every design in this list was chosen because real people save, share, and recreate them year after year. Do not wait for perfect skills; your first attempt teaches your hands more than a month of watching tutorials. Pick the design that made you pause while scrolling, practice it once, and wear it with confidence. I will be painting right along with you this Halloween, and I cannot wait to see which face you choose.
Follow Us On Pinterest: Easy To Find Next Style