Sana
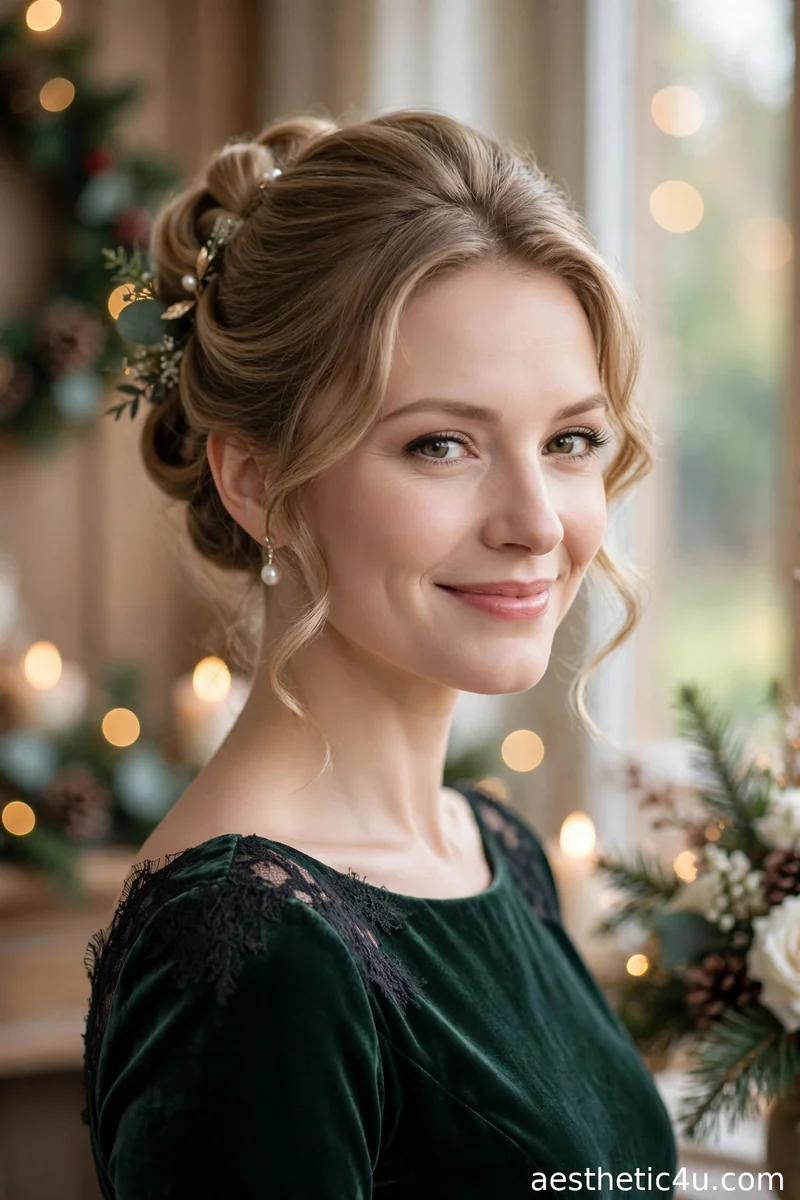
Being a wedding guest at Christmas means balancing festive and tasteful. You want to look beautiful, seasonal, and photo-ready, but never like you are competing with the bride. These Christmas wedding guest hairstyles are polished enough for the occasion but always stay in their lane: soft updos, romantic waves, and elegant details like pearls and greenery that nod to the season without stealing it. The trick is choosing hair that looks intentional and lasts from the ceremony through the last dance.
I chose seventeen styles that feel special but stay guest-appropriate. Each one photographs well, holds up through dancing, and works for different hair lengths and textures. For every style I will tell you how to create it, what it takes, and which wedding setting it suits best. Let us find your perfect guest look. I have also added two new sections before the final thoughts: a guide to choosing the right guest style for the venue, your hair type, and your skill level, plus my best styling tips and the mistakes that make guests look bridal by accident. Everything is practical and honest, so you can walk in confident and enjoy the day. Read the choosing guide first, then pick your style.
1. Soft Low Chignon
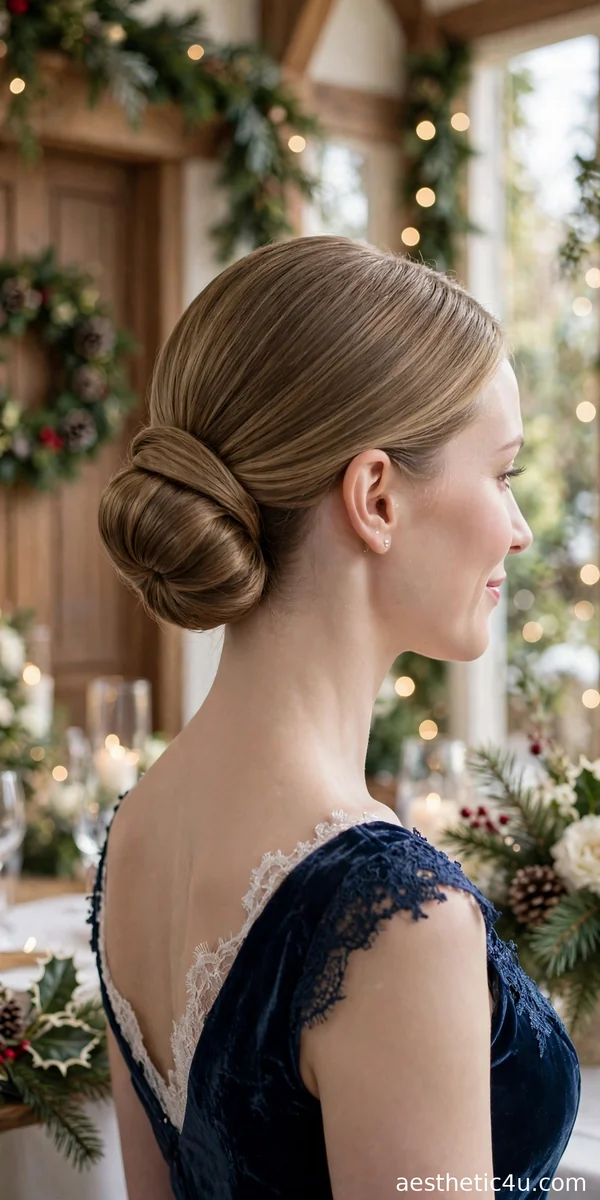
The hair gathers into a soft, relaxed knot at the nape, with a few loose pieces framing the face for romance. Make a low ponytail, twist it loosely into a knot, and pin, pulling out soft pieces around the face. It takes about fifteen minutes and needs only pins and light-hold spray. The finish is polished but not stiff: timeless and flattering on everyone. The softness keeps it from looking bridal. Use U-shaped hairpins for extra hold on thick hair. A light mist of flexible hairspray keeps the soft pieces in place without stiffness.
I would choose this for almost any wedding, because it is the safest elegant choice there is. It suits every face shape and every dress neckline. My honest caveat: keep the accessories minimal, since an overdressed chignon starts looking bridal. Pro tip: this style survives hugs, dancing, and wind, which is exactly what you need as a guest. Understated and perfect.
2. Half-Up Twisted Curls
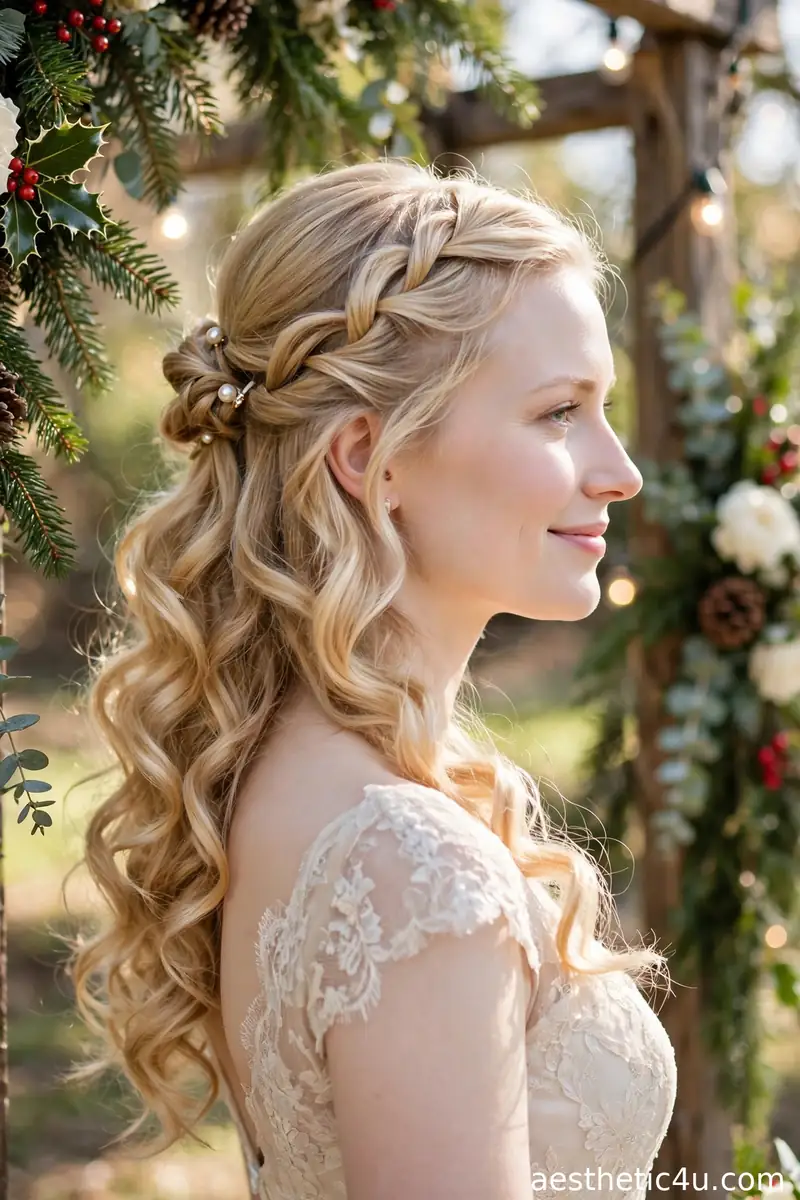
Two front sections twist back and pin at the crown over soft curls that fall freely down the back. Curl with a 1.25-inch iron, twist each front section back, and pin where they meet. It takes about twenty-five minutes. It is romantic and effortlessly pretty, and the twists add just enough detail to look intentional. The curls keep it soft and feminine. Set the curls with clips while they cool for longer-lasting shape. A pea-sized amount of shine serum smooths the finished curls beautifully.
I would choose this if you want your hair down but styled. It lasts through dinner and dancing with a little hairspray. My honest caveat: the twists can loosen on very silky hair, so use texturizing spray first. Pro tip: keep any accessories small and simple, because this is a guest look, not a bridal one. Pretty, romantic, and appropriate.
3. Sleek Low Ponytail with a Bow
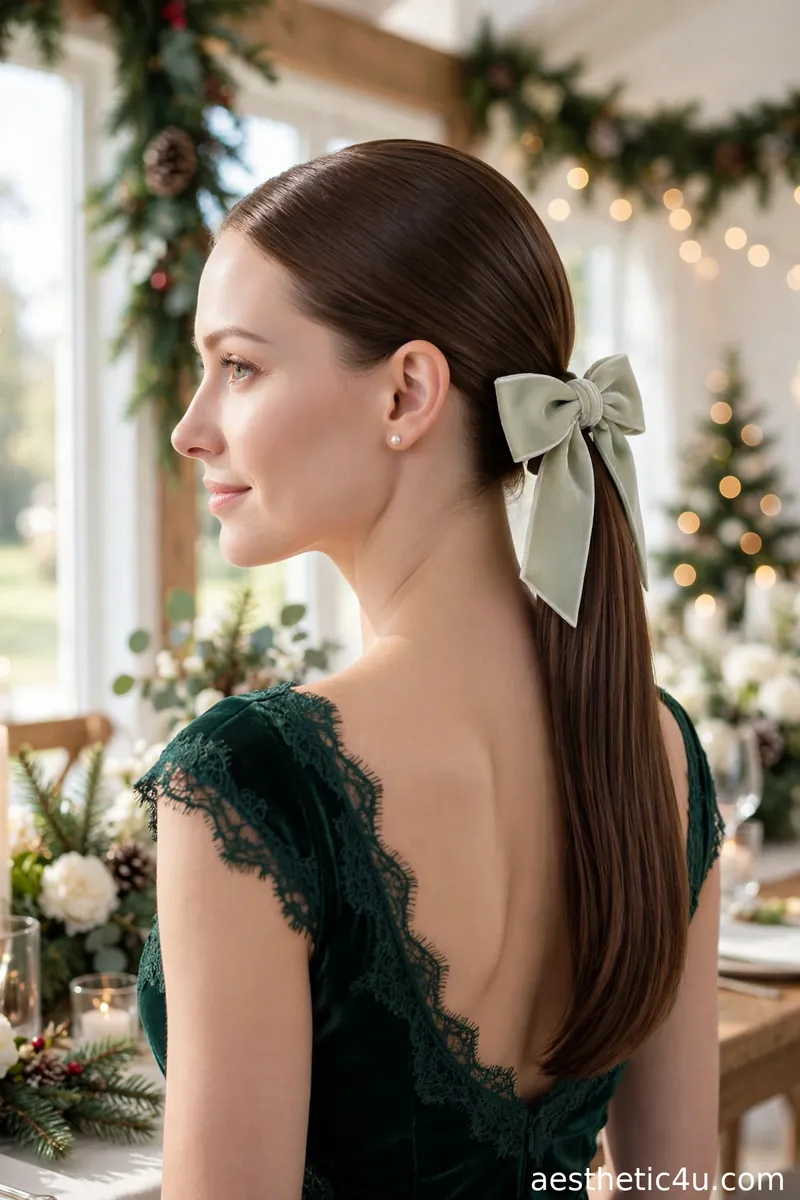
The ponytail is smoothed sleek and secured low, finished with a small elegant bow. Pull the hair into a low ponytail with smoothing cream, wrap the base with a hair section, and add a petite bow. It takes ten to fifteen minutes. The bow adds a festive touch without going overboard. The look is clean and chic. Run a flat iron over the ponytail lengths for extra sleekness. Choose a bow with a clip backing so it stays put through hugs and dancing.
I would choose this for a modern wedding where minimal looks are welcome. It is simple but looks intentional. My honest caveat: keep the bow small so it stays guest-appropriate; a huge bow reads bridal or childish. Pro tip: a velvet or satin bow in black, navy, or deep green looks most sophisticated. Modern, minimal, and chic. It also works beautifully with bold earrings.
4. Loose Braided Updo
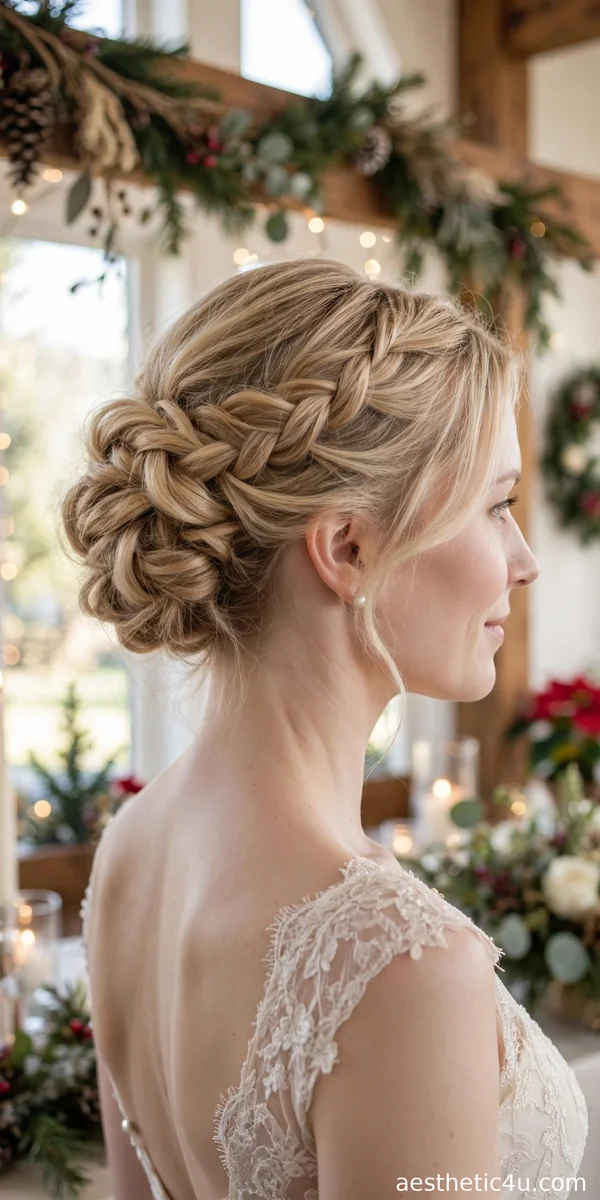
Loose braids are pinned into a soft, textured updo with a slightly undone finish. Create two or three loose braids, pancake them for fullness, then pin them into a low, textured shape. It takes twenty to twenty-five minutes. It looks detailed without being fussy, romantic with a boho edge. It photographs beautifully from the back. Work with day-old hair or add texturizing spray first: grip is everything in a loose updo. Tuck the braid ends deeply so nothing unravels during dancing.
I would choose this if you love boho elegance. The looseness keeps it relaxed and guest-appropriate. My honest caveat: loose styles can fall apart while dancing, so anchor with plenty of pins. Pro tip: a tiny sprig of greenery or a single pearl pin is enough decoration. Detailed, romantic, and relaxed. It is my top recommendation for nervous stylists everywhere.
5. Deep Side-Part Glamour Waves
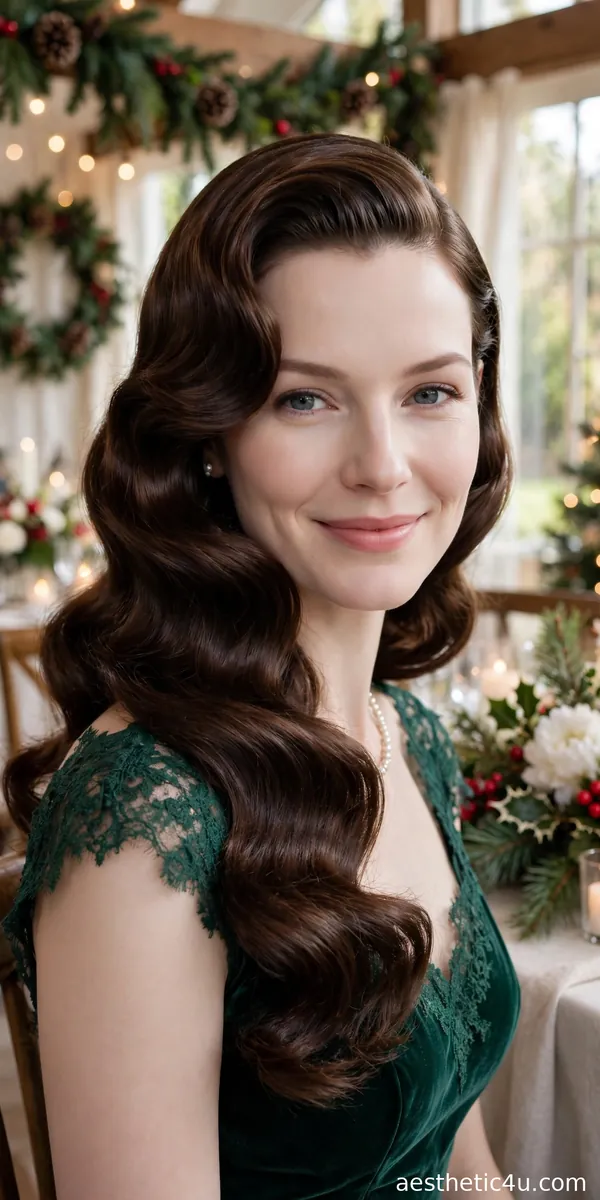
Soft, brushed-out waves are worn down with a deep, dramatic side part for old-Hollywood glamour. Curl all sections in the same direction with a 1.25-inch iron, brush through gently for that smooth, continuous wave, and set the deep part with a tail comb. It takes about twenty-five minutes. The deep part adds instant asymmetry that frames the face, and the polished waves catch every light in the room. It is glamorous but effortless-looking. Curl away from the face on both sides for the most flattering shape, and finish with a touch of shine spray.
I would choose this if you want to wear your hair down at a formal wedding. It suits almost every face shape because the deep side part is universally flattering. My honest caveat: the waves drop faster on very fine or very heavy hair, so set each curl with a clip while it cools. Pro tip: this style pairs beautifully with statement earrings and a bold lip. Glamorous, simple, and striking.
Keep exploring: Elegant Christmas Hairstyles
6. Classic French Braid Bun
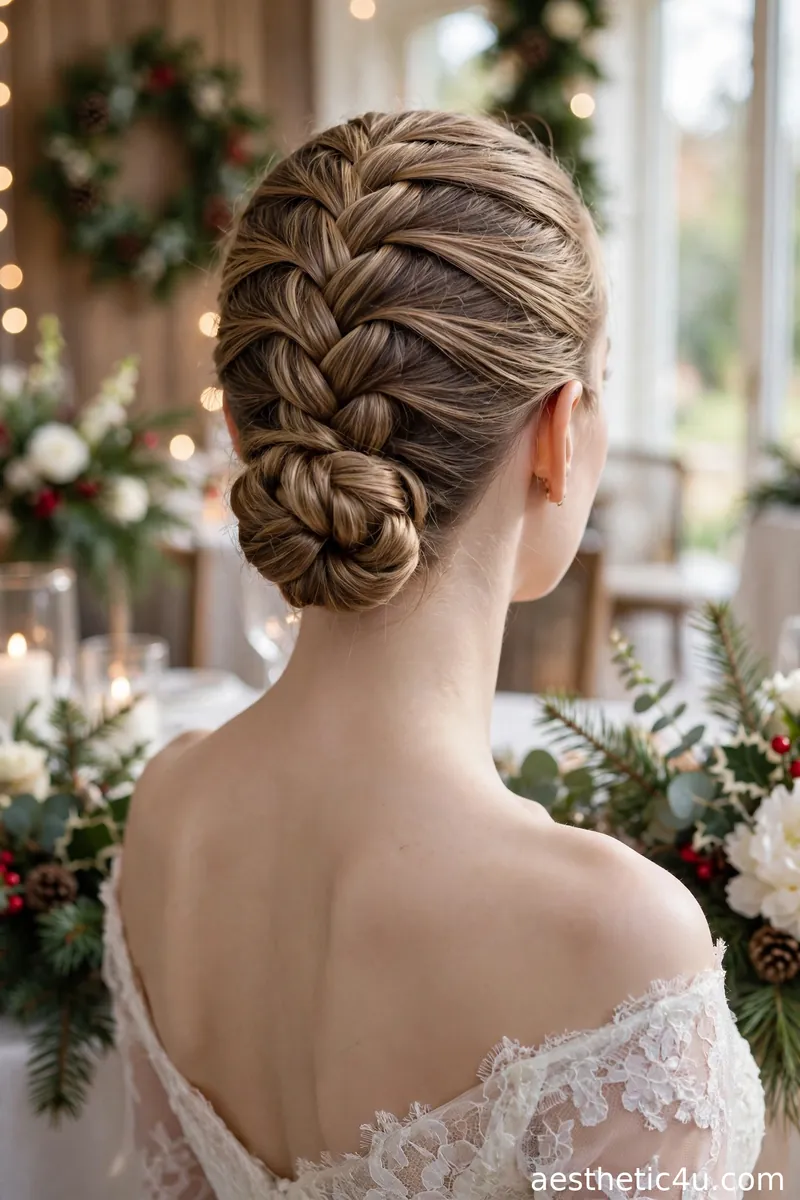
A French braid runs along the head and coils into a bun at the end, adding beautiful texture to the updo. French braid from the crown down, then wrap the tail into a bun and pin. It takes twenty to twenty-five minutes. It is neat, secure, and classic. The braid locks everything in place for the whole night. Pancake the braid gently after finishing to add softness and width. Secure the bun with pins pushed in from four different angles.
I would choose this if you need your hair to last from ceremony to last dance without touch-ups. It is elegant without competing with the bride. My honest caveat: French braids can look severe if pulled too tight, so pancake slightly for softness. Pro tip: this is the most dance-proof style on the list. Secure, classic, and reliable. Pack extra pins; you will thank me later.
7. Polished High Bun with Pearl Pins
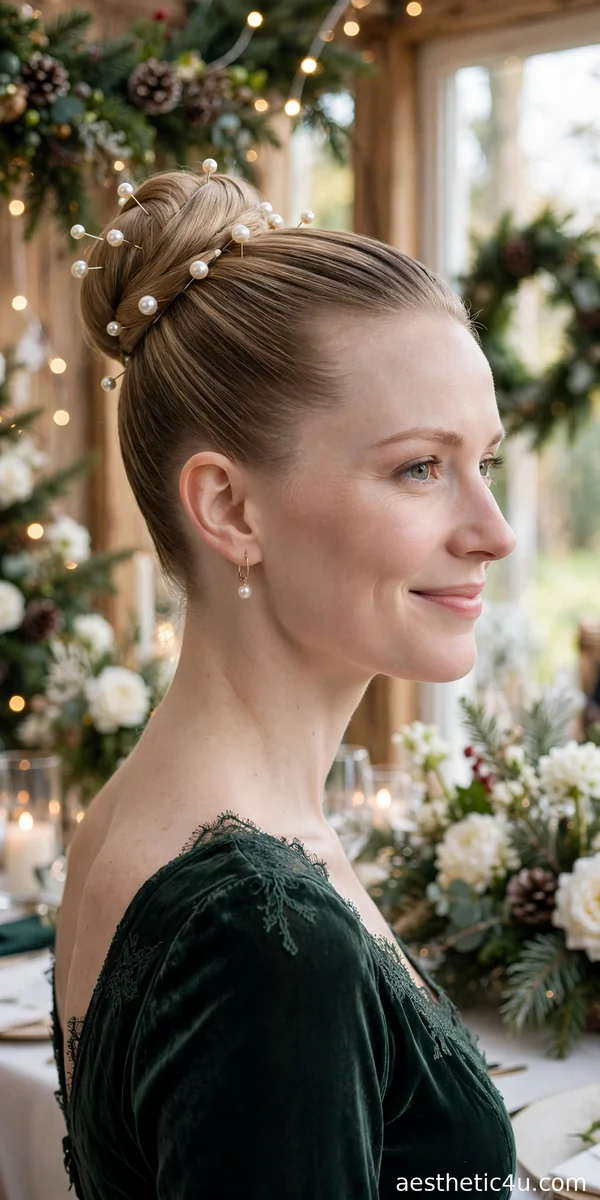
A smooth high bun is decorated with a few delicate pearl pins for quiet luxury. Gather the hair high, coil into a smooth bun, and place three to five pearl pins asymmetrically. It takes fifteen minutes plus the pins. The high placement feels formal and refined. Pearls are always tasteful. Smooth the bun with a bristle brush and a touch of gel for a flawless surface. Place the pearl pins in a loose cluster on one side for a modern, asymmetric look.
I would choose this for a black-tie winter wedding. It elongates the neck and looks stunning with formal gowns. My honest caveat: keep the pins minimal and the bun simple, since an elaborate pearl-covered bun reads bridal. Pro tip: place the pearls only on one side for a modern, asymmetric touch. Formal, refined, and tasteful. It pairs perfectly with a classic red lip.
8. Romantic Messy Bun
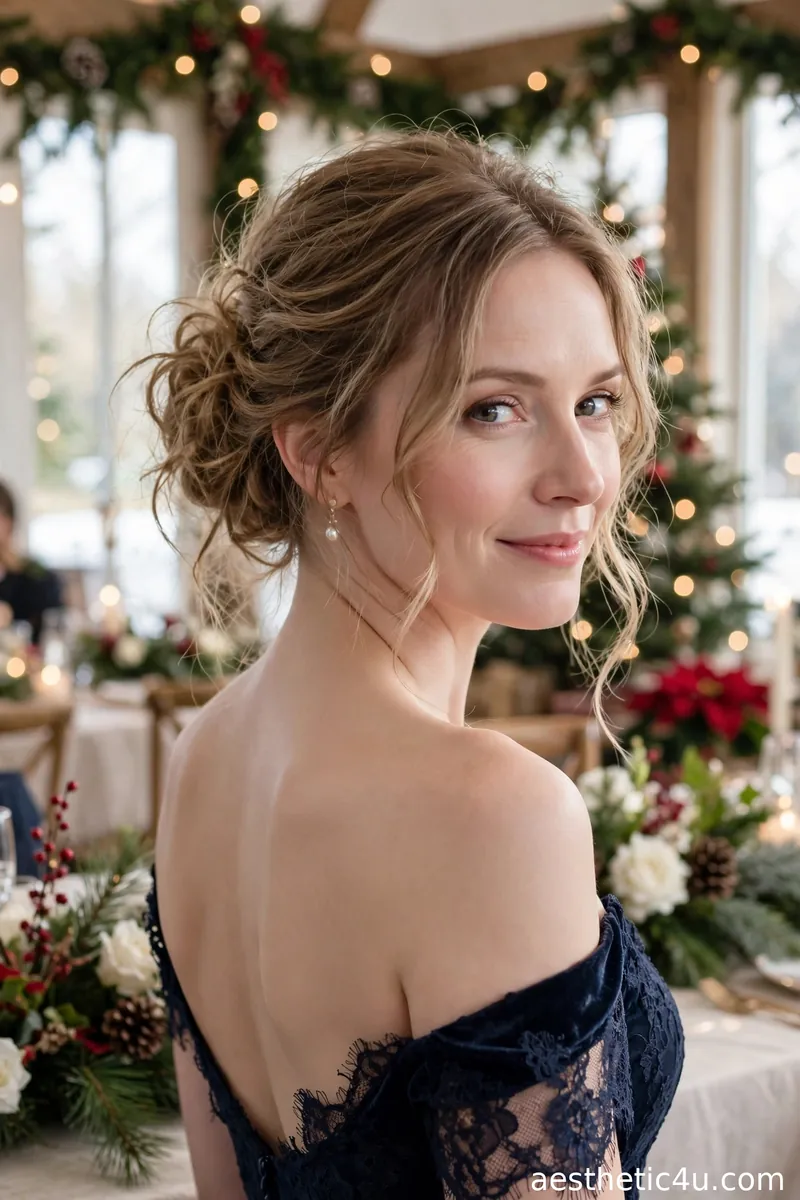
The bun is loosely gathered with soft, touchable texture, face-framing pieces left out for softness. Pull the hair into a loose high or mid bun, pull out pieces for softness, and texturize with spray. It takes ten minutes. It looks effortless and romantic, pretty without looking like you tried too hard. Modern and relaxed. Tease the base of the bun lightly for extra volume that lasts. Pull out the face-framing pieces after securing the bun, not before, for better control.
I would choose this if stiff updos are not your thing. The messiness keeps it modern and approachable. My honest caveat: there is a fine line between romantic-messy and undone, so keep the base secure and neat. Pro tip: this style is forgiving on second-day hair, which actually holds better. Effortless, but on purpose. It is also kind to second-day hair.
9. Braided Half-Up Crown
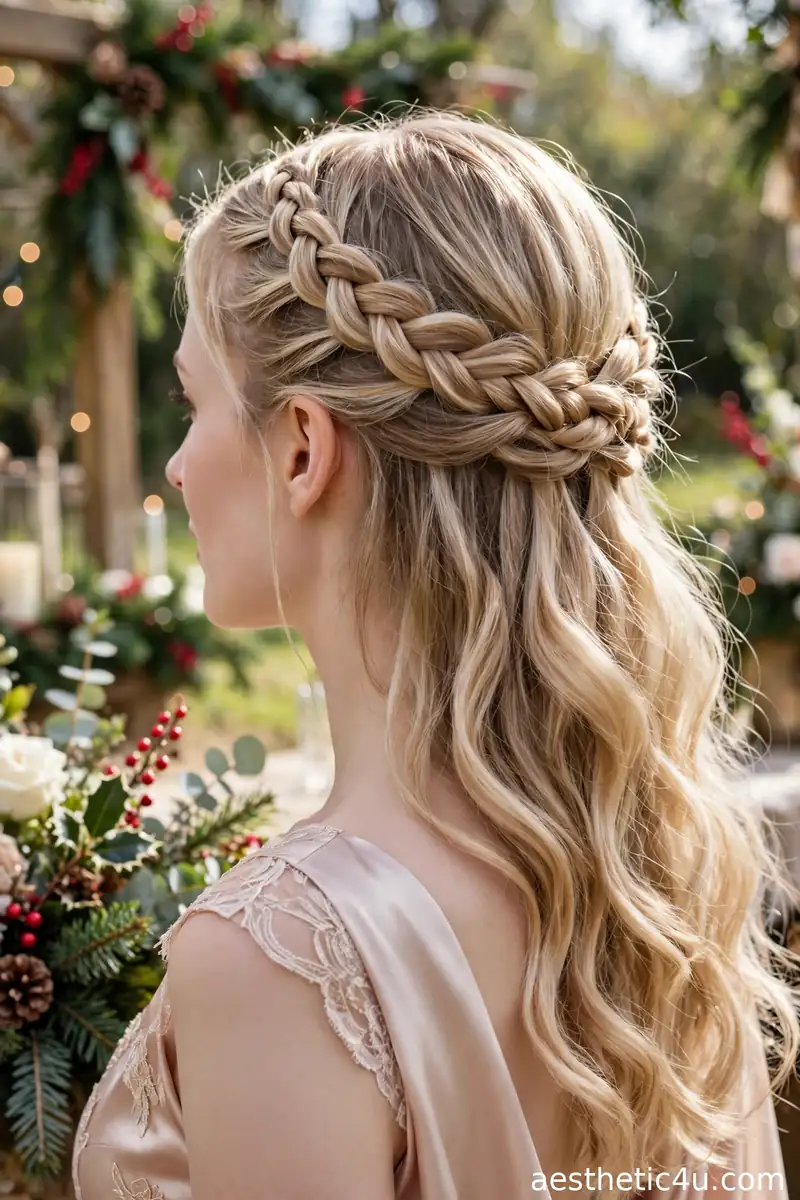
A neat braid runs horizontally across the crown like a headband, pinning the front back while long lengths fall freely beneath. Braid from one temple to the other across the back of the head, keeping the tension even, then pin the end underneath the start and let the rest fall in smooth waves. It takes about twenty minutes with practice. The braided crown adds texture and keeps hair off your face, while the lengths keep it soft and feminine. Secure the braid end with a small clear elastic and tuck it under for an invisible join.
I would choose this if you want something pretty and polished that keeps hair out of your face all day. It suits medium to long hair best. My honest caveat: the braid can loosen at the crown on very fine hair, so prep with texturizing spray first. Pro tip: curl the loose lengths softly for extra romance. Simple, pretty, and memorable. Start practicing a week before the wedding so it feels easy on the day itself.
10. Tucked French Twist
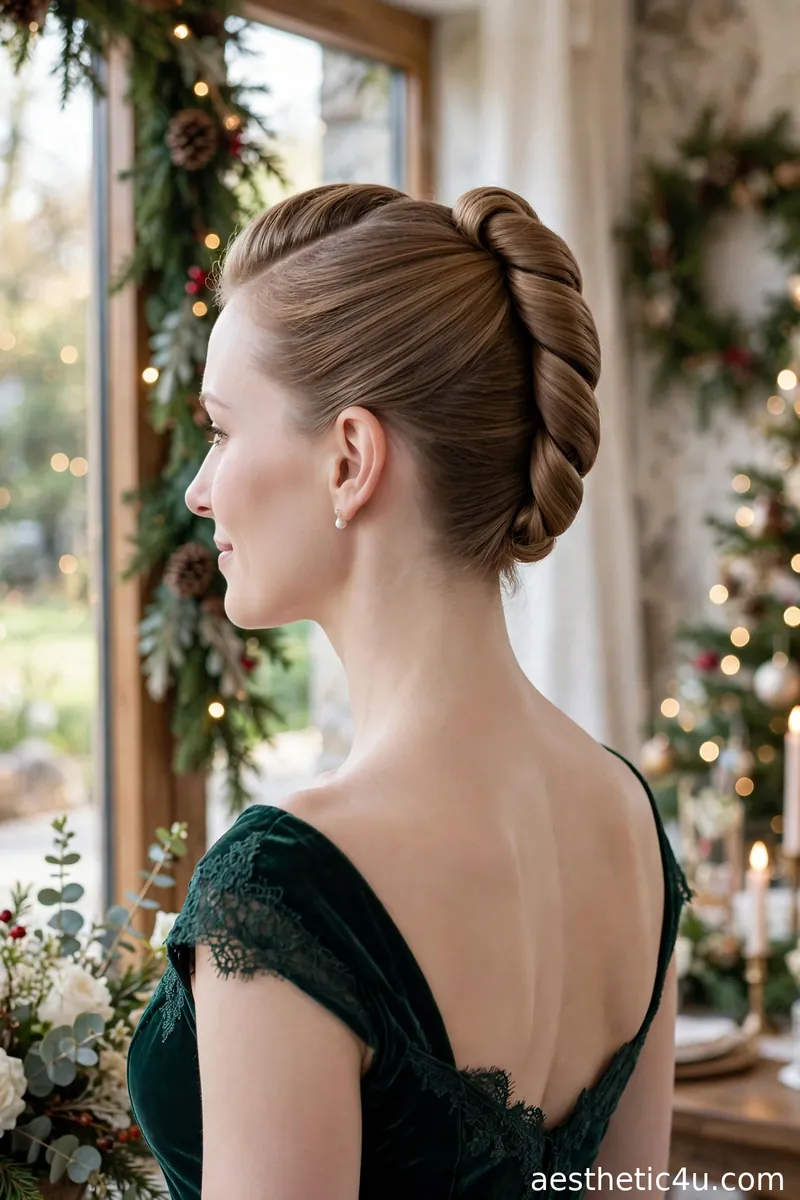
The hair rolls into a soft French twist and tucks neatly at the back for a smooth, sculpted finish. Sweep the hair to one side, roll it upward, tuck the ends, and pin with long bobby pins. It takes about twenty minutes. It is a classic that always looks right. It keeps every strand in place through the last dance. Insert the pins vertically along the roll rather than horizontally for a stronger hold. A final mist of firm-hold spray locks everything in place.
I would choose this for a traditional wedding where timeless matters most. The twist is graceful and completely secure. My honest caveat: it needs day-old hair or texturizing spray to hold, since clean hair slips. Pro tip: a softer, slightly looser twist looks modern, while a tight one looks vintage. Pick your era. Timeless and dependable. It never photographs badly, which guests love.
Keep exploring: Christmas Hairstyles Updo
11. Low Bubble Ponytail with Gold Bands
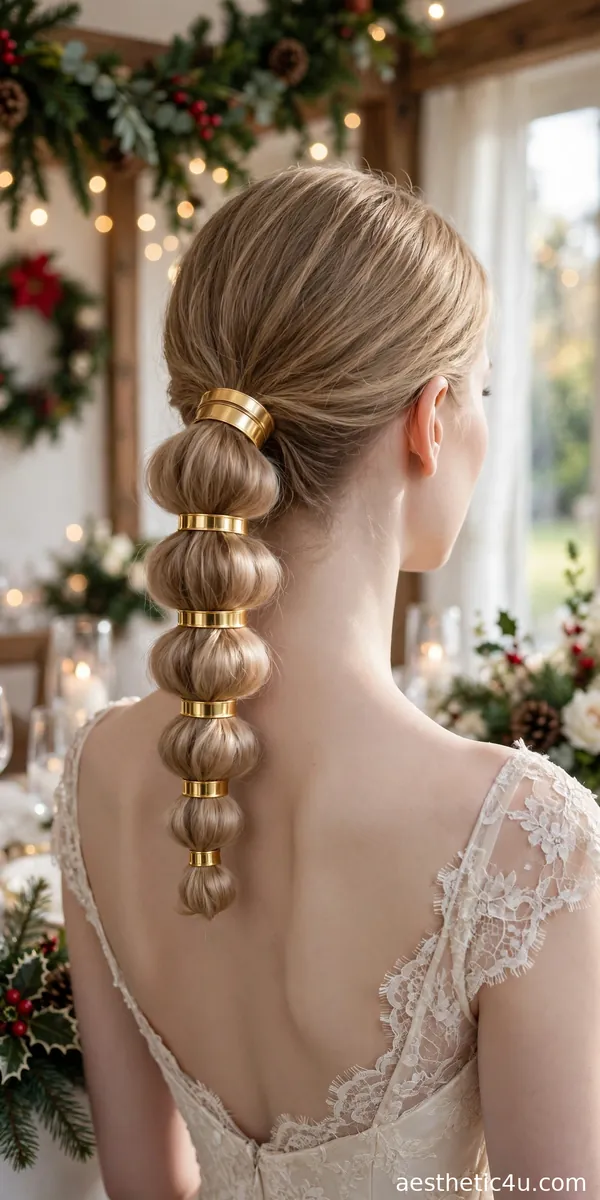
A low ponytail is sectioned with small gold bands into soft bubbles, each section gently pulled for volume. Secure a low ponytail, add elastics down the length, and puff each section. The gold adds a festive, jewelry-like touch. It takes fifteen minutes. Fun but polished, playful but wedding-appropriate. Use small clear elastics as the base, then slide the gold bands over them to hide the elastic completely. Puff each bubble by gently tugging the sides outward for soft, even volume.
I would choose this if you want something fun but still appropriate for a wedding. The bubbles add playful volume. My honest caveat: keep the bands small and gold-toned; colorful elastics look casual. Pro tip: this style works beautifully on long, thick hair. Playful, polished, and festive. It is surprisingly sturdy through hours of dancing, hugging, and photo sessions all evening long.
12. Low Side Bun with a Greenery Sprig
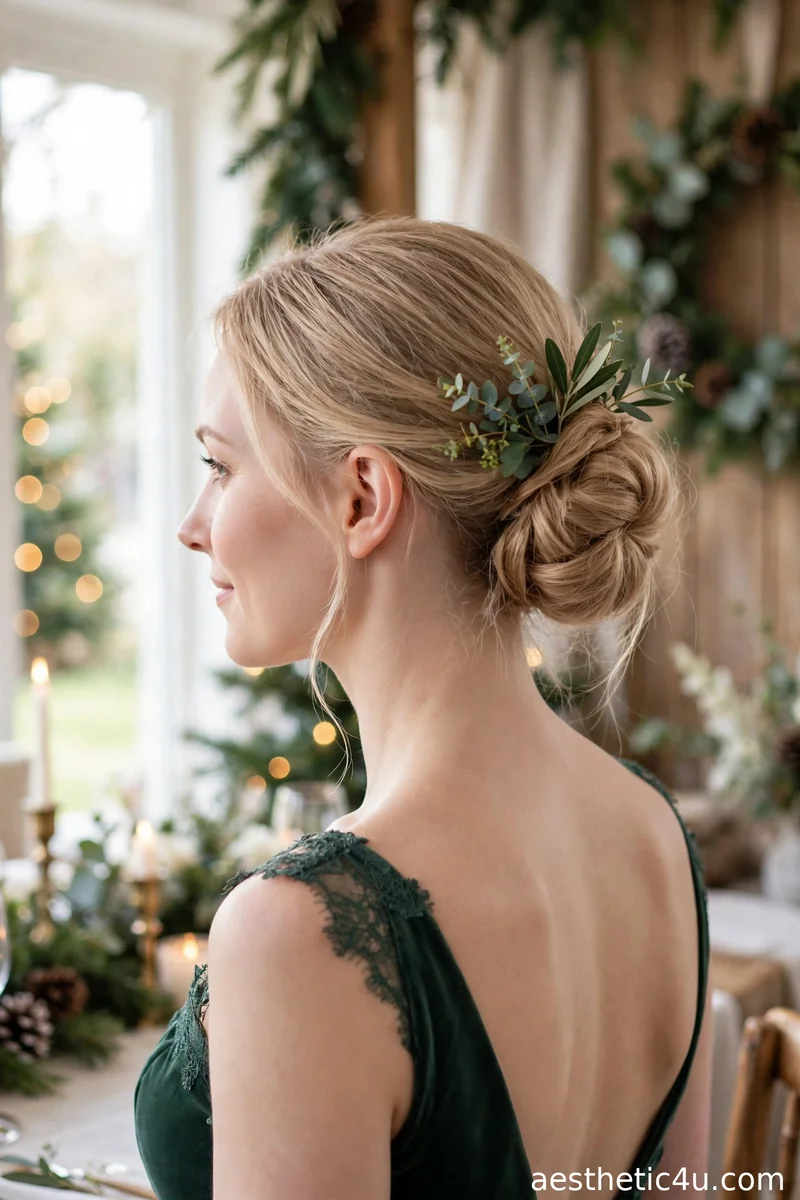
The bun sits low to one side, tucked with a small sprig of greenery for a fresh, seasonal touch. Sweep the hair to one side, coil into a low bun behind the ear, and tuck in a small piece of faux eucalyptus or pine. It takes fifteen minutes. The side placement feels soft and romantic. The greenery nods to the season beautifully. Wrap a thin section of hair around the bun base to hide the elastic before adding the greenery. Choose a sprig with wired stem so you can position it precisely.
I would choose this for a winter wedding, especially a rustic or outdoor one. It is festive without being flashy. My honest caveat: use faux greenery, since real sprigs wilt and shed. Pro tip: a single sprig is enough; more starts looking like a centerpiece. Seasonal, soft, and sweet. Guests always ask about this one, and it takes seconds to explain.
13. Soft Curls with a Headband
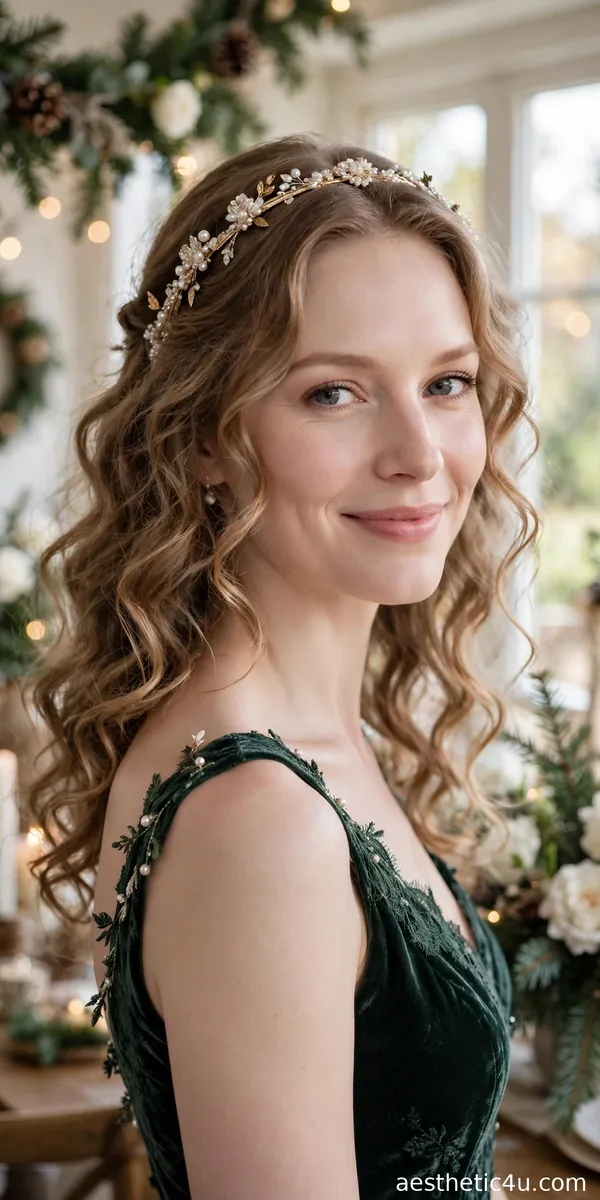
Soft curls are worn down with a slim, elegant headband that keeps hair back from the face. Curl with a 1.25-inch iron, brush through, and place a thin headband. It takes twenty-five minutes. The look is pretty, simple, and timeless. A thin headband looks refined, not casual. Backcomb the crown slightly before placing the headband for a little lift that keeps the style from looking flat. Choose a band with small teeth or velvet lining so it grips comfortably without slipping.
I would choose this if you prefer minimal styling that still looks intentional. It suits every age and face shape. My honest caveat: the headband must be slim and elegant; a wide casual one ruins the effect. Pro tip: a metallic or embellished slim band elevates this instantly. Simple, pretty, and foolproof. It is a lovely choice for older guests too.
14. Low Ponytail with a Knot-Wrapped Base
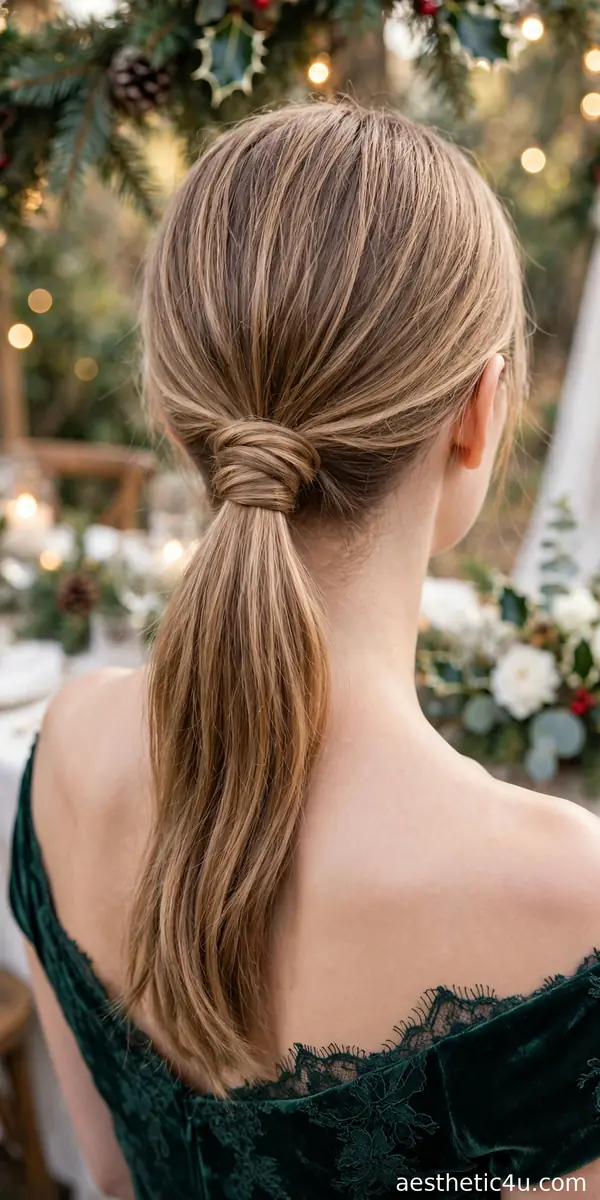
A sleek low ponytail gets a chic twist: a section of hair is looped into a small knot around the elastic, hiding it completely. Pull the hair into a low ponytail and secure it, then take a thin section from underneath, loop it into a loose knot around the base, and pin the tail underneath. It takes ten minutes and needs only an elastic, bobby pins, and smoothing cream. The knot adds handmade detail to the cleanest of styles. The result is modern and minimal: understated, but everyone notices the detail. Smooth the lengths with a drop of shine serum for a polished finish.
I would choose this if you want a ponytail that looks styled rather than plain. It works on most hair lengths and is quick to redo. My honest caveat: the knot needs a hair section long enough to loop, so very short layers will not reach. Pro tip: smooth the knot with a drop of shine serum so it reads polished, not messy. Simple detail, big difference.
15. Pinned-Back Half-Up with Pearl Clips

Two front sections pin back at the crown with small pearl clips, the rest falling in soft waves. Curl the hair, pull back two front sections, and secure with pearl barrettes. It takes twenty minutes. The pearls add a touch of quiet glamour. Sweet, simple, and very photogenic. Curl the lengths with a 1.25-inch iron before pinning back, since the waves make the simple style look finished and intentional. Match the pearl tone to your jewelry for a pulled-together look.
I would choose this for a daytime winter wedding. The pearl clips feel special without being bridal. My honest caveat: place the clips symmetrically or it looks accidental. Pro tip: this is lovely on medium-length hair that cannot quite manage an updo. Sweet, simple, and charming. It is quick enough to redo in the car on the way there itself.
Keep exploring: Christmas Eve Hairstyles
16. Elegant Top Knot with a Gold Cuff

A smooth top knot is finished with a slim gold cuff at the base for a modern, jewelry-like detail. Gather high, coil smoothly, and slide a hair cuff over the base. It takes fifteen minutes. The high bun keeps the look clean. The gold cuff is the perfect accent. Smooth the knot with gel and a bristle brush for a flawless, bump-free surface. Slide the cuff down over the base and give it a gentle squeeze so it grips firmly.
I would choose this for a fashion-forward wedding. It is chic without overshadowing anyone. My honest caveat: the cuff must fit snugly or it slides, so test it before the day. Pro tip: match the cuff metal to your jewelry for a pulled-together look. Modern, chic, and minimal. It looks striking in black-and-white wedding photos, which never go out of style.
17. Loose Fishtail Braid
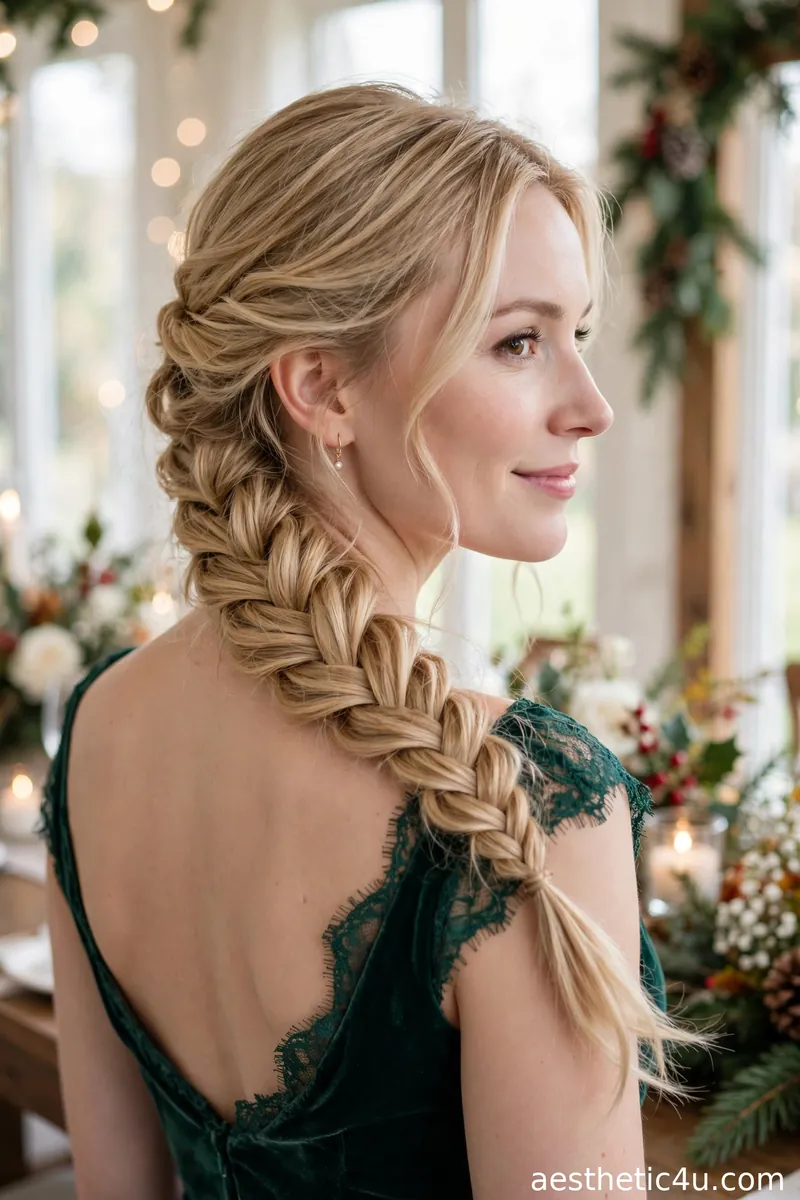
A relaxed fishtail braid falls over one shoulder, gently pulled apart for softness and volume. Create a fishtail braid, pancake it generously, and drape it over one shoulder. It takes twenty minutes. It looks boho, romantic, and effortless. The fishtail looks detailed but is simple. Drape the finished braid over one shoulder and secure it there with a hidden bobby pin so it stays put for photos. Mist lightly with flexible-hold spray so the pancaked texture stays soft and touchable.
I would choose this if you love textured styles. It is a beautiful, bride-safe choice that photographs wonderfully. My honest caveat: fishtails loosen over time, so start it a little tighter than you want. Pro tip: a few small pearl pins woven in make it wedding-ready. Relaxed, romantic, and lovely. It is comfortable enough to wear all day long happily.
How to Choose the Right Christmas Wedding Guest Hairstyle for You
Start with the dress code and venue, because they set the rules. A black-tie ballroom wedding calls for polished looks: the French twist, a high bun with pearls, or deep side-part waves. A rustic barn or outdoor winter wedding welcomes softer styles: the loose braided updo, the greenery side bun, or a fishtail braid. A daytime ceremony suits simpler choices like the pinned-back half-up or soft curls with a headband. When in doubt, check the invitation: overdressed is safer than underdressed, but never bridal.
Next, consider your hair and your stamina. Fine hair holds updos better with texturizing spray and plenty of pins; thick hair needs strong elastics and sectioning. If you will be dancing, choose anchored styles like the French braid bun or the tucked twist over loose waves. Be honest about your skills and do a trial run: wedding day is not the time to learn a braided half-up crown. Finally, keep accessories guest-appropriate: small pearls, a slim headband, or one greenery sprig. Skip veils, tiaras, and anything oversized.
Styling Tips & Common Mistakes to Avoid
My first tip: style on day-old hair, not freshly washed. Second-day hair grips pins better and holds curls longer, which matters through a long wedding day. Second, always do a full trial run, including the accessories, a few days before: photograph it from every angle and wear it for a few hours to test the hold. Third, build a tiny emergency kit: two bobby pins, a mini hairspray, and a clear elastic in your clutch fix almost anything. Fourth, set your style with hairspray from arm’s length in light layers rather than one heavy blast.
The biggest mistake a guest can make is looking bridal. Skip anything white or ivory in your hair, avoid veils and tiaras, and keep pearl and floral accessories small and simple. The second mistake is choosing a style you cannot maintain: an elaborate updo that collapses by dinner is worse than simple hair that lasts. The third mistake is overloading on product, which makes hair look wet or crunchy in photos. Light layers, good pins, and a style matched to your real skills will keep you polished from the first photo to the last dance.
Final Thoughts
The best wedding guest hair looks intentional but never competes, and that is the thread running through every style here. Choose the look that matches the venue, the dress code, and your own comfort: you will enjoy the wedding far more when you are not fussing with your hair. Do a trial run a few days before, pack two spare bobby pins in your clutch, and then forget about your hair completely. Pick one, enjoy the celebration, and let the bride have her day.
Follow Us On Pinterest: Easy To Find Next Style