Sana
Some hairstyles never go out of style, and Christmas is when they shine brightest. Elegant Christmas hairstyles are about polish, not fuss: smooth lines, soft shine, and shapes that look beautiful in candlelight and flash photography alike. What I love about elegant styles is that they never compete with your outfit or your jewelry. A French twist, a low chignon, or a set of Hollywood waves lets your dress, your earrings, and your smile do the talking. These are the hairstyles that look just as good in ten years as they do tonight, which matters when holiday photos live forever.
In this guide I have chosen twenty-one timeless looks for every hair length and skill level, from the ten-minute sleek ponytail to the show-stopping beehive. I will walk you through how to style each one, what tools you actually need, and which occasions each suits best. Whether you are heading to a candlelit dinner, a church service, or a glamorous Christmas party, you will find an elegant style here that feels like you. Let us find it. I have also added two brand-new sections at the end: a guide to choosing the right style for your face shape, hair type, and occasion, plus my best styling tips and the mistakes I see most often. Everything here is written to be genuinely useful, whether you are styling your own hair or briefing your hairdresser.
1. Classic French Twist
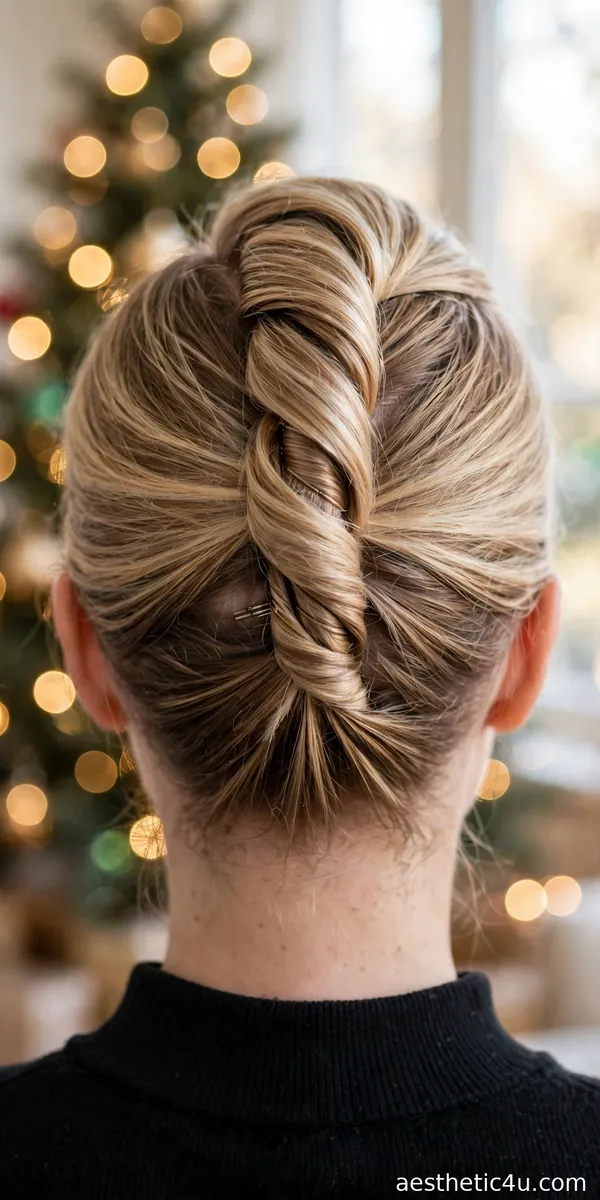
The French twist sweeps all the hair up and rolls it into a vertical coil at the back of the head, secured with pins for a smooth, sculpted finish. To create it, brush your hair to one side, twist it upward along the back of your head, tuck the ends in, and pin with long bobby pins or a French twist comb. It takes about fifteen minutes once you have practiced, and a little texturizing spray beforehand gives the pins something to grip. The result is pure timeless elegance: clean, architectural, and flattering from every angle.
I would choose this for a formal Christmas dinner, a wedding, or any event where you want to look completely polished. It suits oval and heart-shaped faces beautifully and shows off earrings and necklines. My honest caveat: very slippery, freshly washed hair will slide out, so do this on day-old hair or add dry shampoo at the roots. Pro tip: leave two soft face-framing pieces out for a more romantic, modern take. The French twist never looks dated in photos.
2. Low Chignon
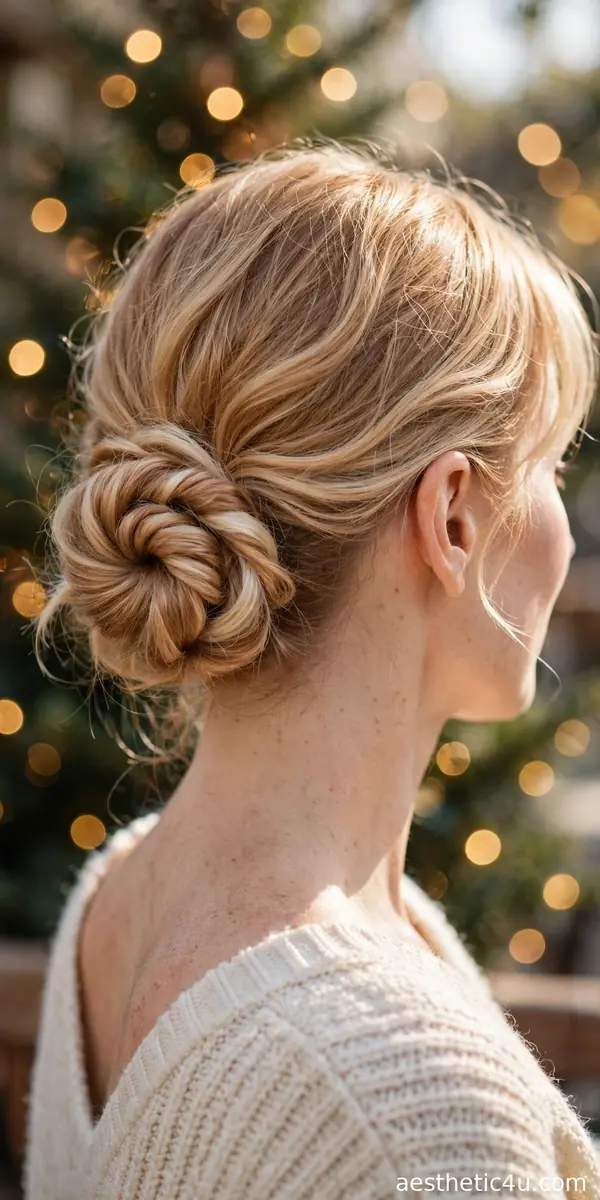
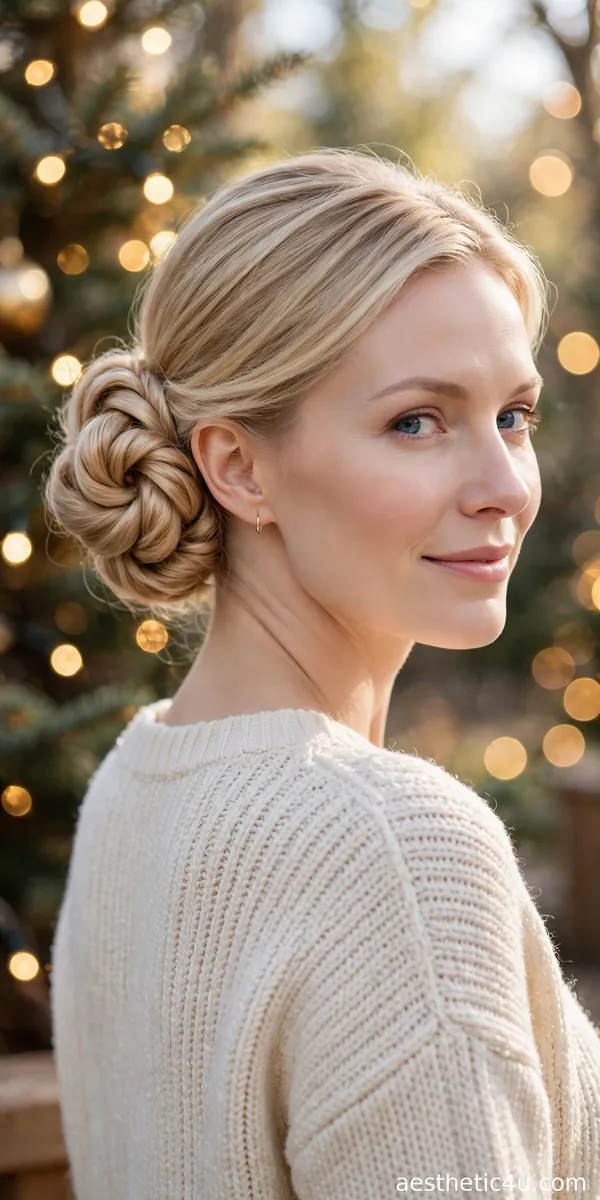
A low chignon gathers the hair into a soft knot at the nape of the neck, and it can be sleek for formality or slightly loose for romance. Start with a low ponytail, twist it into a coil, and pin it flat against the nape, tucking the ends underneath. It takes about ten minutes and needs only an elastic, bobby pins, and light-hold hairspray. The style is simple, neat, and graceful, and it holds up beautifully through long evenings of dinner and dancing. A spritz of shine spray at the end gives that polished finish.
I would choose this if you want elegance without effort, because it genuinely works for every hair type and texture. It is my go-to recommendation for anyone nervous about updos. My honest caveat: very short hair may need extra pins and some teasing at the crown for the knot to hold. Pro tip: the low chignon pairs perfectly with statement earrings, since the neckline stays completely clear. Simple, timeless, and always appropriate.
3. Sleek Low Bun
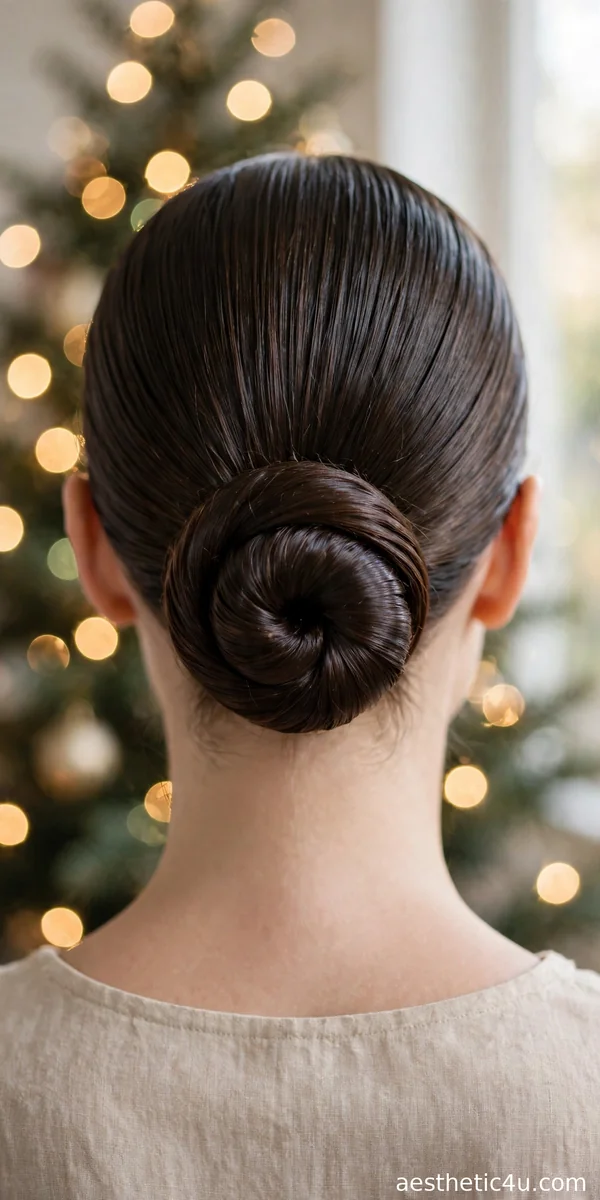
The sleek low bun is smoothed flat and coiled tightly at the back for a clean, minimal finish. Apply smoothing cream or gel to damp hair, blow-dry it straight, then pull it into a low ponytail and wrap it into a tight coil, pinning securely. It takes about fifteen minutes and needs a fine-tooth comb, a boar bristle brush, and strong-hold hairspray to keep every strand in place. The look is minimal, modern, and very chic: it elongates the neck and gives red-carpet polish.
I would choose this for a sophisticated holiday look, especially with a high neckline or bold lipstick. It suits strong features and oval faces particularly well. My honest caveat: sleek styles show every imperfection, so take the time to smooth properly and do not rush. Pro tip: a little shine serum pressed over the finished bun gives an expensive, glass-like finish. Minimal effort, maximum polish.
4. Braided Crown Updo
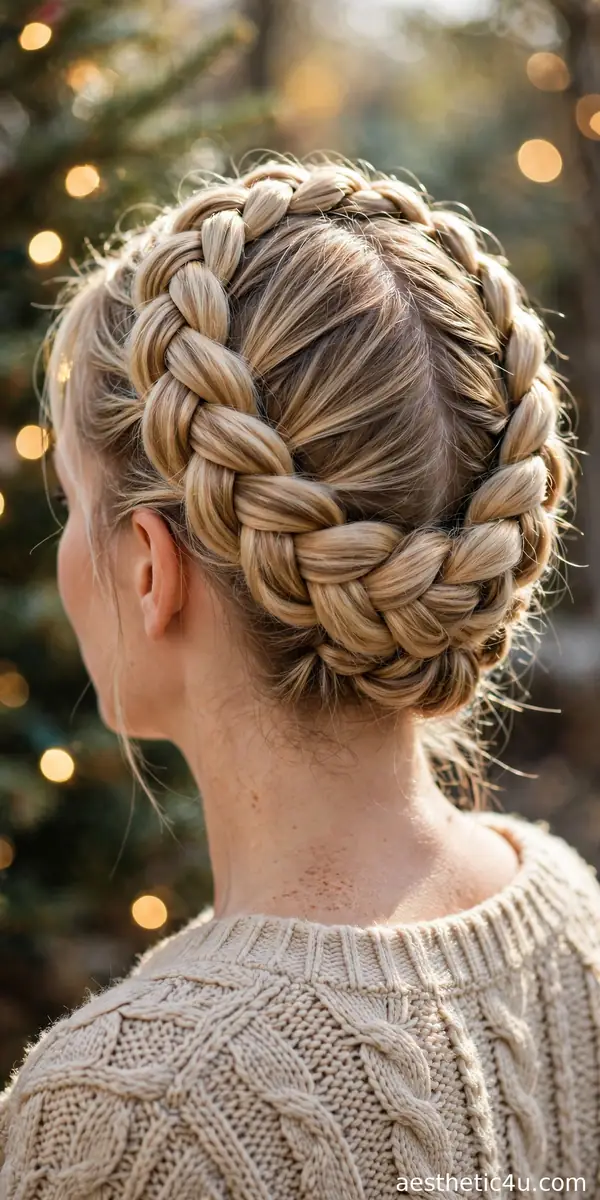
A chunky braid wraps around the head like a golden crown, pinned just above the ears, with the ends tucked beneath to finish. Part your hair in the middle, then Dutch-braid from one ear across the crown to the other, keeping the braid loose and pancaking each stitch as you go for fullness. Pin the tail underneath the start of the braid, tuck in any strays, and set with medium-hold hairspray. It takes about twenty minutes and needs only an elastic and bobby pins. The result is regal and intricate-looking, but genuinely easy. A little shine serum over the braid brings out the golden dimension.
I would choose this if you want maximum elegance with minimum technique. It suits oval and round faces beautifully and keeps every strand secure, which makes it perfect for dancing. My honest caveat: the braid needs to be even on both sides or the crown looks lopsided, so check in a hand mirror from behind. Pro tip: pancake generously and finish with shine spray so the braid reads rich and festive. Intricate-looking, surprisingly simple.
5. Hollywood Waves
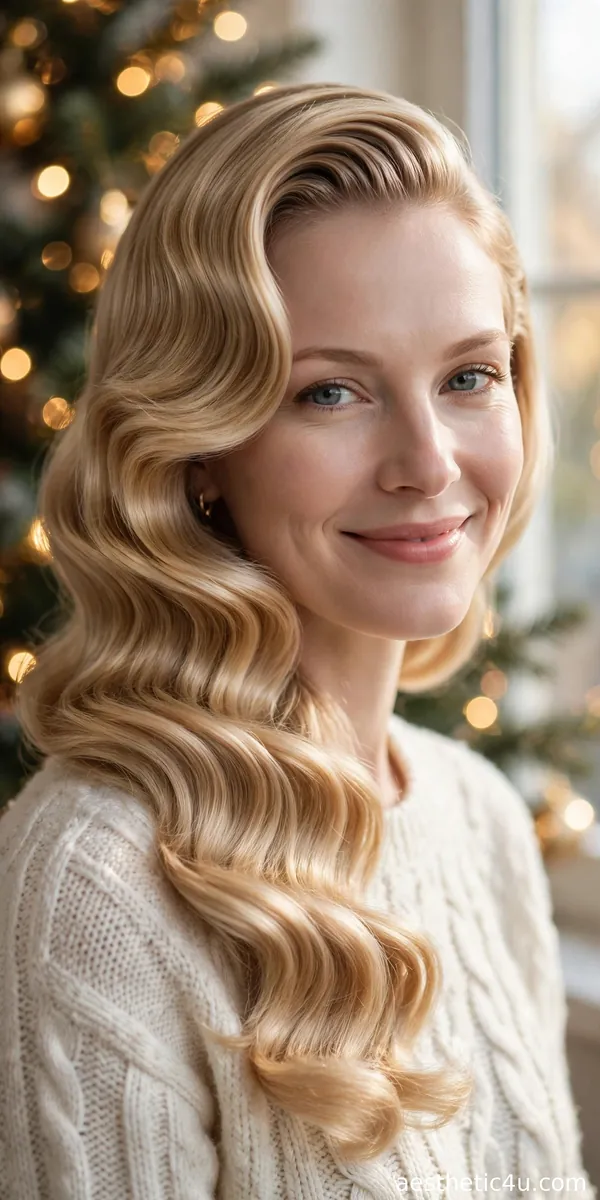
Hollywood waves are deep, uniform waves brushed smooth for a glossy, old-glamour finish, falling over one shoulder. Create them with a 1.25-inch curling iron, curling every section in the same direction, then brush through with a soft bristle brush and set with flexible-hold hairspray. It takes thirty to forty minutes, but the result is pure red-carpet elegance. A shine serum on the lengths gives that liquid-gold reflect. This is the most glamorous down-style you can wear. For extra staying power, pin each cooled curl at the scalp for ten minutes before brushing out.
I would choose this for any glamorous Christmas party where you want to feel like a movie star. It suits medium to long hair best and photographs beautifully, so get ready for compliments. My honest caveat: the waves drop faster on very fine or very heavy hair, so set each curl with a clip while it cools. Pro tip: a deep side part is what makes Hollywood waves look authentic. Old glamour, made for December.
Keep exploring: Christmas Eve Hairstyles
6. Side-Swept Curls
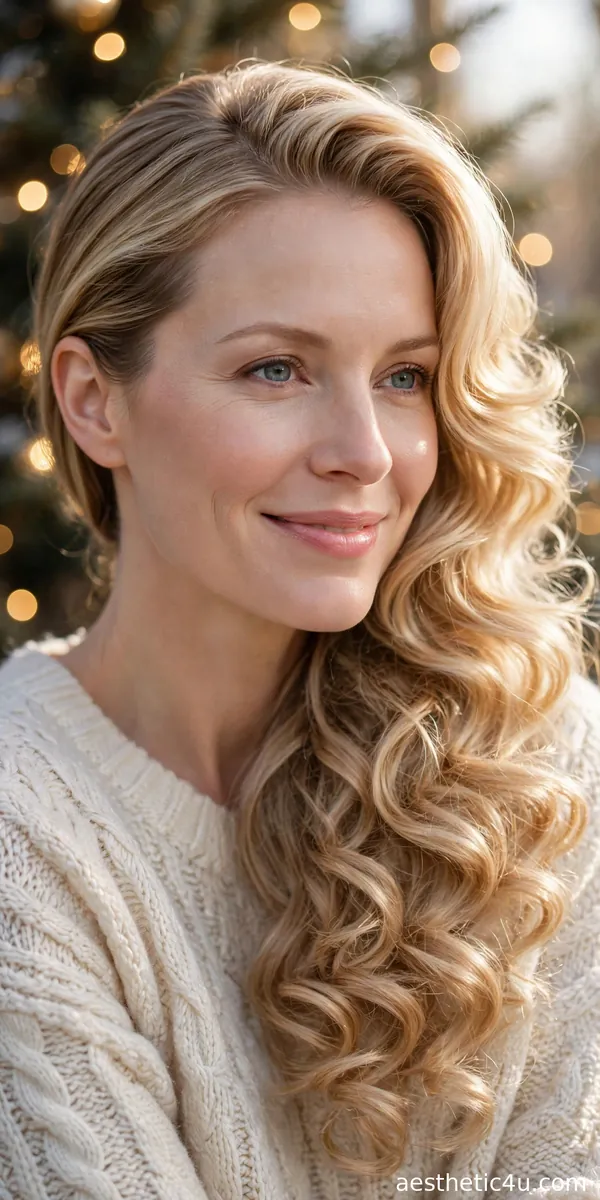
All the hair is curled and swept dramatically to one side, cascading over one shoulder in a soft waterfall. Curl with a 1-inch iron, then sweep everything to your preferred side and pin discreetly at the nape to hold the sweep. It takes about twenty-five minutes and needs only pins and medium-hold hairspray. The asymmetry is romantic and effortlessly glamorous, and it shows off earrings and necklines beautifully. The easiest way to add drama to a simple dress. A light mist of flexible hairspray before you leave keeps the sweep in place for hours.
I would choose this if you love wearing your hair down but want it to look styled and intentional. It suits every face shape because you can adjust the sweep to flatter you. My honest caveat: the pinned side can loosen while dancing, so carry two spare bobby pins in your clutch. Pro tip: curl the ends away from your face on the swept side for the most flattering shape. Drama, with almost no effort.
7. Elegant High Bun
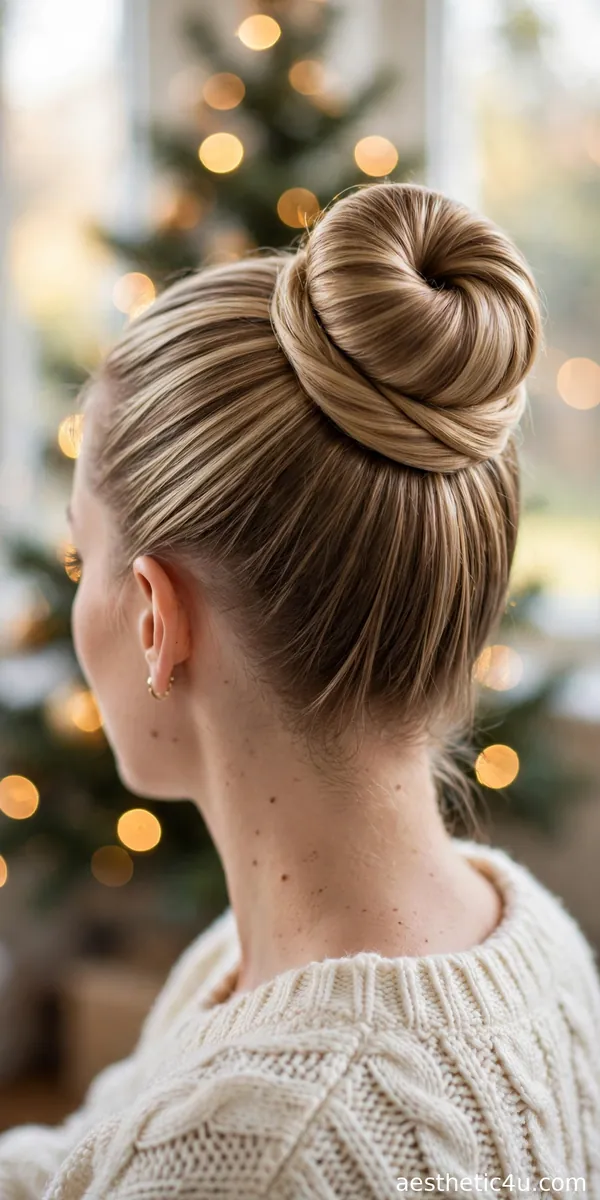
The elegant high bun sits at the crown, smooth and perfectly shaped, lifting the face and creating a long, graceful line. Flip your head over, gather the hair high, smooth it with a bristle brush, and coil it into a bun, pinning as you go. It takes about fifteen minutes, and a donut form underneath gives perfect shape if your hair is fine. The finish is polished and poised, and it works beautifully with high necklines. Every strand in place, nothing left to chance.
I would choose this for a black-tie holiday event where you want to look statuesque. It shows off your cheekbones and your jewelry. My honest caveat: a very high, tight bun can cause headaches, so do not pull it drum-tight. Pro tip: wrap a thin section of hair around the base to hide the elastic for a seamless finish. Intentional, refined, and always elegant.
8. Braided Low Bun
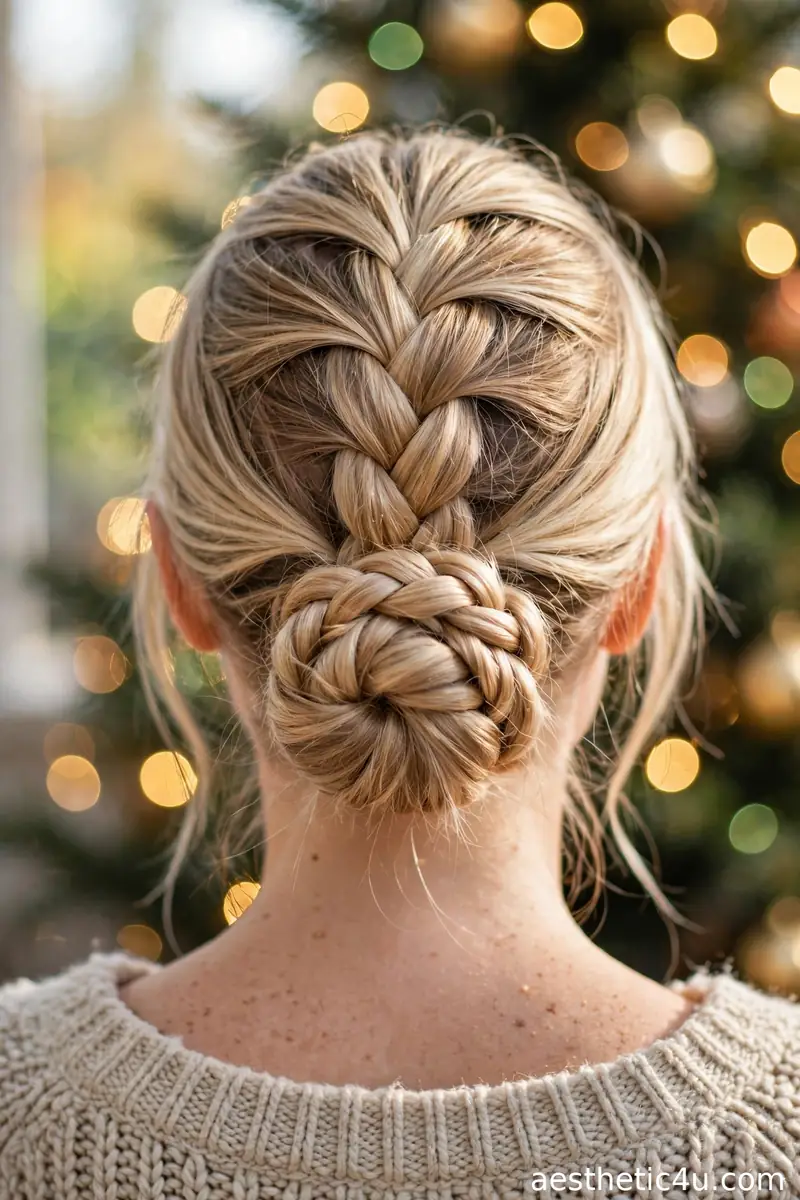
A braid is woven first, then coiled into a low bun at the nape, adding texture and craftsmanship to a classic shape. Braid a low ponytail into a simple three-strand braid, pancake it gently for fullness, then wrap it into a bun and pin. It takes about twenty minutes and the braid keeps everything secure for hours. The texture catches the light beautifully, giving the classic bun extra dimension. Elegant with a handmade feel. Finish with a firm-hold hairspray, since the braid adds weight that can loosen the bun.
I would choose this if you want a bun with more interest than the plain version. It is my pick for long holiday evenings because the braid locks everything in place. My honest caveat: pancake carefully, because over-pulled braids look messy rather than textured. Pro tip: a few small pearl pins tucked into the braid make it party-ready. Classic shape, beautiful detail.
9. Polished Side-Part Bob
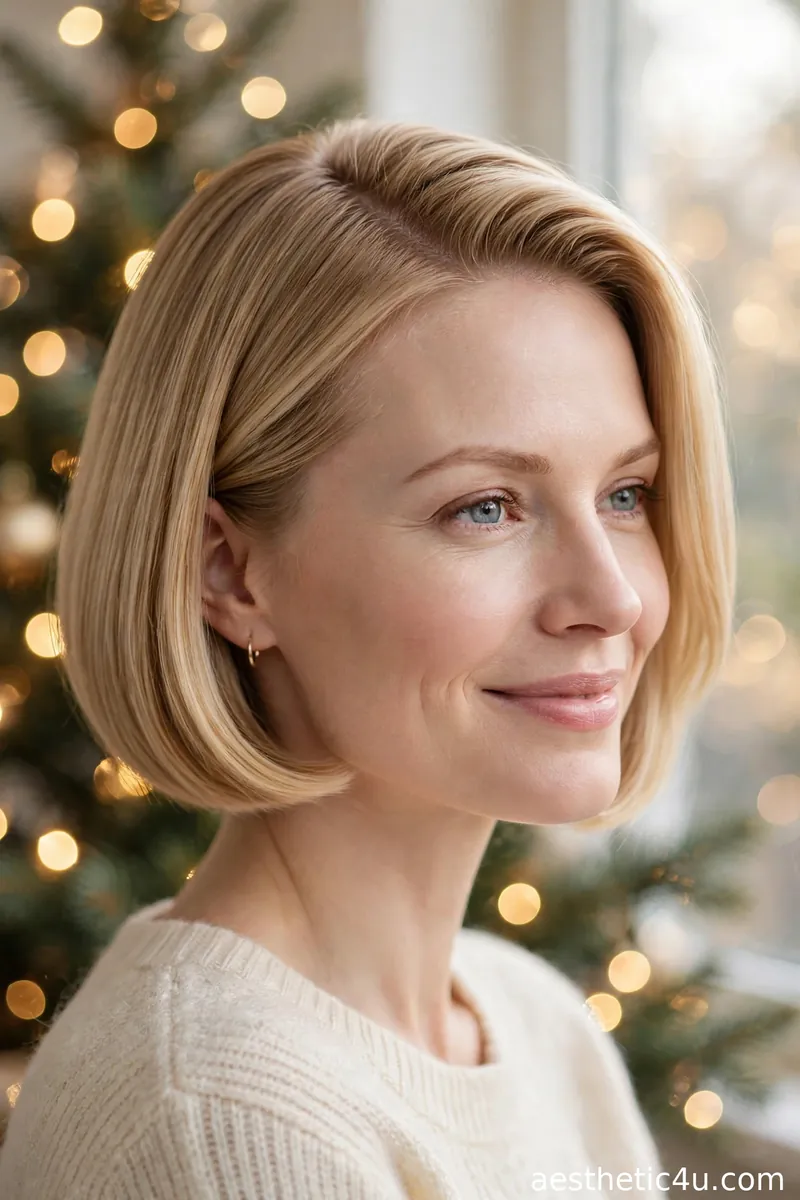
The bob is parted deeply on one side and smoothed sleek, with the ends tucked slightly under for a classic shape. Blow-dry with a round brush, create a deep side part with a tail comb, and flat-iron the lengths smooth, finishing with shine serum. It takes about twenty minutes and needs a flat iron and strong smoothing products. The result is sharp, chic, and timeless: proof that elegance needs no length. The deep part adds instant glamour. A pea-sized amount of shine serum pressed over the finished style gives a glass-like glow.
I would choose this if you have short hair and want to look completely polished. It suits most face shapes, and the asymmetry of the deep part is universally flattering. My honest caveat: you need a fresh trim for this to look sharp, since split ends ruin the sleek line. Pro tip: tuck one side behind your ear to show off a statement earring. Short hair, maximum elegance.
10. Sleek Wrapped High Ponytail
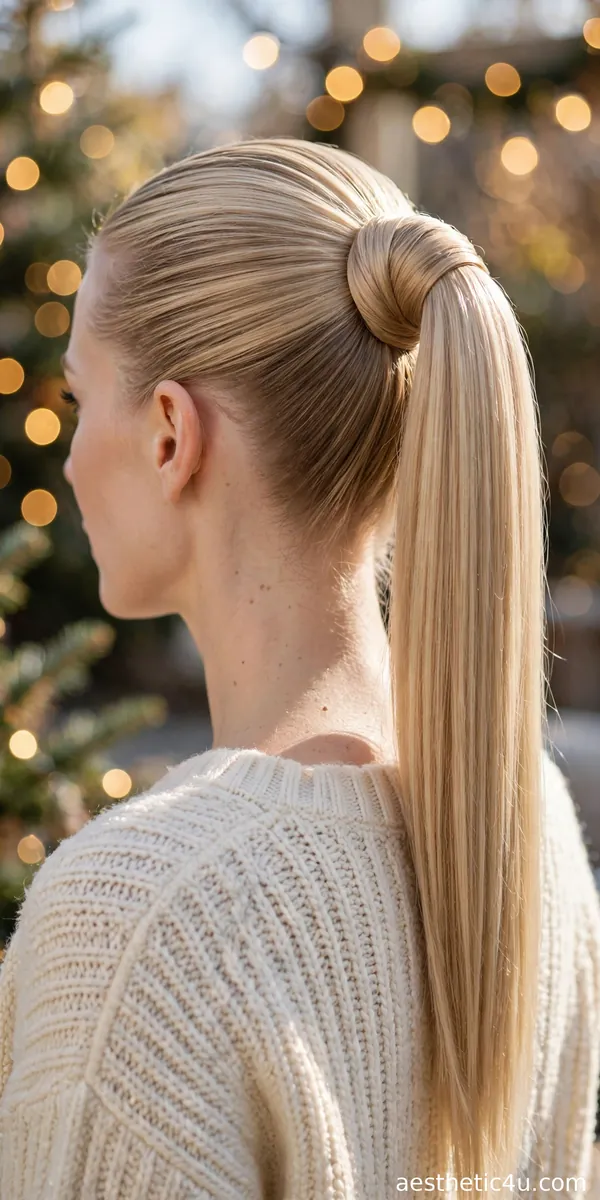
A high ponytail is smoothed glass-sleek and wrapped with a section of hair at the base, hiding the elastic for a seamless finish. Gather the hair high at the crown, smooth it back with gel or smoothing cream and a boar bristle brush, then secure with a strong elastic. Take a thin section from underneath, wrap it around the base, and pin it underneath. It takes ten minutes but looks styled and expensive. Finish with strong-hold hairspray so the length falls in one clean, swishing sheet. Simple, modern, and minimal: the wrapped base is the detail that makes it elegant.
I would choose this for a modern, minimal holiday look when you are short on time. It is genuinely a ten-minute style that lifts the face and elongates the neck. My honest caveat: sleekness shows every bump, so brush thoroughly before securing the ponytail. Pro tip: take an extra minute to get the wrap neat, because that detail is what elevates it. Ten minutes to red-carpet polish.
Keep exploring: New Years Eve Hairstyles
11. Gibson Tuck
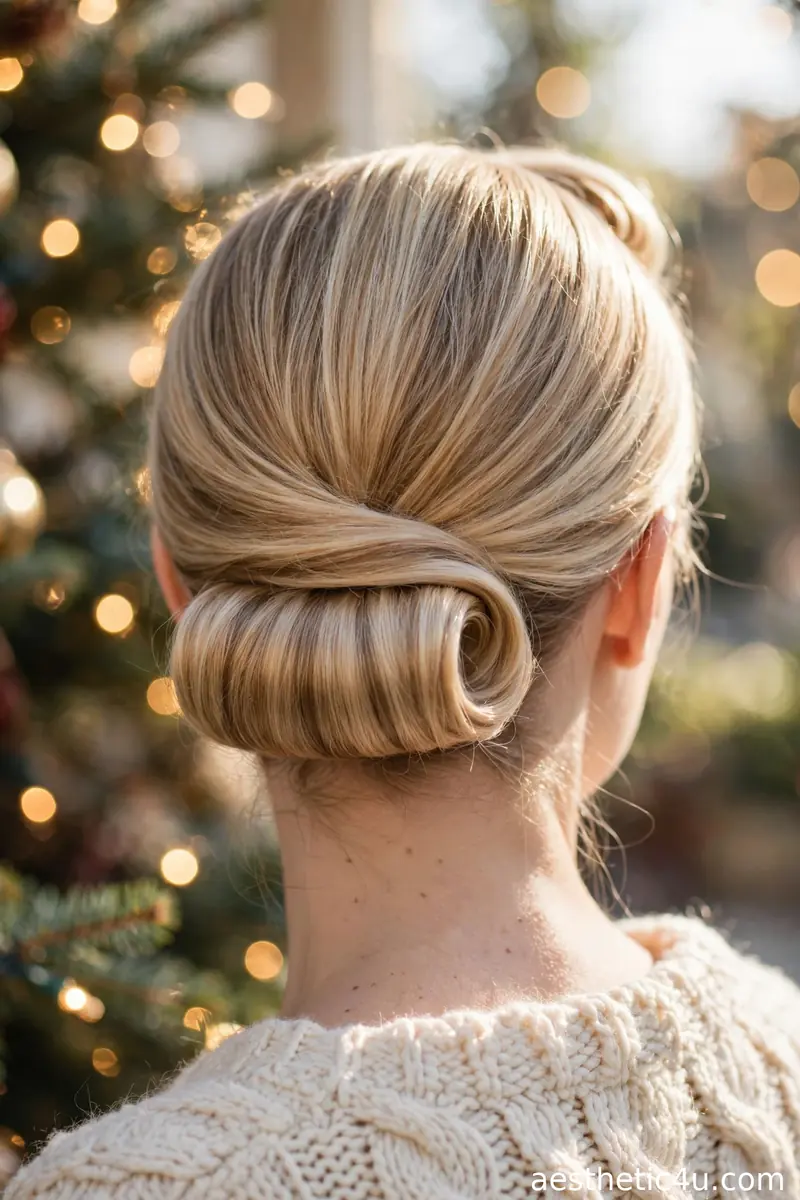
The Gibson tuck rolls the hair under and pins it at the nape for a vintage roll, a century-old style that still looks fresh. Make a low ponytail, loosen the elastic slightly, split the hair above it, and tuck the ponytail up and through, pinning the roll in place. It takes about fifteen minutes and needs only an elastic and bobby pins. The soft roll frames the neck beautifully. Vintage elegance with zero heat styling required. Secure the tucked roll with at least six bobby pins crossed in Xs so it survives the evening.
I would choose this if you love vintage elegance but want something gentle and easy. It works best on medium to long hair. My honest caveat: very thick hair makes a bulky roll, so split it into two smaller tucks. Pro tip: a velvet headband or a small brooch pinned at the side makes it feel festive. Special without being overdone.
12. Pearl-Adorned Updo
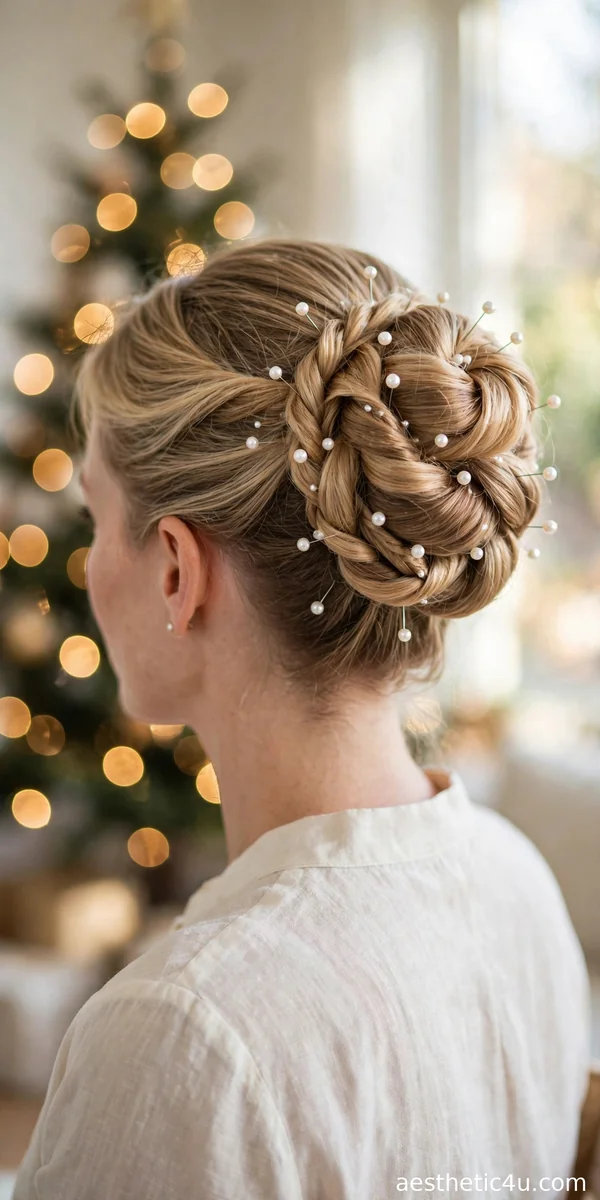
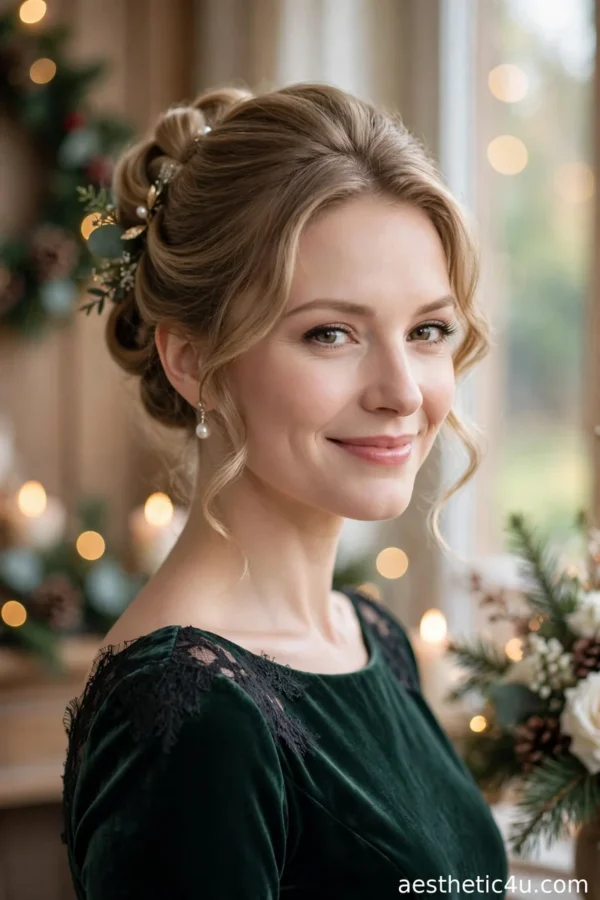
A classic updo gets finished with small pearl pins scattered through it, catching the light like tiny ornaments. Style any simple bun or twist first, then place five to eight pearl pins asymmetrically through the style. It takes five extra minutes on top of your base updo. The base stays simple so the pearls shine. It is the fastest way to take a simple updo straight to special occasion. Choose pins with glass pearls rather than plastic: they catch candlelight far more beautifully. Space them unevenly for an organic, expensive look.
I would choose this for a Christmas wedding or formal party where you want quiet luxury. Pearls always read as elegant and never look try-hard. My honest caveat: cheap plastic pearls look cheap, so invest in decent glass or faux-pearl pins. Pro tip: place the pins in a loose diagonal line rather than scattered randomly for a more designed look. Simple base, stunning finish.
13. Velvet Bow Low Ponytail
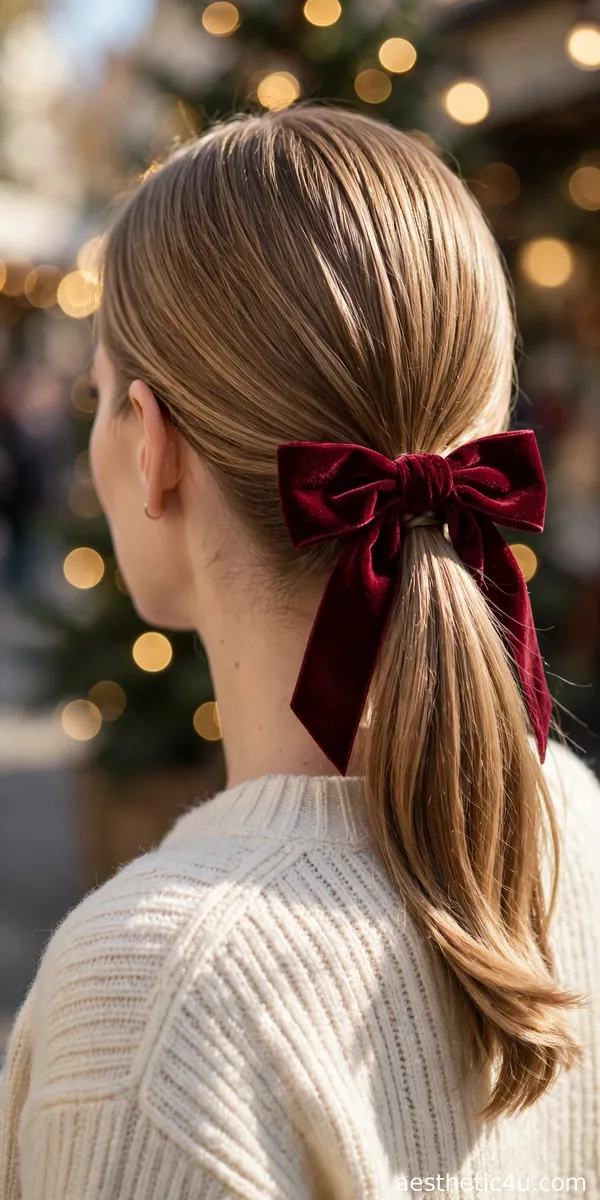
A low ponytail is tied with a soft velvet bow at the base, adding rich texture and a festive feel. Smooth the hair into a low ponytail, wrap the base with a hair section, then tie a velvet ribbon or clip on a velvet bow. It takes ten minutes and the ponytail itself stays sleek and simple. The velvet does all the festive work. Graceful, pretty, and very December. Tie the ribbon in a flat, neat bow and trim the tails at an angle for a tailored finish. Position it slightly off-center for a modern feel.
I would choose this if you want elegance with a clear holiday touch. It is perfect for family gatherings and office parties alike. My honest caveat: a huge bow can read childish, so keep it medium-sized and let the velvet texture do the talking. Pro tip: deep green, burgundy, or black velvet looks most elegant; bright red is fun but less refined. Festive, not fussy.
14. Classic Beehive
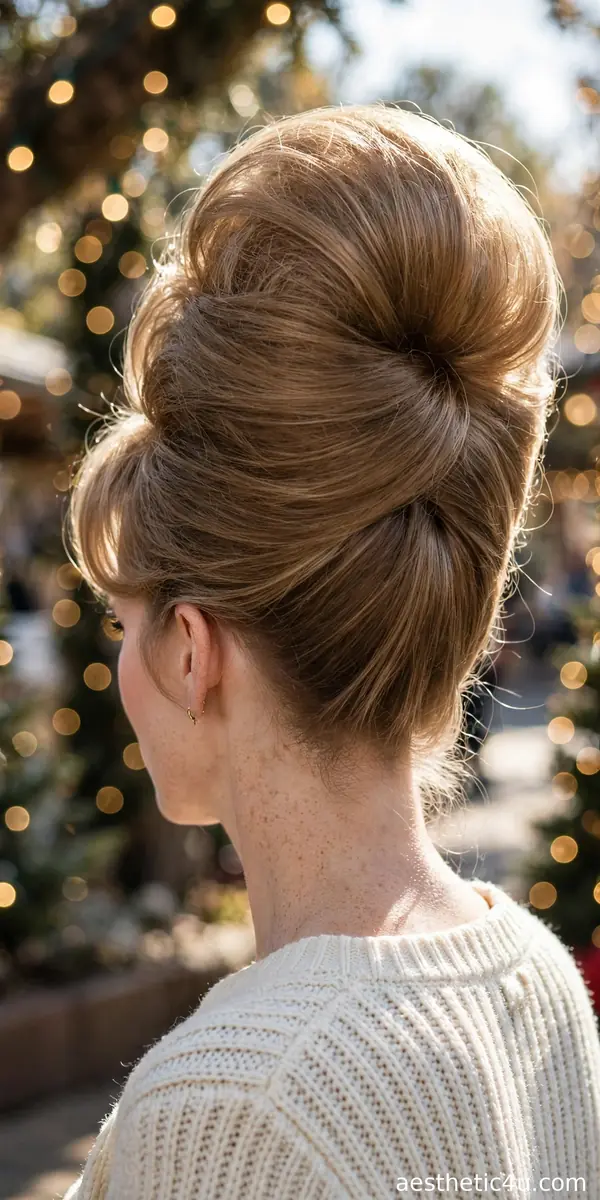
The beehive piles the hair high with volume at the crown, smooth and sculpted, tapering at the top. Tease the crown heavily, smooth the top layer over it, and pin the shape into place, finishing with strong-hold hairspray. It takes twenty-five to thirty minutes and needs a teasing comb and plenty of pins. The result is bold, retro, and undeniably elegant. It suits a statement holiday outfit like nothing else. Work in small sections when teasing and smooth each one before moving on: patience is what makes a beehive look sculpted rather than messy. Finish with a high-shine spray.
I would choose this if you love vintage glamour and want to be remembered. It elongates the face and looks incredible with winged eyeliner. My honest caveat: it is a lot of teasing, so deep-condition afterward and be gentle taking it down. Pro tip: the height belongs at the very crown, not the front, or it looks like a bump. Bold, beautiful, unforgettable.
15. Elegant Top Knot
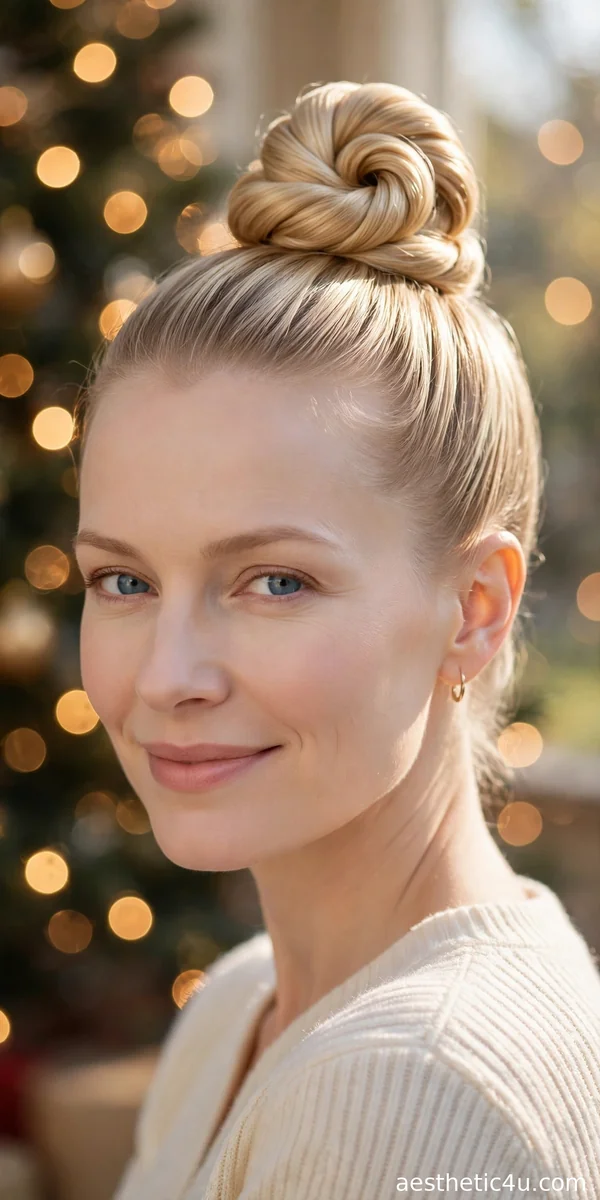
The elegant top knot is a smooth, tightly coiled bun at the very top of the head, with every strand polished. Unlike a casual top knot, this one is sleek: smooth with gel, coil tightly, and pin every loose end. It takes fifteen minutes, and a donut form helps if your hair is fine. The high placement shows off your face and jewelry. Minimal and strikingly chic. After pinning, mist with strong-hold hairspray and smooth any flyaways with a clean mascara wand sprayed with hairspray. The details make it red-carpet.
I would choose this for a fashion-forward holiday look. It is modern elegance at its cleanest. My honest caveat: it exposes your entire face, so it is not the most forgiving style if you are self-conscious. Pro tip: the polished finish is what keeps it elegant, so do not skip the smoothing step. Sleek, striking, and very now. It also photographs beautifully from the front, which is rare for an updo.
Keep exploring: Christmas Hairstyles Updo
16. Soft Rolled Updo

Sections of hair are softly rolled and pinned into a loose updo, with airy texture and gently tucked pieces. Take two-inch sections, roll them loosely toward the head, and pin, leaving the finish soft rather than sculpted. It takes about twenty minutes and suits hair with some natural texture. The result looks romantic and effortlessly graceful. It is elegance that still looks touchable. Roll each section in the same direction for a uniform look, and do not pull the rolls too tight: softness is the whole point. A light texturizing spray beforehand adds grip.
I would choose this for a cozy Christmas gathering where you want to look pretty but approachable. The softness keeps it from feeling stiff or overdone. My honest caveat: very fine, slippery hair may need texturizing spray or it will fall flat. Pro tip: pull out a few face-framing pieces and curl them softly for extra romance. Soft, pretty, and relaxed.
17. Timeless Center-Part Waves
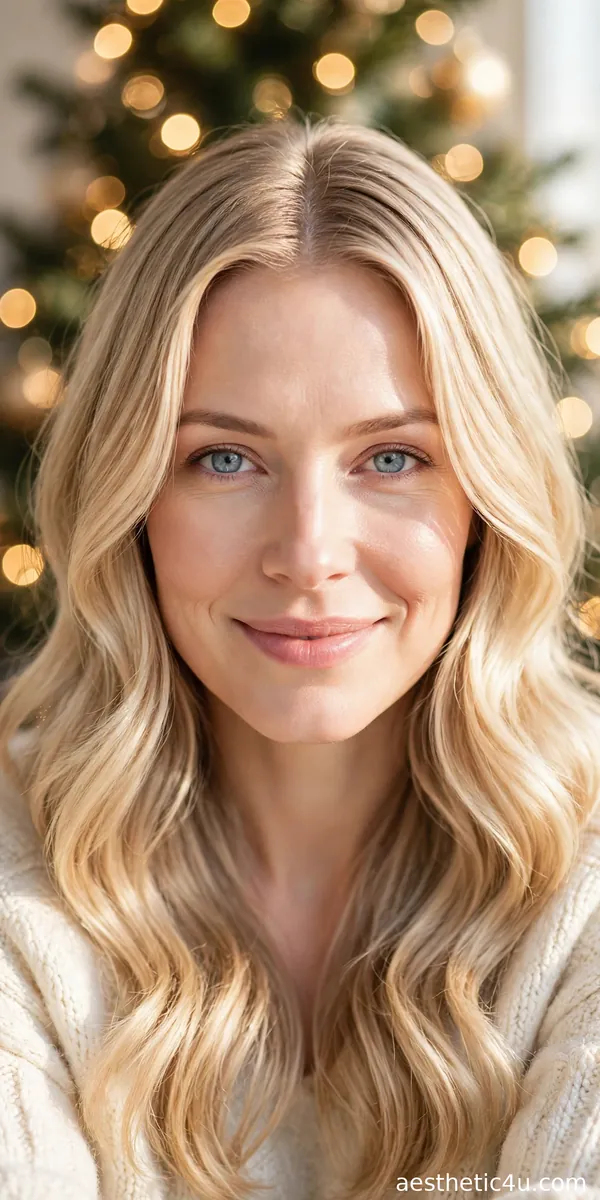
The hair is parted in the center and worn in soft, brushed-out waves for a classic, balanced look. Create loose waves with a 1.25-inch iron, brush through for softness, and set with light-hold spray. It takes about twenty-five minutes. The symmetry is classic and the waves add movement. Simple, balanced, and beautiful: the center part keeps it modern and clean. Clip each wave at the scalp while it cools to lock in the shape, and brush out gently with a mixed-bristle brush for that soft, expensive finish. Shine spray is the final touch.
I would choose this if you want understated elegance that suits almost everyone. It works on most face shapes and every hair color. My honest caveat: a center part emphasizes asymmetry, so skip it if that bothers you. Pro tip: the waves should start at cheekbone level, not at the roots, for the most flattering shape. Quiet, classic, perfect. Add a touch of shine serum to the mid-lengths before waving for extra glow.
18. Double Twist Half-Up

Two sections twist back from the temples and join at the crown, while the rest of the hair falls in soft waves below. Twist each front section, bring them to the back, and pin or tie them together. It takes fifteen minutes and is the perfect mix of polished and relaxed. The twists keep hair out of your face while the waves keep it romantic. Just enough detail. Secure the joined twists with a small clear elastic hidden underneath, then cover it with a decorative pin. This keeps the half-up style locked for hours.
I would choose this if you want your hair partly up but still flowing. It is ideal for dinners where you will be leaning over the table. My honest caveat: the twists can loosen, so cross your bobby pins in an X for extra hold. Pro tip: curl the lower hair first, then do the twists, so the waves are already set. Polished, pretty, practical.
19. Graceful Low Side Bun
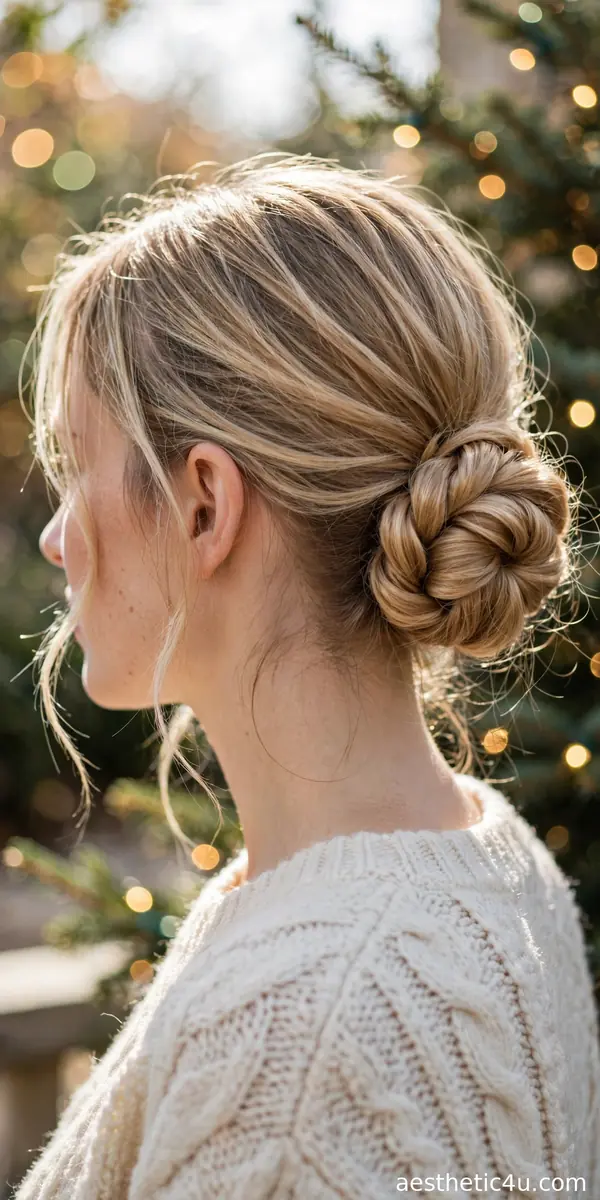
The bun sits low and to one side, just behind the ear, with an asymmetry that feels artistic and soft. Sweep the hair to one side, coil it into a bun behind the ear, and pin, leaving a few loose pieces to frame the face. It takes about fifteen minutes. The side placement flatters and looks beautiful in profile photos. Romantic with a creative edge. Balance the asymmetry by wearing a statement earring on the opposite side from the bun. Mist the finished style with flexible-hold spray so the loose pieces move naturally.
I would choose this for an elegant but creative look. The side placement is especially flattering on round faces. My honest caveat: it can feel unbalanced if you are not used to asymmetry, so wear it around the house first. Pro tip: place the bun on the opposite side of your part for the most natural sweep. Artistic, soft, and photogenic.
20. Vintage Finger Waves
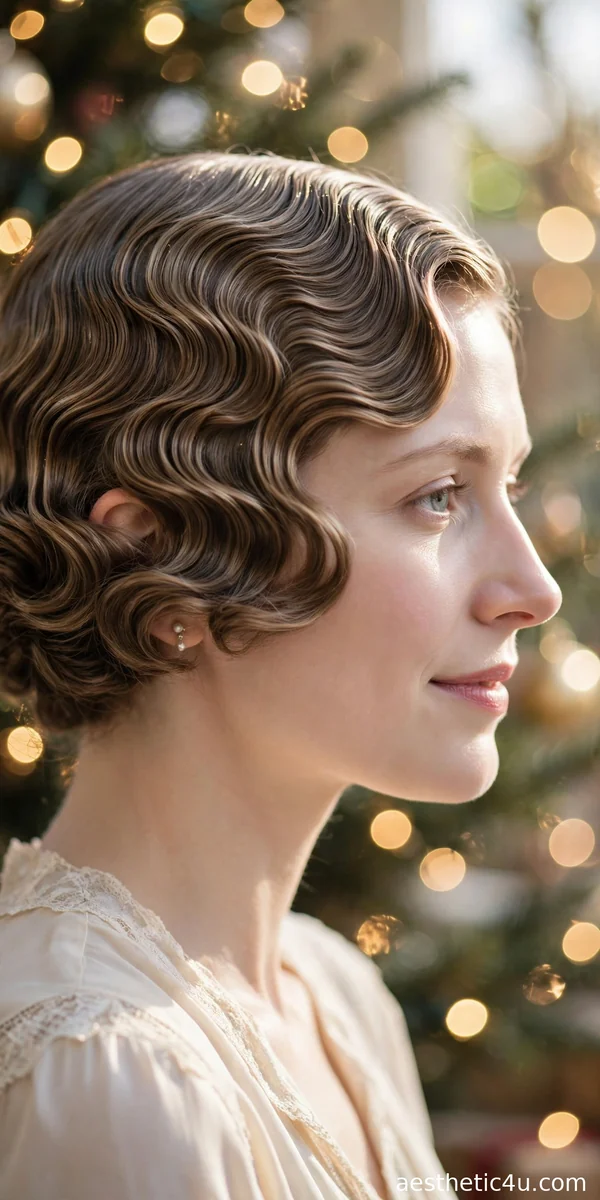
Finger waves are sculpted into smooth S-shapes close to the head for pure 1920s glamour. Apply strong-hold gel to damp hair, then use a fine-tooth comb and your fingers to mold the waves, clipping each ridge until it dries. It takes thirty to forty minutes plus drying time. Every wave is precise and glossy. It turns any outfit into a statement. Use a rat-tail comb for crisp partings between the waves, and keep a damp cloth handy to re-wet sections as you sculpt. Patience here pays off enormously in the final gloss.
I would choose this if you adore vintage style and want something truly special. It is stunning on short to medium hair. My honest caveat: this is the hardest style on the list, so practice before the event or book a stylist. Pro tip: the waves must be completely dry before you remove the clips, or they fall. Glamour, commitment, payoff.
Keep exploring: Christmas Dinner Hairstyles
21. Vintage Victory Rolls
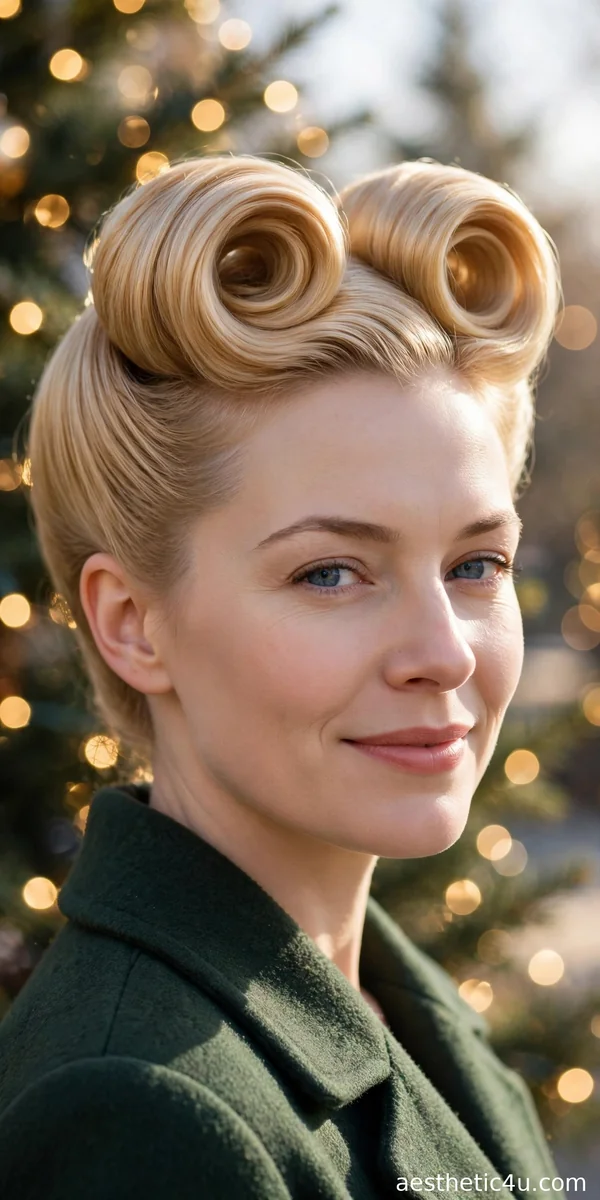
Victory rolls are large, sculpted rolls set on top of the head in bold 1940s style. Section the front hair, roll each section around your fingers toward the scalp, and pin securely, smoothing with pomade. It takes thirty to forty minutes and needs strong pins and setting spray. Each roll is smooth and perfectly shaped. Bold, playful, and glamorous. Backcomb the base of each roll lightly before rolling for extra grip and height. Set the finished rolls with a strong setting spray and let them cool fully before touching.
I would choose this if you want show-stopping vintage elegance. It pairs beautifully with red lips and makes any Christmas party feel like an event. My honest caveat: the rolls are heavy, so anchor them well or they will droop by midnight. Pro tip: do the rolls first, then style the back hair, so you can adjust the balance. A true showstopper.
How to Choose the Right Elegant Christmas Hairstyle for You
Start with your hair length, because it decides your options. Short hair shines in polished bobs, finger waves, and pearl-adorned styles. Medium hair can do almost everything here, from French twists to side-swept curls. Long hair owns the dramatic looks: Hollywood waves, braided buns, and victory rolls. Next, consider your face shape. Updos and high buns flatter round faces by adding height, while soft face-framing styles suit square and heart-shaped faces. Side-swept styles are universally flattering and my safest recommendation if you are unsure.
Then match the style to the occasion and your skill level. A candlelit dinner or church service calls for quiet elegance: a low chignon, a Gibson tuck, or soft waves. A glamorous party welcomes drama: Hollywood waves, a beehive, or victory rolls. Be honest about your skills: if you have ten minutes and basic skills, choose the sleek wrapped ponytail or the velvet bow ponytail. If you love a project, try finger waves or the French twist a week before the event. Practice once, photograph it, and you will walk in confident.
Styling Tips & Common Mistakes to Avoid
My first tip: elegant hair starts with prep. Blow-dry smooth or apply a smoothing cream before you begin, because sleek styles show every bump. Second, invest in good pins: cheap bobby pins slide out, while quality ones with a strong grip hold all night. Third, always finish with hairspray, but spray from arm’s length so it mists rather than wets. Fourth, photograph your style from the back before you leave: the back view is what everyone else sees, and a quick check catches lopsided twists.
The biggest mistake is styling on freshly washed, slippery hair. Day-old hair holds pins and keeps its shape far better, so wash the night before and add dry shampoo at the roots. The second mistake is using too little product on sleek styles or too much on soft ones: match the product to the finish you want. The third mistake is skipping a trial run for complicated styles like finger waves or victory rolls. Never debut a new technique on party night. Practice once, and your elegant Christmas hair will be flawless.
Final Thoughts
Elegance never shouts, and these elegant Christmas hairstyles prove it quietly. The timeless styles in this guide work because they are built on good technique, not trends: smooth finishes, balanced shapes, and details like pearls or velvet that elevate without overwhelming. Pick the one that matches your plans, your outfit, and your mood, and give yourself enough time to style it without rushing. Timeless hair means your photos will look just as good years from now. Enjoy every party. Your timeless choice will not let you down.
Follow Us On Pinterest: Easy To Find Next Style