Sana
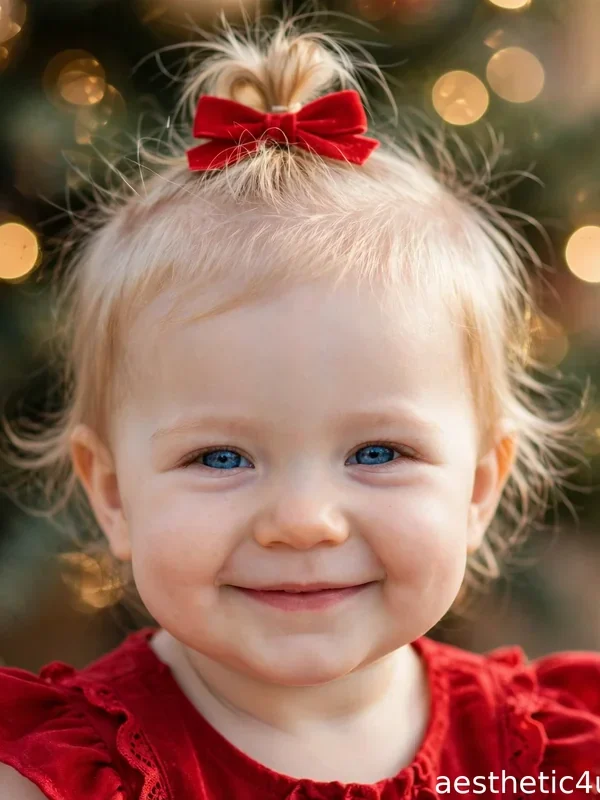
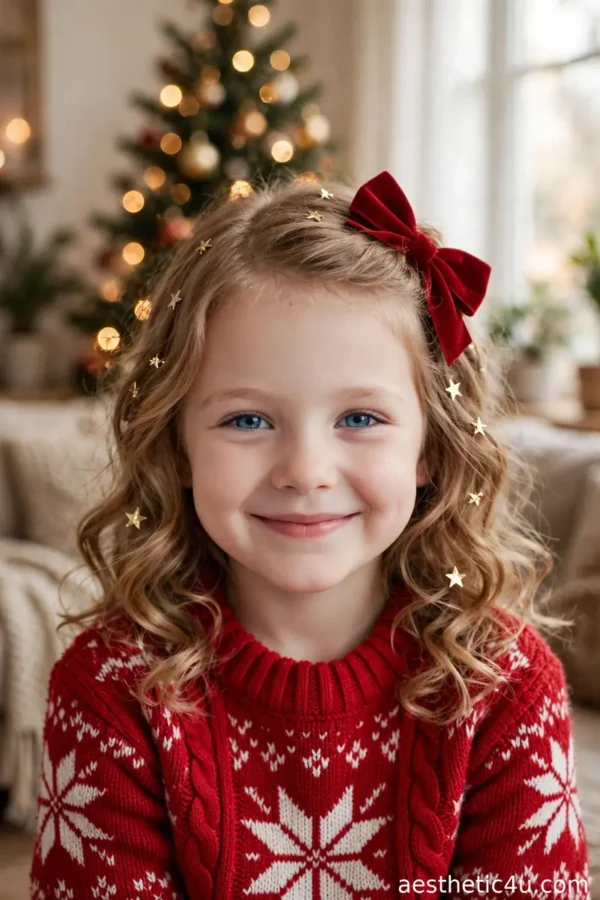
Every December, searches for toddler Christmas hairstyles spike hard, and I know exactly why. This is photo season. Between the Christmas card shoot, the visit with Santa, and about six family dinners, your little one’s hair will be in more pictures this month than all year. The good news is that toddler hair does not need anything complicated to look festive. A soft bow, a tiny bun, or a clever part can turn everyday hair into something straight out of a holiday movie. The real trick is choosing styles that survive actual toddler life: the wiggling, the naps, the snacks, and the great bow-removal ceremony that happens about four minutes into every event.
This guide is for parents and caregivers of toddlers, roughly ages one to four, with any hair type: fine and wispy, curly, thick, or barely-there baby hair. You do not need braiding skill for most of these, and every style here takes ten minutes or less, with most clocking in under five. I have noted exactly what each one needs so you can grab your supplies before the wiggling starts. You will also learn which styles survive car seats and naps, which accessories are actually comfortable, and which looks are worth saving for the planned photo shoot. In my years of styling little ones for holiday pictures, I have learned that the simplest style done gently always beats the fancy one done with tears. Let us find the one that fits your morning.
1. Tiny Top Knot with Red Bow
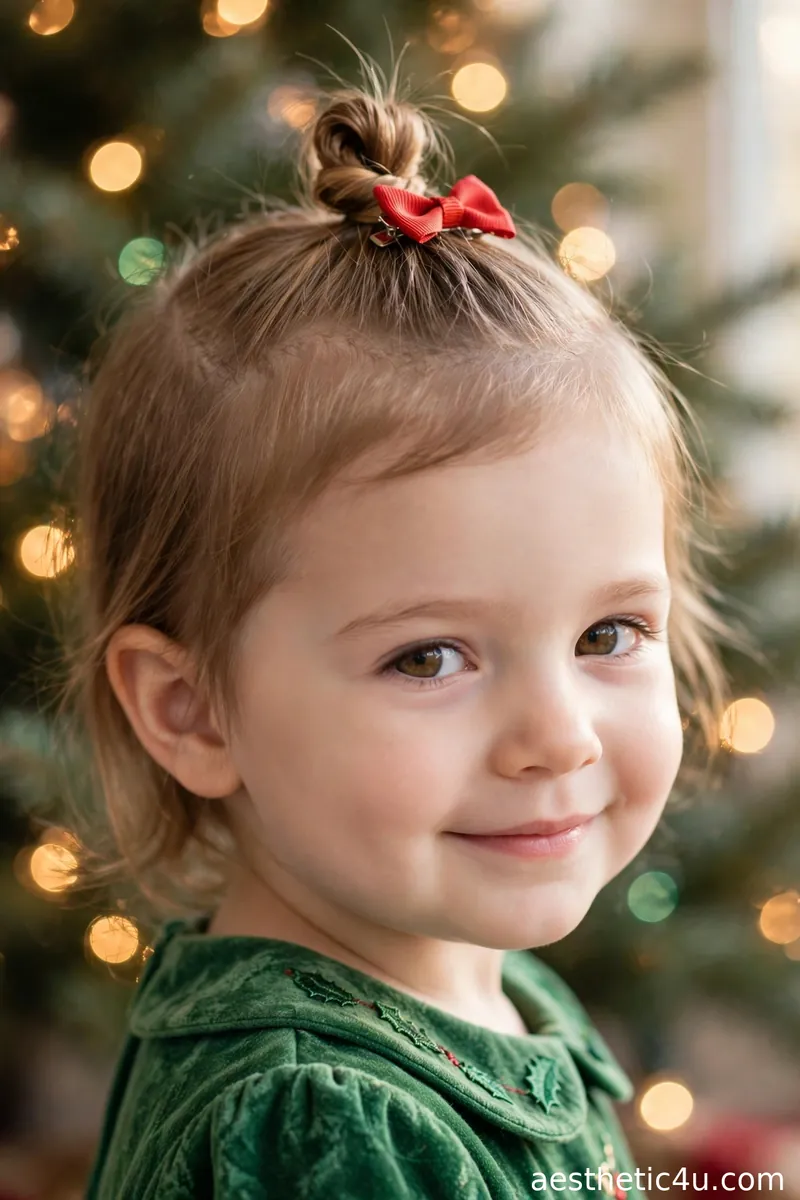
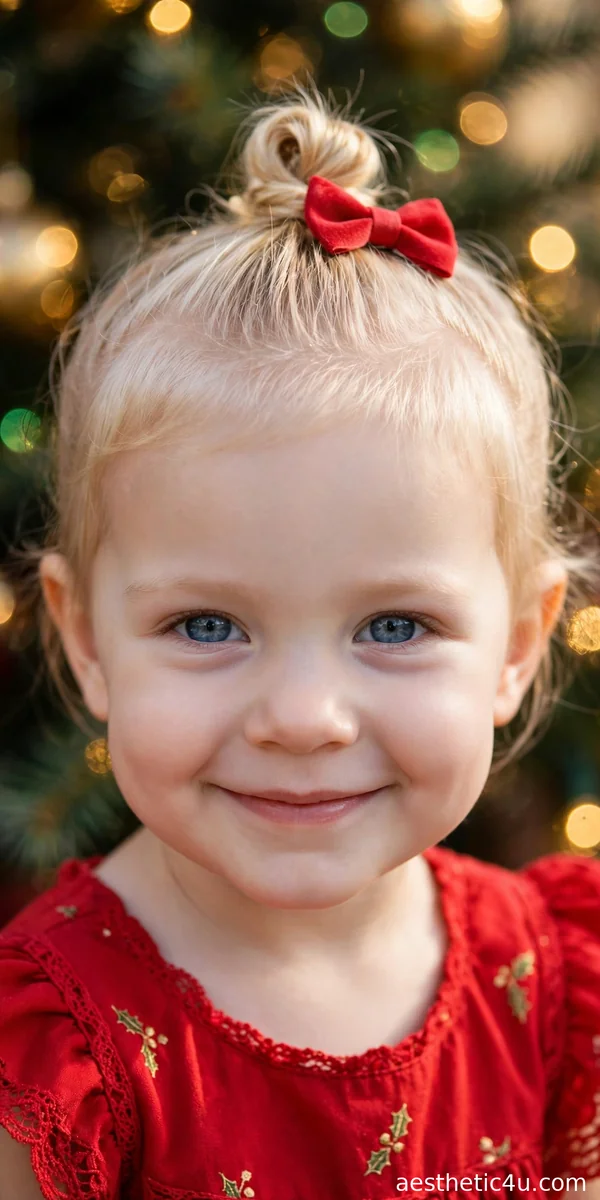
Start with slightly damp hair, because damp toddler hair gathers without flyaways. Scoop everything up to the crown and secure it with one small snag-free elastic to make a mini ponytail. Twist the ponytail once or twice around its base and wrap a second elastic over it to form a tiny bun, tucking the ends underneath. Slide a soft fabric red bow clip right beside the bun, angled slightly forward so it shows up in photos. You need two mini elastics and one bow clip. Total time: about two minutes. Difficulty: beginner, zero braiding skill needed.
This works best on fine, short, or medium toddler hair, and it flatters every face shape because the height on top balances a round little face. I would pick this for the Christmas card photo or the Santa visit, since it reads festive from across the room. My honest caveat: keep the ponytail loose at the hairline. A too-tight top knot on delicate toddler edges causes breakage and tears, so comfort comes first, always.
2. Two Mini Space Buns
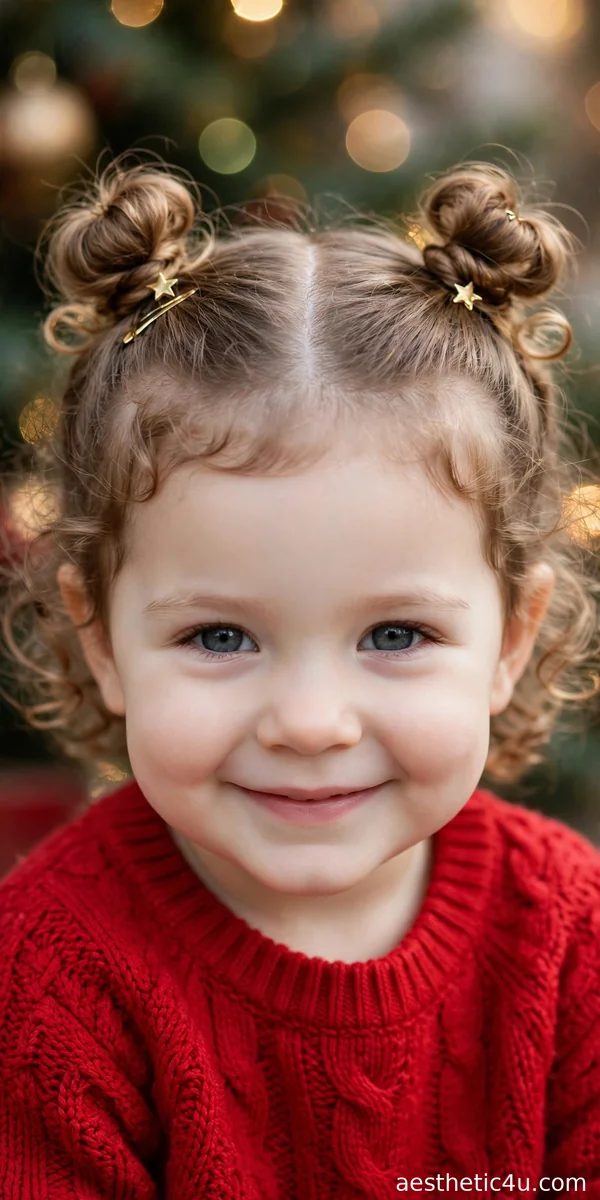
Part the hair down the middle, then gather each side into a high pigtail just above the ears. Secure each with a small elastic, twist each pigtail around its base, and wrap a second elastic over it to form two neat buns. Fluff the bun edges for a rounder shape. Smooth the hairline with an edge brush and a pea-sized amount of kids’ gel, laying the baby hairs into swoops. Slide one gold star clip at the base of each bun, angled up to catch the light. You need four elastics, edge gel, and two star clips. Time: five minutes.
These suit medium to long toddler hair, especially curly or textured hair, and they flatter round faces since the height balances the cheeks. I love this one for the Christmas party because the star clips sparkle in photos and the buns survive dancing, cake, and being scooped up by grandparents. Honest tip: lay the edges after the buns are secure, not before. Gel under a tight elastic pulls, but gel over settled hair holds the baby hairs down all day.
3. Curly Puff Pony with Velvet Scrunchie
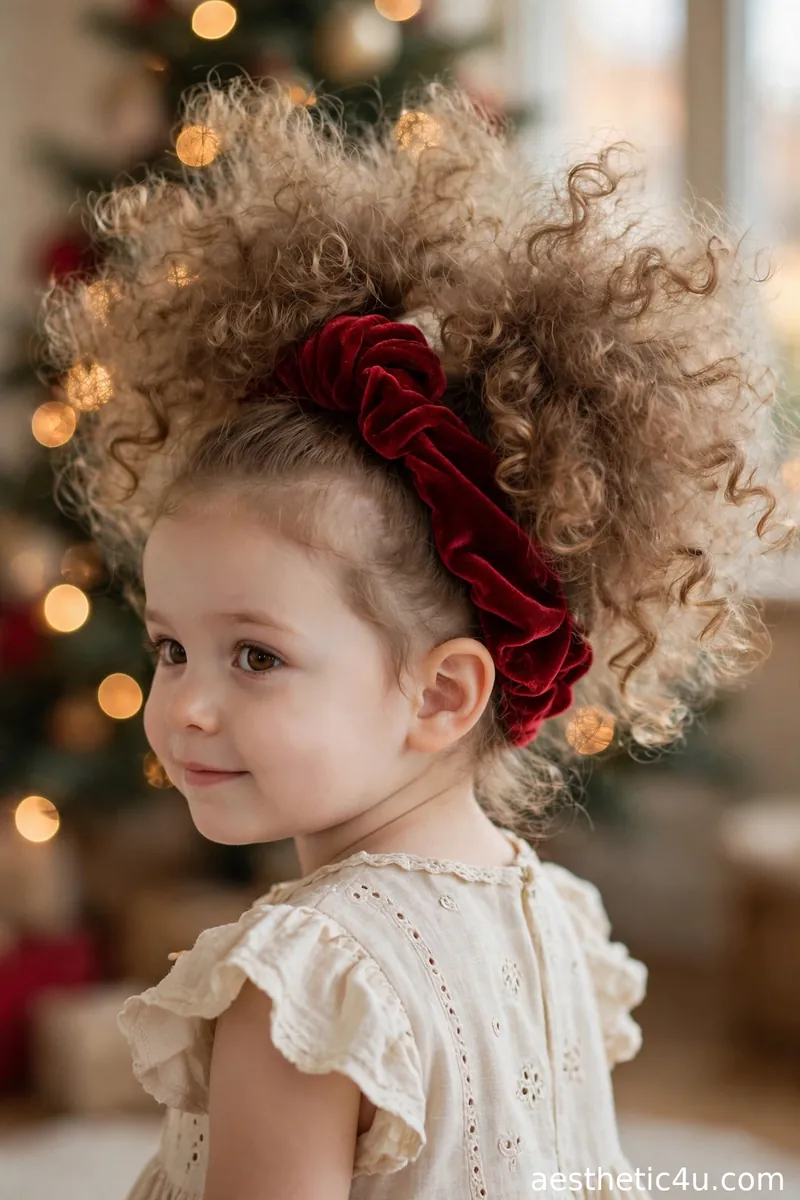
Refresh the curls first with a light mist of water mixed with a pea-sized amount of leave-in conditioner, then gently fluff the roots with your fingers. Gather all the curls to the crown with your hands, smoothing the sides just enough to look neat while leaving the curl pattern intact. Wrap a soft velvet scrunchie around the base twice, never a tight elastic that dents the curls. Let the puff fan out naturally and pull one small curl forward at the forehead. You need a spray bottle, leave-in, and a velvet scrunchie. Time: three minutes. Difficulty: beginner.
This is made for curly and coily toddler hair, types 3A through 4C, and it suits every occasion from church to Christmas morning. If your little one has curls, I always say skip the heat and the fuss and let the texture do the decorating. Honest caveat: do not brush the puff out dry. That creates frizz fast. Fingers or a wide-tooth comb on damp hair only, and you will keep the definition.
4. Soft Center-Part Toddler Curls
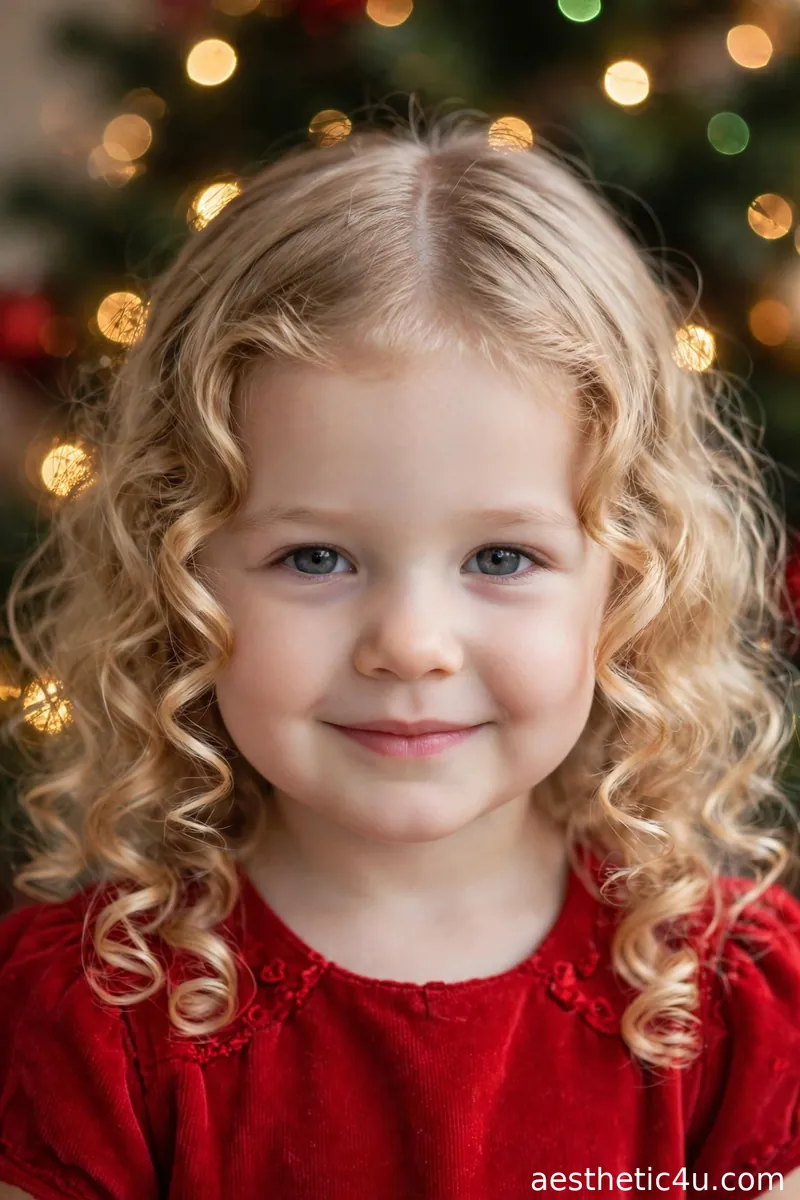
Part the hair softly down the middle with your fingers and let the natural curls fall on both sides of the face. Scrunch a pea-sized amount of kids’ leave-in conditioner into damp curls to define them, then let the hair air dry or diffuse on the coolest setting. Shake the roots gently with your fingertips for volume, keeping the curl clumps intact. Finish by letting two soft curls fall forward at the temples. No heat or accessories needed. Time: three minutes plus drying. Difficulty: beginner.
This is made for toddlers with natural curls, types 2C through 4A, and it suits every face shape since the curls soften the cheeks. I would pick this for the family dinner or the Christmas card shoot because it photographs beautifully and takes almost no effort. My honest caveat: do not brush the curls dry. That creates instant frizz. Define them on damp hair with your fingers or a wide-tooth comb, and the curls will hold their shape all evening.
5. Mini Dutch Braid Headband
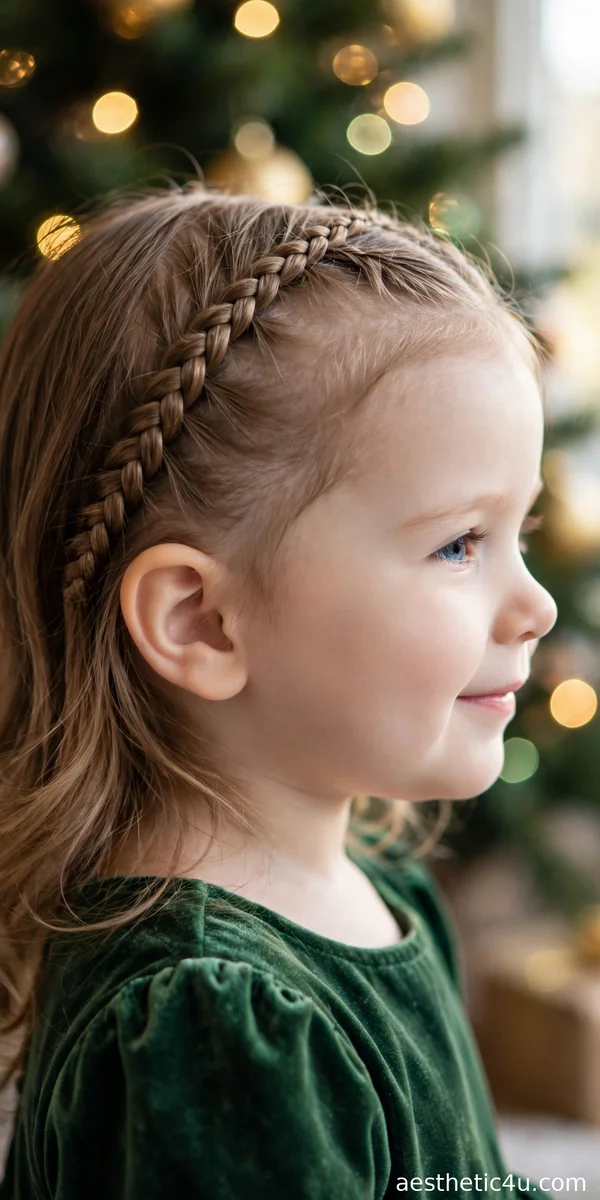
Start with brushed, slightly damp hair and part it on the side. Take a two-inch section at the front hairline and divide it into three strands. Braid Dutch-style, crossing the outer strands UNDER the middle one, adding a little hair from the hairline into each outer strand as you work toward the ear. Secure behind the ear with an elastic, tuck the tail under the loose hair, and pin it with one bobby pin. Smooth the rest of the hair behind it. You need a comb, one elastic, and one bobby pin. Time: seven minutes. Difficulty: medium, but very learnable.
This works on medium to long hair of any texture, and it flatters round faces by adding height at the hairline. I recommend it for the Christmas dinner table because it keeps hair out of the food and the face for hours. My honest take for nervous beginners: your first one will look lumpy, and that is fine. The second one will look great. Practice once the night before, never on party morning.
Keep exploring: Christmas Hairstyles for Kids
6. Little Pigtail Loops
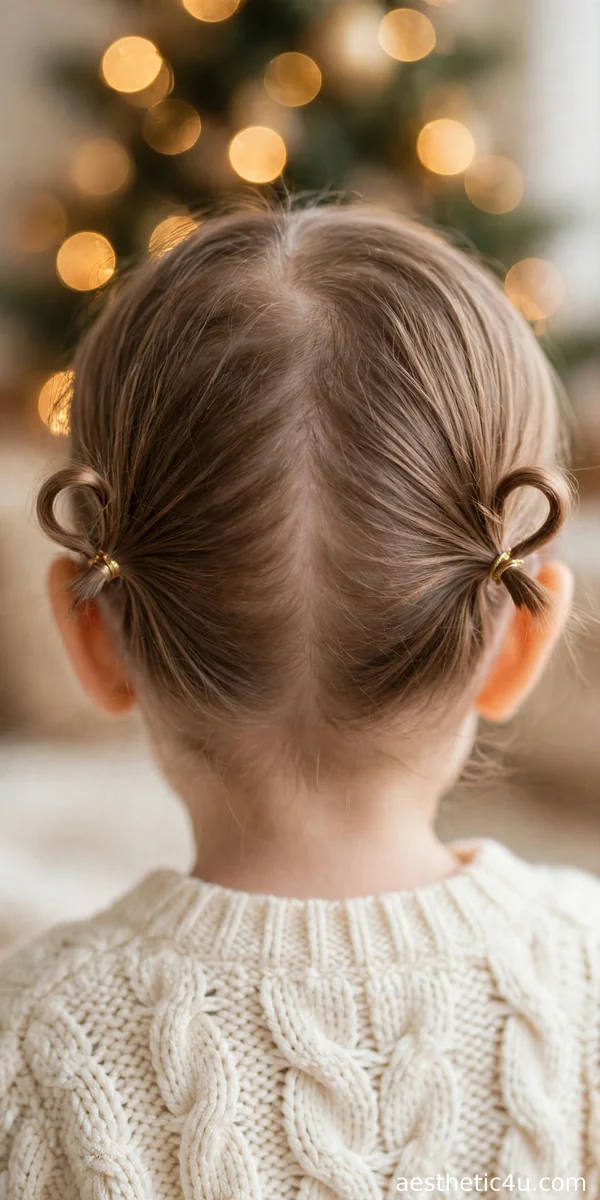
Part the hair down the middle and make two low pigtails behind the ears with gold elastics. On the last wrap of each elastic, pull the ponytail only halfway through to create a looped bun instead of a full tail. Fan the loop open with your fingers and wrap the leftover tail once around the base of the loop, tucking the end into the elastic. Pull the loops gently to even them out, and add a tiny bow at the top of each loop for holiday color. You need two gold elastics and optional bows. Time: four minutes. Difficulty: easy.
These are best for medium to long hair, straight or wavy, and they suit active toddlers because nothing hangs in the face. They are my favorite pick for a holiday playdate since the loops bounce when she walks and almost never fall apart. One caveat: on very fine hair the loops can look skimpy. Tease the pigtail lightly with a comb before looping and the loop will look twice as full.
7. Faux-Hawk Strip with Mini Red Bow Clips
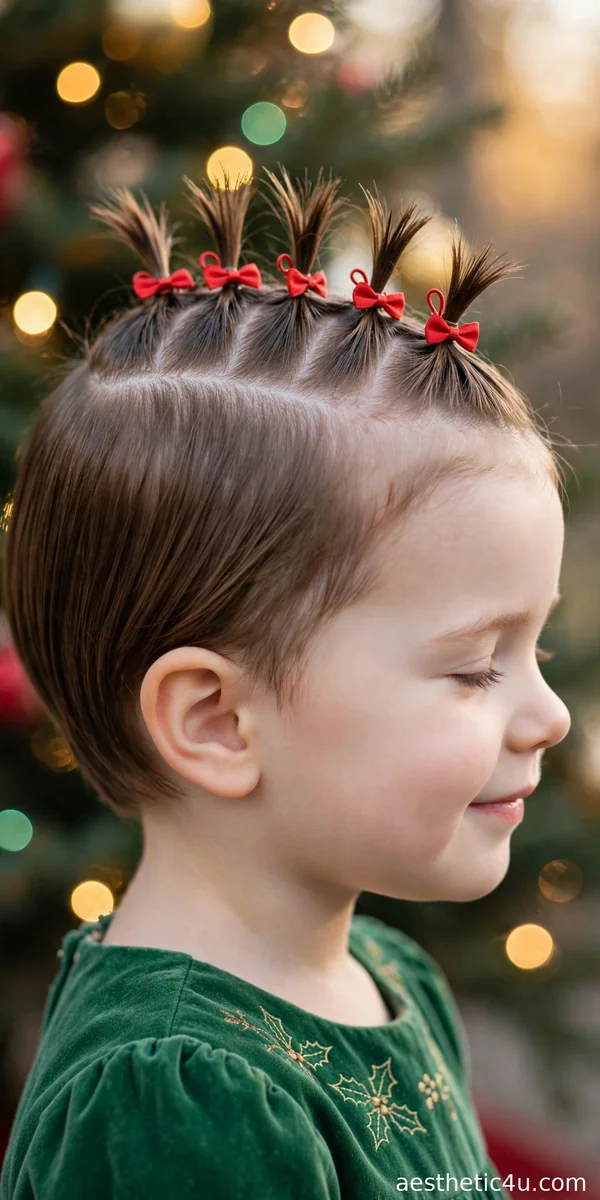
Work with slightly damp hair for control. Use a comb to define a two-inch strip from the forehead straight back to the crown, clipping the side hair flat and smooth. Divide the strip into five or six small sections, securing each with a tiny elastic, then push each section upright with a dab of kids’ gel to form a spiky row. Clip one mini red bow onto each section, alternating them along the strip. Smooth the sides with water. You need a comb, mini elastics, gel, and six tiny red bow clips. Time: six minutes.
This is the fun pick for toddlers with at least two inches of hair on top, boys or girls, and it photographs with so much personality. I love it for the Christmas party because the little red bows do all the festive work and it washes out with one shampoo. Honest caveat: skip heavy adult wax. Toddler scalps are sensitive, and a light kids’ formula gives the same spikes without the buildup or the tears at bath time.
8. Toddler Chignon with Pearl Clip
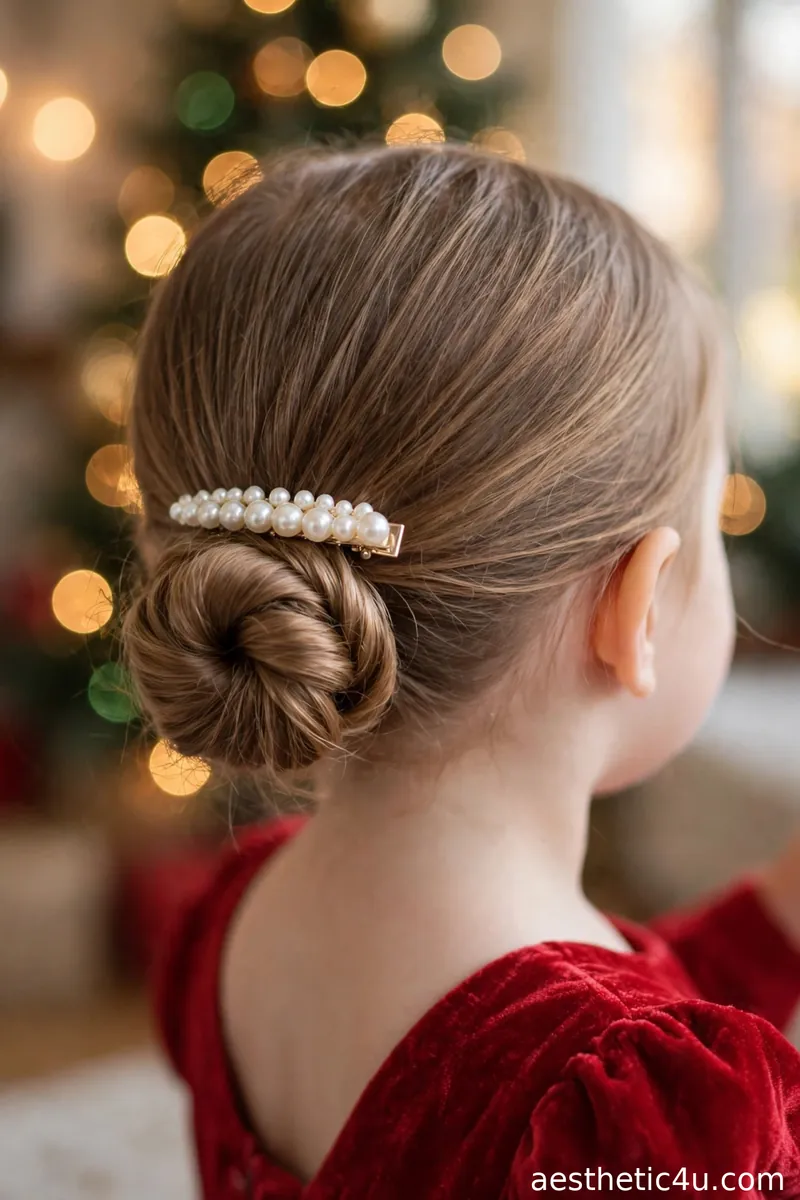
Brush the hair smooth into a low ponytail at the nape with a bristle brush, using a little water to tame flyaways. Twist the ponytail and coil it against the head, securing it with two or three bobby pins pushed in from different angles so the bun feels anchored. Slide a pearl clip just above the bun, catching a small section of hair so it does not slide. Smooth the crown with your palms and finish with a spritz of kids’ detangler for shine. You need a brush, three bobby pins, and a pearl clip. Time: five minutes. Difficulty: easy.
This suits medium to long hair and looks lovely on oval and heart-shaped faces. If you want your toddler to look like a little lady for church or the formal family photo, this is the one I would choose. Pro tip: place the bun slightly off-center. A perfectly centered chignon can look severe on a small child, while a soft side placement looks sweet and keeps the pearl clip visible from the front.
9. Simple Side Part with Gold Clip
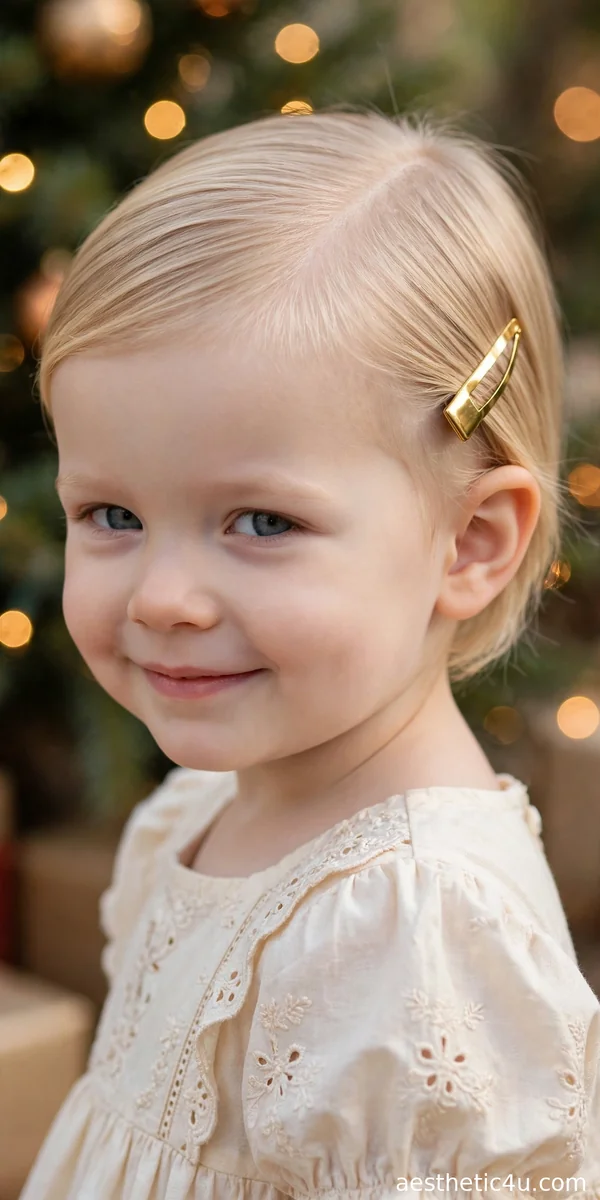
Comb the hair neatly with a clean side part, working from front to back in one smooth line. Brush both sides flat and smooth, misting lightly with water if there are flyaways. Take the smaller front section on the heavy side of the part and sweep it back, securing it with one gold barrette or snap clip placed about two inches above the ear. Check that the clip lies flat against the head so it does not catch on clothing. That is the entire style. You need a comb and one gold clip. Time: ninety seconds. Difficulty: beginner.
This is the universal option. It works for boys and girls, any hair type, any length past the ears, and any face shape. I love how one small clip can change the whole look, which makes this my emergency pick when you are already running late. My only caveat: choose a clip with smooth edges and a gentle grip. Cheap clips with sharp teeth pull fine toddler hair and turn a ninety-second style into a meltdown.
10. Baby Bubble Braid Ponytail
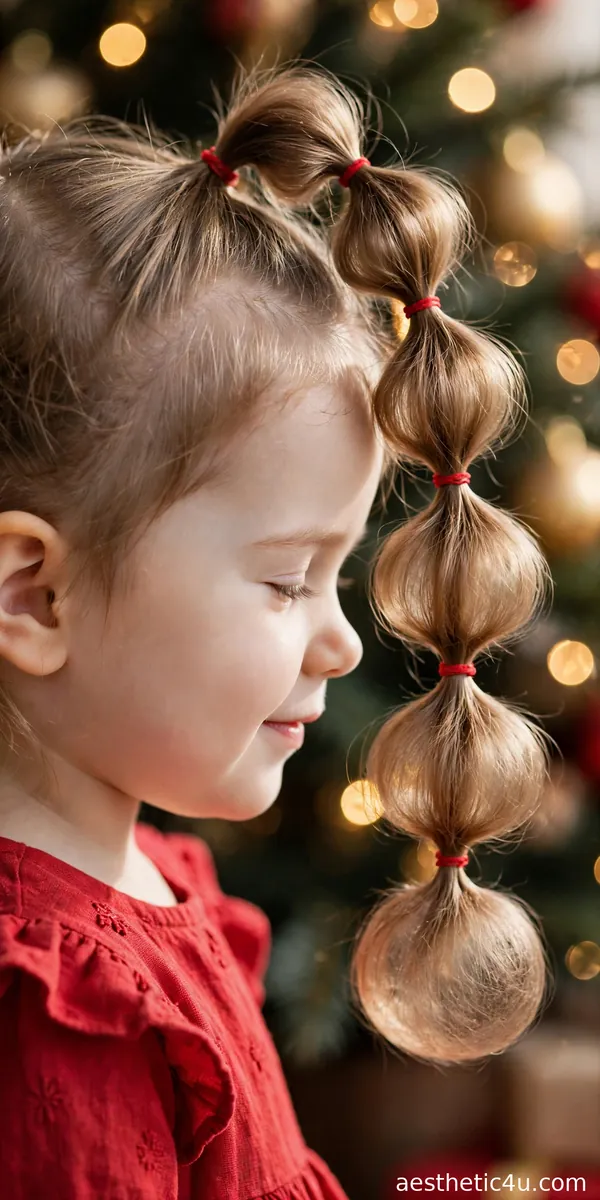
Gather the hair into a high ponytail at the crown and secure it firmly with a snag-free elastic. Place a second small elastic two inches down the ponytail, then gently pull the hair between the two elastics outward to puff it into a round bubble. Repeat down the length, spacing the elastics evenly, and puff each section a little wider than the one above it for a graduated look. Use clear or red mini elastics to match the season. You need four to six mini elastics. Time: five minutes. Difficulty: easy.
This is best for medium to thick hair with enough length for at least three bubbles, and it survives naps, car seats, and playground time better than almost anything. Kids love it because it looks like a toy, which means less fussing during styling. Honest tip: do not puff the first bubble too wide. A slim top bubble and fuller lower ones give the prettiest shape and keep the ponytail from tipping forward on small heads.
Keep exploring: Cute Christmas Hairstyles
11. Braided Pigtails with Red Elastics

Part the hair cleanly down the middle with the end of a rattail comb. Gather each side into a high pigtail above the ears and secure with a small elastic. Divide one pigtail into three equal strands and braid straight down, crossing the outer strands over the middle, keeping gentle even tension. Secure the end with a small red elastic, then repeat on the other side. Run your fingers down each braid once to smooth any bumps. You need a comb and four small elastics. Time: six minutes. Difficulty: easy.
These suit medium to long straight or wavy hair and flatter every face shape, and they survive active toddlers because nothing hangs in the face. They are my favorite pick for a holiday playdate since the braids bounce when she walks and stay neat for hours. One caveat: do not pull the elastics too tight at the scalp. Snug holds fine, but tight braids on delicate toddler edges cause headaches and breakage, so keep the top of the braid comfortable.
12. Holiday Half-Up with Plaid Bow
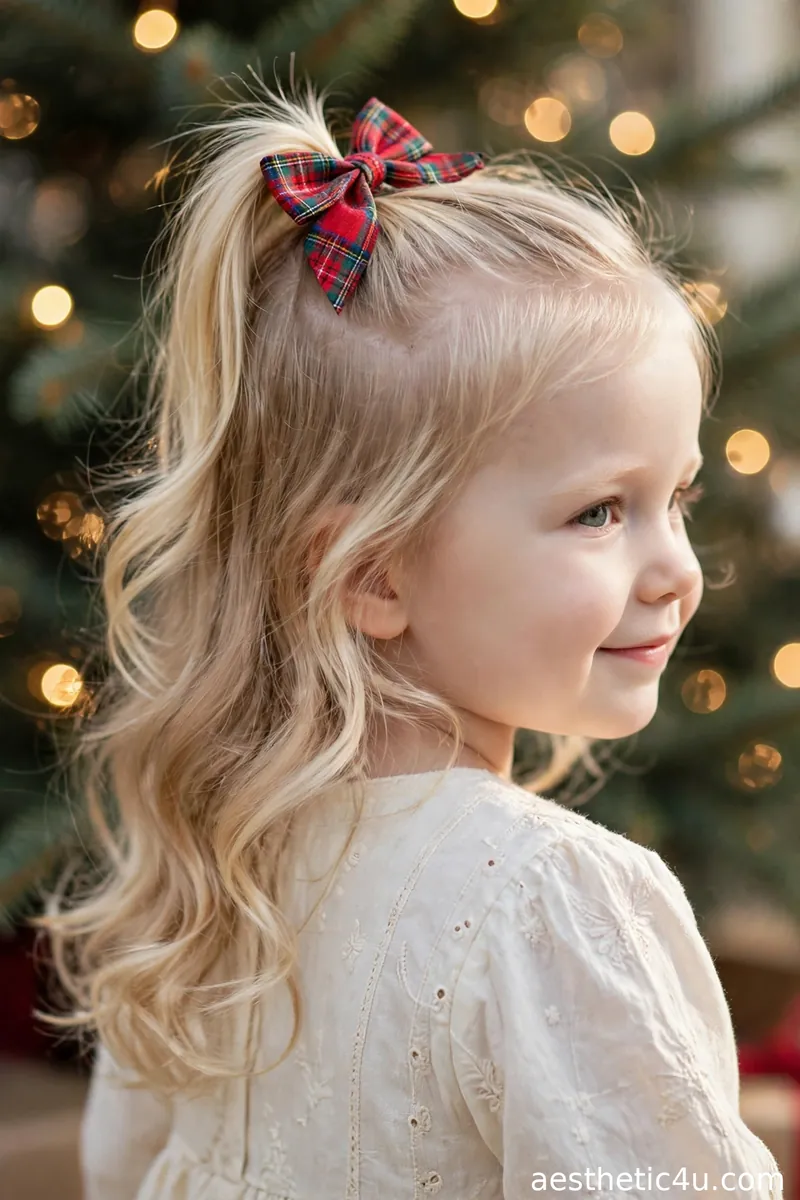
Section the top half of the hair from temple to temple and gather it into a small ponytail at the crown. Secure with a thin elastic, then wrap the plaid bow’s attached band over it so the bow sits right at the base. Leave the bottom half loose, brushing it smooth or letting natural waves fall. Position the bow slightly to one side rather than dead center for a softer look. If the bow has alligator clips, clip it over the elastic for extra security. You need one elastic and a plaid bow. Time: three minutes. Difficulty: beginner.
This suits medium to long hair of any texture and flatters round faces because the crown height adds balance. It screams Christmas while staying easy enough for a school-day morning, and the plaid bow does all the holiday work. My caveat: heavy bows slide off fine hair. If the bow keeps slipping, anchor the ponytail first with a small clear elastic and clip the bow onto that instead of onto bare hair.
13. Soft Toddler Curls with Headband
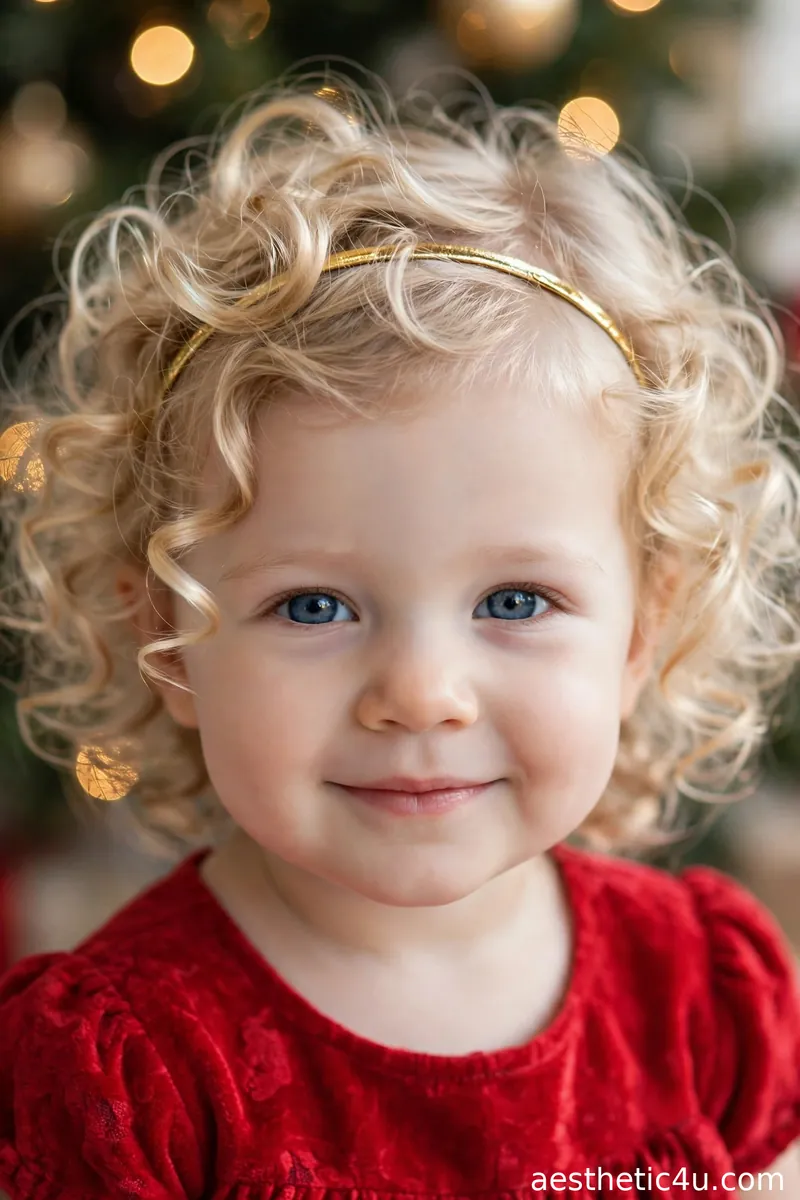
Start with clean, damp curls and scrunch in a pea-sized amount of kids’ leave-in conditioner to define them. Let the hair air dry or diffuse on the coolest setting, then shake the roots gently with your fingertips for volume without breaking the curl clumps. Slide a thin gold headband into place just behind the hairline, letting the curls fall naturally over and around it. Let one or two curls spill forward at the temples. You need leave-in and one slim headband. Time: three minutes plus drying.
This is the comfort-first pick for babies and young toddlers with curly hair, and the slim gold band suits every face shape. Nothing is pulled tight, so there are no tears and no complaints, which makes it perfect for little ones. For a toddler who will not tolerate pins or clips, I reach for a headband first. One honest note: skip hard plastic bands. They press behind ears and get ripped off fast. A slim, flexible band stays comfortable.
14. Mini French Braid Crown

Part the hair down the middle and start a French braid at one temple, adding hair from the hairline as you curve the braid along the front of the head toward the other temple. Keep the braid snug against the scalp so the crown looks delicate and even. When you reach the far temple, continue into a three-strand braid, then tuck the tail under the starting point and pin it with two bobby pins. Leave the center hair loose or gather it into a bun. You need a comb, one elastic, and two bobby pins. Time: ten minutes. Difficulty: medium.
This needs medium-length hair, at least shoulder-grazing, and it looks stunning on oval and heart-shaped faces. It looks like a princess from a Christmas story, so I save it for the big family photo. My honest advice: this is a ten-minute style on a good day. Do not attempt it for the first time with a tired toddler. Practice on a doll or a willing older sibling first, then it becomes a five-minute crown.
15. Sprinkle-Colored Twists
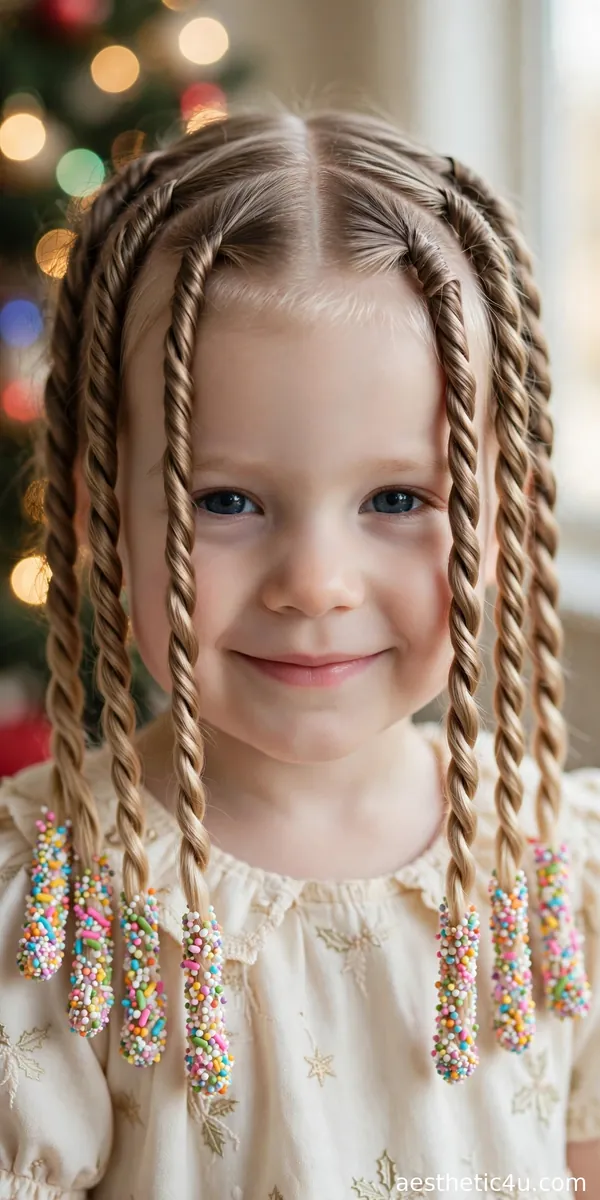
Make a center part and divide the hair into even sections across the head. Take each section and create a two-strand twist, securing the end with a tiny elastic. Coat the last inch of each twist with a dab of kids’ gel, then roll the sticky ends through a plate of pastel sprinkles so the colors cling to the hair. Pinch each coated end gently so the sprinkles set. When the day is done, the sprinkles wash out with one shampoo. You need mini elastics, kids’ gel, and a small bowl of sprinkles. Time: ten minutes.
This works on any hair type with enough length to twist, and the pastel sprinkles suit every skin tone and outfit. Toddlers adore this because it looks like candy in their hair, and it photographs like pure magic. My one rule: do the sprinkle-coating over a tray, not over your lap. Loose sprinkles get everywhere. And skip this if your toddler still mouths everything, since even food-safe sprinkles do not belong in hair on very young toddlers.
Keep exploring: Easy Christmas Hairstyles
16. Messy Top Bun with Tinsel Scrunchie
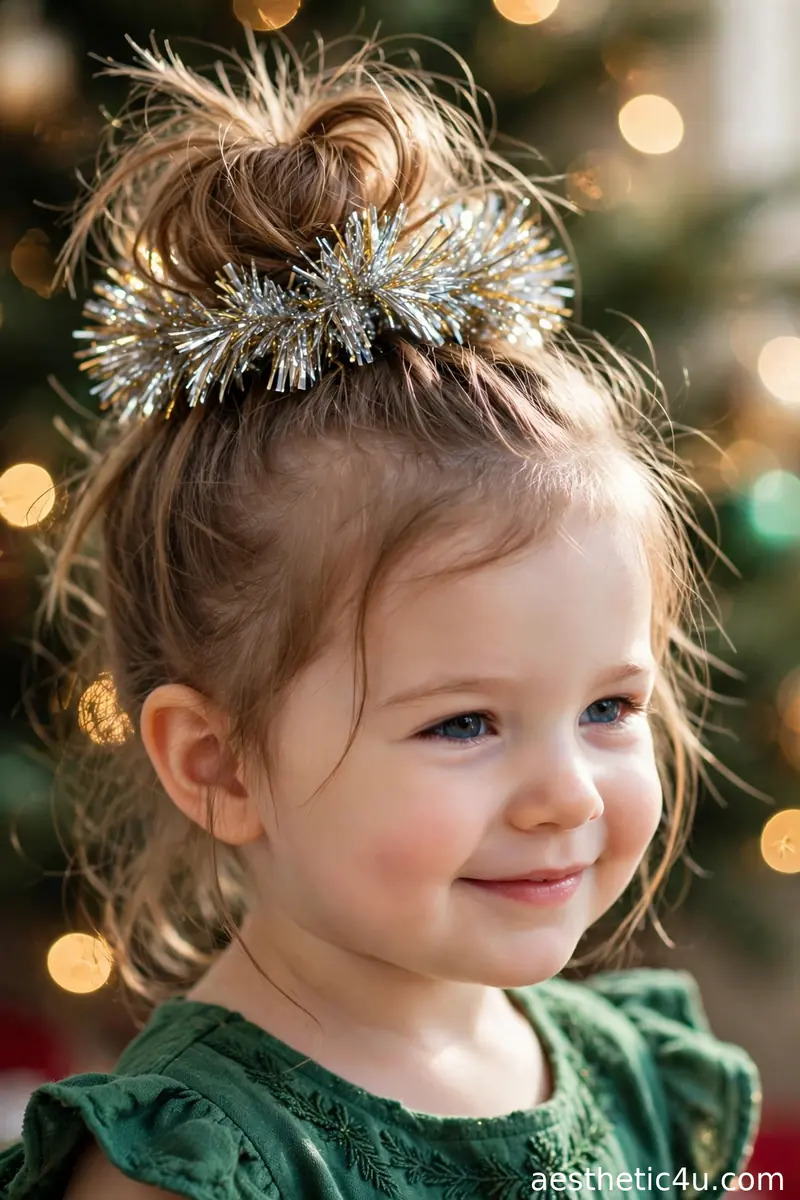
Flip the head forward and gather the hair into a loose high ponytail, securing it with one elastic. Twist the ponytail loosely around its base and pin it with two bobby pins, leaving the ends poking out for that deliberate messy look. Wrap a tinsel-covered scrunchie around the base of the bun, fluffing the tinsel outward so it catches the light. Pull two thin wisps free at the temples and let them frame the face. You need one elastic, two bobby pins, and a tinsel scrunchie. Time: two minutes. Difficulty: beginner.
This suits medium to long hair, straight or wavy, and it is the ultimate Christmas-morning style because it takes seconds once you have done it once. The tinsel scrunchie makes it instantly festive with zero skill. One honest caveat: tinsel sheds. Give the scrunchie a good shake over the sink before it goes near your toddler, and keep it away from the mouths of very young toddlers who explore everything by taste.
17. Short Toddler Bob with Beret
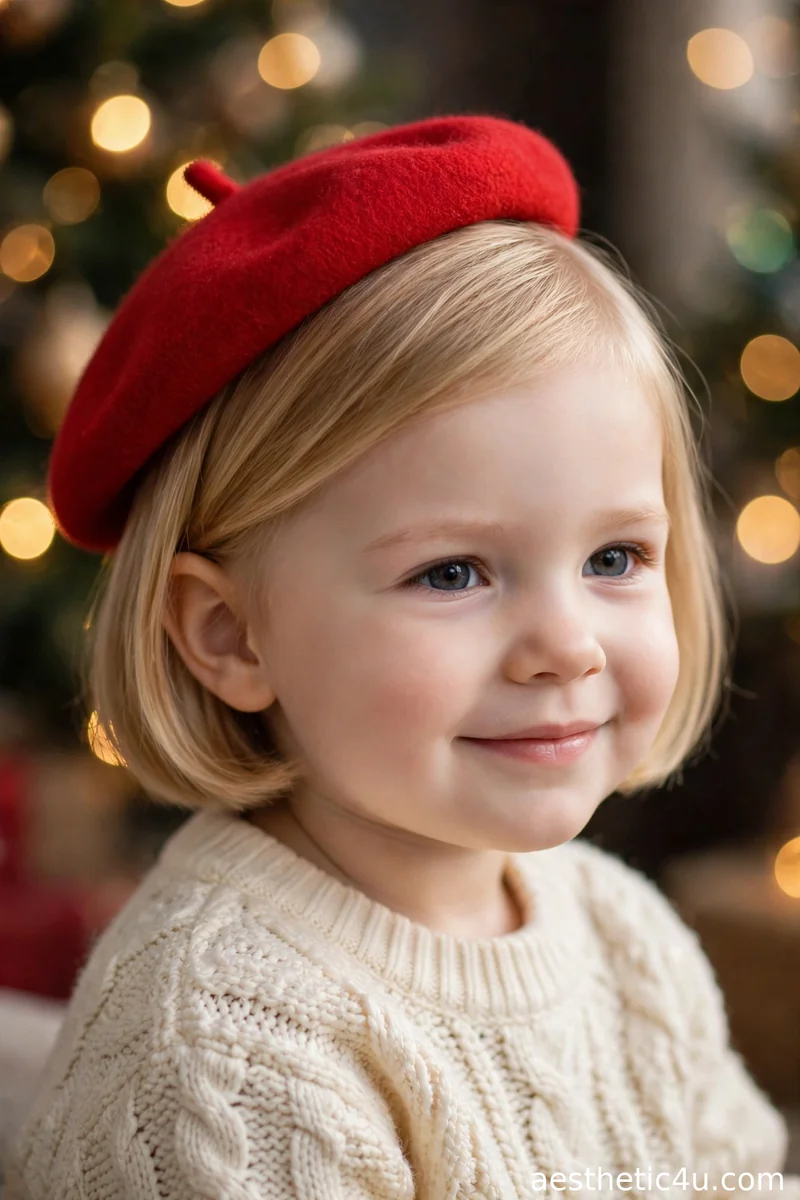
Brush the bob smooth with a soft bristle brush, misting lightly with water to settle any morning cowlicks. Tuck both sides neatly behind the ears so the shape of the cut shows. Place a tiny beret tilted to one side, positioning it just behind the hairline, and secure it with one small snap clip hidden underneath so it survives hugs and wind. Smooth the crown once more with your palms. You need a brush, a water mister, a beret, and one clip. Time: three minutes. Difficulty: beginner.
This is proof that short hair can be festive too. It works on chin-length bobs and pixie cuts, and the beret keeps little ears warm at outdoor holiday markets. So cute and so practical. My tip: let your toddler pick the beret color. A child who chose her own red beret will actually keep it on, and a forced accessory lasts about four minutes. Choice equals cooperation at this age.
18. Heart-Part Pigtails
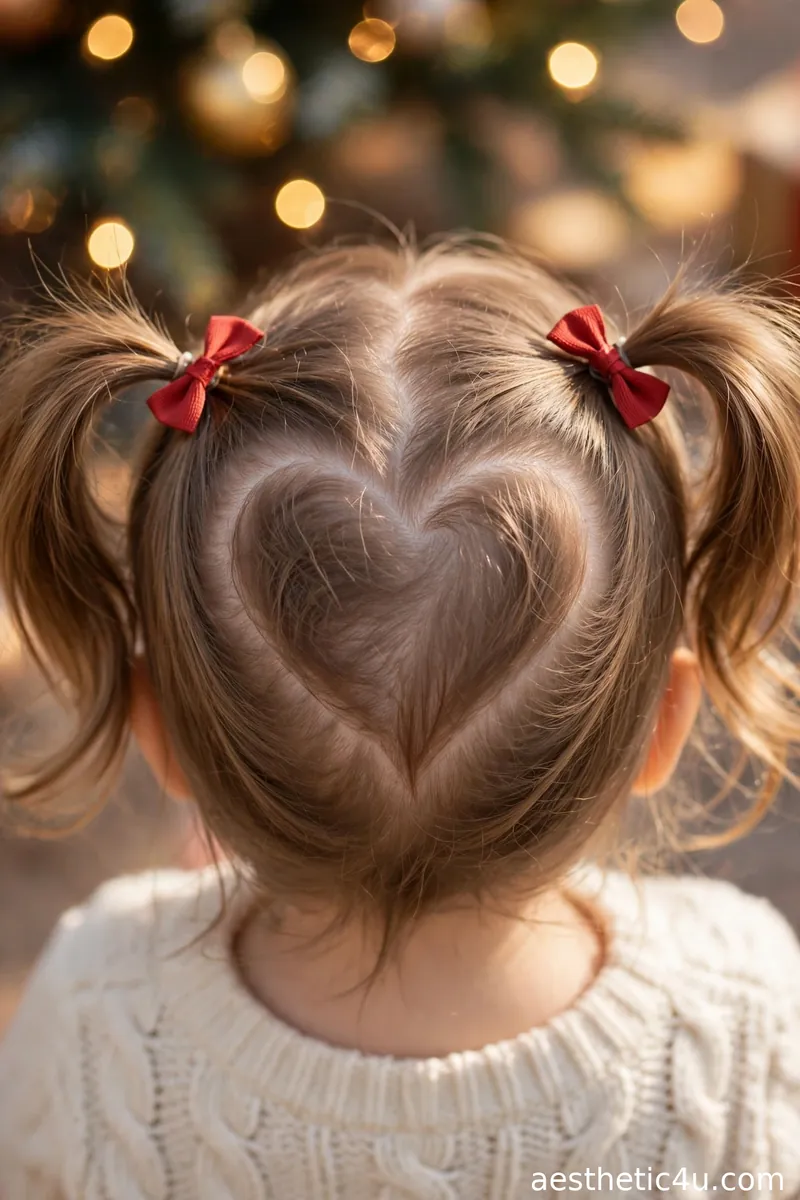
Use the end of a rattail comb to draw a heart shape on the crown: two curved humps at the front meeting in a point toward the back. Clip one side up while you work on the other. Gather the hair from each hump into a high pigtail right at the top of the heart, securing with elastics. Smooth the heart outline so the shape reads clearly, and add bows at the base of each pigtail. You need a rattail comb, two elastics, and optional bows. Time: eight minutes. Difficulty: medium, but the part does all the talking.
This works on medium to thick hair with enough length for high pigtails, and the heart shape flatters every face. It looks complicated but it is just a clever part, which is why every photo of it gets a million compliments. My honest advice: draw the heart with the comb first and check it in the mirror before adding elastics. Fixing the part takes ten seconds; fixing it after the pigtails are in takes ten minutes.
How to Choose the Right Style for You
Start with your toddler’s hair type and your morning reality, not the photo in your head. Fine, wispy hair holds buns and clips best when it is slightly damp, and it needs lightweight accessories because heavy bows slide straight off. Thick or curly hair does better with scrunchies and twists that work with the volume instead of fighting it. For length, anything above the ears limits you to parts, clips, and headbands, and that is completely fine. A gold clip on a neat side part looks just as festive as an elaborate braid.
Next, match the style to the occasion and the schedule. A two-minute top knot beats a ten-minute crown on Christmas morning when presents are calling. Save the French braid crown and the heart part for the planned photo shoot when your toddler is fed, rested, and cooperative. For events with food, car seats, or naps, choose styles that sit flat at the back of the head. Low buns, bubble braids, and twists survive car seat headrests, while high buns get squashed. Finally, be honest about your skill level. If you cannot braid, the two-twist pigtails give you the same polished look with zero braiding. The best toddler style is the one you can do calmly, because a relaxed parent makes a happy photo.
Styling Tips & Common Mistakes to Avoid
A few habits make every toddler style easier. First, always style slightly damp hair. A quick mist from a spray bottle cuts styling time in half and tames flyaways without any product. Second, prep like a pit crew: lay out every elastic, clip, and bow before your toddler sits down. You get about a three-minute cooperation window, and hunting for a bobby pin wastes half of it. Third, distract on purpose. A favorite song, a snack, or a Christmas cartoon buys you the stillness you need for the trickier parts. Fourth, finish with comfort in mind. Run your fingertip under every elastic and clip. If you cannot fit a fingertip, it is too tight for a toddler.
The mistakes I see most: pulling styles too tight at the hairline, which hurts and damages delicate edges; using adult-strength gel or hairspray, which is too harsh for toddler scalps; and choosing hard plastic headbands that dig behind the ears. The fixes are simple: keep everything finger-loose, use only kids’ formulas, and pick soft stretchy bands. And if a style falls apart mid-event, do not panic. A crooked bow in a happy photo beats a perfect style with tears every single time.
Final Thoughts
Toddler hairstyles should be quick, gentle, and full of joy, and I hope this list gave you at least one style that made you smile. Pick the one that fits your morning, your little one’s mood, and the photos you want to remember. Do not chase perfection. The best Christmas pictures are the ones where everyone is happy, even if the bow is a little crooked and one pigtail sits higher than the other. Style with love, keep it comfortable, and enjoy every wiggly, wonderful moment of the season.
Follow Us On Pinterest: Easy To Find Next Style