Sana
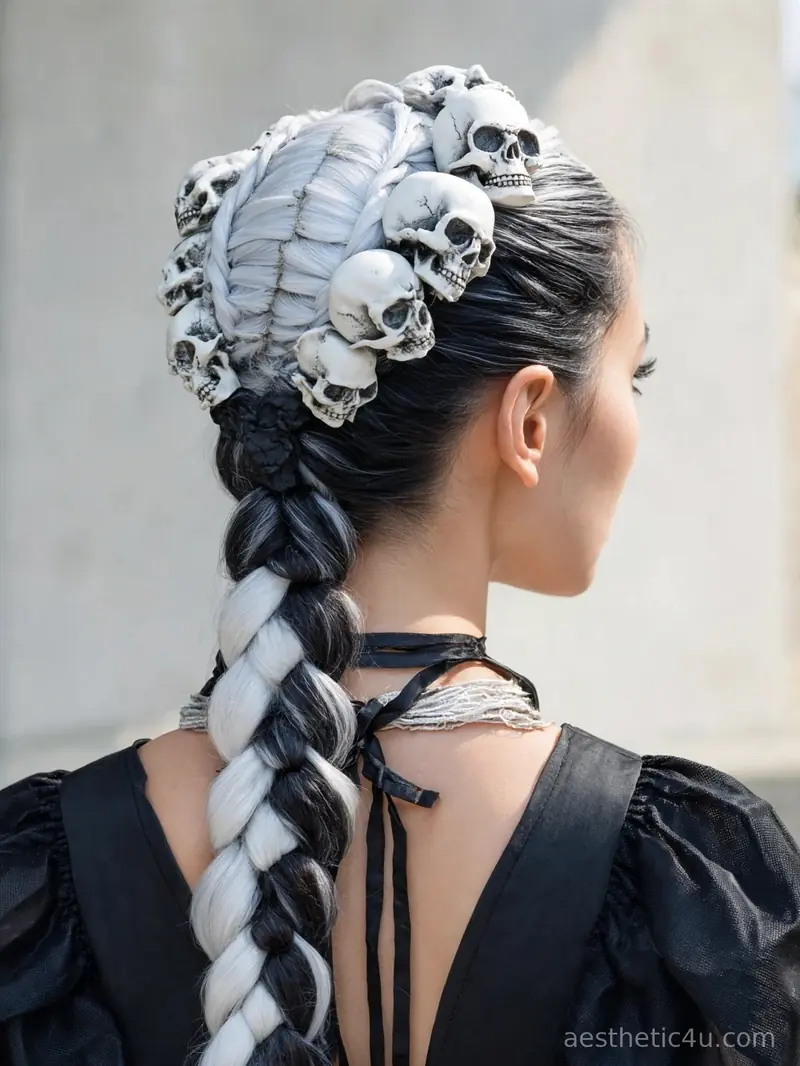
Halloween braid styles are my favorite way to carry the spooky season in your hair, and this October the creepy-cool braids are trending hard. Every fall, spooky braids surge on Pinterest because they do something no other hairstyle can: they turn your hair into part of the costume. Skeleton partings, spiderweb crowns, and bone-toned plaits read as Halloween from across the room, which means your hair does the costume talking. Braids hold their shape all night, they photograph beautifully, and they turn a simple black outfit into a full look.
This list goes from skeleton-inspired partings to spider-webbed plaits, so pick the one that matches your costume energy. You will learn exactly how to build each spooky braid, which accessories sell the effect, how long each style takes, and the mistakes that ruin the illusion. As your stylist friend, I will tell you the truth: spooky braids look complicated, but most of them are simple techniques plus one clever detail. These nineteen styles prove that creepy can still be wearable. I will show you exactly how to build each one and which accessories sell the effect. Pick the braid that matches your costume energy, and wear it proudly. You have got this.
19 Halloween Braid Styles From Skeleton to Spider
Every style below is a real braid you can wear, with a dark twist baked in. I kept the techniques honest and the spooky details bold. Let us get into the looks.
1. Skull-Studded Bone Braids
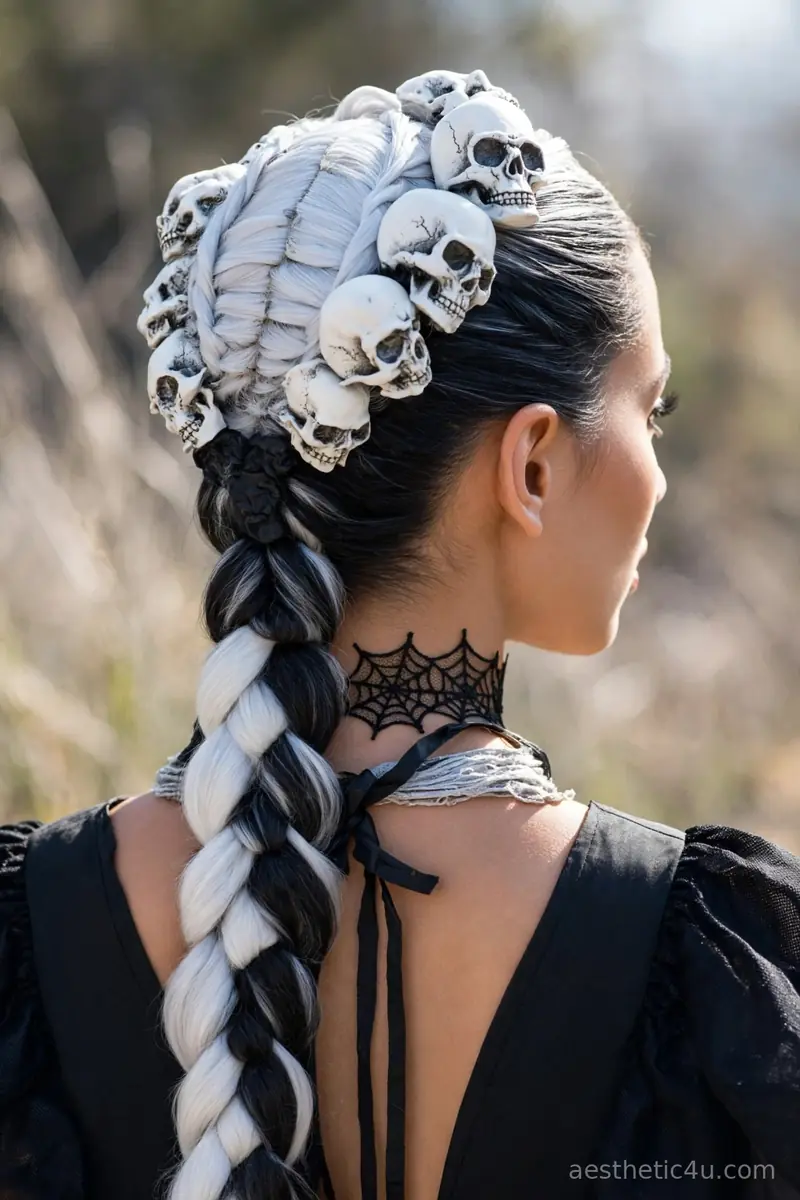
Two chunky braids woven in bone-white against black, with a cluster of small skulls pinned at the crown like a bony crown. To build it, part the hair for two braids, weave pale extensions or temporary bone-white color into the braids for the two-tone effect, secure, then pin small skull charms or clips in a tight cluster at the crown. It takes 15 to 20 minutes, difficulty easy. The contrast between the bone-white and black does all the spooky talking, and the skulls make it read Halloween from across the room.
I would wear these with a skeleton costume for full effect, because the bone-white plaits plus the skull cluster complete the story. The skulls do the heavy lifting, so the braids themselves can be simple. One honest caveat: lightweight skull charms work best, because heavy ones pull and slide. Pin each skull twice, and pack a few extras, because one lost skull ruins the symmetry.
2. Bone-Charm Side French Braid
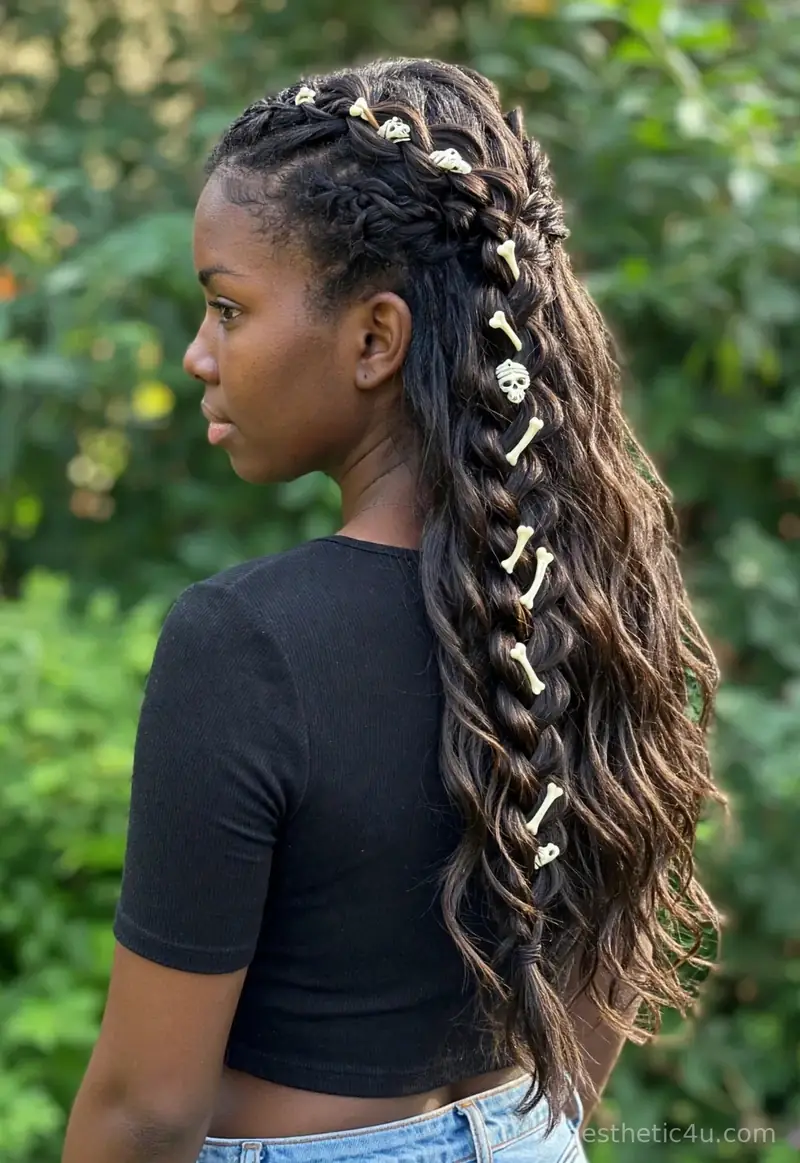
A French braid sweeps from the hairline down one side, threaded with tiny bone charms along its length. To build it, French braid a section from the front hairline down the side, feeding in hair as you go, secure, then thread small bone-colored beads or tiny skull charms onto the braid with jump rings or clear elastics. It takes 15 minutes, difficulty easy to medium. The braid itself is simple, but the bone charms turn it spooky. It works on dark or light hair, and the charms catch the light as you move.
I love this one because it is wearable spooky: pretty braid from the front, creepy detail up close. I would choose it when I want Halloween energy without a costume. It suits medium to long hair. Honest caveat: space the charms along the whole braid, not clustered in one spot, because evenly spread charms read like they wandered in. Clustered charms look planned, and spooky is better unplanned.
3. Spider-Spine Braid Down the Back
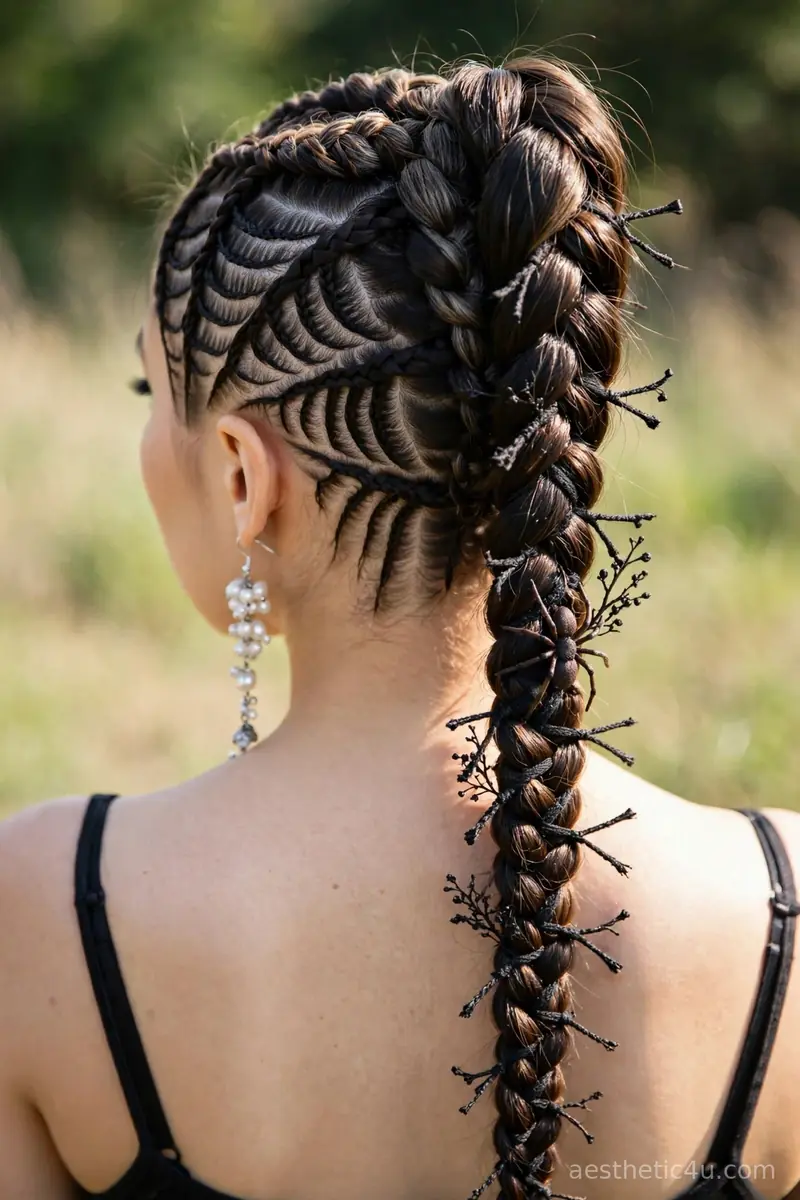
One long braid trails straight down the back like a spider’s spine, with small leg-like accent strands crossing at each knot. From behind, it looks like something crawled down your back. Creepy in the best way. To build it, braid a tight three-strand or rope braid down the center back, and at intervals pull out tiny strands and cross them over the braid like legs, securing with mini elastics. It takes 15 to 20 minutes, difficulty medium. It works on medium to long hair, and the back view is the whole point. Great for costume photos.
I would choose this if you want creepy but clean, because it is spooky without being messy. It works on medium to long hair, and the back view is the whole point, so it is great for costume photos. It suits every face shape since the detail is all behind you. My pro tip: make the leg accents from very thin strands, because thick legs look like a messy braid instead of a spider. Thin, deliberate, creepy. That is the formula.
4. Twin Skull Braids
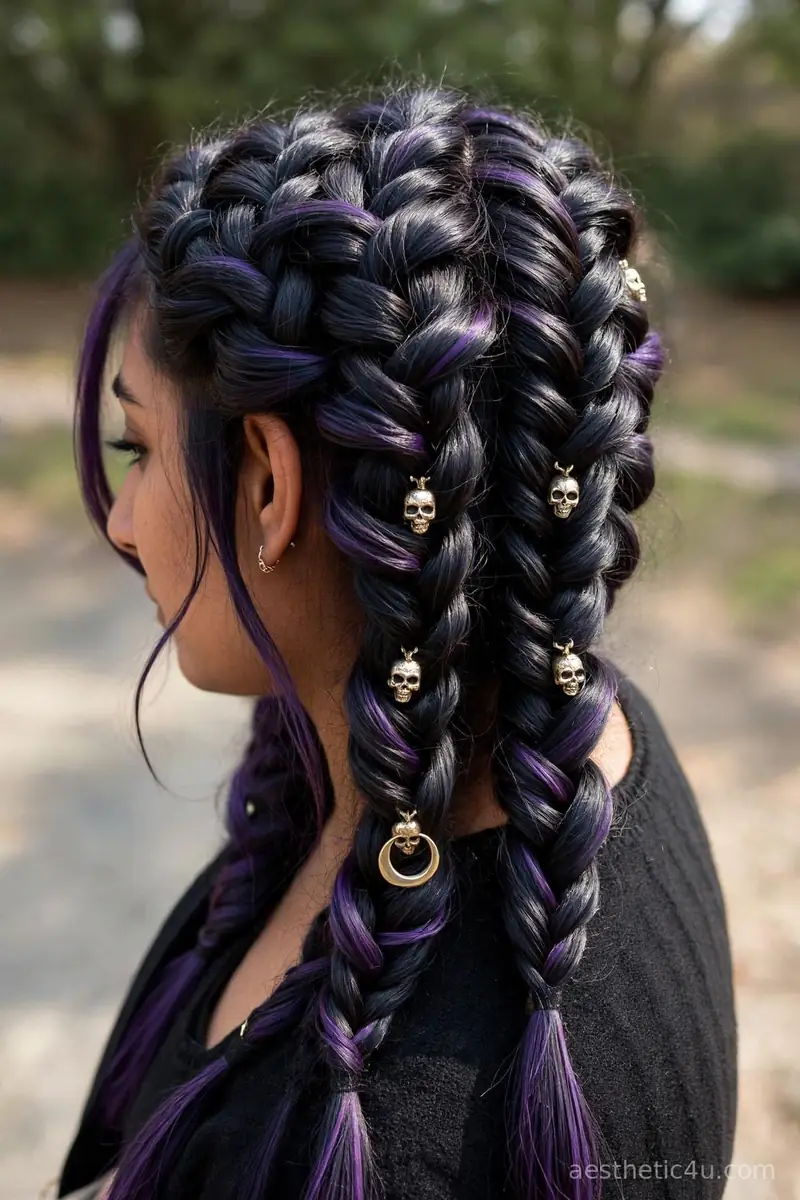
Two chunky Dutch braids start at the forehead and frame the face, with the partings drawn sharp like a skull’s cracks. Dark hair with pale streaks makes the skull effect pop. It is bold and symmetrical. Part sharply down the middle and along the hairline with a rattail comb, Dutch braid each side tightly from front to back, and secure. It takes 20 minutes, difficulty medium. They suit long faces and strong jawlines, and they also hold all night, which is a big plus. The pale streaks can be temporary color or clip-ins.
I would wear these with a skeleton costume, obviously, because the sharp partings plus the bone streaks complete the skull story. They suit long faces and strong jawlines. They also hold all night, which is a big plus for parties. One honest caveat: the skull effect depends on crisp partings, so do not rush the sectioning. Ten careful minutes on the parts makes the whole style read as intentional instead of just braids.
5. Black Widow Side Braid
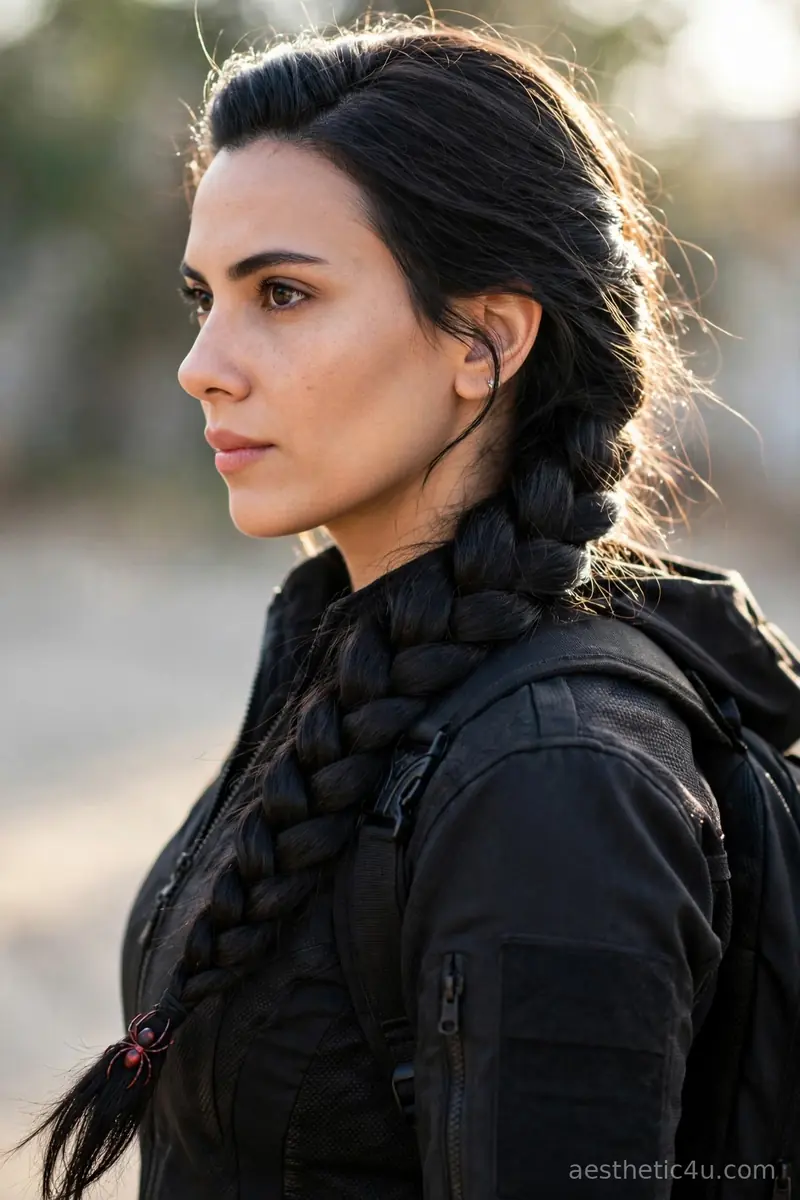
A thick side braid draped over one shoulder, jet black, with a small red spider accent at the tail. The red pops like a black widow’s warning mark. Simple and deadly. Braid a chunky three-strand plait over one shoulder, pancake it for fullness, secure, and pin a small red spider charm or clip at the tail. It takes 10 minutes, difficulty easy. It suits everyone, honestly, but the red accent needs dark hair to shine. Elegant with an edge, perfect for a witch or vampire costume.
I would pick this for a witch or vampire costume, because the black plus the red warning mark tells the whole story. It suits everyone, honestly, but the red accent needs dark hair to shine. Elegant with an edge. Honest caveat: one accent is perfect, five is cluttered. The black widow effect works because the single red mark is a surprise. Resist the urge to add more charms and let the one red spider do its job.
Keep exploring: 21 Spider Braid Halloween Hairstyles: Web-Inspired Plaits
6. Spiderweb Crown Braid
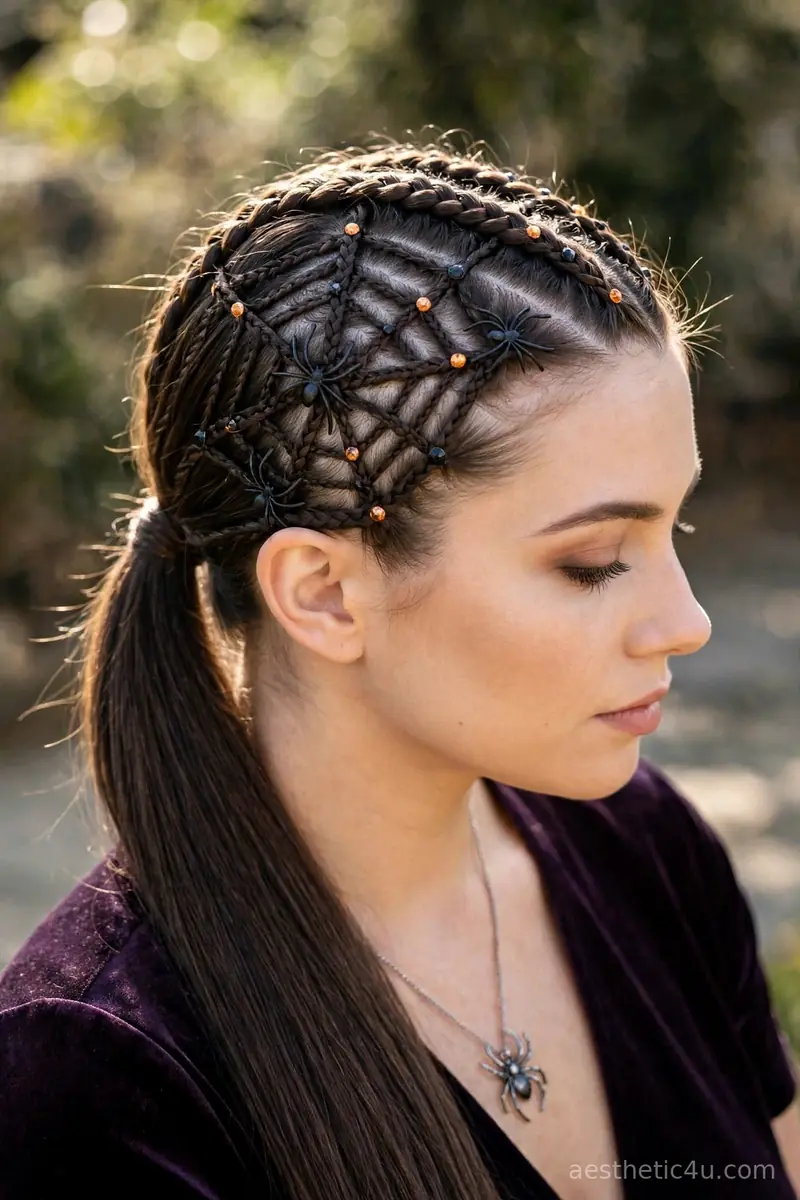
A crown braid circles the head, with thin crossing strands woven over the top to form a web. It looks like a spiderweb caught on your crown. Delicate but dark. Braid a crown or halo braid first, then take thin strands and cross them over the crown in a web pattern, pinning as you go. It takes 20 to 25 minutes, difficulty medium to hard. It suits fine hair because the webbing adds volume illusion. It reads elegant from far and creepy up close, which is exactly the duality you want.
I would choose this for a formal Halloween event, because it reads elegant from far and creepy up close. It suits fine hair because the webbing adds volume illusion. It is the sophisticated spooky choice. One honest caveat: the web strands need to be thin and deliberate, because thick crossing strands just look like a messy crown. Take thin sections, cross them with intention, and pin each crossing. Patience is what makes the web read.
7. Blonde Double Dutch Braids
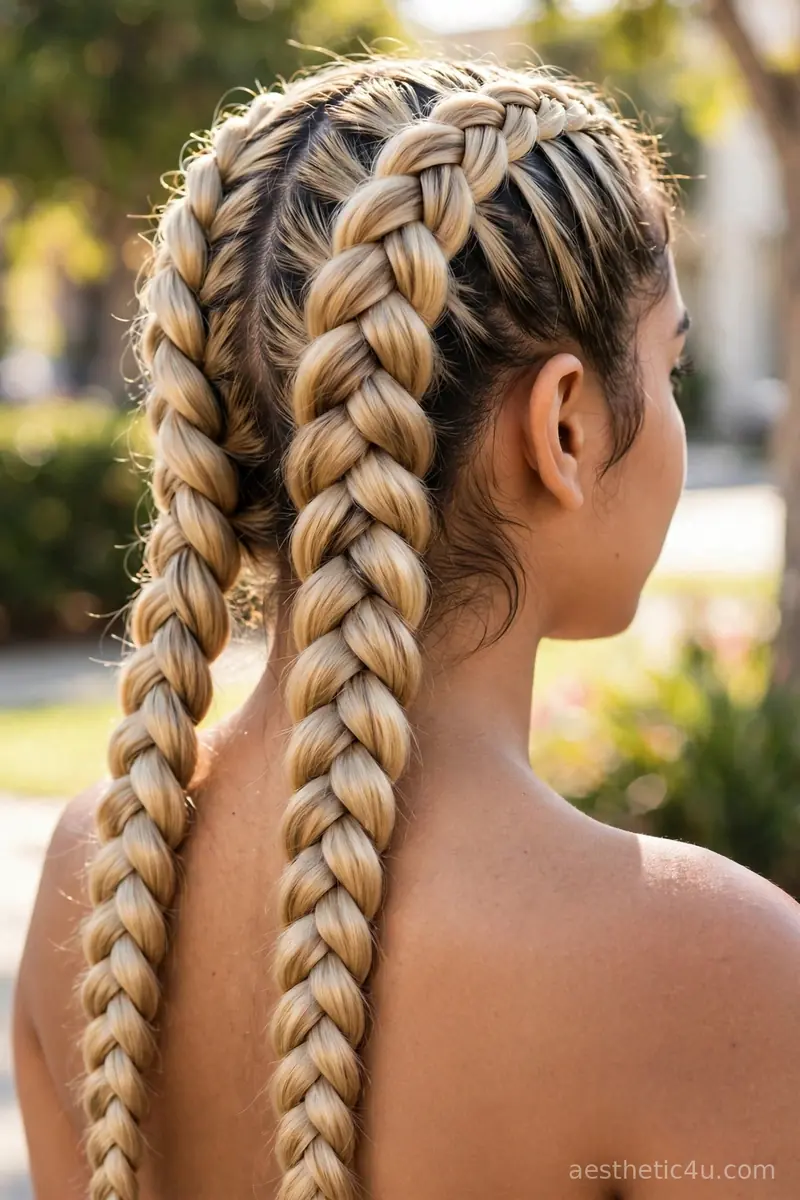
Two chunky Dutch braids run from the hairline down each side, ending past the shoulders in soft blonde plaits. Part sharply down the middle, then Dutch braid each side by crossing the outer strands under the middle while feeding in hair from the hairline, keeping the sections snug to the scalp. Secure each with a clear elastic. It takes 15 to 20 minutes, difficulty easy to medium. The raised braids look bold and symmetrical, and the blonde tone keeps them bright and fun for a Halloween night out.
Double Dutch braids are my pick for a playful Halloween costume because they are cute, sporty, and they stay put through dancing. I love how the raised braids catch the light. They suit medium to long hair. One honest caveat: crossing under instead of over feels backwards the first time, so do a quick practice run. Once your fingers learn it, you will never go back.
8. Vertebrae Pull-Through Braid
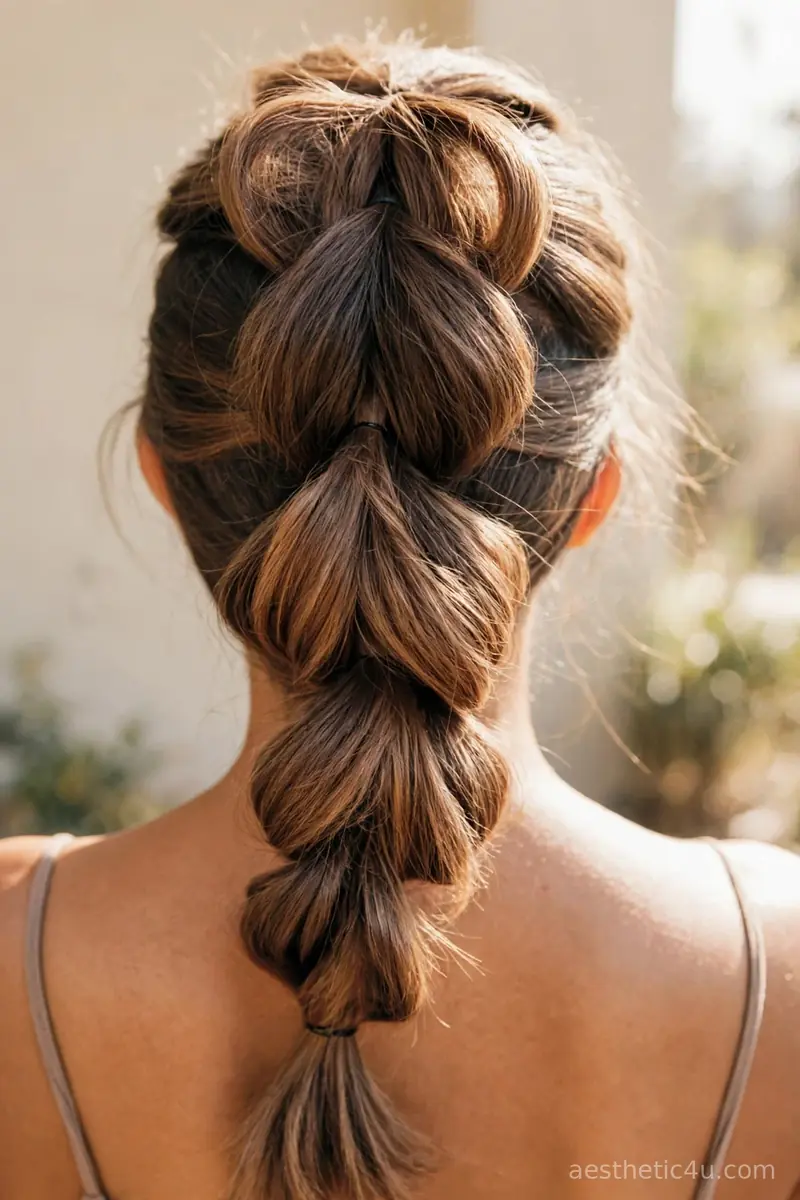
A pull-through braid stacked section by section so each bubble looks like a vertebra in a spine. It is thick, textured, and reads exactly like a backbone. No fancy tools needed. Build stacked mini ponytails down the back, fan each bubble round and full rather than wide, secure. It takes 15 minutes, difficulty easy. It fakes serious volume on thinner hair, and the spine effect is strongest on darker shades. Comfortable all night too, since there is no tight braiding pulling at the scalp.
I would pick this if your hair is on the thinner side, because it fakes serious volume better than any other style here. The spine effect is strongest on darker shades, and it is comfortable all night too. It suits medium to long hair. My pro tip: fan the bubbles round instead of wide, because round bubbles read as vertebrae while wide bubbles just read as a pull-through. That shaping choice is what creates the spine illusion.
9. Spider-Leg Micro Accent Braids
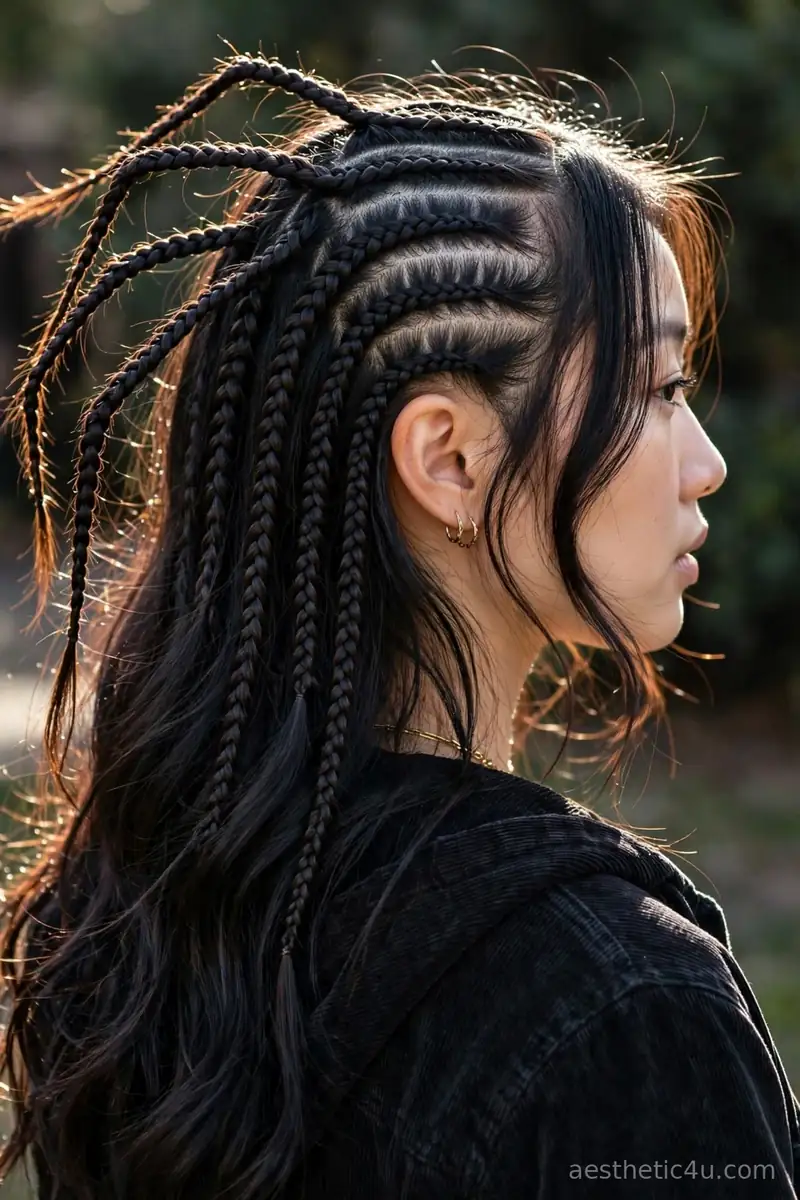
Several tiny micro braids fan out from the crown like spider legs over loose hair. They are subtle from the front and wild from the back. The texture contrast is the whole trick. Braid six to eight tiny three-strand plaits at the crown, angling them outward like legs, secure each with a mini elastic, and leave the rest of the hair loose. It takes 15 to 20 minutes, difficulty easy to medium. They suit thick hair best, since the micro braids need something to anchor into. Edgy without trying too hard.
I would choose these for texture lovers, because the contrast between the tiny braids and the loose hair is so cool. They suit thick hair best, since the micro braids need something to anchor into. Edgy without trying too hard. One honest caveat: micro braids on fine hair can look sparse and get lost, so this one really is for medium to thick hair. On the right hair it is striking, on the wrong hair it disappears.
10. Skeleton-Key Rope Twist
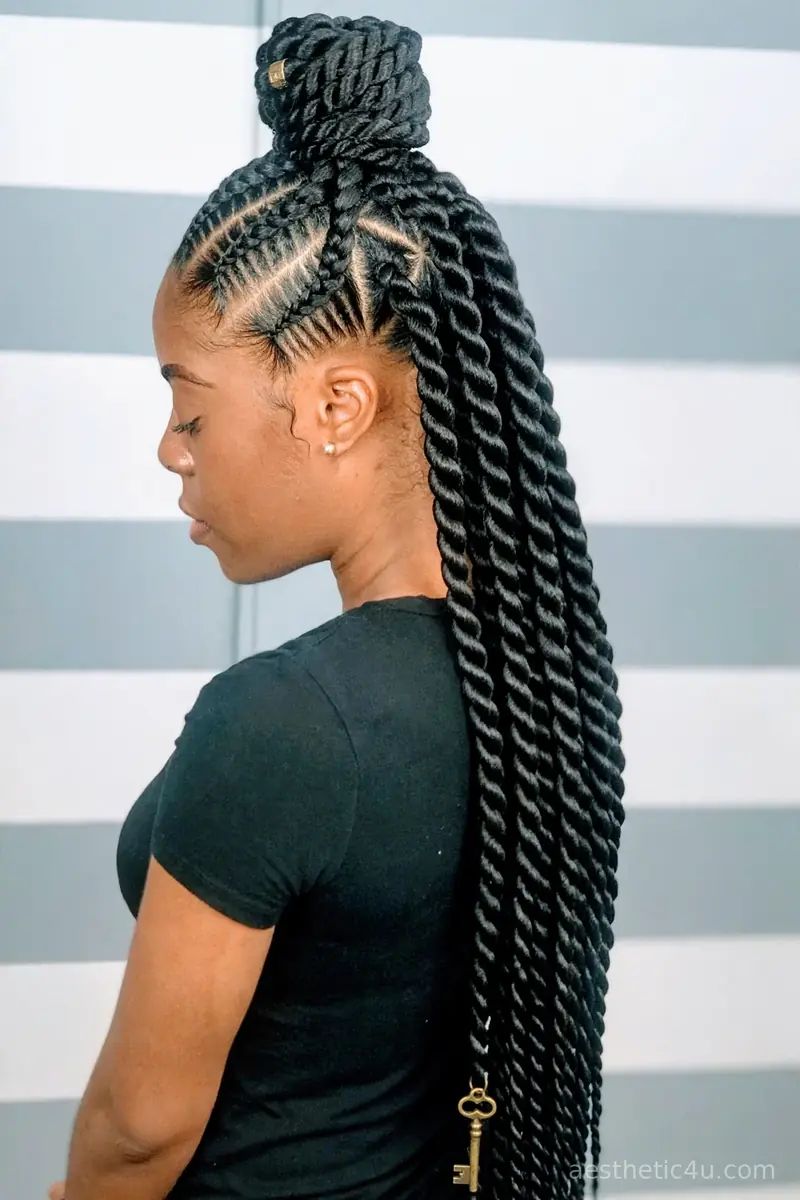
A heavy rope twist with an old-fashioned key charm hanging from the end. The twist itself looks like a rope from a haunted house, and the key sells the story. One accessory, big payoff. Twist two sections into a rope braid, secure, and hang a vintage-style key charm from the end with a small ring or thread. It takes 10 minutes, difficulty easy. It suits medium hair and updos alike. The charm does the heavy lifting, so keep the twist clean and smooth.
I would wear this with anything Victorian or ghostly, because the key tells a haunted-house story instantly. It suits medium hair and updos alike. The charm does the heavy lifting, so keep the twist clean. Honest caveat: a heavy metal key pulls, so choose a lightweight charm or it will drag the twist down by midnight. Lightweight charms look identical in photos and stay put. Your neck will thank you.
Keep exploring: 25 Simple Halloween Hairstyles for Women: No-Fuss Party Looks
11. Twin Cobweb Fishtail Braids
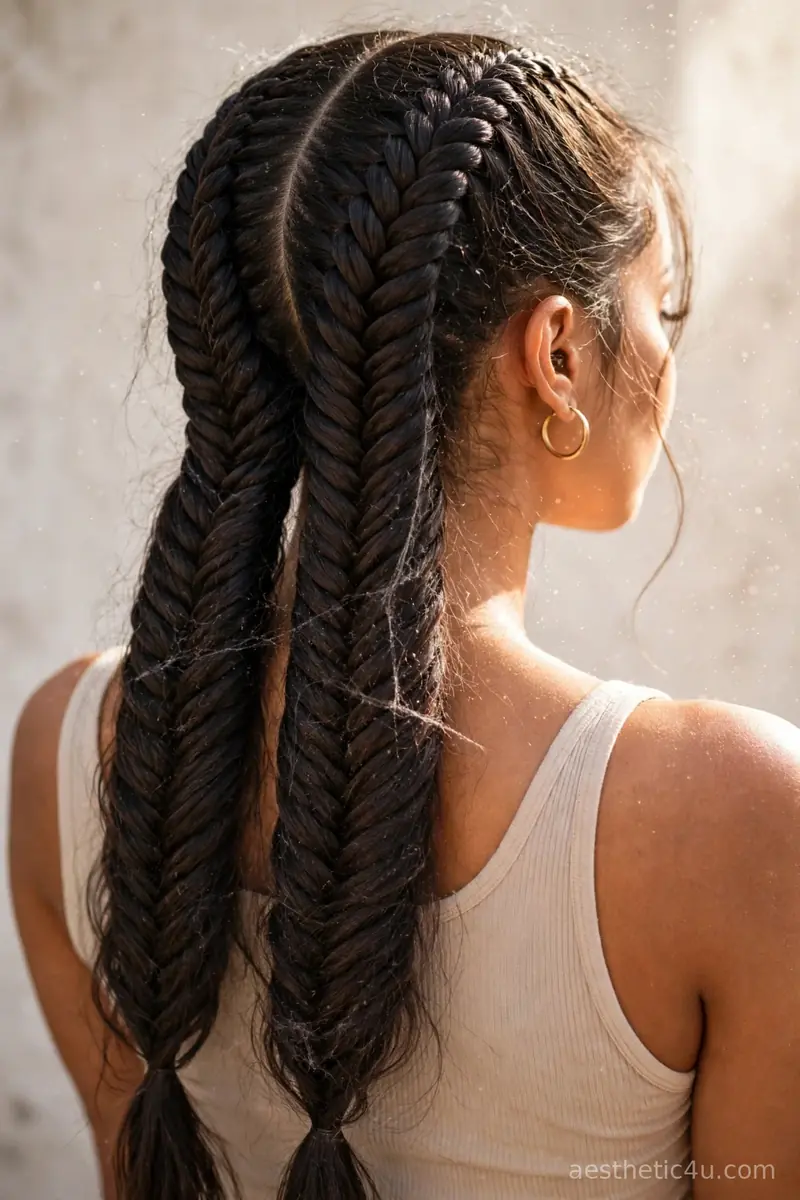
Two tight fishtail braids hang down the back, with wispy pulled-out strands floating like cobweb threads between them. Part down the middle, fishtail each side by pulling thin strands from the outside of one piece across to the other, keep the weaving tight, secure, then gently pull out fine wisps all along both braids. It takes 20 minutes, difficulty medium. The tight herringbone pattern underneath keeps it looking intentional while the floating wisps add the haunted, dusty feel of an old attic.
I would pick these for a ghost or witch costume because the twin fishtails read dark and witchy from behind. The cobweb wisps sell the haunted story. They suit straight to wavy hair best. One honest caveat: there is a line between cobweb and just messy, and it is the fishtail pattern underneath. Keep the herringbone tight and visible, because the structure is what makes it read as intentional.
12. Spider-Charm Bubble Ponytail
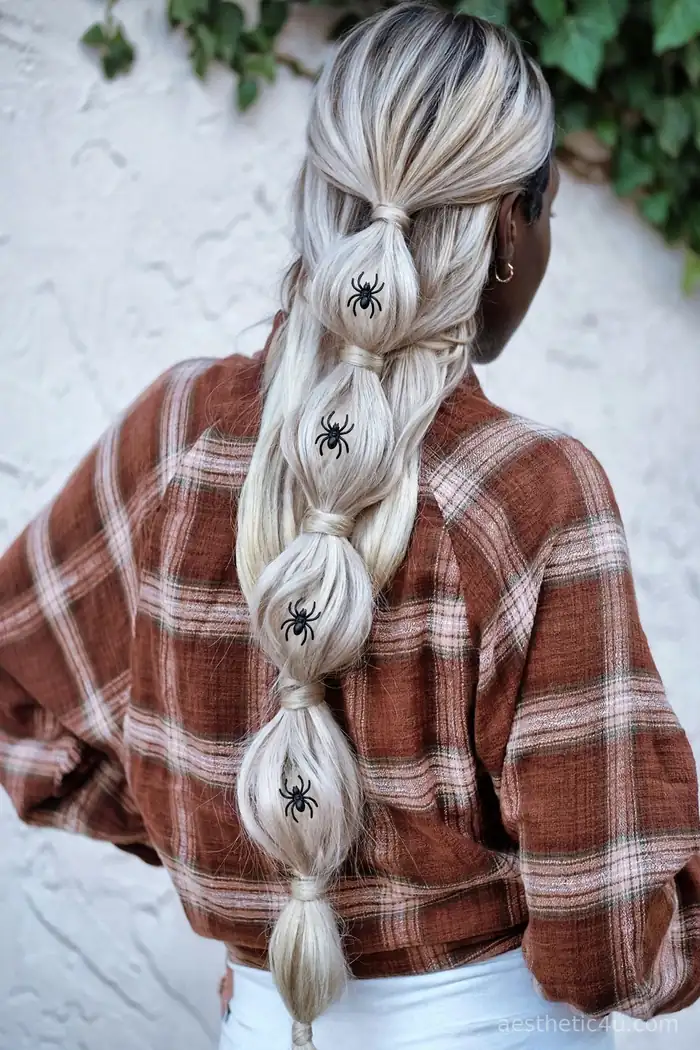
A bubble ponytail stacked with clear-elastics sections, with a small black spider charm pinned on each bubble. To build it, secure a ponytail, add elastics down the tail at even intervals, gently fan each section into a round bubble, then pin or thread a small spider charm onto each bubble. It takes 10 minutes, difficulty easy. No braiding at all, just bubbles and charms. The spiders look like they are crawling down your hair, which is the whole creepy fun of it.
I would choose this when I want maximum Halloween effect with zero braiding skill. The bubble technique fakes fullness beautifully, so it is perfect for finer hair. I love how the spiders catch the eye in photos. Honest caveat: keep the spiders on the bubbles, not the elastics, because charms on elastics slide. And use one spider per bubble, because more reads cluttered.
13. Bone-Braid Headband
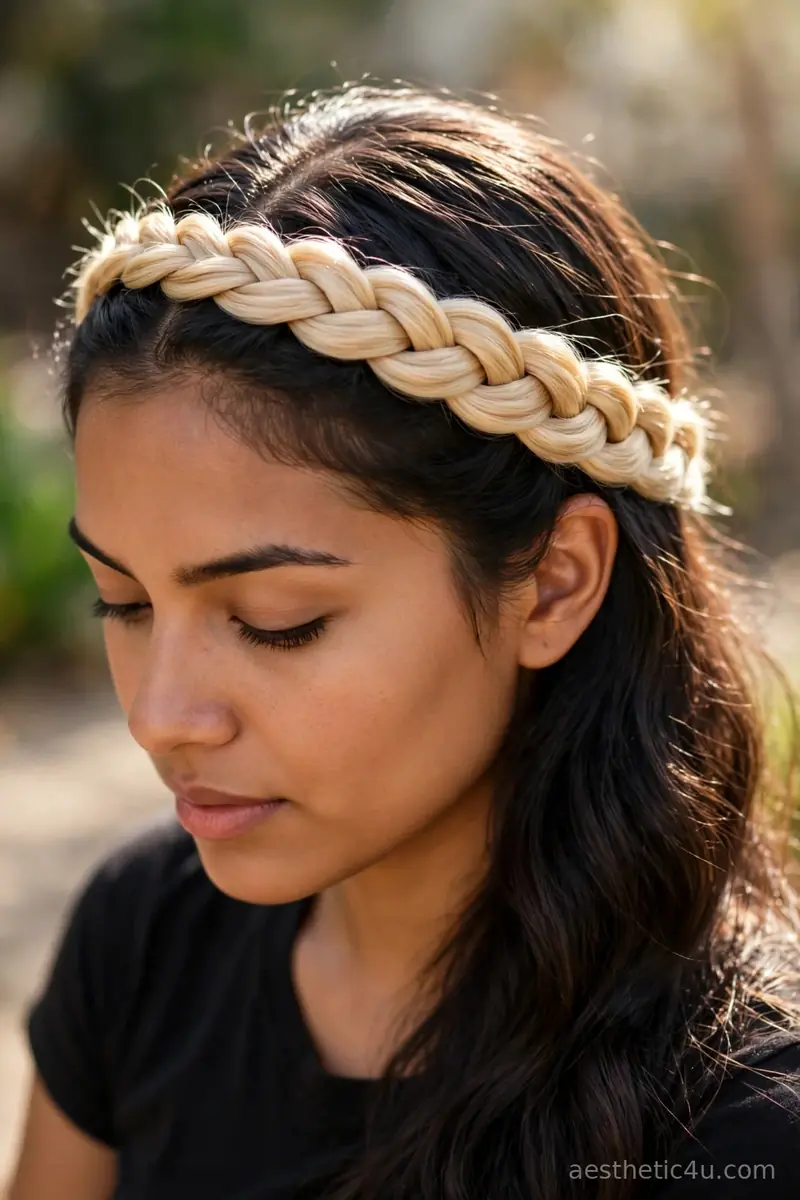
A Dutch braid swept across the hairline like a headband, in pale blonde against dark hair. It frames the face like a bone circlet. Regal and eerie. Dutch braid along the hairline from ear to ear, keeping it snug, and pin the end behind the opposite ear. It takes 10 to 15 minutes, difficulty medium. Wear it with the rest of the hair down and dark for maximum contrast. It suits round faces by lifting the eye upward. Simple, wearable, and very Halloween.
I would wear this with the rest of the hair down and dark, because the contrast is what makes the bone circlet read. It suits round faces by lifting the eye upward. Simple, wearable, and very Halloween. Honest caveat: the bone effect needs the pale-against-dark contrast, so on blonde hair it just looks like a headband braid. This one is for dark-haired girls, or add a temporary pale color to the braid section. Contrast is everything here.
14. Spider-Net Halo Braid
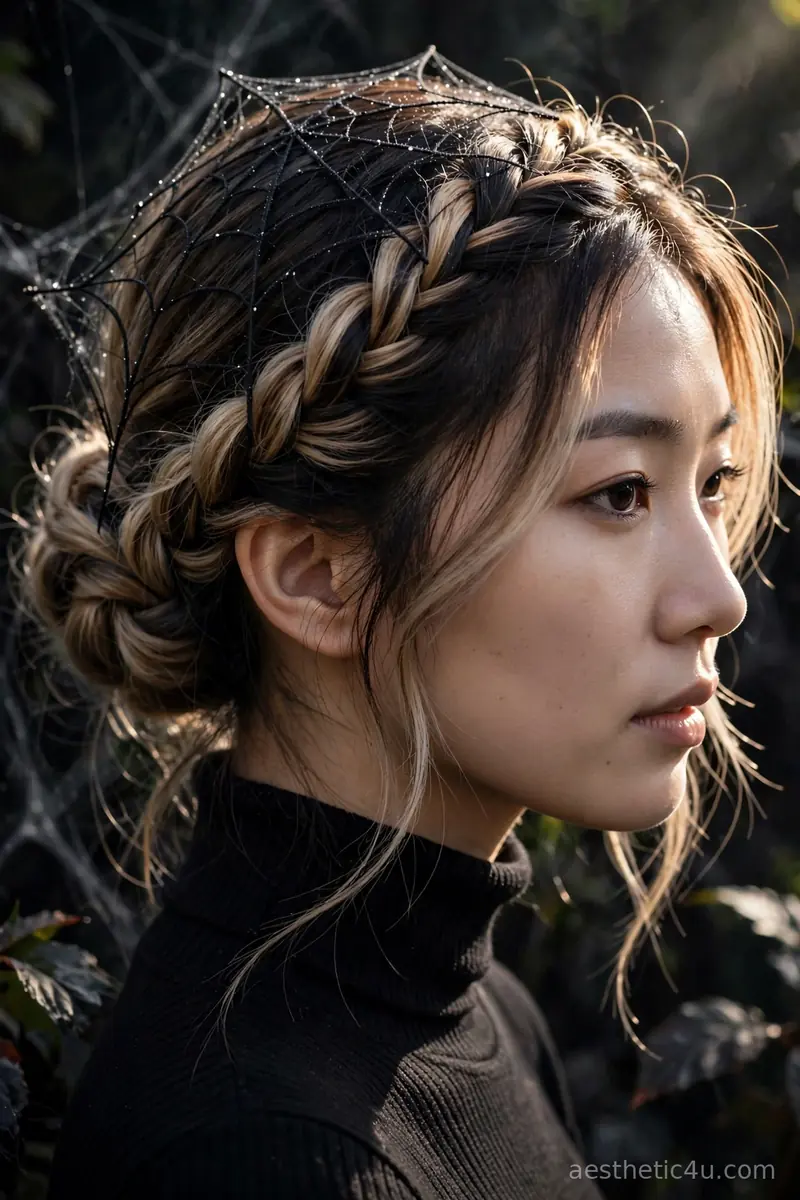
A halo braid wraps the head while a net of fine strands crosses over the crown like a spider’s net. From above it is a perfect web. Stunning from every angle. Braid the halo first and pin securely, then cross fine strands over the crown in a net pattern, pinning each crossing. It takes 25 to 35 minutes, difficulty hard. It needs long hair and a friend to help, because you cannot see the crown of your own head. The result is worth every minute. This is the showpiece spooky braid.
I would save this for your best Halloween look, because from above it is a perfect web and it is stunning from every angle. It needs long hair and a friend to help, I am serious about the friend. The result is worth every minute. One honest caveat: do not attempt this solo for the first time on party night. The back of your own head is a blind spot, and a lopsided web ruins the effect. Recruit help.
15. Ribcage-Fed Chunky Side Braid
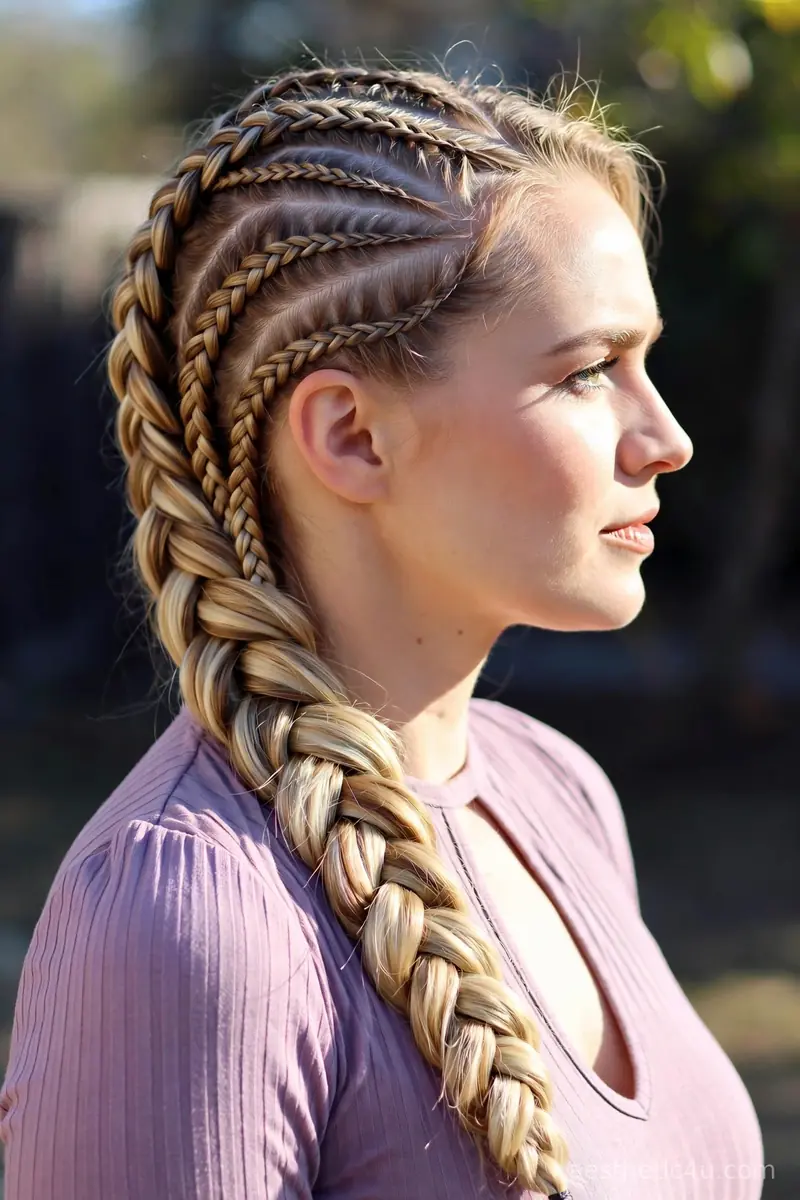
Thin cornrow-like braids curve from the hairline and feed into one thick, chunky braid that hangs down the back. Create several curved partings fanning from the front, braid each thin section back, then gather everything into one big three-strand braid and secure. It takes 20 to 25 minutes, difficulty hard. The curved thin braids read like ribs feeding into a spine, which is the whole sculptural effect. It photographs beautifully from the side, where the curved partings show at their best.
I would pick this when I want the ribcage idea without the full commitment of the symmetrical version. It is artsy and bold, and the chunky braid keeps it wearable. It suits thick hair best. Honest caveat: the curved partings are the entire effect, so use a rattail comb and take your time. Wobbly partings make it look accidental, and five careful minutes on the partings is what separates art from mess.
Keep exploring: 22 Halloween Hairstyles for Black Women: Stunning Protective Styles
16. Dark Braided Low Bun
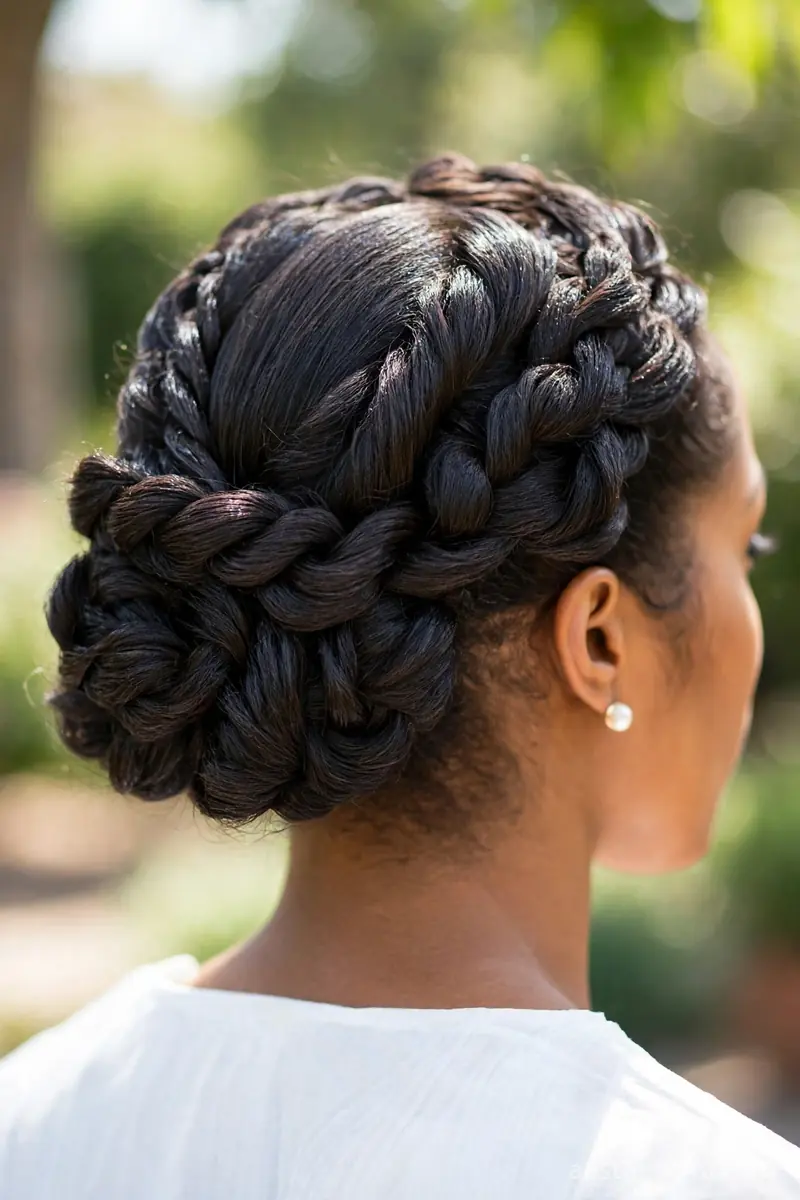
A low braided bun wrapped from thick, dark braids, sitting neatly at the nape. Braid the hair into two or three thick sections, wrap them around each other into a low bun, and pin generously, tucking the ends underneath. It takes 15 minutes, difficulty easy to medium. The chunky braided texture gives the bun depth and shadow, which reads moody and elegant for Halloween. It stays secure through dancing, and it looks polished with a formal costume all night.
I would choose this for a formal costume party because it is elegant horror at its most wearable. The dark braided bun reads dramatic without any props. It suits medium to thick hair. Honest caveat: braided buns need more pins than you think, so pin generously and crisscross them. When in doubt, add three more pins. Nobody sees them, everybody sees the bun.
17. Skeleton-Hand Fishtail
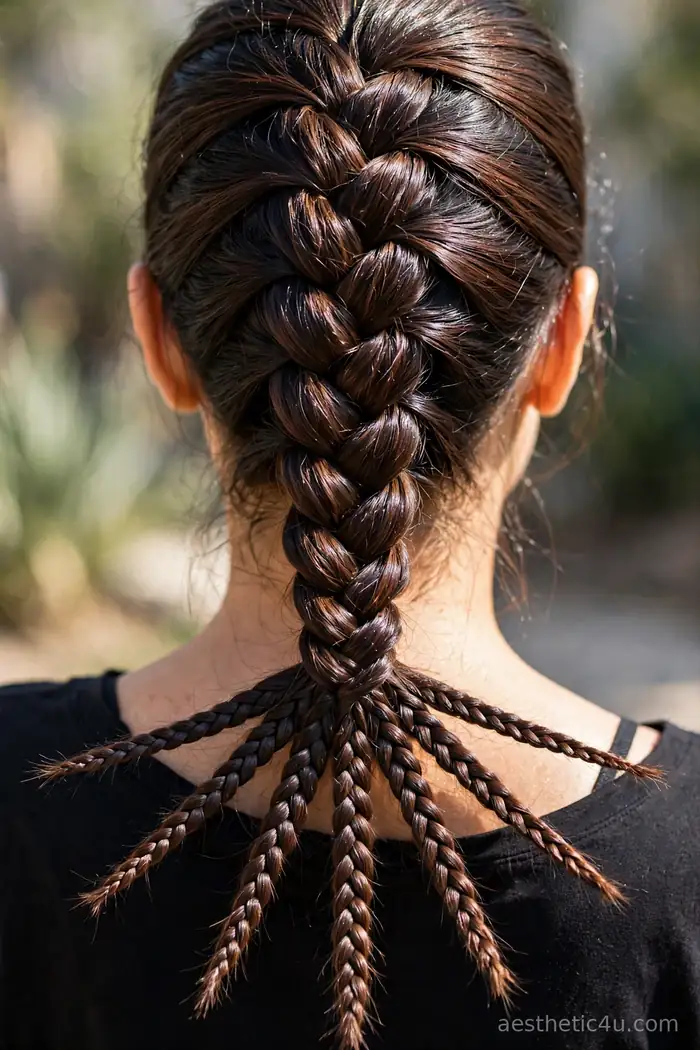
A fishtail braid with the sections pinched and spread so it fans like a skeleton hand. The wide, flat shape is the trick. Strange and striking. Fishtail normally, then pinch and spread each section wide and flat, pressing the braid flat as you go. It takes 15 minutes, difficulty medium. It suits straight hair best, where the fan shape holds. Wear it with a skeleton costume for full effect. The flattened, fanned shape is what reads as bony fingers rather than a braid.
I would wear this with a skeleton costume for full effect, because the fanned shape plus the costume is the complete illusion. It suits straight hair best, where the fan shape holds. It is weird in a good way. One honest caveat: the fan shape collapses on wavy or curly hair, so straighten first if your hair has texture. The flat, spread sections are the entire trick, and texture fights them. Sleek base, spooky result.
18. Bone-Bead Accent Braids
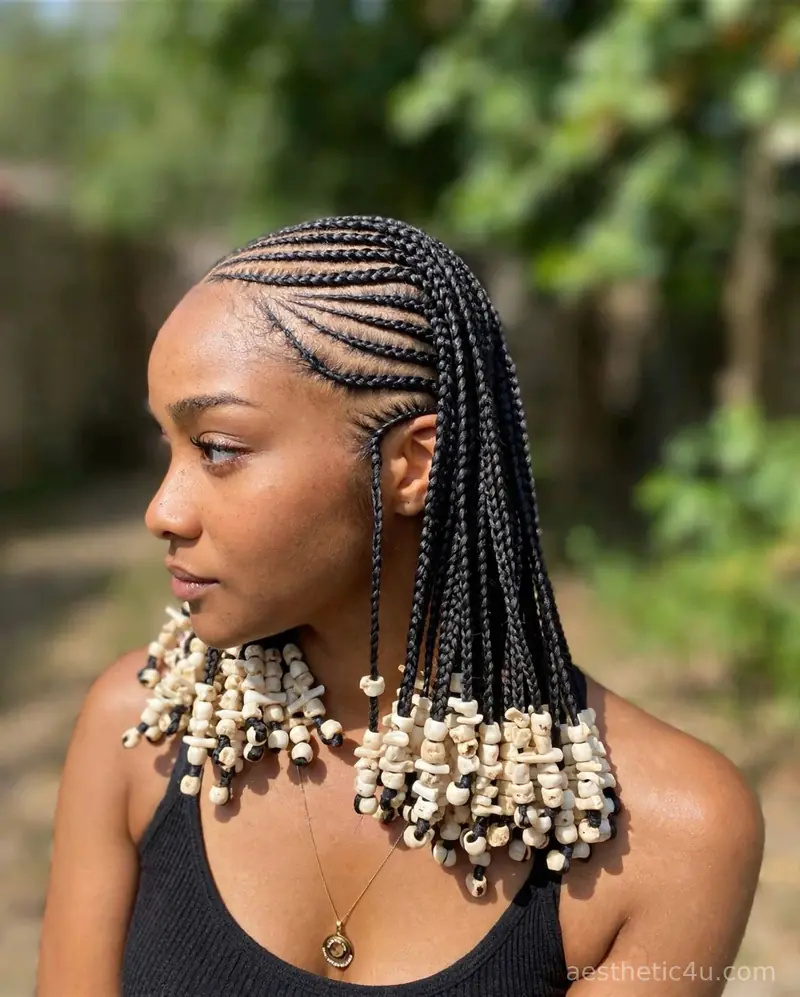
Thin braids threaded with small white beads that look like bone fragments. The beads click softly when you move. Subtle, creepy, and very wearable. Braid several thin plaits and slide small white or bone-colored beads onto them, securing with tiny elastics above and below each bead. It takes 10 to 15 minutes, difficulty easy. They suit any length and read classy from a distance. The beads are the only spooky signal, which makes this the work-friendly Halloween braid.
I would pick these for work-friendly Halloween, because they read classy from a distance and only whisper spooky up close. They suit any length. The beads are the only spooky signal. My pro tip: use bone-white or off-white beads, not bright white, because bright white reads as crafty while bone tones read as eerie. That color choice is the difference between cute and creepy, and creepy is the assignment.
19. Spider Queen Waterfall Braid
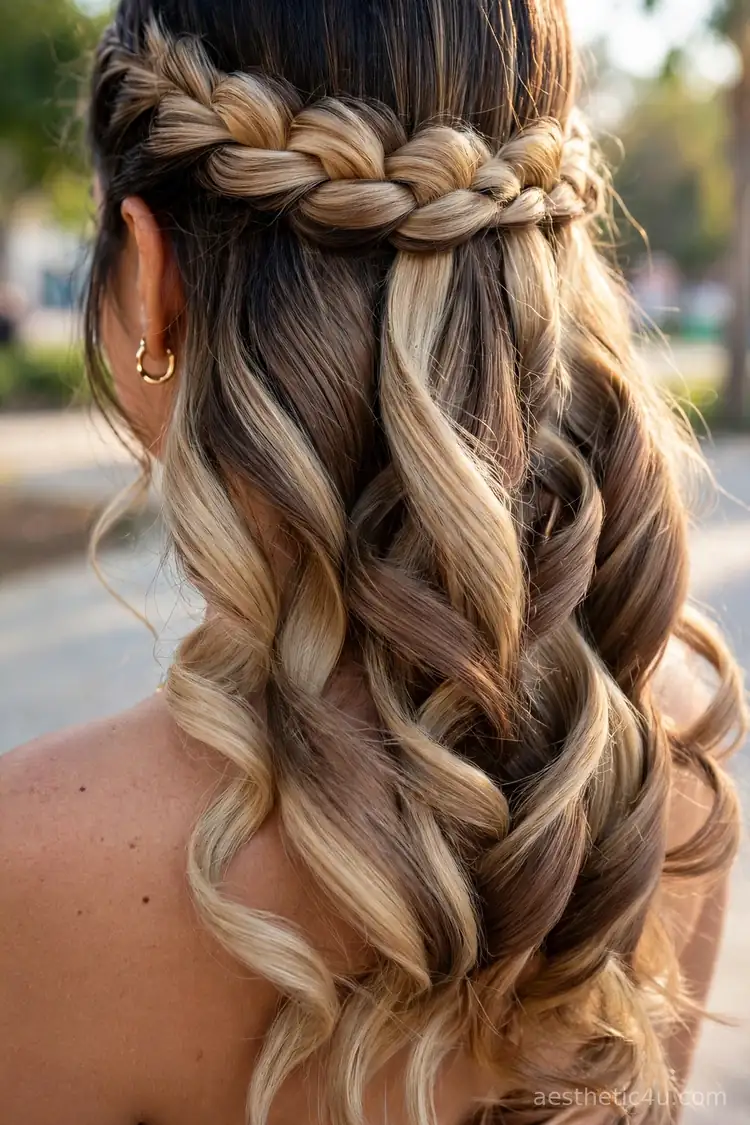
A waterfall braid cascades across the crown while the falling strands are curled into dark waves. It looks like a spider queen’s crown melting into hair. Dramatic and dark. Build the waterfall braid with the drop-and-replace rhythm, then curl each falling strand with a 1-inch iron for dark waves. It takes 25 to 30 minutes, difficulty hard. It suits long hair and a bold costume. It takes time, but it is the one people will remember, the showpiece look of the list.
I would choose this as the showpiece look, because it is the one people will remember. It suits long hair and a bold costume, and the curled falling strands are what elevate it from pretty to dramatic. Honest caveat: this combines two skills, waterfall braiding and curling, so practice the braid first on its own. Do the trial run two days before, and on party night you will build it with confidence instead of panic.
How to Choose the Right Spooky Halloween Braid for You
Start with your costume, because the braid should match the story. Skeleton costumes pair with bone-toned braids, sharp center parts, and ribcage patterns. Witch and vampire looks love spiderweb crowns, dark side braids, and waterfall styles with curled falling strands. Ghost costumes suit wispy, undone braids like the cobweb fishtail. If you are not wearing a costume, choose subtler spooky signals: bone-bead accent braids or a bone-braid headband read Halloween without screaming it.
Next, be honest about skill and time. Simple spooky effects like accent braids with charms, rope twists with a key charm, and bone-bead braids are beginner-friendly and take under fifteen minutes. Pattern braids like the ribcage and the spider-net halo are advanced and need twenty to forty minutes plus a mirror or a friend. Finally, match to your hair: fine hair suits webbed and pinned styles that fake volume, while thick hair carries chunky Dutch and pull-through spine braids beautifully. Pick the braid that fits your costume, your hands, and your hair, and the spooky effect will land.
Styling Tips & Common Mistakes to Avoid
Spooky braids live or die by the details, so here is my stylist approach. First, the parting is everything: sharp, clean parts sell skeleton and skull effects, so use a rattail comb and be precise. Second, accessories do the heavy lifting: spider charms, bone beads, and key charms are cheap and transform a basic braid into a story. Thread them on with clear elastics or bobby pins. Third, texture spray is your best friend, because spooky braids need grip to hold their sculptural shapes. A strong-hold hairspray finishes the illusion.
The mistakes that ruin spooky braids are all avoidable. First, muddy color contrast: bone-blonde accents need dark hair behind them to read as bone, so the contrast is the effect. Second, over-pancaking pattern braids like the ribcage, because the pattern needs defined sections to read. Third, skipping the trial run on advanced styles like the spider-net halo, which genuinely needs practice or a helper. One honest caveat: heavy charms and beads pull on fine hair, so keep them light and few on thin hair. A few well-placed accents beat a heavy head every time.
Final Thoughts
Spooky braids are the Halloween hairstyle for women who want their hair to tell a story, and any of these nineteen will do it. Whether you went skeletal with bone tones or creepy with spiderwebs, you picked a style that turns your hair into part of the costume.
Do a trial run before the big night, pack extra pins and elastics, and wear your creepy crown with confidence. Happy Halloween, and may your braids stay spooky until morning. Wear it proudly.
Follow Us On Pinterest: Easy To Find Next Style