Sana
Christmas Eve has its own kind of magic. It is quieter than Christmas Day, full of candlelight, good food, and the people you love most, and the hair that suits it is different from party hair: softer, more romantic, and just festive enough. These christmas eve hairstyles are made for that mood. Every December I watch the same searches spike on Pinterest, because everyone wants to look beautiful in those warm, golden family photos without looking overdone.
This guide is for hosts and guests alike: the person cooking dinner, the one opening one gift early, the family heading to a midnight service. It covers every hair length and texture, from short bobs to long waves, and every skill level, from a two-minute headband fix to a braided crown. Whether your evening is dressy or cozy, there is a look here that fits.
You will learn how to build each style step by step, which tools and products make it last through a long evening, how long each look really takes, and the small mistakes that ruin an otherwise perfect style. I will be honest with you, as I am with every client in my chair: Christmas Eve hair should never be fussy, just lovely. Let us find the version of lovely that feels like you.
1. Romantic Candlelit Waves
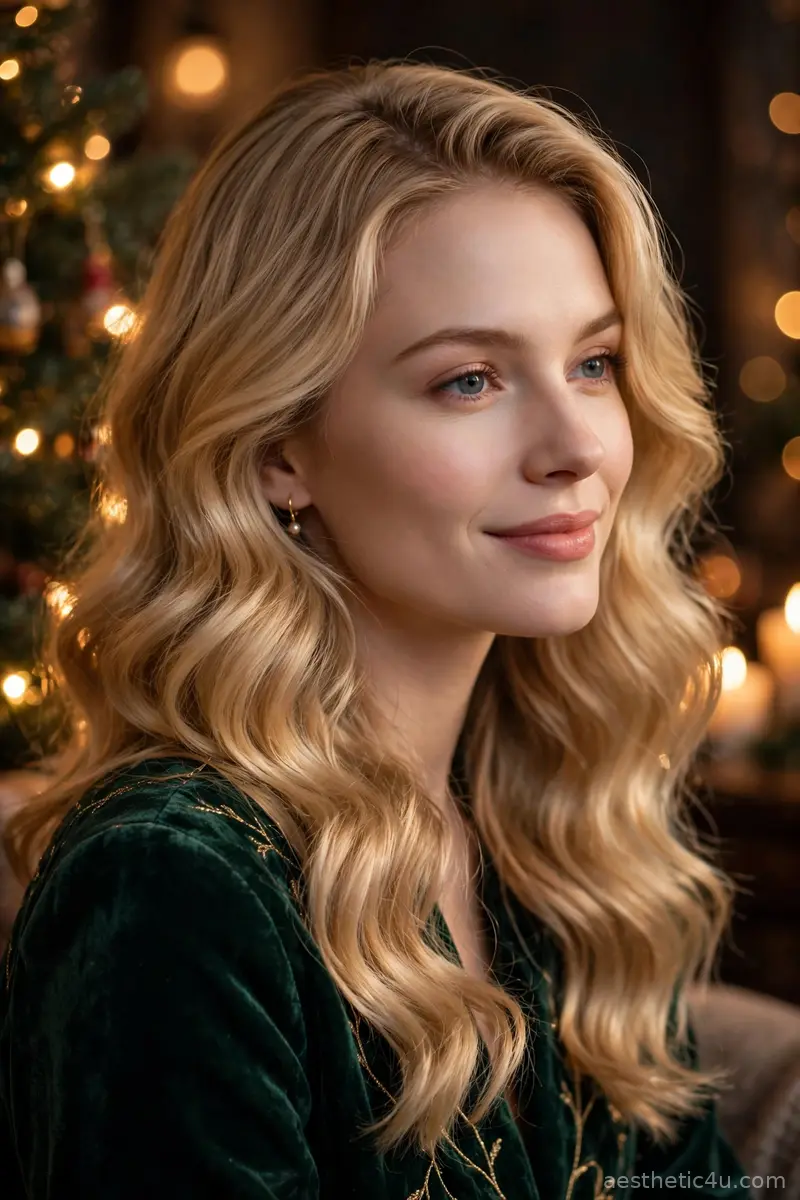
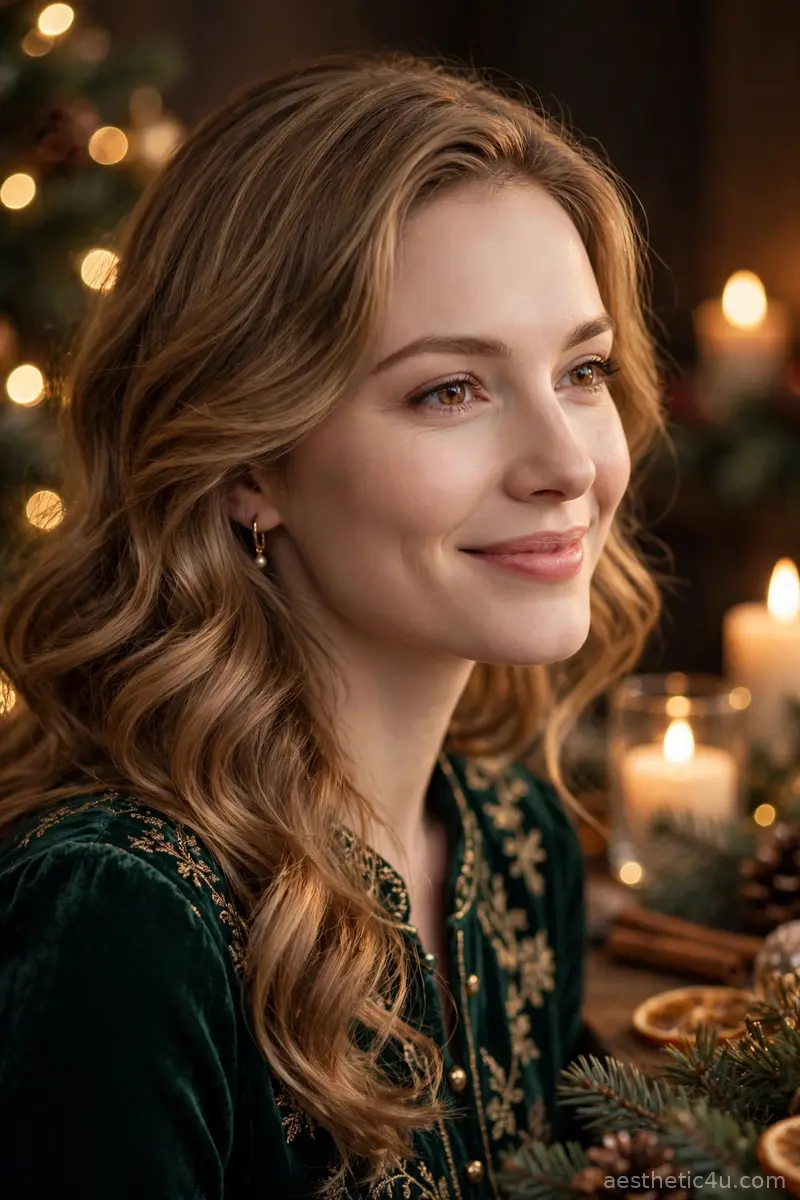
Soft, loose waves that glow in warm light, brushed out gently so they look touchable instead of stiff, with a center or side part both working beautifully. Wrap 1.5-inch sections around a large-barrel iron away from the face, let each curl cool completely, then brush through with a paddle brush until the curls melt into soft waves. Finish with a shine spray, not a heavy hairspray. It takes 25 to 35 minutes, is beginner to intermediate, and the brushed-out softness is what makes them romantic.
This suits every face shape and works on medium to long hair. I’d pick this when I want effortless romance, because the waves catch every flicker of candlelight at dinner. Pro tip: brush the curls out more than you think you should; under-brushed waves read prom-night stiff, while fully brushed waves read expensive and relaxed. It also needs no accessories, which keeps the whole look soft and unfussy.
2. Velvet Bow Low Ponytail
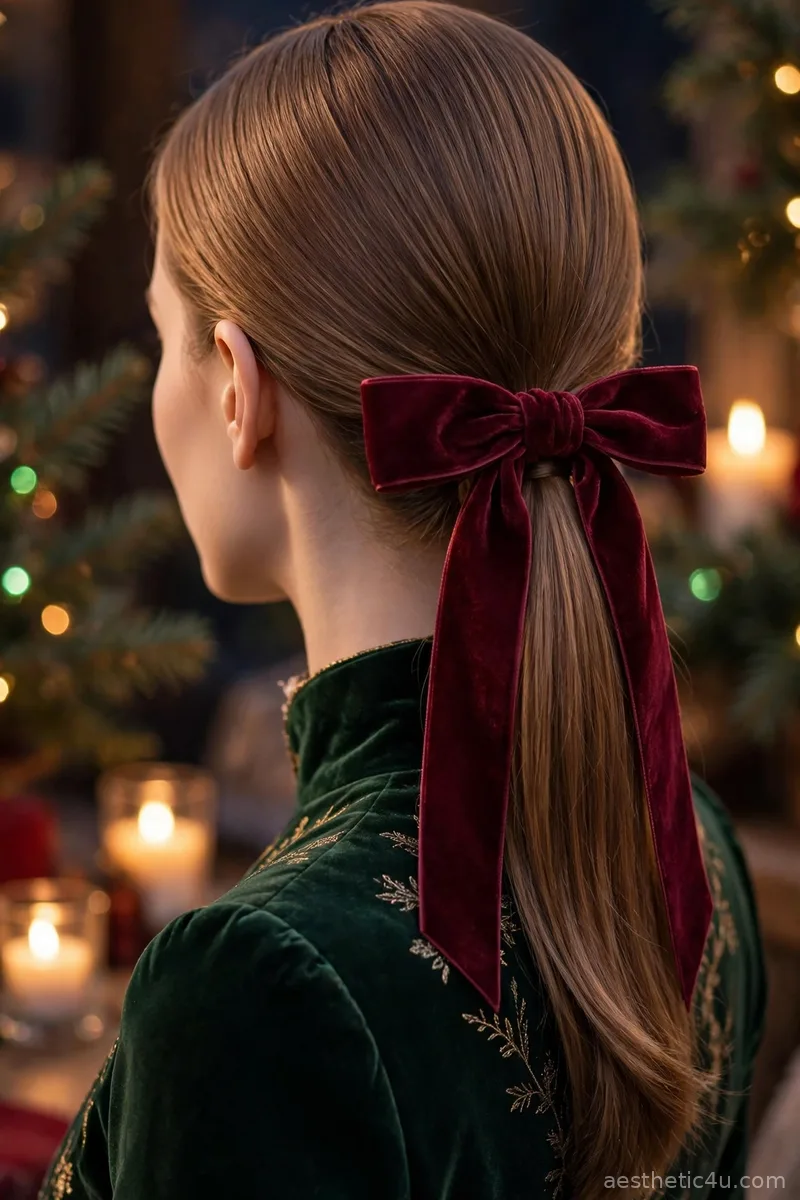
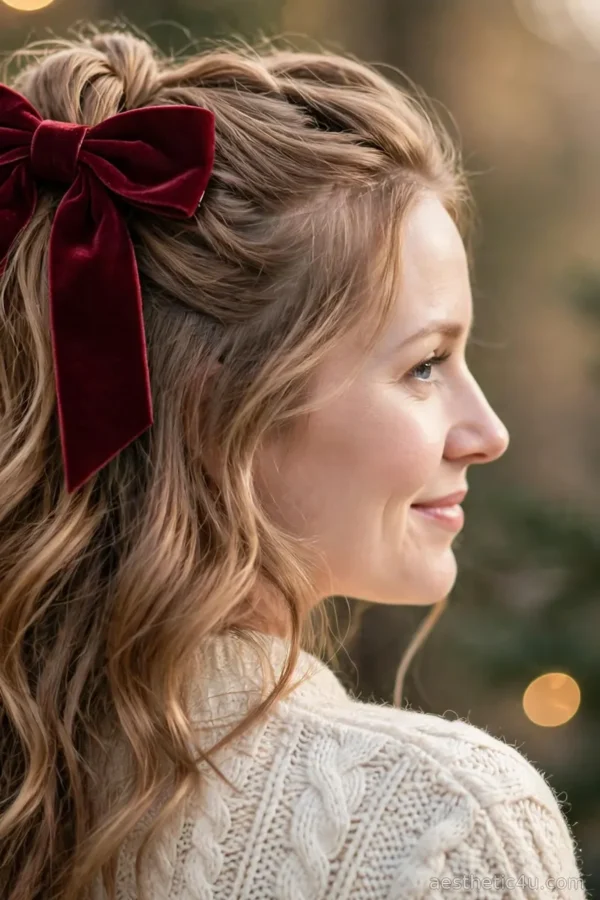
A low ponytail tied with a wide velvet bow at the nape, the hair kept smooth and simple while the bow adds all the Christmas Eve charm. Brush the hair back sleekly with a smoothing serum, secure low with a snag-free elastic, then tie a wide velvet ribbon around the base in a full bow with even loops. It takes under ten minutes, is beginner-easy, and it looks sweet in family photos without any real effort. Smooth the top with a boar-bristle brush for the sleekest finish.
This suits every face shape and hair length past the shoulders. I’d pick this when I am hosting and need hair that stays out of the way while still looking festive. Honest caveat: a bow tied over a lumpy ponytail base looks messy fast, so smooth the elastic area first and tie the bow snugly over it. A wired-edge ribbon holds its bow shape far better through a long evening.
3. Low Braided Bun
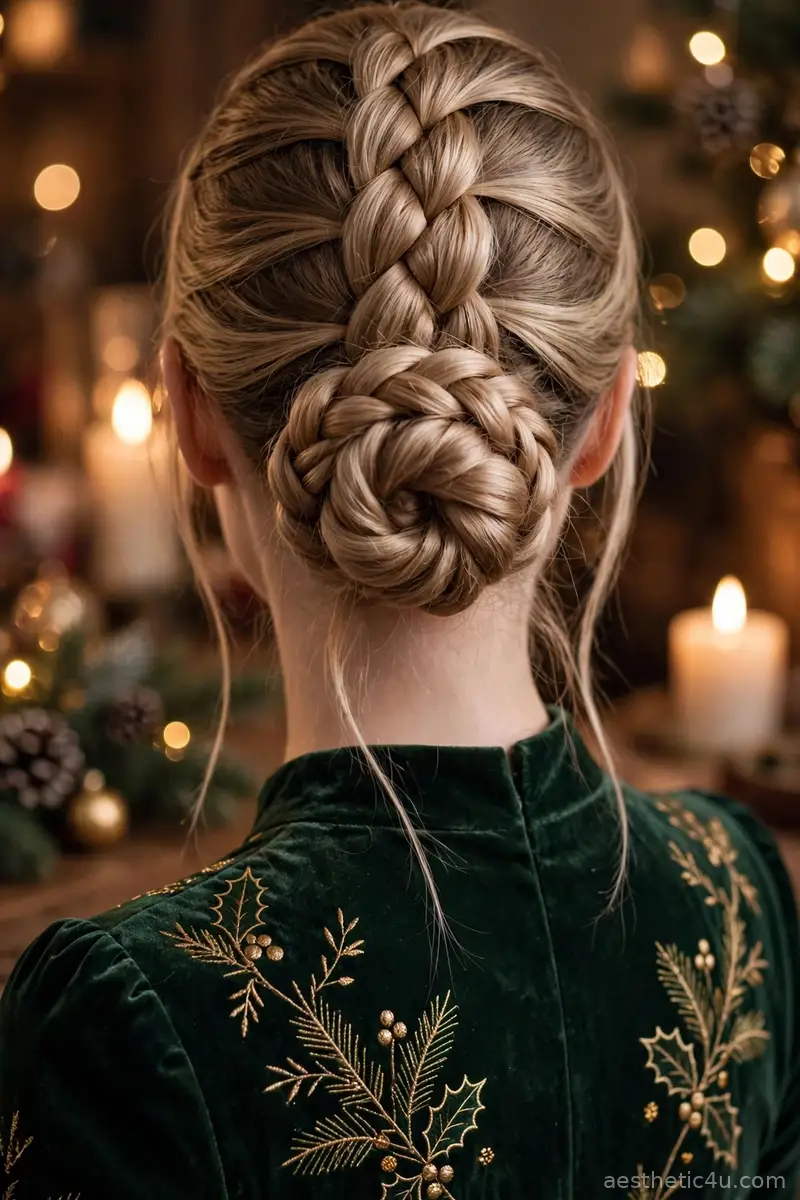
A low bun built from a chunky braid coiled at the nape, soft and textured with loose wispy strands left around the face. Brush the hair back, secure it in a low ponytail, braid the tail in a simple three-strand braid, then coil the braid around its own base and pin with four to six bobby pins tucked under the coil. Pull out two thin pieces in front to soften the look and mist lightly with flexible hairspray. It takes 10 to 15 minutes, is beginner to intermediate, and the braided texture is what gives the bun its fullness.
This suits oval, round, and heart-shaped faces and works on medium to long hair. I’d pick this for a cozy family evening because it feels festive without trying too hard. Pro tip: pancake the braid gently before coiling to make the bun look twice as thick. Honest caveat: do not braid too tightly, because a hard, stiff braid kills the softness that makes this look romantic.
4. Half-Up Braided Knot with Gold Pins
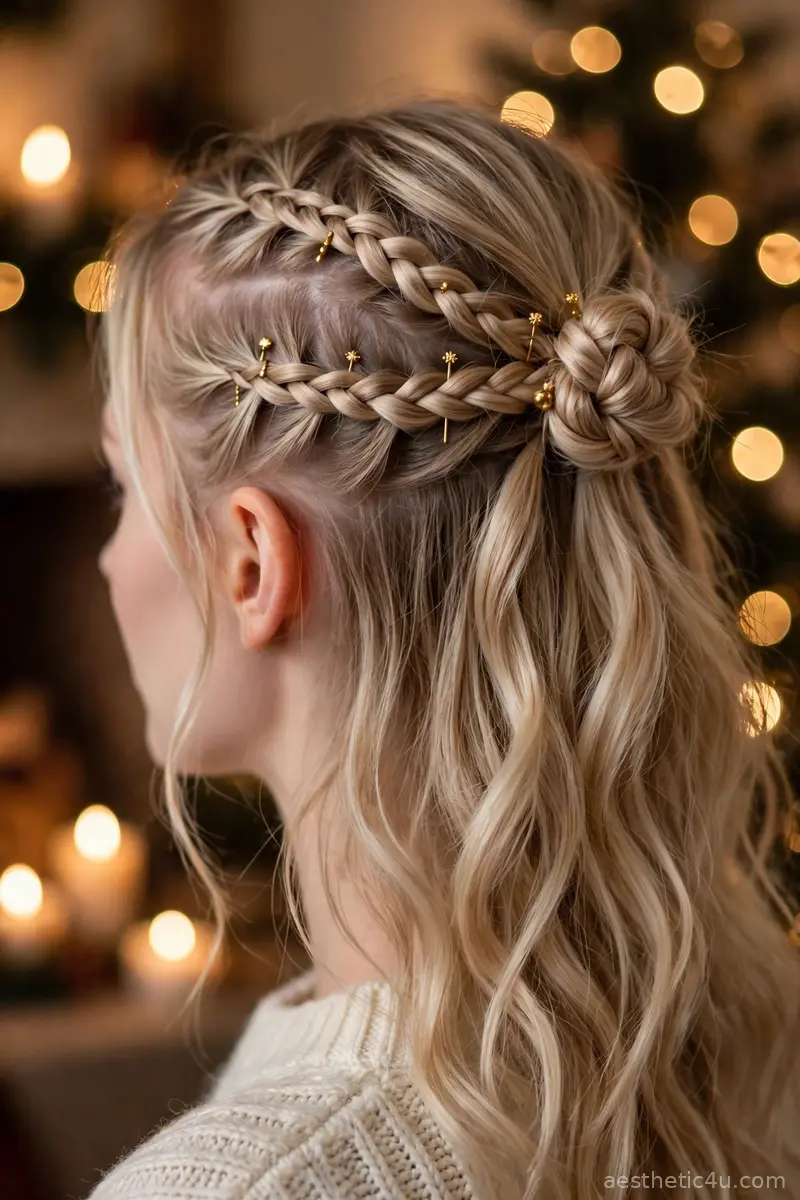
Two small braids pulled back from the front and joined into a tiny knotted bun at the back of the crown, a few miniature gold pins dotted along the braids, the rest of the hair falling loose in soft waves. French-braid a two-inch section back from each temple, cross the braids at the crown, twist them together into a small knot, and pin underneath with crossed bobby pins. Slide four to six tiny gold pins along the braids for sparkle. It takes about 12 minutes, is beginner to intermediate, and it keeps hair out of your face while looking delicate.
This suits almost every face shape and works on shoulder-length to long hair. I’d pick this for a candlelit dinner because the gold pins catch the light every time you turn your head. Honest caveat: the small knot slips on freshly washed hair, so work on day-old hair or mist the crown with texturizing spray first. Keep the braids relaxed and even on both sides so the knot sits centered.
5. Classic French Twist with Pearls
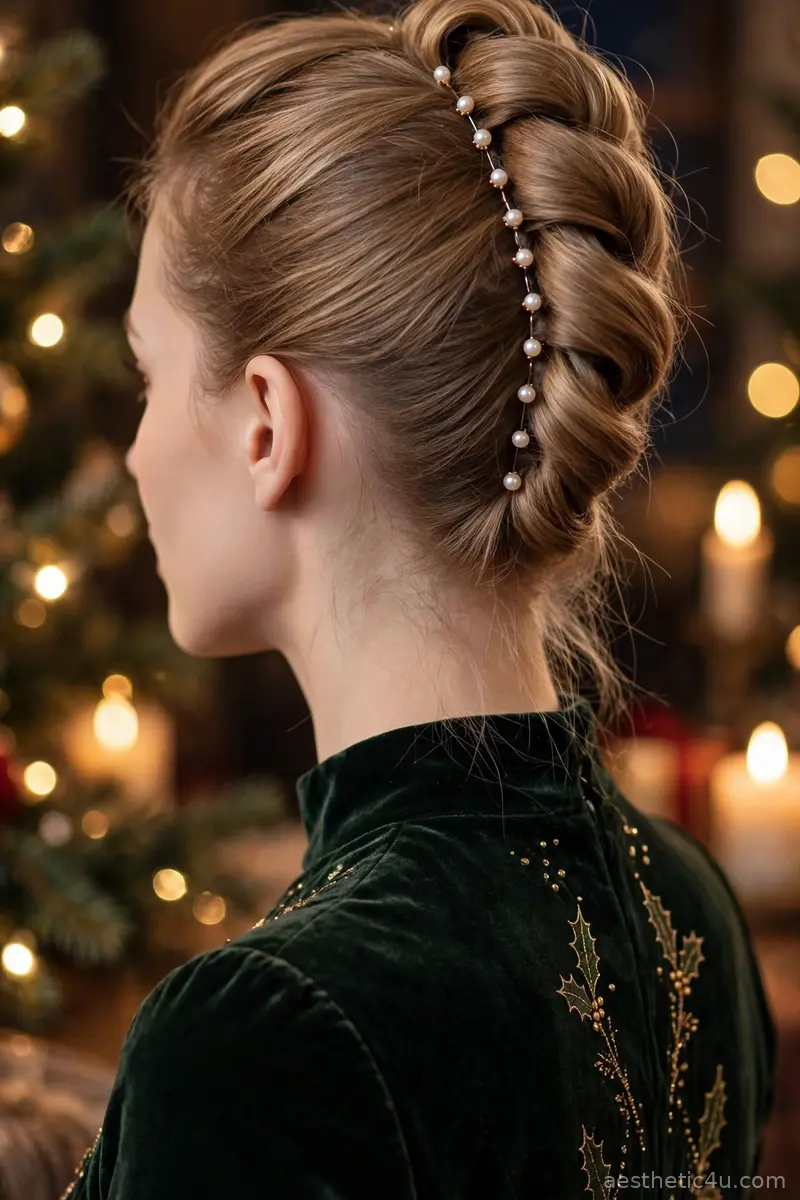
The timeless French twist, rolled smooth and pinned tight, finished with small pearl pins along the seam for a festive glow. Tease the crown lightly, gather the hair to one side, roll upward tightly against the head, and pin with long bobby pins tucked inside the roll. Place pearl pins in a neat line along the seam. It takes 15 to 20 minutes, is intermediate, and the shape is smooth, elegant, and unmistakably classic. Mist the finished twist with a medium-hold spray to lock the shape all evening.
This suits oval, oblong, and heart-shaped faces and works on medium to long hair. I’d pick this when I want to feel truly elegant on Christmas Eve, because pearl pins are my favorite way to make a classic look holiday-ready. Pro tip: insert the pearls at a slight angle so they sit proudly on the seam, and use an odd number for the most natural look.
Keep exploring: 17 Christmas Dinner Hairstyles That Look Expensive (But Aren’t)
6. Loose Braided Updo
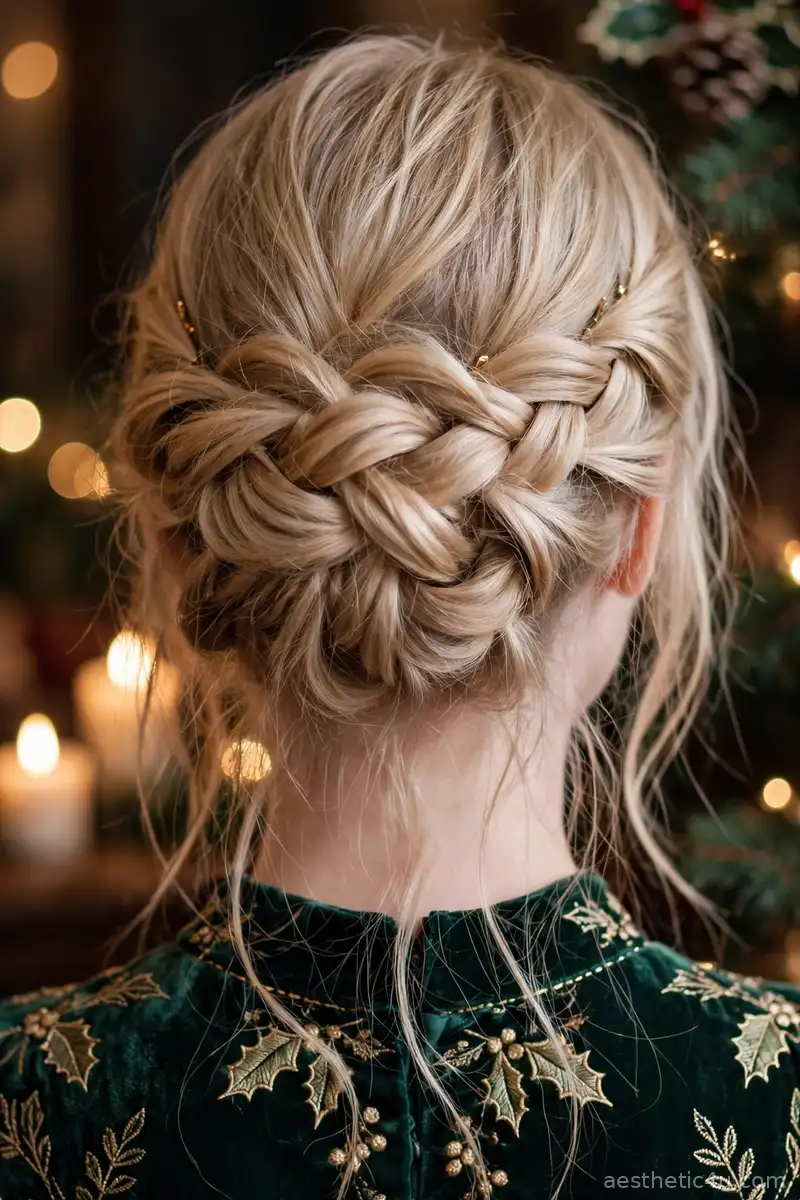
A relaxed updo built from loose, pancaked braids pulled wide for softness, with strands escaping around the face for a romantic finish. Create two or three loose braids, pancake each one gently from the bottom up, then wrap and pin them together at the nape without pulling tight. It takes 20 to 25 minutes, is intermediate, and it holds well through a long evening, looking beautiful as it loosens. Secure each braid’s end with a clear elastic before wrapping so nothing unravels.
This suits oval and heart-shaped faces and works on medium to long hair. I’d pick this when I want texture without stiffness. Honest caveat: pancake gently and evenly, because yanking one section wider than the rest makes the braid look lopsided; work from the bottom up and check in the mirror as you go. Add a sprig of baby’s breath for a truly Christmas Eve feel.
7. Satin Headband Blowout
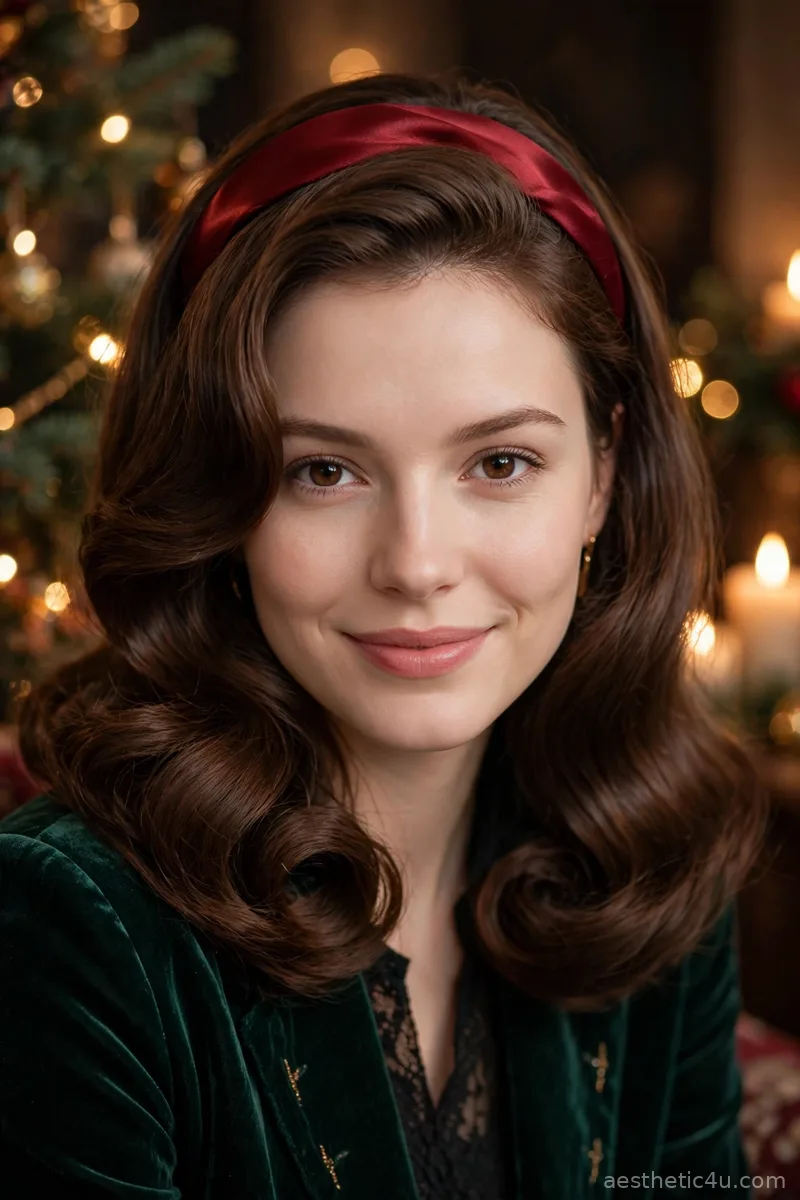
A smooth blowout with body and shine, finished with a satin headband for a soft festive touch. Blow-dry in sections with a large round brush, rolling the ends under, then blast with the cool shot to set and smooth a shine serum through the lengths. Place the headband about an inch behind the hairline. It takes 30 to 40 minutes, is intermediate, and it dresses up even a simple blowout instantly. Blast each section with the cool shot to set the smoothness before moving on.
This suits every face shape and works on medium to long hair. I’d pick this when I want to look polished with almost no styling stress. Pro tip: choose a deep red or champagne satin headband for Christmas Eve, and pick one with a silicone grip strip so it stays put through the whole evening without sliding. It also hides unwashed roots beautifully, which is a gift on a busy day.
8. Cozy Fireside Curls
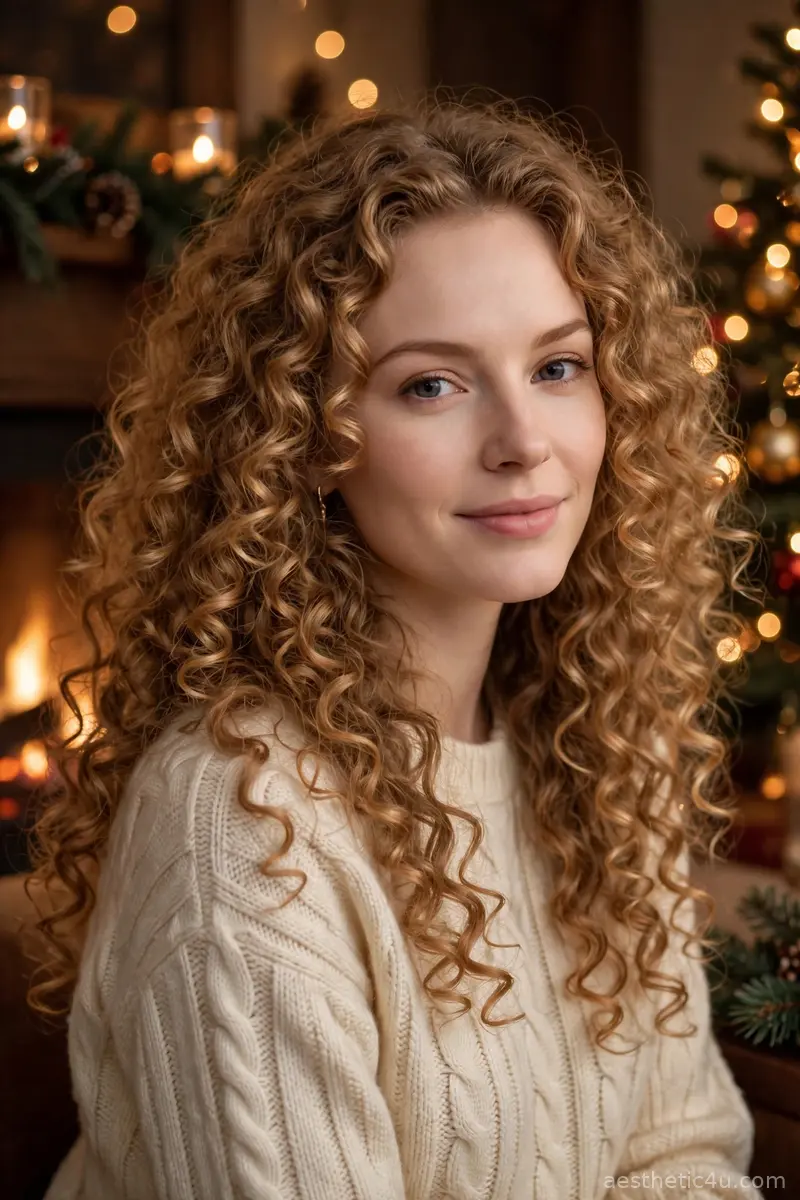
Long natural curls worn loose and full, softened with curl cream and diffused gently so every curl keeps its spring: warm and inviting, like the evening itself. Work a curl-defining cream through damp hair in sections, then diffuse on low heat with your head tilted forward until the curls are fully dry. Break the cast by scrunching upward with dry hands until the curls feel touchable. It takes 20 to 30 minutes with a diffuser, is beginner-easy, and natural curls need no iron to look their best.
This is made for naturally curly and coily hair of any length past the chin. I’d pick this for a quiet Christmas Eve at home because curls and candlelight are a perfect match. Pro tip: never brush dry curls, since brushing turns curls into frizz; if you need more volume, only fluff the roots with your fingertips. A silk pillowcase the night before keeps curls defined for the evening.
9. Milkmaid Braid Crown
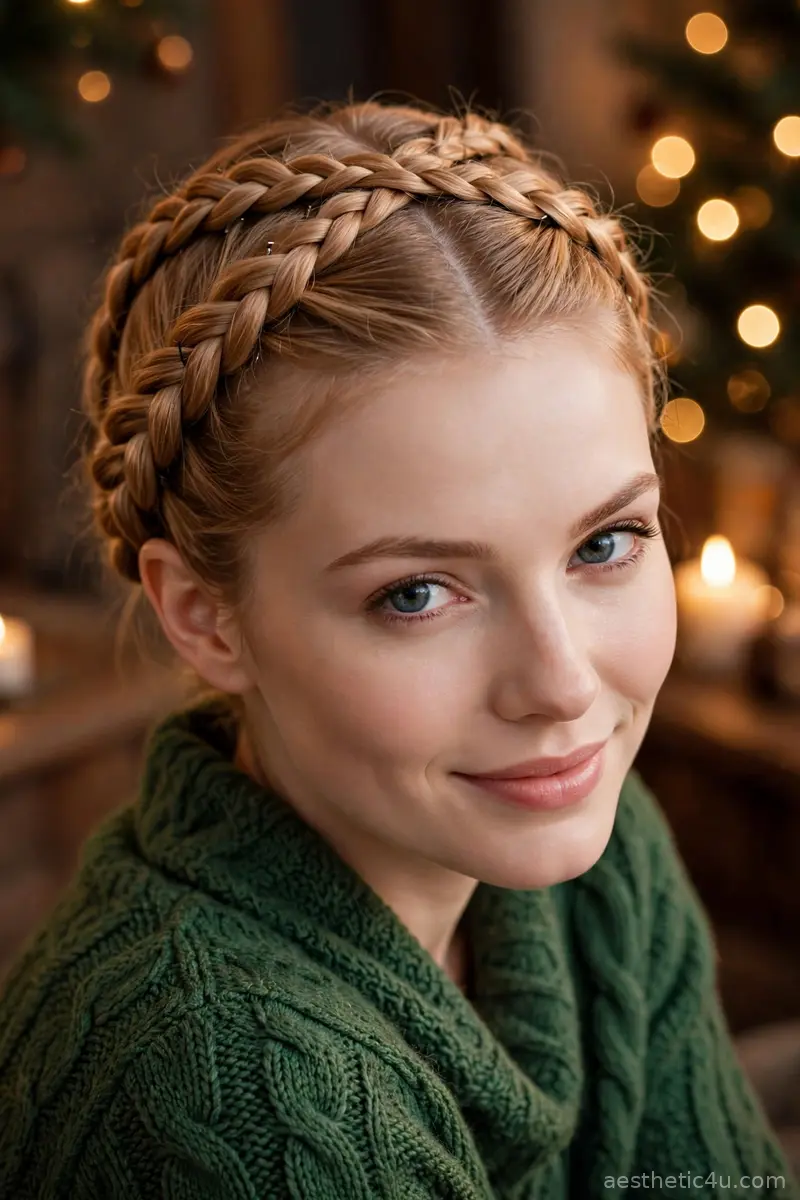
Two braids wrapped over the head and pinned into a crown, sweet and old-fashioned, keeping every strand in place all evening. Part down the middle, braid each side, cross them over the top of the head, and pin the ends flat, tucking them under the opposite braid. Use plenty of pins in X shapes. It takes 15 to 20 minutes, is intermediate, and it survives cooking, hugging, and a whole evening of celebrating. Cross the bobby pins in X shapes for the strongest possible hold.
This suits oval and heart-shaped faces and works on medium to long hair. I’d pick this when I am hosting and need hair that lasts, because nothing moves once it is pinned. Pro tip: tiny gold pins along the braids make it feel like a holiday crown, and braid on day-old hair so the pins actually grip. It keeps every strand off your neck, which feels wonderful in a warm kitchen.
10. Low Chignon with Gold Pins
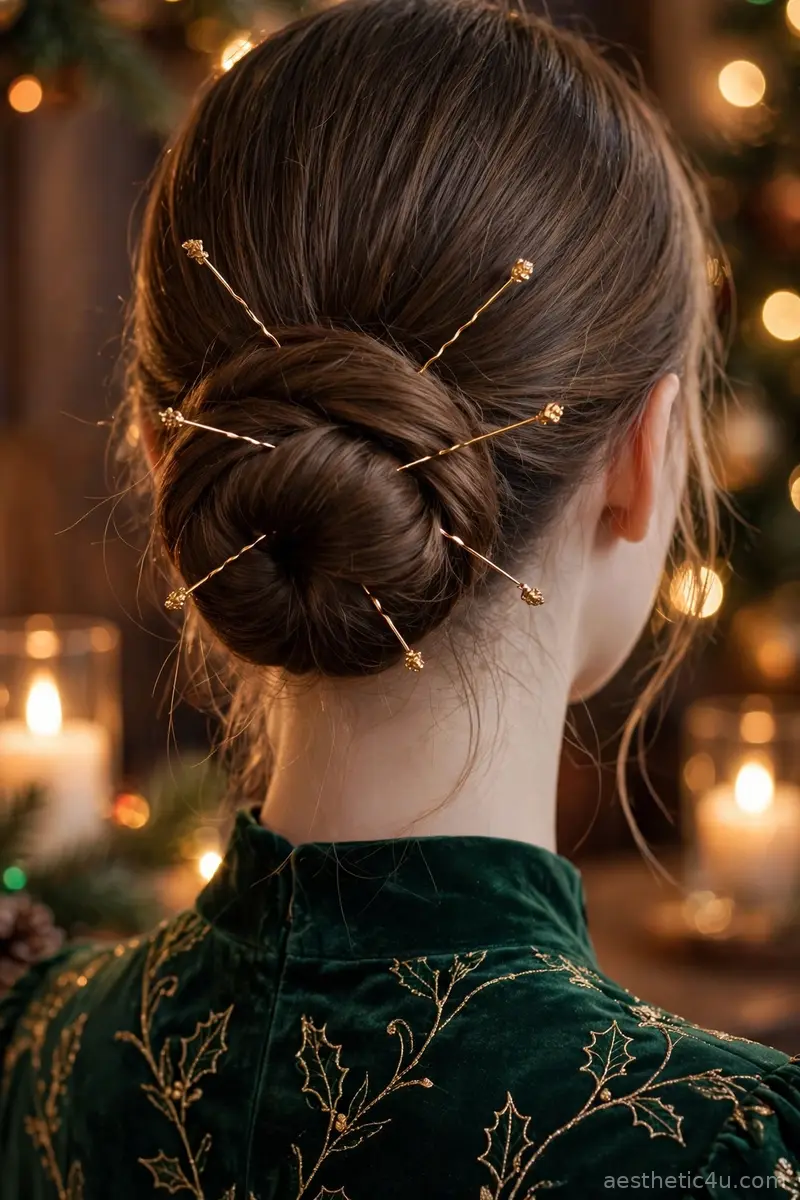
A smooth low chignon decorated with delicate gold pins that catch candlelight beautifully, the base kept sleek and simple. Twist the hair into a neat low coil at the nape, pin securely, smooth the top with a serum, then scatter five to seven gold pins at different angles through the coil. It takes 10 to 15 minutes, is beginner to intermediate, and the effect is pure quiet luxury. Keep the part clean and precise, because neatness is what reads expensive here.
This suits every face shape and works on medium to long hair. I’d pick this when I want quiet luxury for a formal Christmas Eve dinner, because it looks stunning with gold jewelry. Honest caveat: cheap gold pins can look brassy, so choose a warm, muted gold tone that reads elegant rather than flashy under warm light. It suits high necklines and statement earrings equally well.
Keep exploring: 19 Elegant Christmas Updo Hairstyles That Belong on a Red Carpet
11. Wavy Side Ponytail with Ribbon
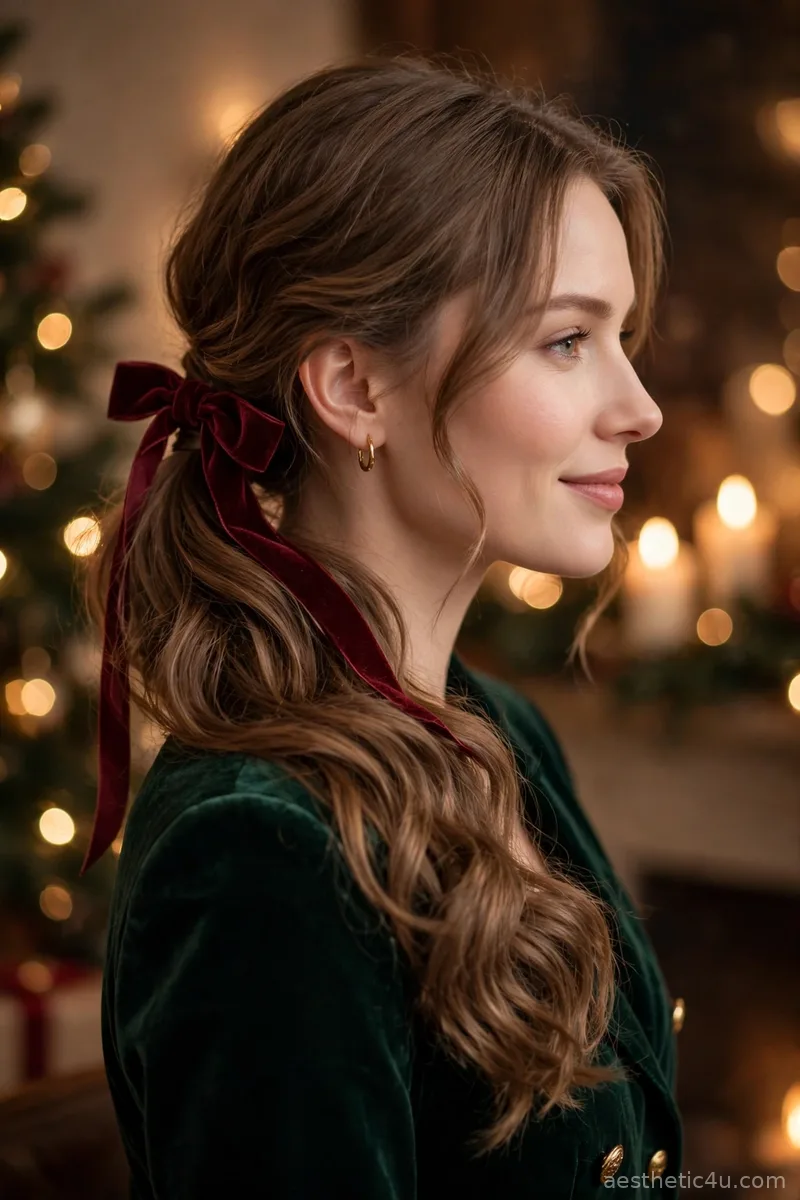
A low ponytail swept to one side with waves through the tail, a ribbon tied at the base, the side placement making it feel romantic. Sweep the hair over one shoulder, secure low behind the ear, curl the tail with a 1.25-inch iron, then tie a velvet or satin ribbon around the base. It takes 15 to 20 minutes, is beginner-easy, and the ribbon is the Christmas Eve detail that makes it special. Secure the pony behind the ear with two crossed pins so the side placement holds.
This suits oval, heart, and round faces and works on medium to long hair. I’d pick this for a family gathering or a date night when I want something soft and feminine. Pro tip: sweep the pony to the side opposite your part for the most natural drape, and keep the ribbon loops full so it photographs beautifully. It looks especially lovely in candlelit family photos from the side.
12. High Braided Ponytail with Gold Cuff
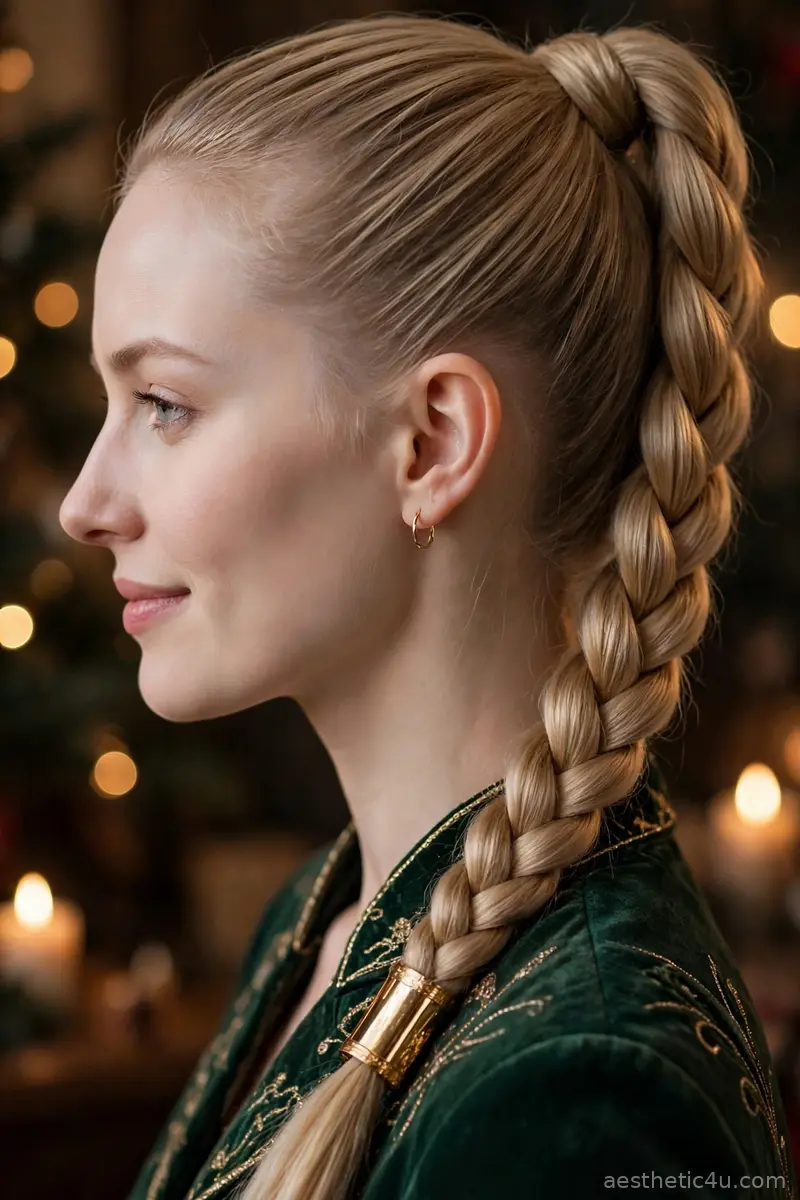
A sleek high ponytail with the tail braided in a smooth three-strand braid and a slim gold cuff slid over the end, the shine of the hair doing most of the talking. Brush everything back tightly with a smoothing serum, secure high with a strong elastic, then braid the tail firmly and secure with a clear elastic. Slide a gold hair cuff over the braid’s end and push it up slightly so it grips. It takes about 12 minutes, is beginner-easy, and the gold cuff is the one detail that makes it festive.
This suits oval, heart, and round faces and works on medium to long hair. I’d pick this when I want sharp and polished but still want one holiday accent. Honest caveat: a high ponytail pulled too tight gives a headache by dessert, so secure it firmly but comfortably, and keep two bobby pins handy in case the cuff starts sliding down the braid.
13. Elegant Gibson Tuck with Brooch
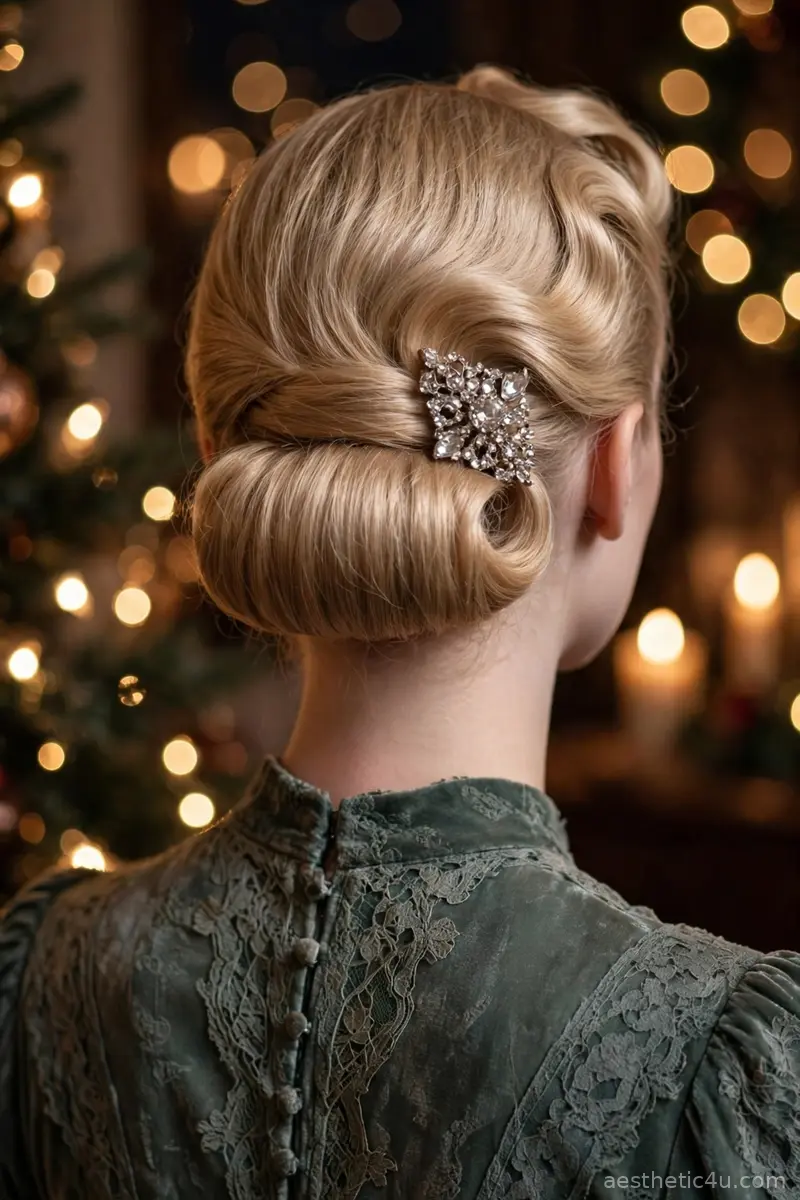
Hair tucked into a soft roll at the nape, finished with a vintage brooch sitting like jewelry on the hair: smooth, rounded, and elegant. Make a low ponytail, split the hair above the elastic to form a pocket, flip the tail up and tuck it through, then roll until snug and pin flat. Place the brooch slightly off-center. It takes 10 to 15 minutes, is beginner to intermediate, and one special brooch is all you need. Pin the roll flat against the nape with long bobby pins hidden inside.
This suits oval, long, and heart-shaped faces and works on medium to long hair. I’d pick this when I love vintage elegance for a formal Christmas Eve. Pro tip: anchor the brooch through the roll’s base, not just surface hair, so it never shifts, and keep the front sleek with a light serum for contrast. It looks incredible with high necklines and vintage-inspired dresses.
14. Shiny Straight Hair with Velvet Headband
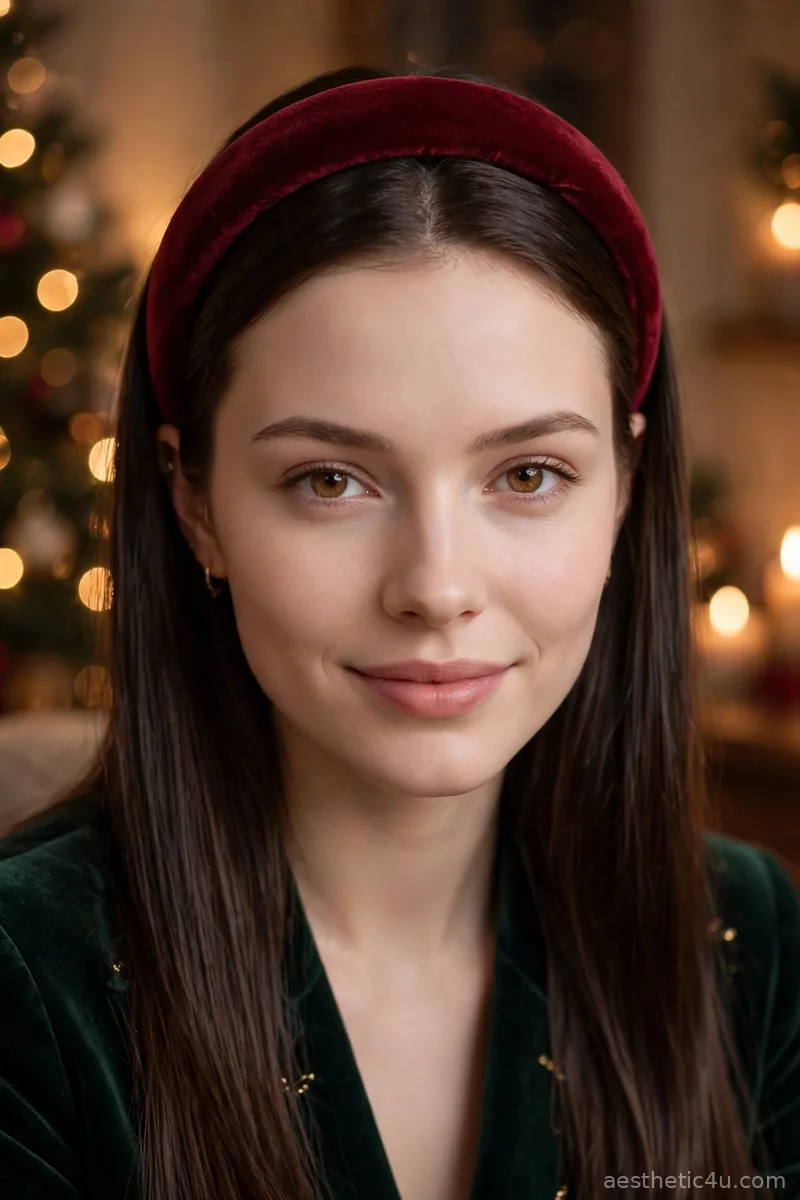
Straight, glossy hair with a padded velvet headband bringing all the holiday drama while the hair stays sleek and simple. Flat-iron in clean sections with a heat protectant, press a shine serum through the ends, then place the headband about an inch behind the hairline and push gently back. It takes 20 minutes, is beginner-easy, and it takes thirty seconds to place the band for a completely intentional look. Press a shine serum through the mid-lengths and ends for a mirror-like finish.
This suits every face shape and works on short to long hair. I’d pick this when I want maximum effect with minimum effort. Honest caveat: padded bands press into the head over hours, so choose one with soft inner padding and position it slightly back from the hairline to avoid a headache by dessert. It takes thirty seconds and looks completely intentional every time.
15. Half-Up Braided Crown with Fairy Lights
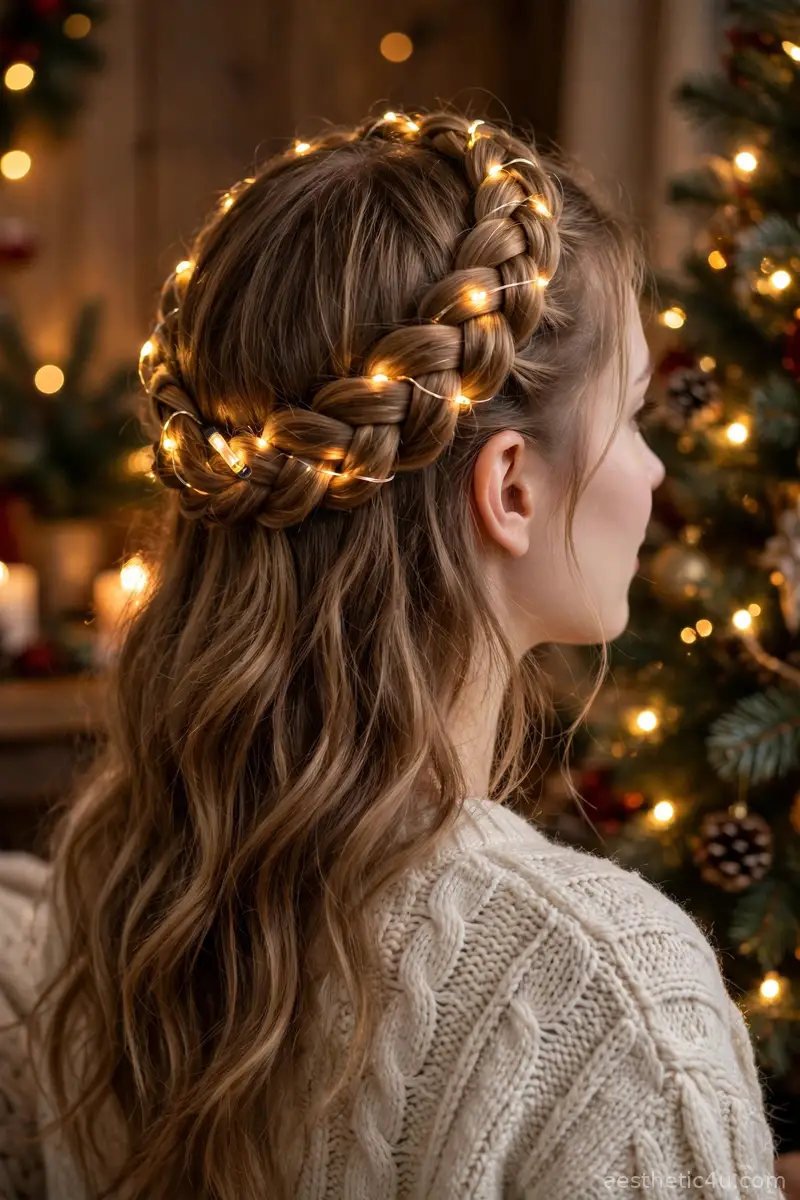
A chunky braid wrapped around the crown like a halo, with a thin string of battery fairy lights woven loosely through it, the rest of the hair falling in loose waves. Braid from one temple along the hairline around to the other side, pin the tail under, then weave the light string through the braid’s loops, tucking the battery pack under the braid’s end. It takes 15 to 20 minutes, is intermediate, and it is pure Christmas magic for a tree-side evening. Keep the lights on the lowest warm setting for a gentle glow.
This suits medium to long hair and flatters oval and heart-shaped faces. I’d pick this when I want the most magical look of the evening. Pro tip: test the lights before you weave them in, and keep the battery pack hidden at the back of the crown where it never shows. It suits a holiday party or photos by the tree perfectly.
Keep exploring: 19 Christmas Velvet Bow Hairstyles That Feel Pure Luxury
16. Messy Bun with Fairy Lights
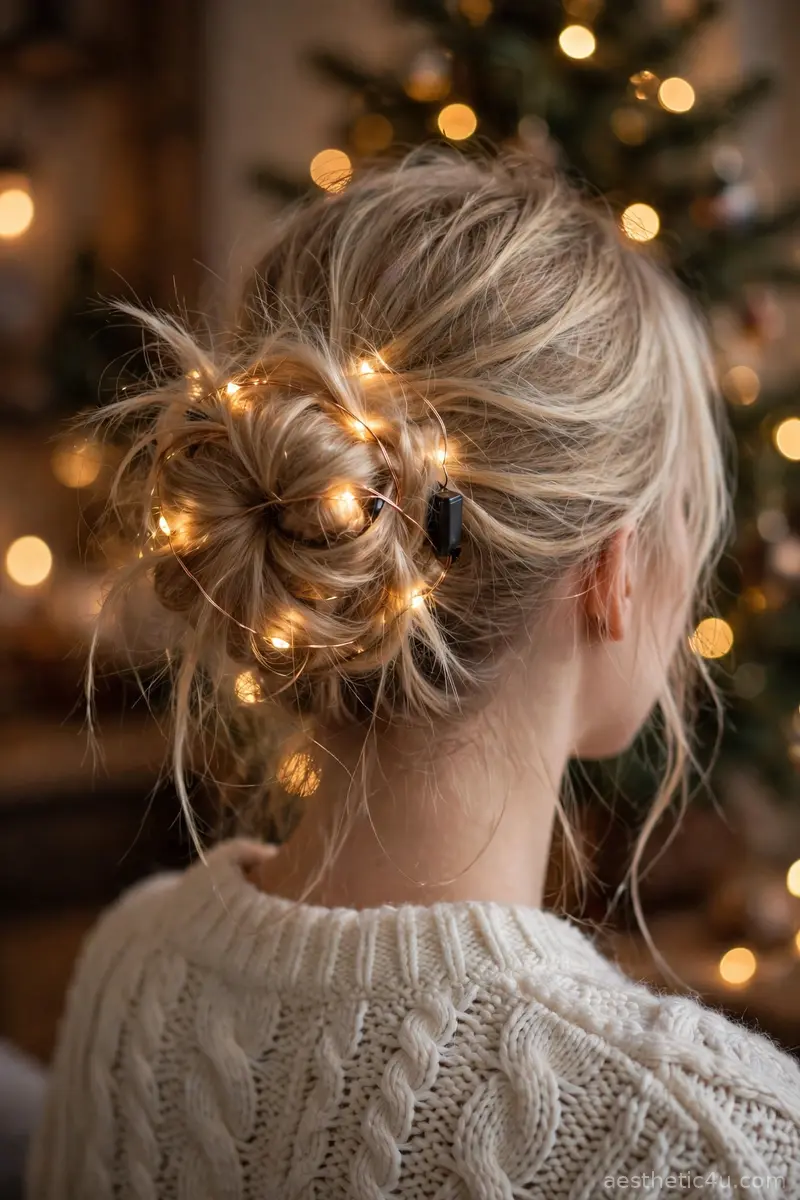
A loose, relaxed bun with a string of fairy lights woven through it: the bun itself casual and soft, the lights making it festive. Gather into a loose low bun without smoothing, pin casually, then weave a thin string of battery lights through and around it, tucking the battery pack underneath. It takes 10 minutes, is beginner-easy, and it is the most joyful hairstyle for opening gifts or a casual family night. Tuck the battery pack underneath the bun where it stays completely hidden.
This suits every face shape and works on medium to long hair. I’d pick this for the most fun, cozy moments of the evening. Honest caveat: keep the lights on a low setting and never use plug-in strings in hair; battery micro-lights only, and remove them before leaning near candles or the fireplace. It is the most joyful hairstyle on this entire list.
17. Sleek Wrapped Ponytail
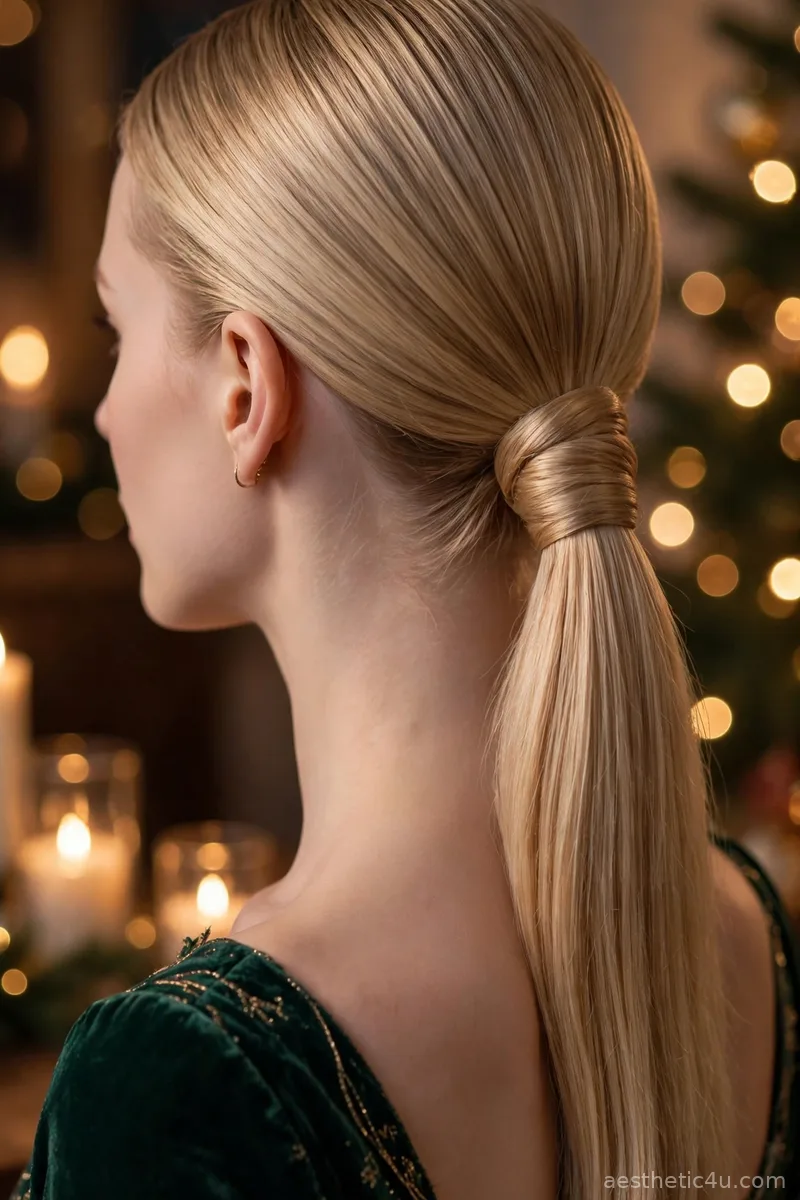
A smooth ponytail with the elastic hidden under a wrapped strand of hair, the top sleek and the tail falling straight for a clean, modern finish. Brush everything back tightly, secure at the nape or mid-head, take a half-inch strand from underneath, wrap it around the base, and pin underneath. It takes 10 to 15 minutes, is beginner-easy, and the wrapped base is the small detail that makes it look expensive. Use a snag-free elastic so the base stays smooth and bump-free.
This suits oval, heart, and long faces and works on medium to long hair. I’d pick this when I want sharp and simple. Pro tip: smooth the top with a light gel applied with a toothbrush along the hairline for a truly flawless finish, and check the back with a hand mirror before heading out. It looks great in photos and suits a modern, minimal outfit.
18. Curly Pinned Updo
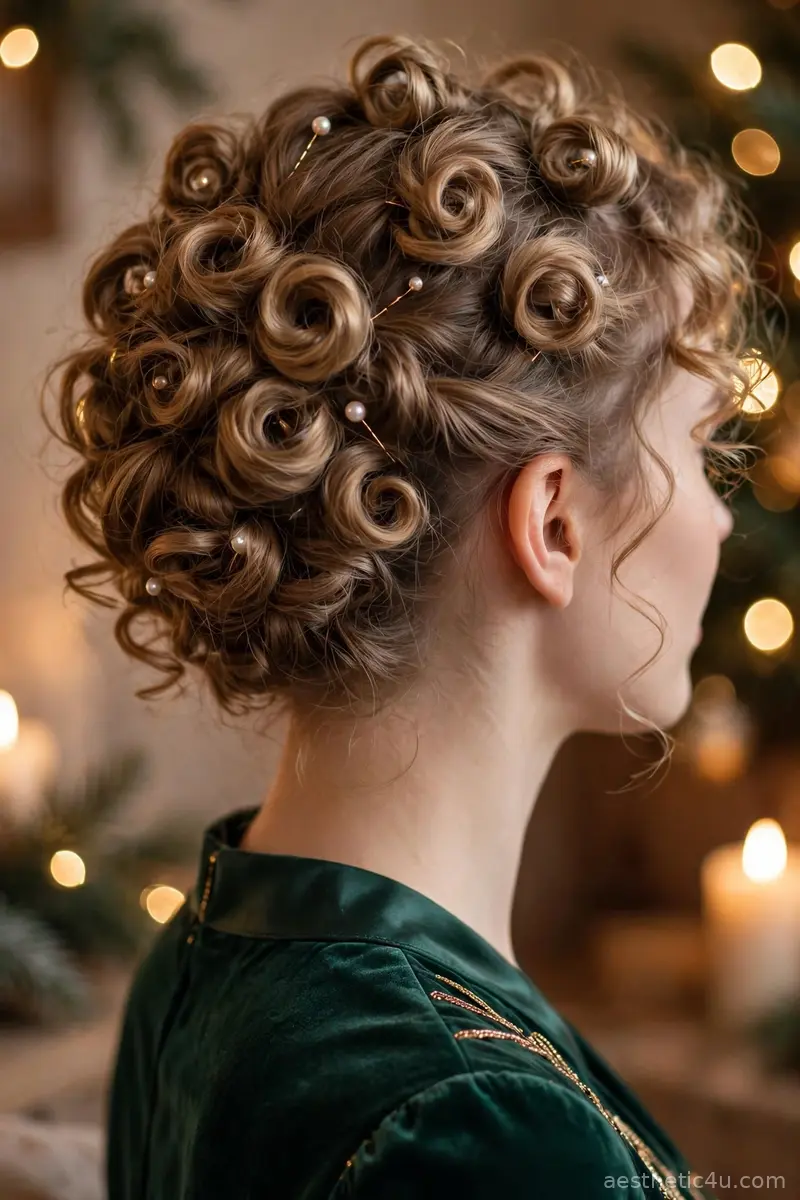
Natural curls pinned up into a soft, textured updo, the curls creating the volume and shape while pins hold it all without hiding the texture. Gather sections loosely upward and pin with the curls’ natural fall, building a soft shape at the crown and back. Work with a curl cream for definition. It takes 15 minutes, is beginner to intermediate, and it celebrates natural texture while keeping curls off the neck. Build the shape gradually, pinning one section at a time and checking the balance.
This is made for naturally curly and coily hair of any length past the chin. I’d pick this when I have curls and want to show them off. Honest caveat: pin with the curl pattern, not against it, or the pins will pop out; use U-shaped hairpins instead of bobby pins for the strongest hold in thick curls. A few pearl pins tucked in make it Christmas Eve ready.
19. Vintage Hollywood Side Part
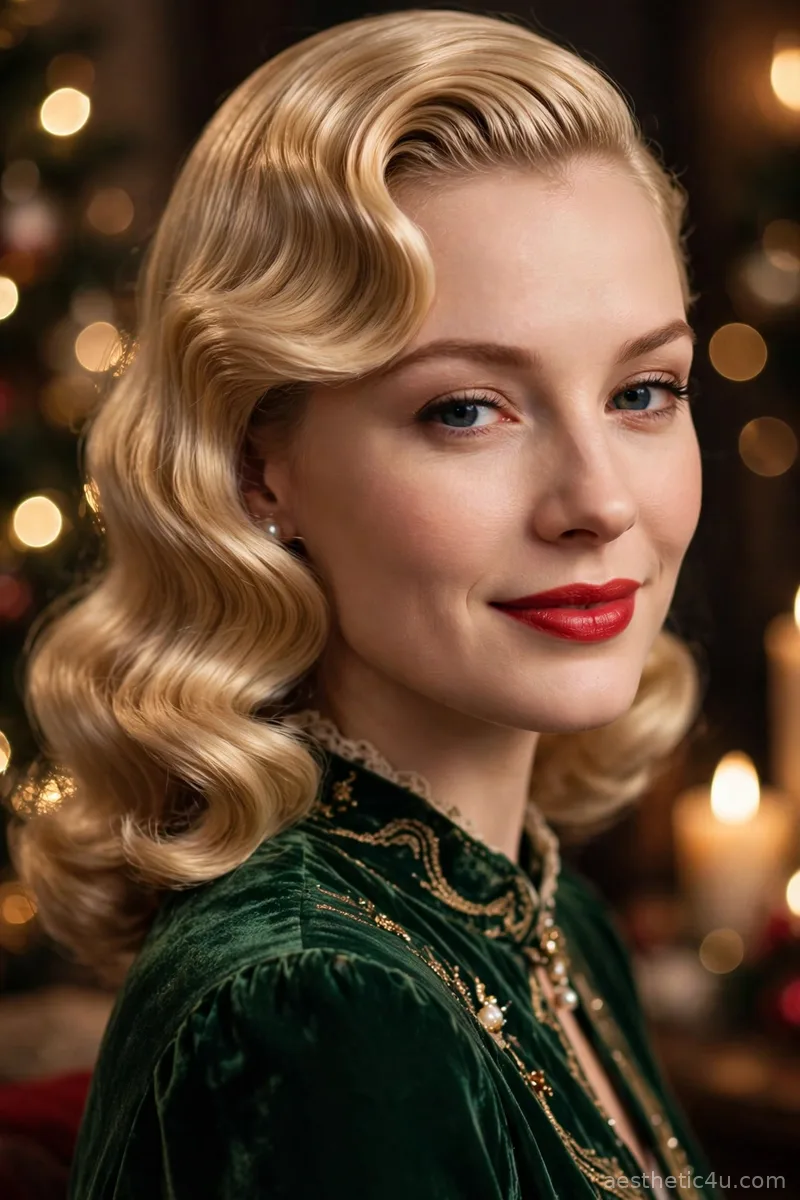
Deep side-parted hair with polished vintage waves, the part sharp and the waves glossy: old Hollywood at its most elegant. Create a deep side part, curl sections with a 1.25-inch iron in the same direction, pin to cool, then brush through with a soft brush and set with a medium-hold spray. It takes 30 to 40 minutes, is intermediate, and it looks stunning in candlelight. Brush the cooled curls with a soft boar-bristle brush until they merge into smooth, glossy waves.
This suits oval and heart-shaped faces and works on medium to long hair. I’d pick this when I want to feel glamorous on Christmas Eve. Pro tip: pair it with a red lip for the full vintage effect, and set the deep part with a strong-hold spray plus two hidden bobby pins so the sweep never collapses mid-evening. It looks stunning in candlelight and photographs beautifully.
How to Choose the Right Christmas Eve Hairstyle for You
Think about your evening first. Hosting dinner means your hair must survive cooking, hugging, and hours on your feet, so choose braided crowns, low buns, and pinned updos that lock in. Attending as a guest gives you more freedom for looser waves and half-up styles. A midnight service or formal dinner calls for polish: French twists, wrapped buns, and pearl or gold pins. For face shapes, round faces gain from crown height and asymmetry, oval faces suit almost everything, heart-shaped faces love side-swept softness, and square faces soften with waves rather than severe styles.
Then match your hair and your energy. Fine hair needs grip helpers like dry shampoo and texturizing spray, plus styles with built-in hold like braids and twists. Thick hair needs strong elastics and long pins. Short hair shines with accessories: velvet headbands and satin bands do the festive work with zero styling stress. And be honest about the night: if you will be busy and moving, pick a style you can forget about; Christmas Eve is about the people around you, not fussing with your hair.
Styling Tips & Common Mistakes to Avoid
My Christmas Eve rules: first, style on day-old hair whenever you can, because freshly washed hair slips out of pins and braids; dry shampoo at the roots fixes it in seconds. Second, always use a heat protectant before hot tools, since December damage shows as frizz in every flash photo. Third, do a trial run a day or two before, timed, so the evening itself stays relaxed. Fourth, if you use fairy lights, choose battery micro-lights on a low warm setting and keep the pack tucked invisibly at the style’s base.
The mistakes I see every year: overloading on hairspray until the style turns crunchy, when light layers of flexible hold work better; placing pins and accessories symmetrically, which reads stiff instead of romantic; and choosing a fussy style that needs constant fixing, which pulls you out of the evening. The biggest one is skipping the mirror check from behind: Christmas Eve means group photos from every angle, so check the back with a hand mirror before anyone arrives.
Final Thoughts
Those are my favorite christmas eve hairstyles for this year, chosen for the quiet magic of the evening: candlelight, good food, and the people you love most. Pick the one that fits your evening, do a quick trial run, and remember that Christmas Eve is about comfort and closeness. The best hair is the kind that lets you relax and enjoy the people around you, and now you know how to build it. Have a magical night. Style it, spray it, and go enjoy every minute.
Follow Us On Pinterest: Easy To Find Next Style