Sana
Christmas is the one time of year when kids’ hair gets to be as fun and festive as everything else. December is packed with moments that deserve great hair: the school holiday party, the family dinner, the Christmas morning photos, and all the days in between. Braids are the perfect vehicle for festive styling because they hold decorations beautifully – ribbons woven through the strands, bells tied at the ends, clips dotted along the length – and they stay neat through a full day of playing. This guide collects 20 Christmas braids for kids that range from simple 5-minute styles to genuine showstoppers.
These ideas are written for parents styling kids roughly ages 4 to 12, from complete beginners to confident braiders. Every braid includes step-by-step instructions with the exact tools and products to use, how long it takes, which hair type it suits, and my honest stylist opinion on the best occasion for it. I have also added a guide on choosing the right braid for your child’s hair and skill level, plus my best styling tips and the mistakes I see parents make most often. Let your little one scroll through and pick her favorite – kids wear braids they chose themselves with so much more pride.
1. Red Ribbon Woven Dutch Braid
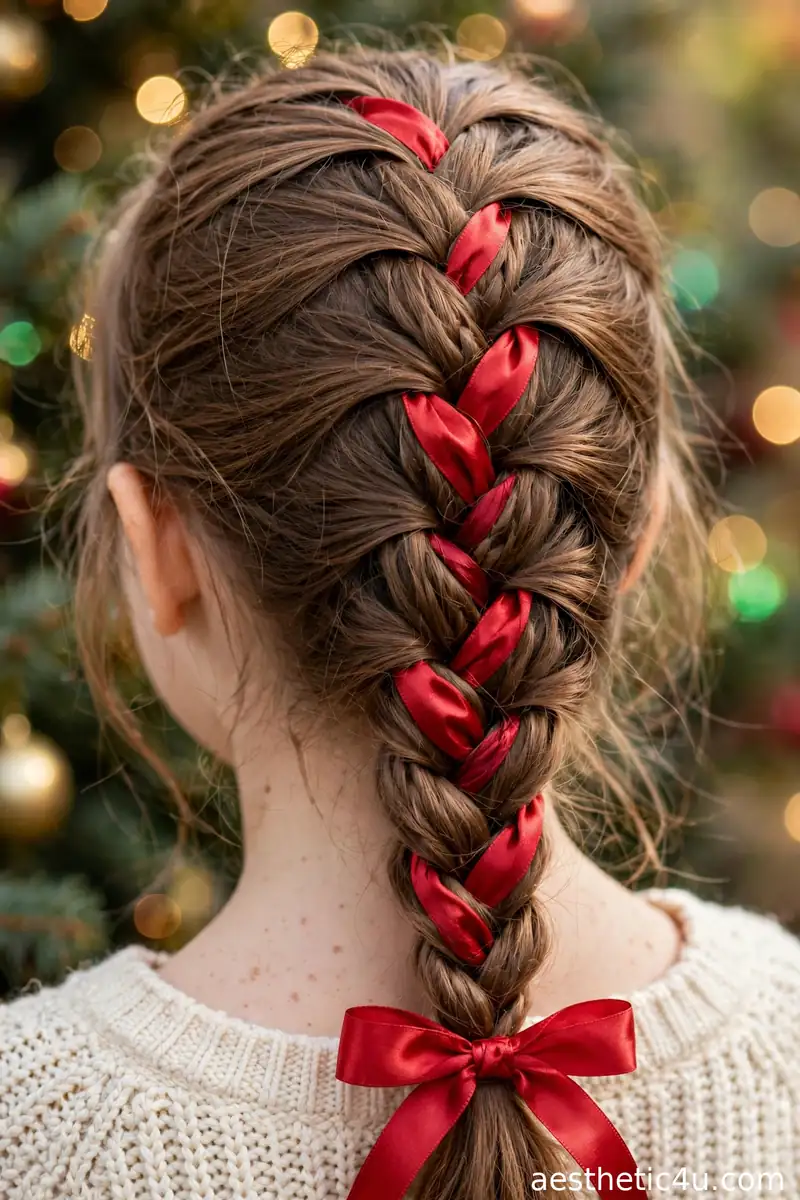
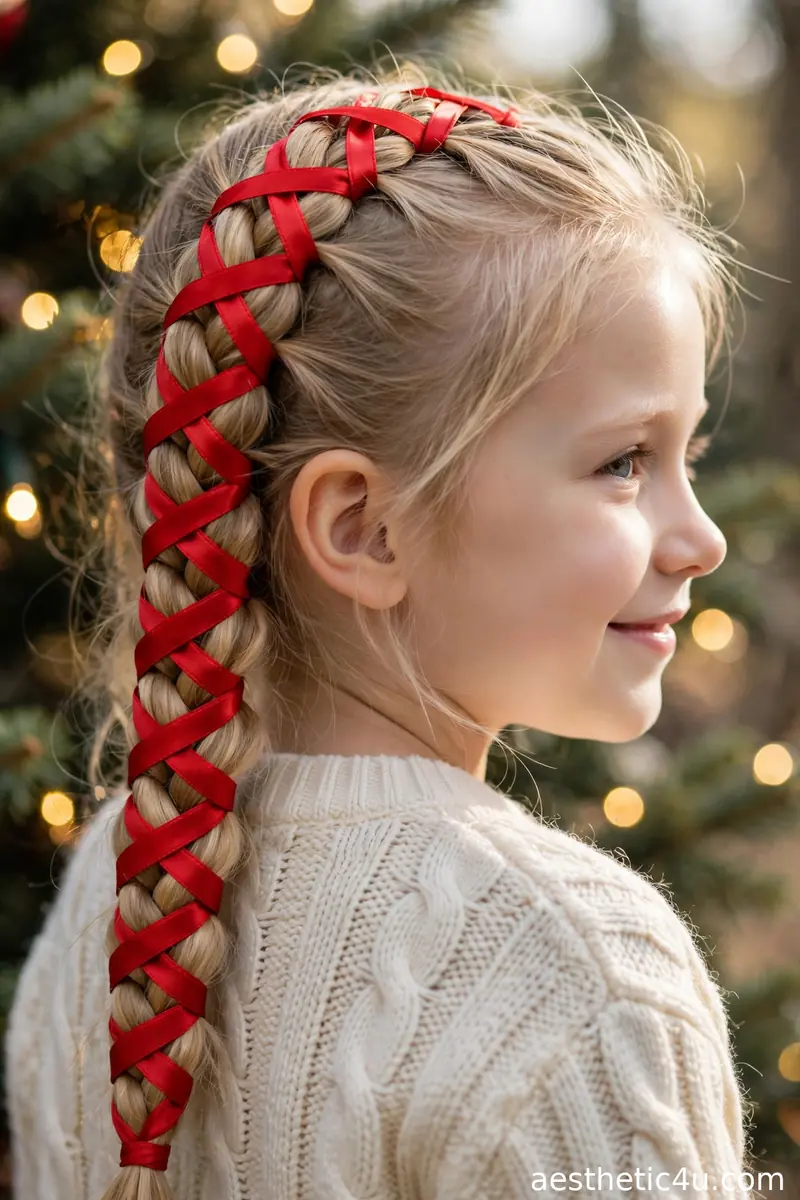
Brush the hair smooth and gather it into a low ponytail base to start, or begin the Dutch braid directly at the crown. Take a 1-inch wide red satin ribbon, fold it in half, and anchor it under your elastic at the start so you have two ribbon tails. Braid Dutch-style – crossing the outer strands UNDER the middle – adding hair from the sides as you go, and weave one ribbon tail in with each outer strand. Tie off with a small elastic and wrap the ribbon ends into a bow. This takes about 10 minutes and is beginner-friendly if you can already do a basic Dutch braid.
I’d pick this as the first holiday braid to learn, because it looks impressive but the technique is just a Dutch braid with a passenger. It suits medium to long hair of any texture, and the red pops beautifully against blonde, brown, and black hair alike. My honest tip: use a ribbon no wider than 1 inch, because wider ribbon slips and bunches. This is my top recommendation for the school holiday party – festive, neat, and it lasts all day.
2. Candy Cane Stripe Fishtail
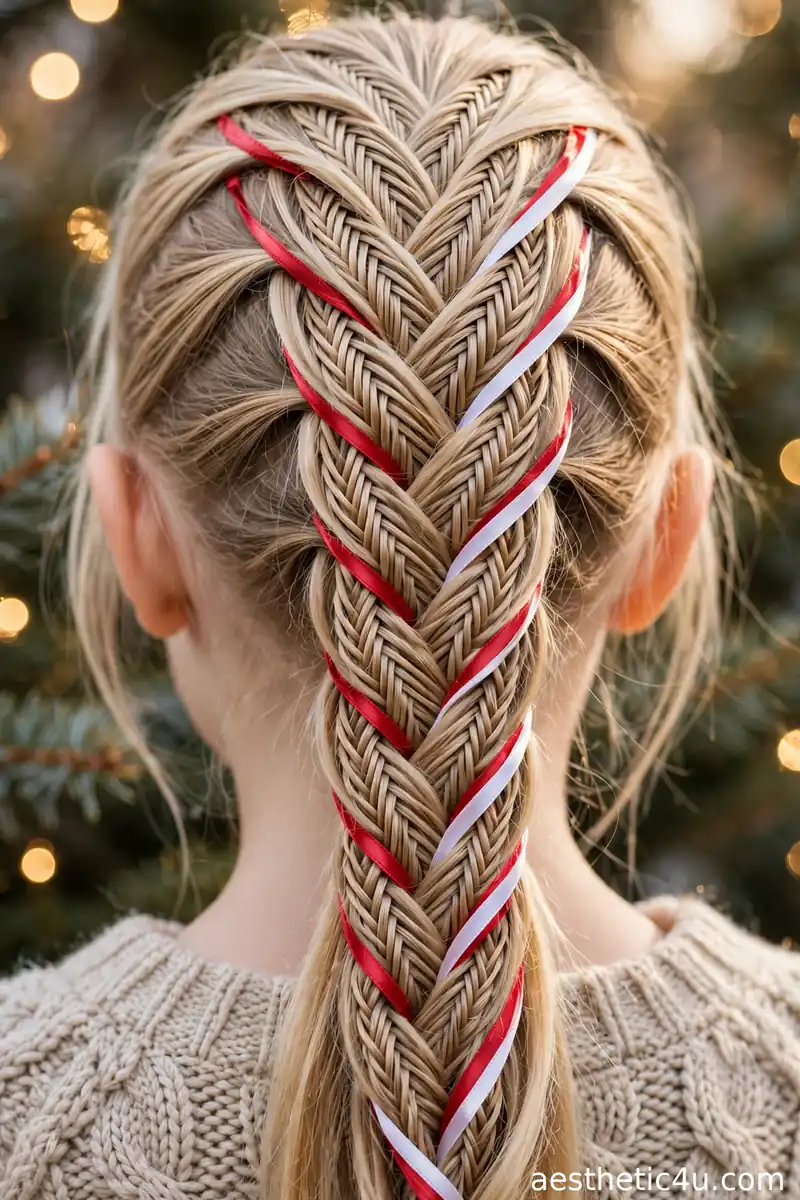
Gather the hair into a ponytail at the nape or to one side – starting from a ponytail makes fishtails much easier for beginners. Anchor one red and one white narrow ribbon (about half an inch wide) at the elastic. Split the ponytail into two sections and fishtail down: take a thin strand from the outside of the left section, cross it over to the right, then repeat from the right. Carry the red ribbon with the left crossings and the white with the right to create the candy cane stripe effect. Tie off and trim ribbon ends. Allow 12 to 15 minutes; the fishtail technique needs a little practice.
I’d pick this for the kid who wants the most eye-catching braid in the room. It suits long hair best, since fishtails need length to show the stripe pattern, and it works on straight or wavy textures. My honest caveat: keep your sections small and even, because chunky uneven pieces blur the stripes. Kids absolutely love this one – it genuinely looks like Christmas candy, and it gets compliments everywhere she goes.
3. Jingle Bell Accent Braid
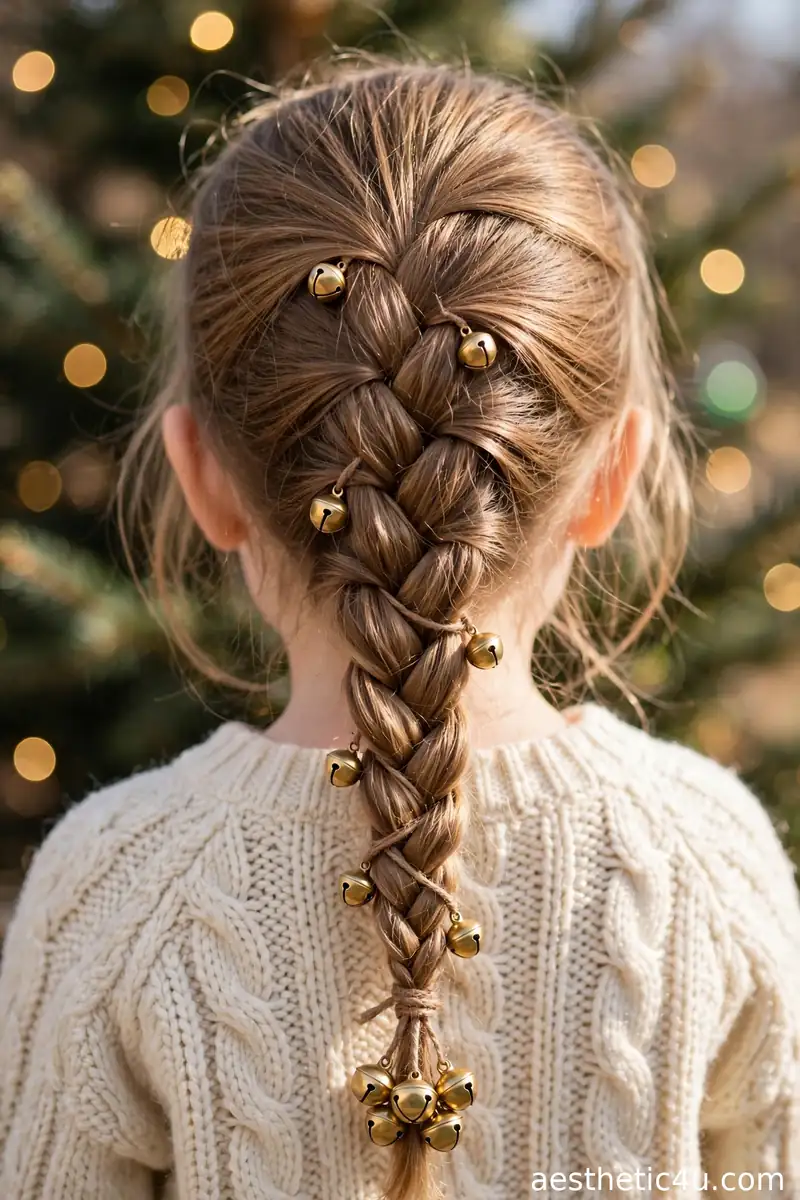
Braid a simple three-strand braid down the back – the easiest braid there is, perfect for beginners. Tie it off with a small elastic, then attach tiny craft jingle bells (the half-inch size with built-in loops) by threading thin ribbon through the loops and tying them firmly at 2-inch intervals along the braid, plus a cluster of three at the end. Give each bell a firm tug to make sure it cannot slide off. This takes about 8 minutes total. The braid itself is basic; the bells are the whole magic, and they jingle softly when she moves.
I’d pick this for younger kids who care more about fun than fancy – it is basically a braid and a musical instrument in one. It suits any hair length that can hold a basic braid and any texture. My honest tip: tie the bells on tighter than you think necessary, because a lost bell on the classroom floor is a sad moment. Skip this style for naptime or quiet events, since the jingling is constant and joyful and not exactly subtle.
4. Double French Braids with Green Bows
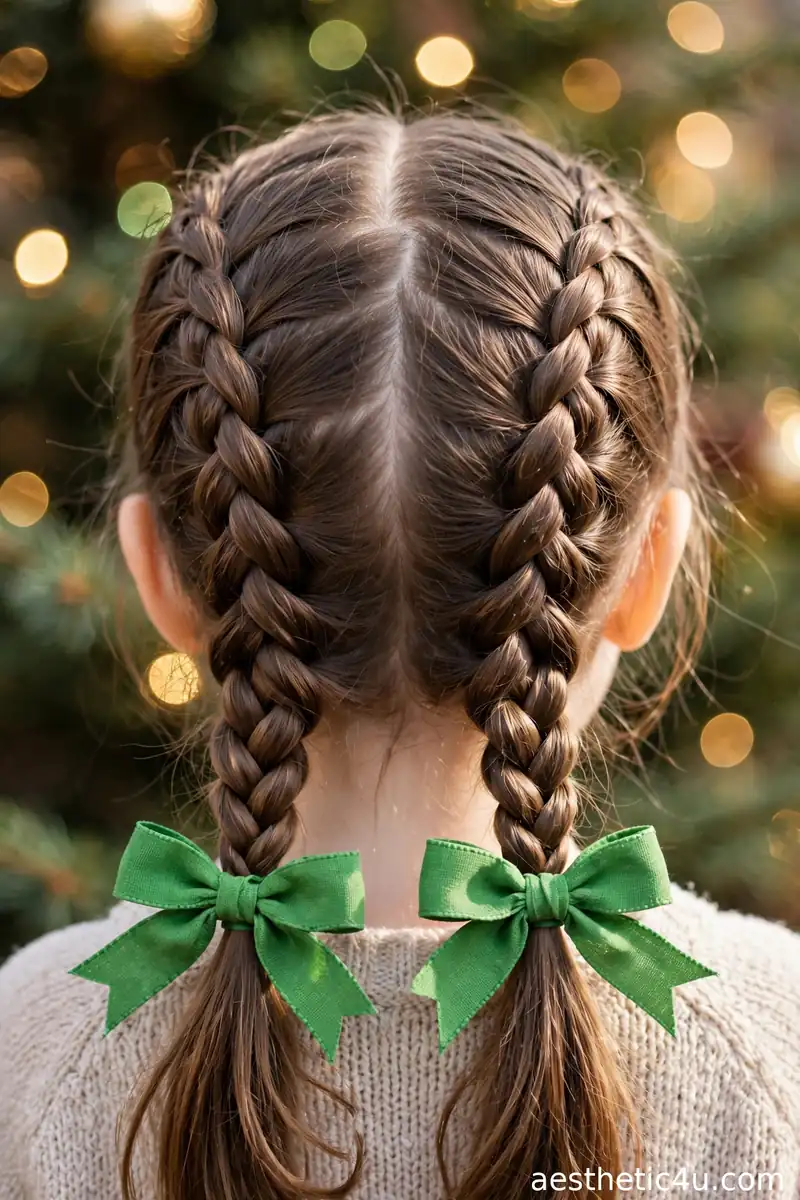
Part the hair cleanly down the middle with a rat-tail comb. On each side, French braid from the hairline back to the nape, keeping your tension even and your sections neat – lightly misting with water or a detangling spray keeps flyaways under control. Secure each braid into a low ponytail with a small elastic, then tie a large green grosgrain bow over each elastic. This takes about 12 minutes if you are comfortable with French braiding, a bit longer if you are still learning. The symmetrical braids read sporty, the bows read Christmas.
I’d pick this for active kids who need their hair to survive playground time and still look festive at dinner. Double French braids stay put through literally anything, and they suit every face shape and hair texture. My honest tip: the bows do the heavy festive lifting here, so invest in good-quality structured bows that hold their shape – floppy cheap bows ruin the effect. This is my go-to recommendation for Christmas sports days and school parties.
5. Christmas Tree Pull-Through Braid
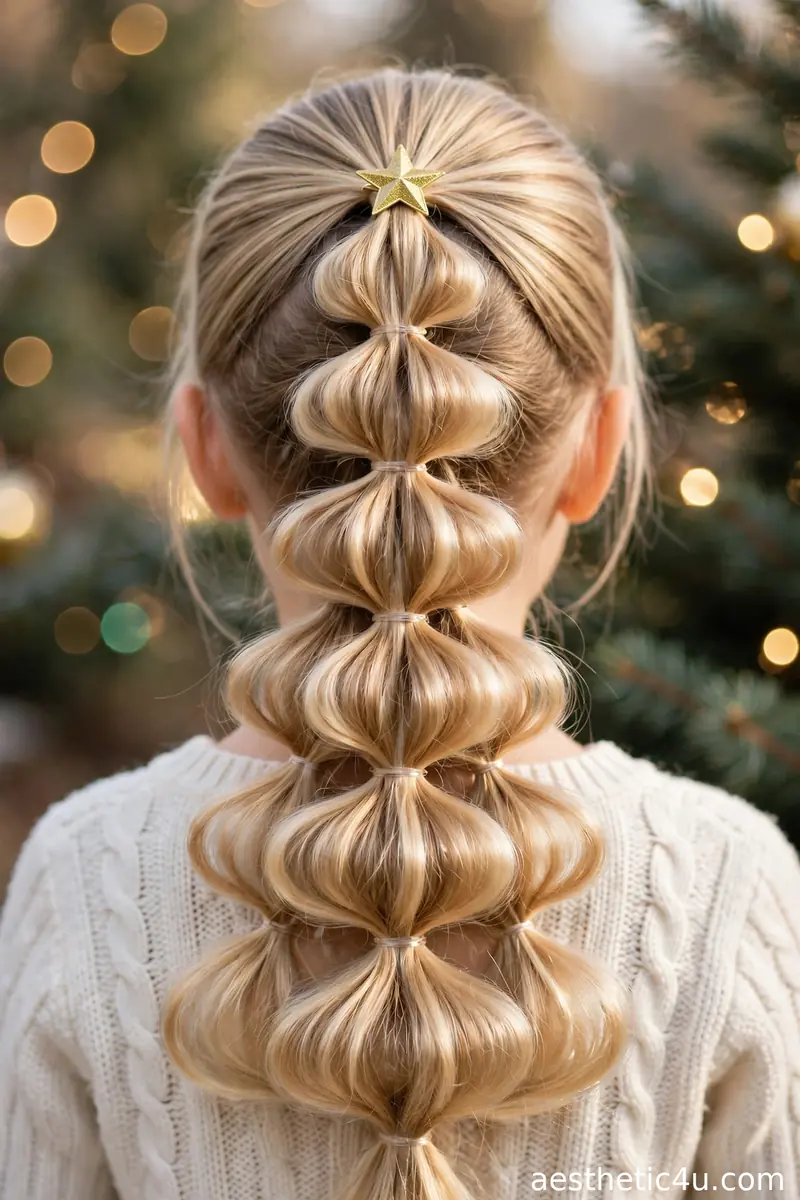
Gather the top section of hair into a small ponytail and secure with a clear elastic. Take a second section from the sides, pull it up and over the first ponytail, and secure with another elastic a couple of inches down – this creates the first “bubble.” Repeat down the head, making each section slightly wider than the last so the shape widens toward the bottom like a Christmas tree. Gently pancake each bubble by tugging the edges outward for fullness. Clip a small gold star on top as the tree topper. Allow 15 minutes; the technique is simple but the stacking takes patience.
I’d pick this for the ultimate Christmas party statement – kids ask for this one by name once they have seen it. It suits medium to long hair and works on most textures, though very slippery fine hair may need a light texturizing spray for grip. My honest caveat: this is a sit-still style, so save it for events, not playground days – the bubbles flatten if she roughhouses. The star topper is non-negotiable; it makes the whole thing.
Keep exploring: Christmas Hairstyles for Kids
6. Star Clip Dutch Crown Braid
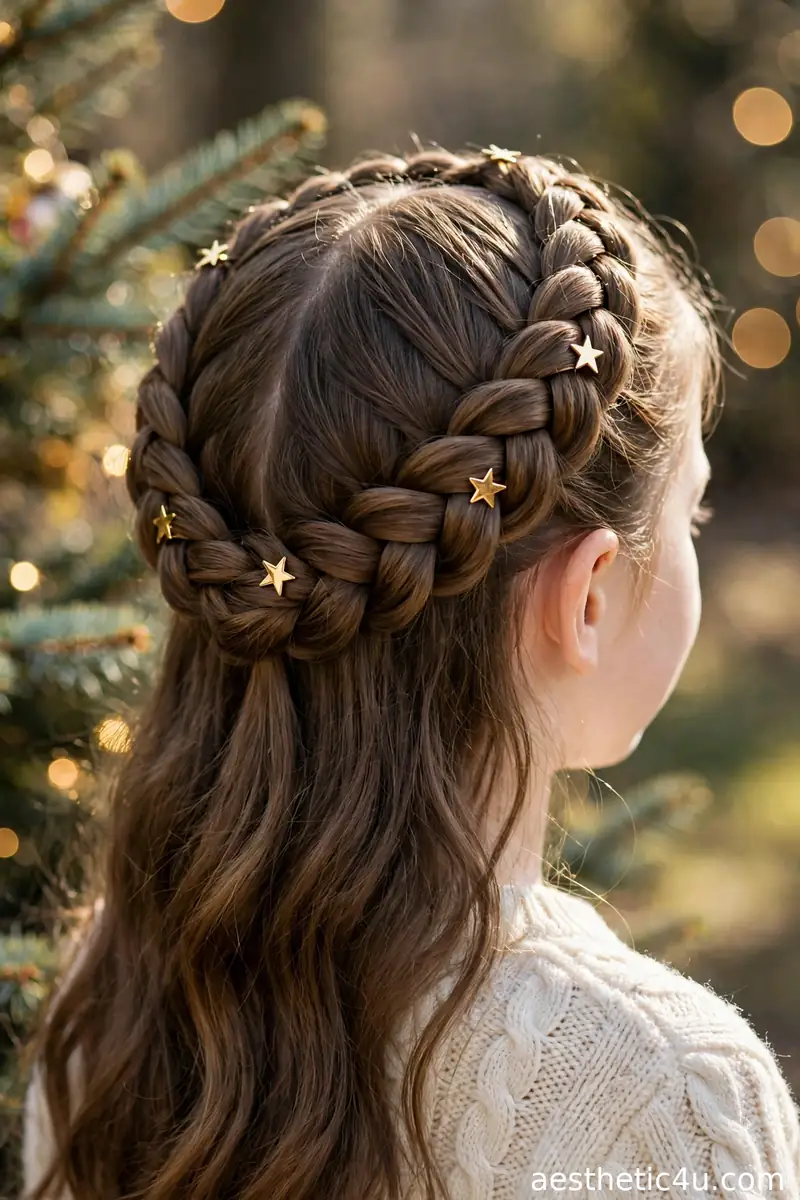
Part the hair to one side, then Dutch braid along the hairline from the deep part around the head, adding hair only from the front hairline side as you curve – this creates the crown effect. Work all the way around and braid the remaining length, then tuck and pin the tail under the start of the braid with 3 to 4 bobby pins. Dot 5 to 7 small gold star clips along the braid, spacing them evenly, making sure every bit of hair is worked into the crown so nothing hangs loose. Allow 15 to 20 minutes; crown braids take practice to keep the curve smooth.
I’d pick this for family Christmas photos and holiday dinners where she should feel like a princess. It suits medium to long hair and flatters round faces by adding height at the crown. My honest tip: pin as you go rather than at the end – one pin every few inches keeps the curve from sagging while you work. The star clips are the easiest decoration in this whole guide, and they catch the light beautifully in photos.
7. Bubble Braid with Red and Gold Ties
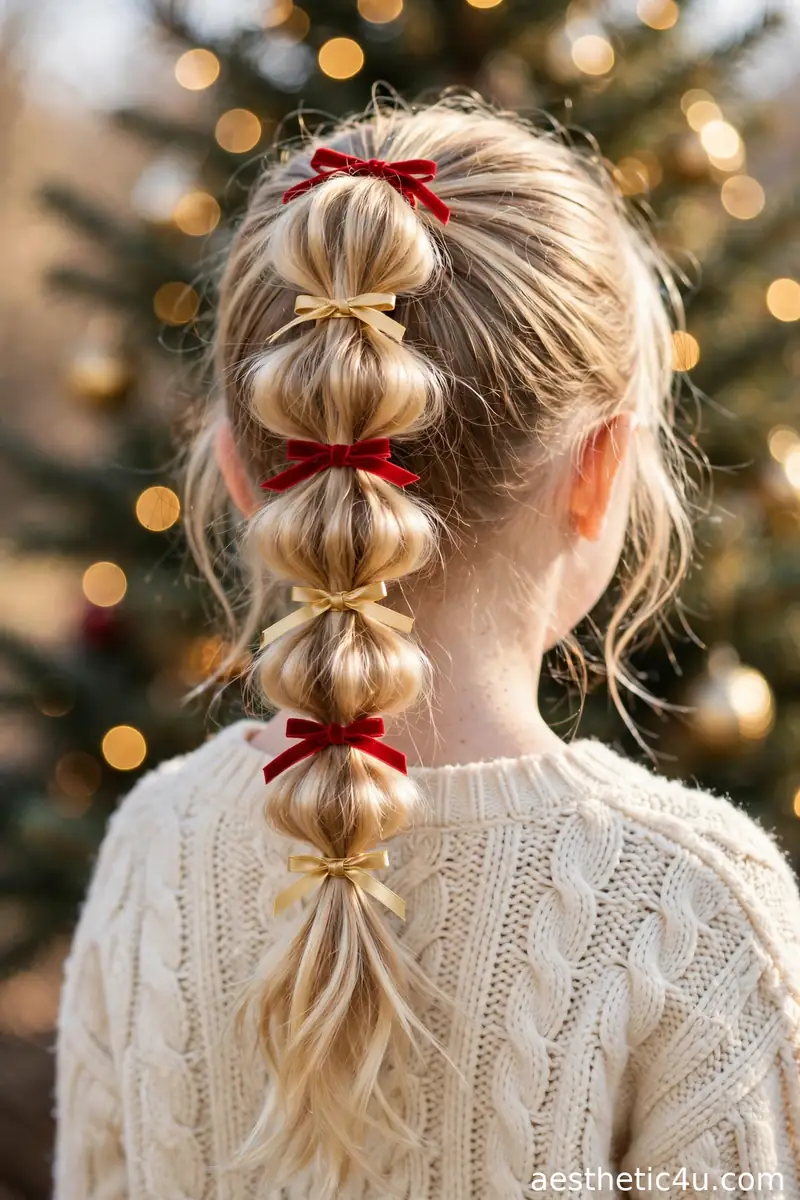
Gather the hair into a high or mid ponytail and secure firmly with an elastic. Place another elastic 2 inches down, then gently tug the hair between the two elastics outward to puff it into a bubble. Repeat down the length, alternating red and gold small elastics – or use clear elastics and tie short red and gold ribbon pieces over each one for a richer look. Pancake each bubble a little more for maximum fullness. This takes about 8 minutes and is genuinely beginner-proof; if you can use an elastic, you can make this braid.
I’d pick this for the busiest mornings, because it is the fastest festive style in this guide that still looks like real effort. It suits medium to long hair of any texture, and the red and gold ties do all the talking. My honest tip: start the first elastic tight and secure, since the whole style hangs from it – a slipping base ruins every bubble below. Even total beginners nail this one on the first try.
8. Candy Bow Braided Pigtails
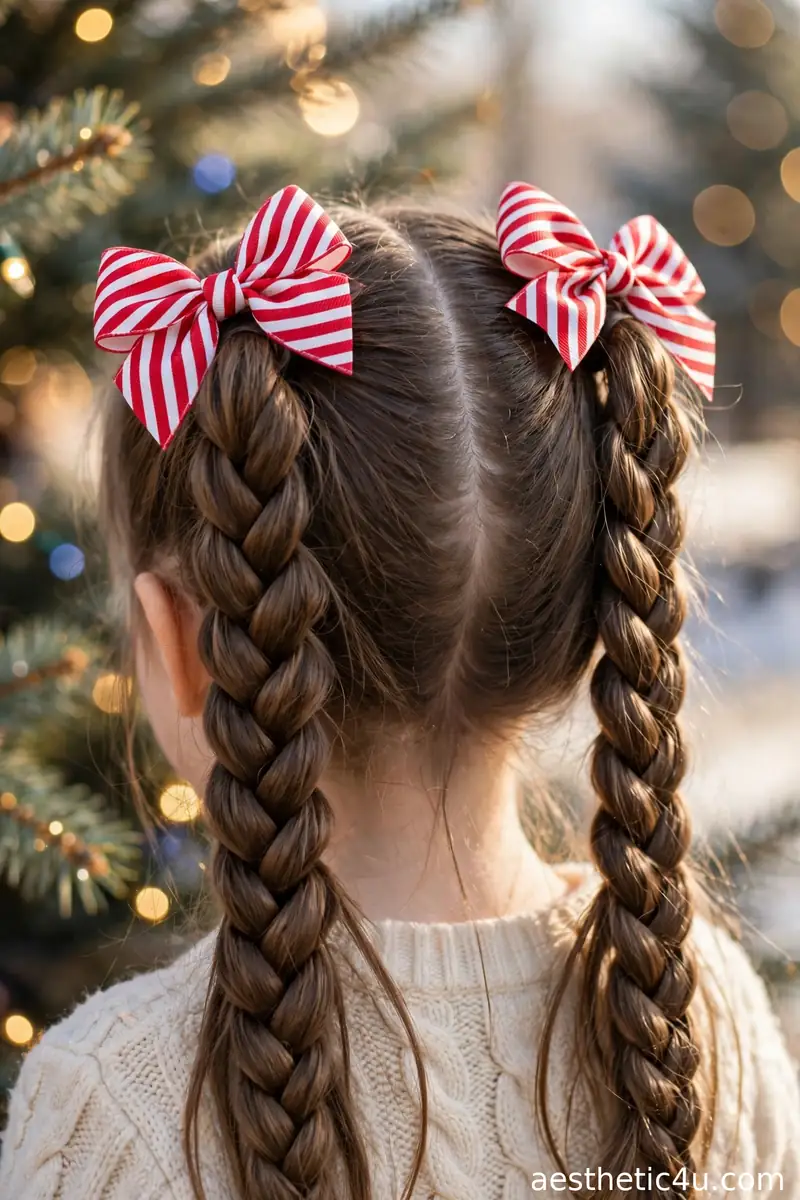
Part the hair down the middle and braid each side into a classic three-strand braid, starting high near the temples for a playful look. Tie each off with a small elastic. Then attach one large candy-striped bow – red and white striped grosgrain – at the top of each braid using the bow’s alligator clip, positioning them symmetrically. Fluff the bows so the loops stand full and even. This takes about 10 minutes. The braids themselves are simple; the oversized bows are the entire statement, so choose bows at least 4 inches wide for the right proportions.
I’d pick this for Christmas morning – it is the definition of a holiday classic and photographs incredibly well. It suits medium to long hair and flatters heart-shaped and oval faces. My honest caveat: big bows plus high pigtails is a LOT of look, so keep her outfit simple to avoid visual overload. Buy quality bows with stiffened loops; cheap floppy bows collapse by noon and drag the whole style down.
9. Braided Heart with Festive Pins
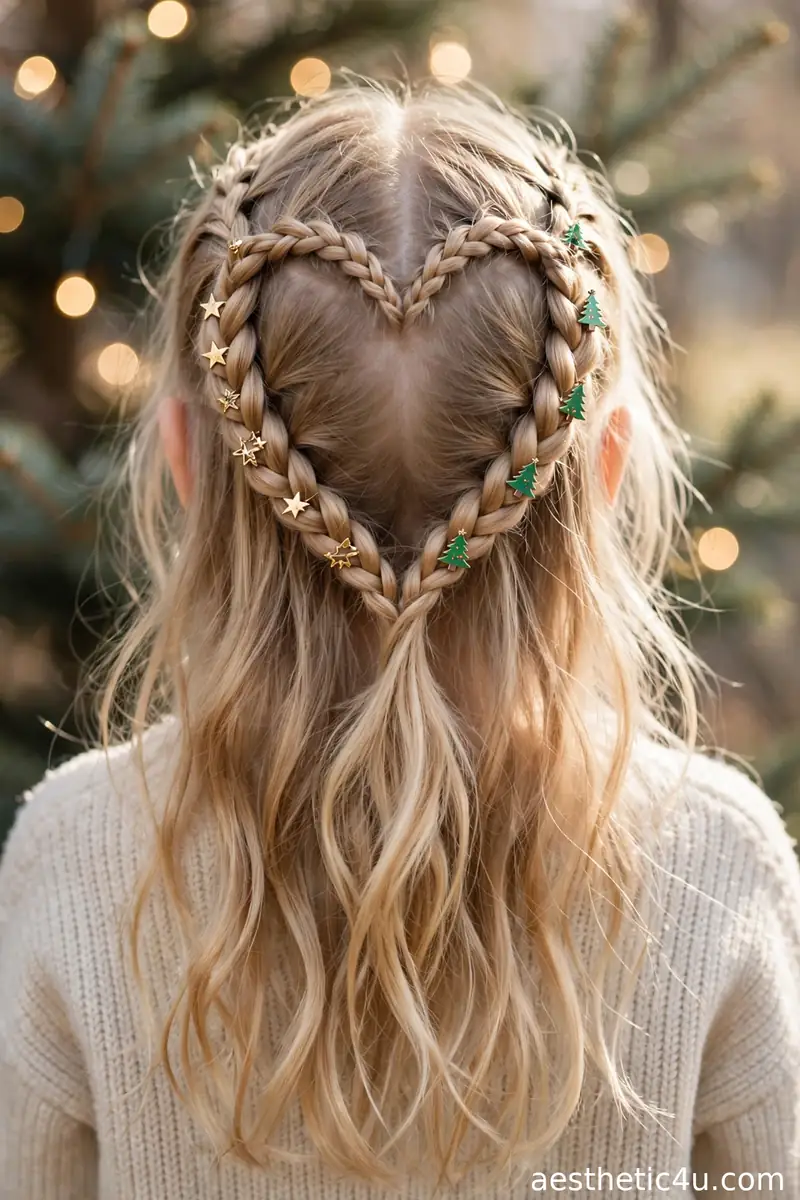
Part the hair down the middle at the back of the head. On each side, take a 2-inch section from the crown and braid a small three-strand braid angling down and inward. Curve the two braids toward each other so their ends meet at the center back, forming the bottom point of a heart, and join them with a small elastic. Pin the curves in place with mini bobby pins hidden underneath, then decorate with 3 to 4 festive clips – stars, trees, or holly – along the heart’s curves. This takes about 10 minutes and looks far more complicated than it is.
I’d pick this when you want maximum reaction for minimum effort – the heart shape gets gasps every time. It suits medium-length to long hair and works on straight or wavy textures. My honest tip: sketch the heart shape mentally before you start pinning, because the symmetry is what sells it. Step back and check from behind with a hand mirror. Kids feel incredibly special wearing this one.
10. Snowflake Fishtail with White Ribbon
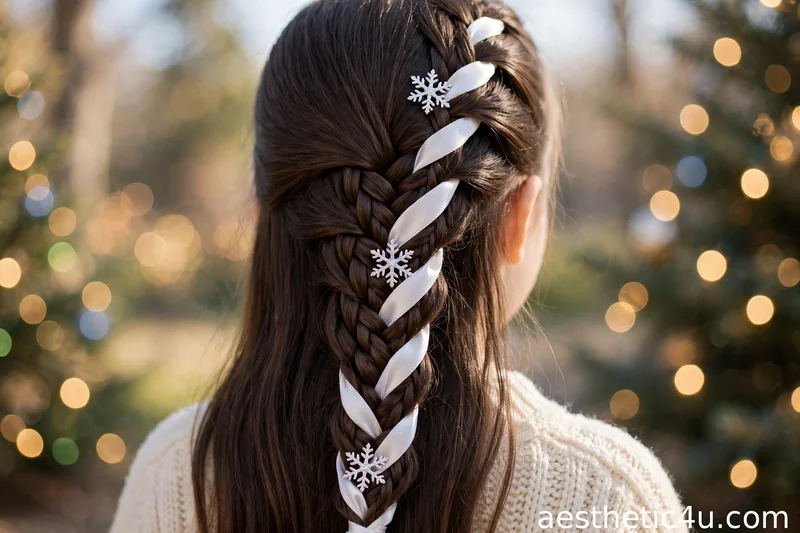
Gather the hair to one side into a low side ponytail – side placement makes fishtails easier to see and manage. Anchor a white satin ribbon about three-quarters of an inch wide at the elastic. Split the hair into two sections and fishtail downward, carrying the ribbon along with one side’s crossings so it weaves through the braid. Tie off with a clear elastic, then clip 3 to 4 silver snowflake clips along the braid’s length. Gently pancake the fishtail edges for a fuller look. Allow 12 to 15 minutes; fishtails reward patience with small, even sections.
I’d pick this for Christmas Eve – it is elegant without being over the top, like a winter wonderland in a braid. It is especially stunning on dark hair, where the white ribbon reads like fresh snow. It suits long hair best. My honest tip: the snowflake clips are the magic here, so space them deliberately rather than clustering – one near the top, two in the middle, one near the end. A little texturizing spray beforehand helps the fishtail hold its shape.
Keep exploring: Christmas Braids
11. Silver Tinsel Wrapped Braid
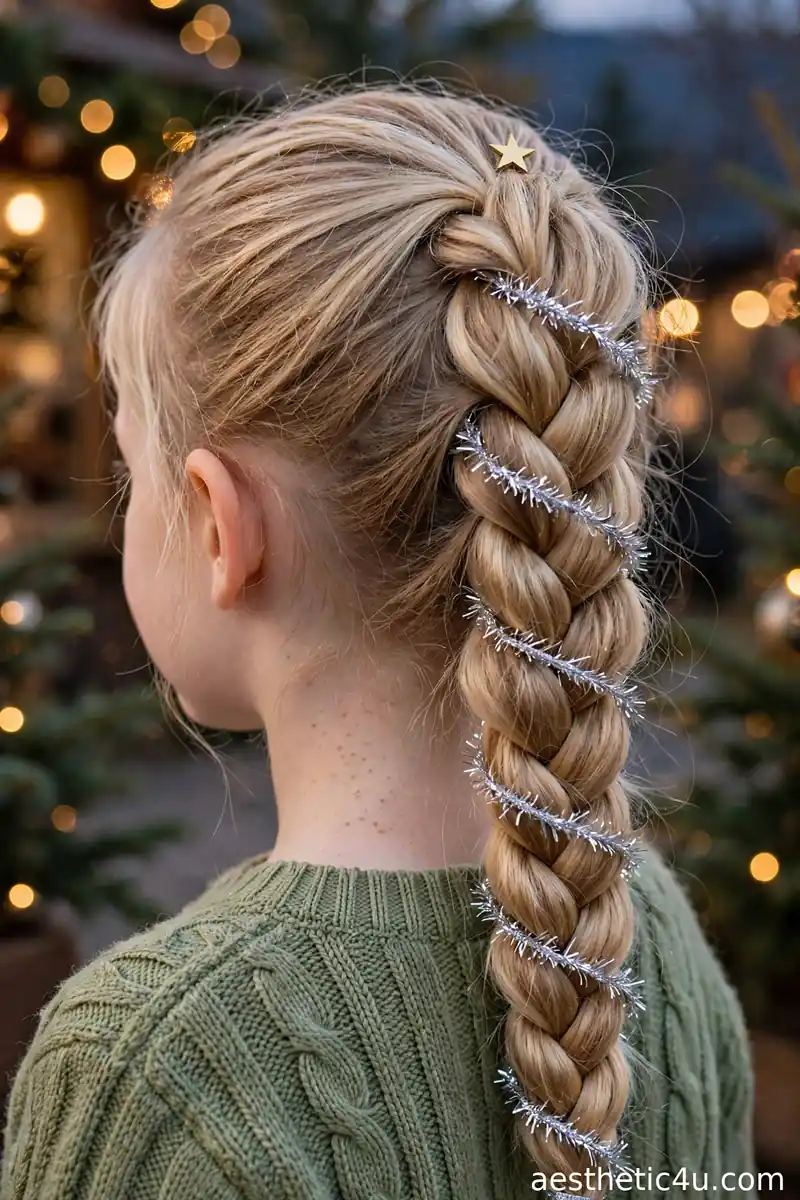
Gather the hair into a low side ponytail and secure firmly with an elastic. Braid a thick, chunky three-strand braid all the way down, keeping the sections wide and even so the braid looks bold and full. Then wrap a strand of fine silver tinsel loosely around the finished braid in a downward spiral, tying it off at the end with another elastic. Clip one small gold star pin at the top of the braid to anchor the tinsel and add sparkle. This takes about 10 minutes and is easier than most decorated braids, because the tinsel wrap takes less than a minute.
I’d pick this for evening holiday events, because silver tinsel shimmers like Christmas lights under indoor lighting and the effect is pure magic after dark. It suits medium to long hair and any texture. My honest caveat: use fine, soft tinsel garland, not the scratchy stiff kind, and keep it out of very tangly hair – tinsel plus knots equals a bad evening. Keep the wrap loose so it does not slip down the braid.
12. Reindeer Antler Braided Pigtails
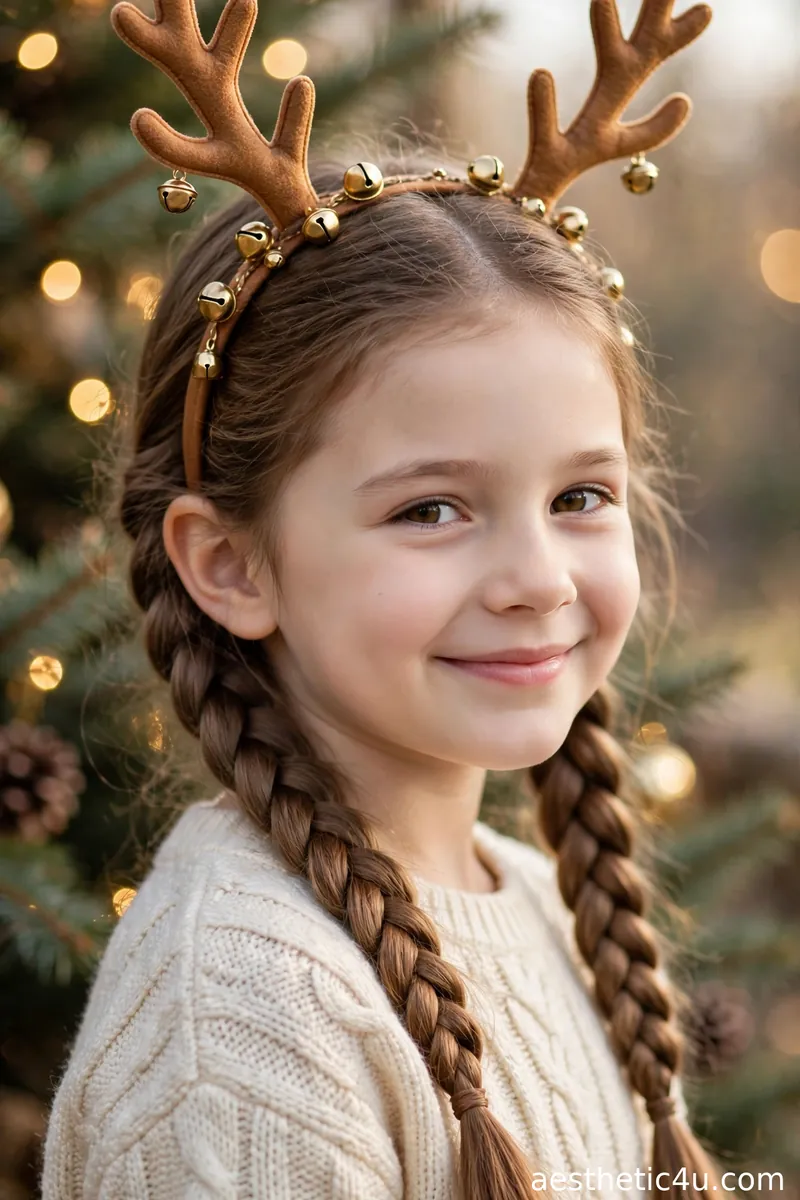
Part the hair down the middle and braid each side into a relaxed three-strand pigtail that hangs naturally past the shoulders, securing the ends with small elastics. Keep the braids loose so they drape instead of sticking out. Slide a reindeer antler headband with little jingle bells into place behind the part line, so the antlers frame her face. This takes about 8 minutes and the difficulty is easy; the braids do the styling work and the headband does the talking.
I’d pick this for the school Christmas party, where funny beats pretty every single time. It suits medium to long hair and it works on every face shape because silliness is universal. My honest tip: choose a headband with a padded band, because plastic bands dig in behind the ears after an hour. Kids love the jingle of the bells, and the photos are unbeatable.
13. Plaid Ribbon Corset Braids
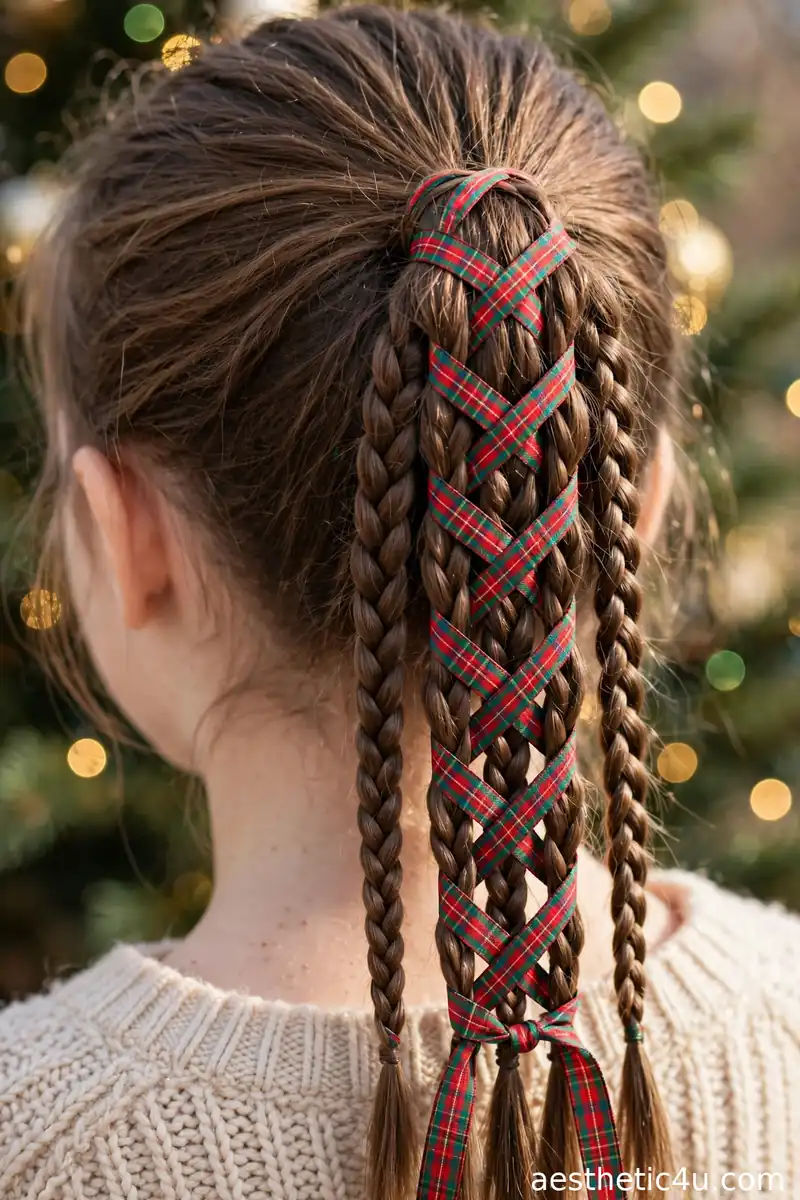
Start with a ponytail and divide it into four to six slim three-strand braids, tying off each end with a clear elastic. Keep the slim braids the same thickness so the pattern stays neat. Then take a long red-and-green plaid ribbon about 1 inch wide and lace it through the slim braids in a crisscross corset pattern from top to bottom, weaving over and under each braid like shoe laces. Tie off the ribbon ends in a small bow at the bottom. Allow 15 minutes; the corset pattern takes a couple of tries to look neat, so practice the rhythm once before the event.
I’d pick this for holiday dinners where you want her to look extra polished – the plaid corset lacing makes this braid look expensive. It suits thick, long hair best, since you need several slim braids to lace. My honest tip: keep the tension even on the ribbon, because pulling one side tighter makes the whole corset twist. Once the rhythm clicks, though, it is weirdly relaxing to do, and the result always impresses.
14. Ornament Ball Braid Bun
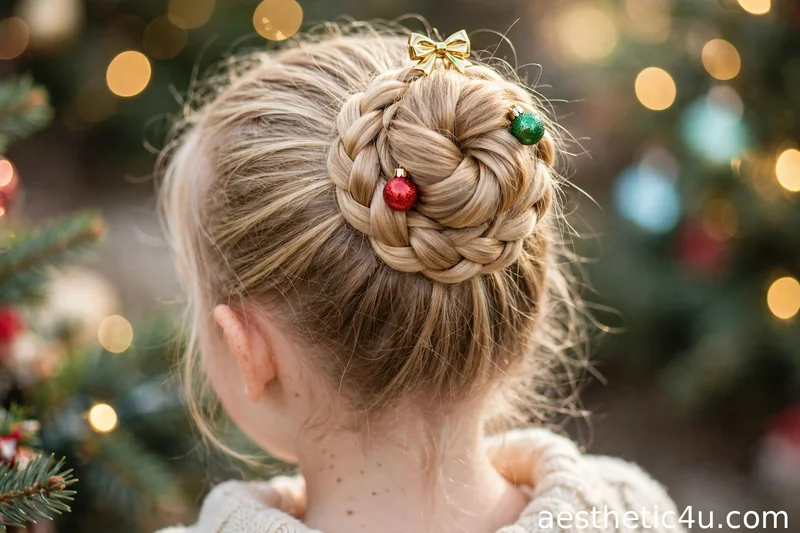
Braid the hair into a single three-strand braid – a slightly loose braid works better than a tight one here. Coil the braid around its own base into a round, full bun shape and pin it securely with 4 to 6 bobby pins, hiding them underneath. The goal is a smooth round ball like a Christmas bauble. Clip a small gold “cap” clip – a flat metallic bow or star – on top of the bun where an ornament’s hanger would be. Add 2 to 3 tiny shiny bauble clips around the bun if you like. This takes about 10 minutes and is beginner-friendly.
I’d pick this for the clever factor – it genuinely looks like an ornament hanging on her head, and kids love showing it off to friends. It suits medium to long hair with enough length to coil into a full bun. My honest tip: pancake the braid before coiling to make the bun rounder and more ornament-like; a skinny braid makes a sad flat bun. This holds up well through parties since everything is pinned close to the head.
15. Gingerbread Braid with Brown Bows
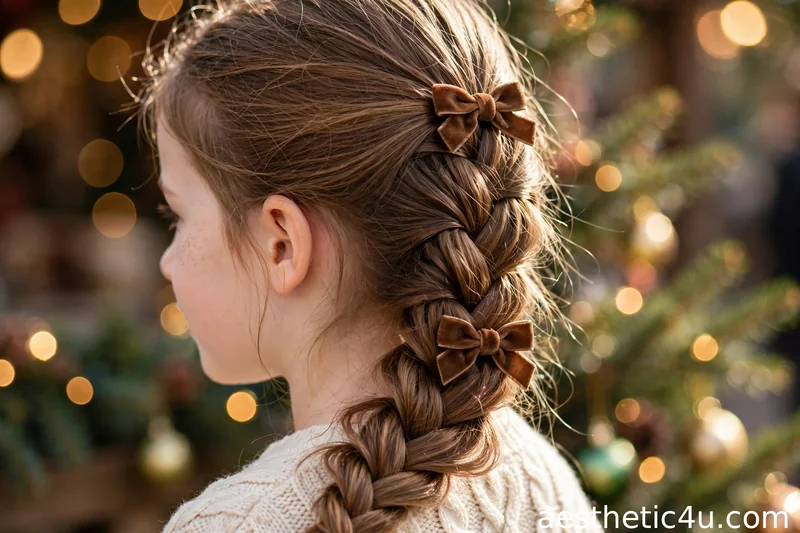
Braid a Dutch or French braid down one side of the head, sweeping it over the shoulder – either technique works, so use whichever you know best. Keep the braid soft and full by pancaking the edges as you go. Tie off with a clear elastic, then finish with two small brown velvet bows – one at the top near the crown, one at mid-length – pinning each through the braid so they sit on top. No ribbon needs to be woven through; the bows alone carry the gingerbread look. This takes about 10 minutes and is beginner-friendly if you can French or Dutch braid.
I’d pick this as the unexpected twist in your holiday rotation – everyone does red and green, and the warm browns stand out beautifully in a crowd. It suits medium to long hair and looks especially cozy on warm brown and auburn hair. My honest tip: velvet bows are worth the small splurge here; they read “gingerbread” far better than shiny satin. This is a sweet-as-pie alternative when she is tired of the classic Christmas colors.
Keep exploring: Christmas Hairstyles with Bows
16. Icicle Waterfall Braid
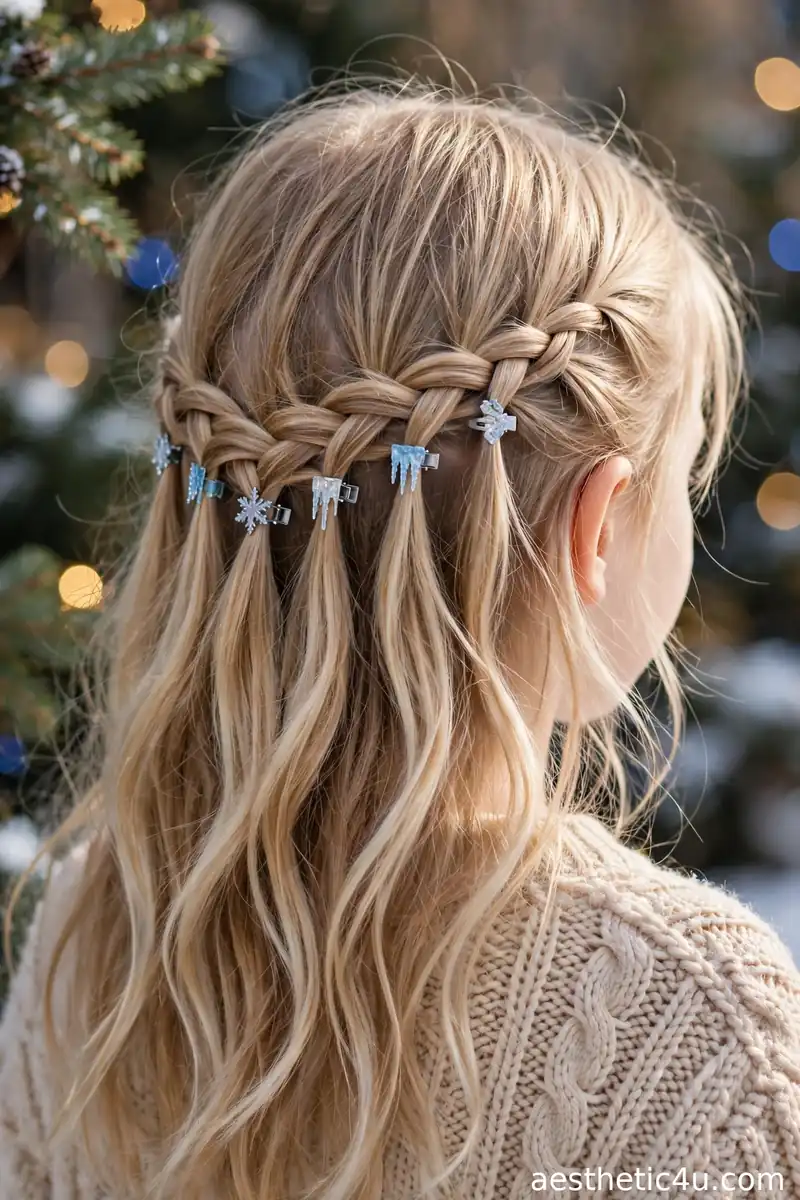
Start a French-style braid at one temple, but here is the waterfall trick: each time you would cross the bottom strand over, drop it instead and pick up a new section of hair from just behind it. Work across the back of the head toward the other side, letting the dropped strands cascade down like icicles. Secure the end behind the opposite ear with bobby pins. Clip small silver and icy-blue clips at 3 to 4 of the drop points to emphasize the icicle effect. Allow 15 to 20 minutes; the drop-and-pick-up rhythm is intermediate level and needs one practice run.
I’d pick this for Christmas Eve when you want something elegant rather than cute – it is the most sophisticated braid in this guide. It suits medium to long hair; the dropped strands need length to cascade properly. My honest caveat: waterfall braids loosen faster than anchored braids, so this is an evening style, not a playground style. Pack extra bobby pins for touch-ups, and the icicle clips do the real winter-magic work here.
17. Holly Berry Braided Crown
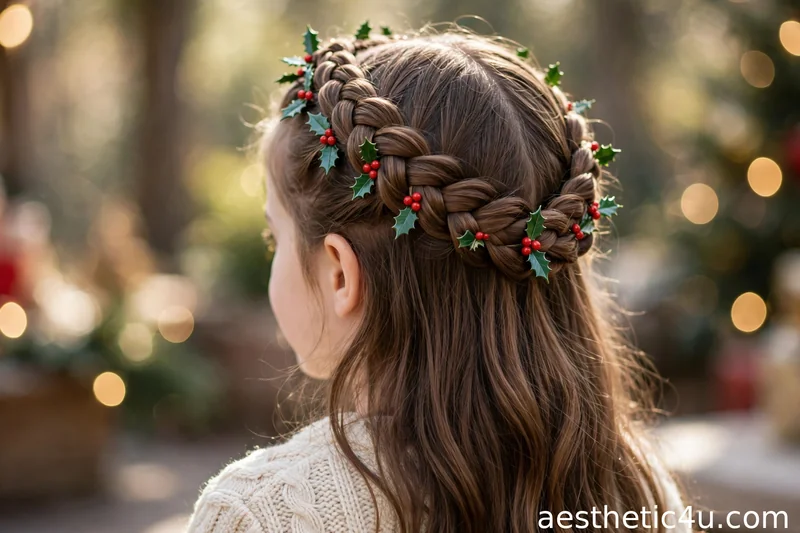
Dutch braid around the full hairline like a crown, following the technique from idea 6, and pin the tail under the start. Once the crown is secure, decorate it like a living Christmas wreath: tuck small faux holly leaf picks between the braid sections and clip 5 to 7 red berry clips – the small round ones on wire stems work best – evenly around the crown. Use mini bobby pins to anchor any decoration that feels loose. This takes about 20 minutes including decorating. The braiding is intermediate, but the decorating is pure fun and kids can help choose placements.
I’d pick this for the most stunning holiday photos in this entire guide – the wreath crown is breathtaking and it stays put far better than a real flower crown ever would. It suits medium to long hair and flatters every face shape. My honest tip: buy the holly and berry clips now, not on December 23rd, because craft stores sell out of the good ones. Let her help place the berries; kids take ownership of styles they helped create.
18. Santa Hat Braid with White Trim
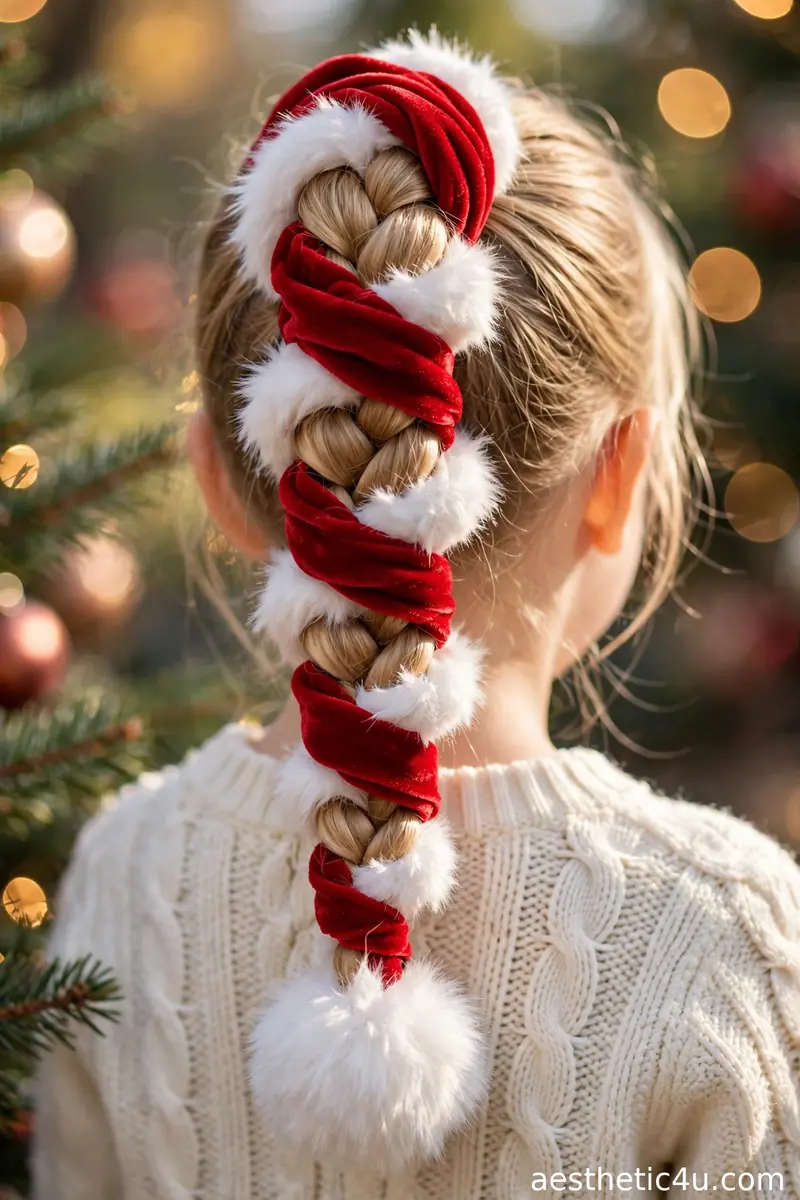
Braid a high three-strand braid starting at the crown – height matters because the braid itself becomes the Santa hat. Tie it off firmly. Wrap a strip of red velvet fabric around the braid from top to bottom so the braid disappears underneath, then wrap white fluffy faux-fur trim in a spiral around the red velvet, mimicking the hat’s fur trim. Pin both wraps underneath so they do not slip. Finish with a white pompom pinned to the very end of the braid. This takes about 12 minutes and the difficulty is easy-to-medium; the accessories do most of the work.
I’d pick this for maximum laughs – a braid dressed up as a Santa hat is instant Christmas and kids find it hilarious. It suits medium to long hair that can hold a high braid. My honest tip: pin the fabric wrap at three points – top, middle, and end – because a wrap that slides sideways mid-party kills the joke. This is the funniest holiday photo in the guide, full stop. Perfect for Christmas cards that make grandparents laugh out loud.
19. Frosty Side Braid with Blue Accents
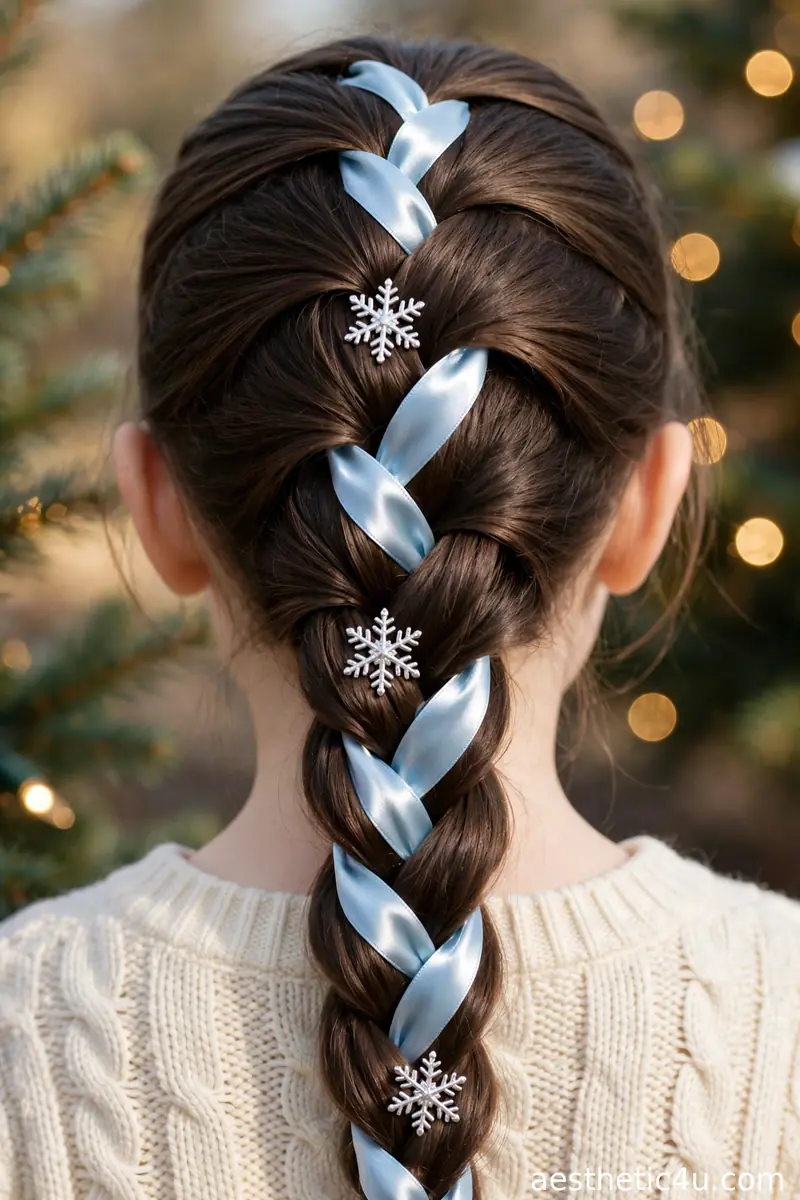
Sweep all the hair over one shoulder and braid a loose three-strand braid – keep it relaxed, because the frosty look wants softness, not tightness. Weave an icy-blue satin ribbon through one side as you braid, using the same weave technique as idea 1. Tie off with a clear elastic, then add 3 to 4 silver snowflake clips along the braid and finish with a light mist of shine spray for an icy gleam. Gently pancake the braid edges for fullness. This takes about 10 minutes and is beginner-friendly; loose braids are forgiving of uneven sections.
I’d pick this for the Frozen-obsessed kid who has outgrown red and green – blue and silver are a fresh, gorgeous take on Christmas colors. It suits medium to long hair and looks magical on dark hair especially. My honest tip: the “frosty” effect lives or dies on the pancaking, so do not skip gently pulling the braid edges wider. This braid looks like it belongs on a snow queen, and kids who love icy aesthetics will wear it with total confidence.
20. Twinkle Lights Braided Ponytail
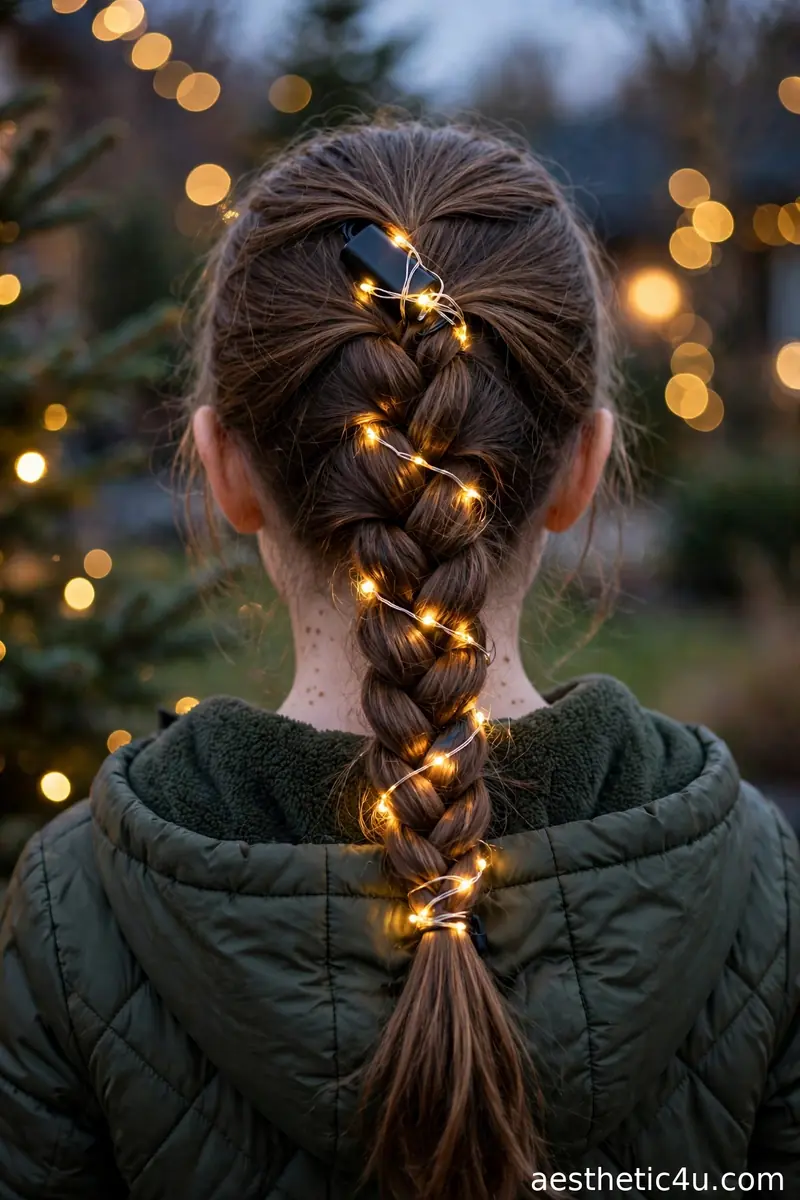
Braid a long three-strand, Dutch, or fishtail braid – whichever you do best, since the braid is the foundation. Take a short strand of battery-operated fairy lights (the 3-foot copper-wire kind with a small battery pack) and wrap it loosely in a spiral down the full length of the braid, tucking the wire gently between braid sections. Secure the battery pack at the top near the elastic with a small ribbon tie, keeping it away from the scalp. Switch the lights on for the big reveal. This takes about 12 minutes plus the braid time. An adult should handle the battery pack placement and supervise while the lights are on.
I’d pick this as the showstopper – the lights twinkling through the braid look unreal in evening photos, like she is wearing a Christmas tree. It suits long hair best, since you need length for the full spiral effect. My honest and firm caveat: this is for supervised evening events only – remove the lights before the car ride home and never let her sleep in them. Used correctly, it creates the single most memorable holiday hair photo of the year.
Keep exploring: Crazy Christmas Hairstyles
How to Choose the Right Christmas Braids for Kids Style for You
Start with your braiding skill level, because nothing ruins a holiday morning like attempting a waterfall braid for the first time at 8 AM. True beginners should stick to ideas 3, 7, 12, and 18 – basic braids and ponytails where accessories do the work. If you can French or Dutch braid confidently, ideas 1, 4, 13, and 15 open up. The intermediate techniques – fishtails, ladder braids, waterfall braids, and crown braids – need one practice run on a calm evening before the event. Be honest with yourself here; a well-done simple braid always beats a struggling ambitious one.
Next, consider her hair type and the occasion together. Fine, slippery hair needs texture help – a light texturizing spray or slightly dirty (day-old) hair grips far better than freshly washed silk. Thick hair can handle any of these but takes longer, so budget extra time. For active days – school, playground, parties with dancing – choose anchored styles like the double French braids or the bubble braid that lock everything down. For photos and dinners, the decorative showstoppers like the holly crown, the tree braid, and the twinkle lights are worth the extra effort.
Finally, let her choose. I have styled enough kids to know that a child who picks her own braid sits stiller, complains less, and wears the style with visible pride. Show her the photos, let her point, and then you pick the version that matches your skill and the day’s schedule. And always do a trial run of anything rated intermediate or above – you will learn exactly how long it takes on HER hair, which is the only timing that matters on a busy holiday morning.
Styling Tips & Common Mistakes to Avoid
My first tip: slightly dirty hair braids better than squeaky-clean hair, so plan wash day for the night before, not the morning of. Second, keep a “braid kit” ready through December – small clear elastics, mini bobby pins, a rat-tail comb, detangling spray, and your ribbon and clip collection in one pouch. Third, mist with water or detangler as you work; damp sections are dramatically easier to control than dry flyaways. Fourth, finish every party braid with a light-hold hairspray misted from 10 inches away – it tames flyaways without making the hair crunchy or stiff.
The most common mistake is braiding too tight at the hairline. Snug is good; painful is not – if she complains, you have gone too far, and tight edges on kids can cause real discomfort and even traction damage over time. The second mistake is decorating before the braid is secure – always finish and pin the structure first, then add ribbons, bells, and clips. The third mistake is using full-size accessories on small heads; oversized bows slide and look clownish. Buy kid-proportioned pieces. And never skip the trial run on intermediate styles – Christmas morning is not the time for surprises.
Final Thoughts
These 20 Christmas braids for kids cover every kind of holiday moment, from the 5-minute jingle bell braid before the school party to the twinkle-lights showstopper for Christmas Eve photos. The real secret I have learned from years of holiday styling is this: match the braid to your skill level, let her pick her favorite, and always do one practice run. Do that, and the styling becomes part of the holiday fun instead of the holiday stress. Save this guide, pick your top three, and enjoy every compliment that comes your way this December.
Follow Us On Pinterest: Easy To Find Next Style