Sana
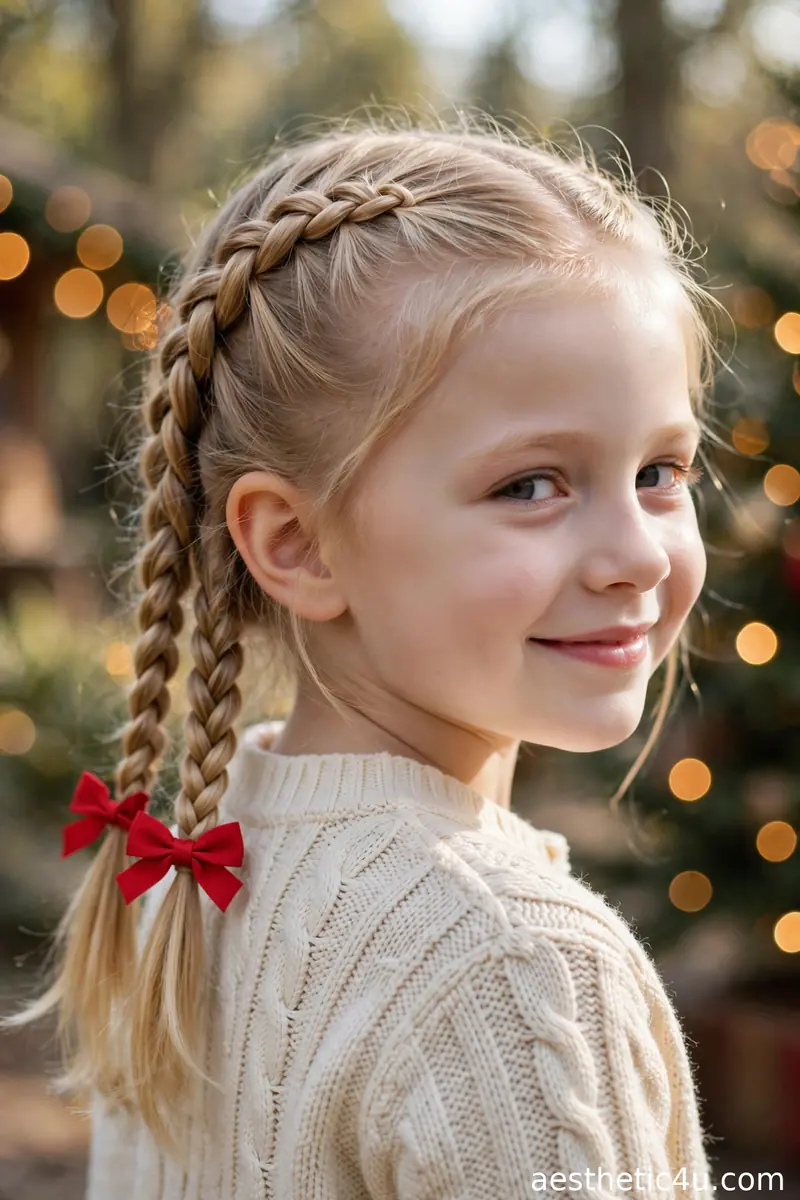
The prettiest Christmas braid is the one that still looks good at dinner. Anyone who has styled a kid’s hair at 7 AM knows the heartbreak of the 2 PM collapse – the sagging ponytail, the escaped wisps, the bow hanging on by a thread. Kids play hard, and their holiday hair needs to keep up through school parties, playground time, present-opening chaos, and family photos. This guide is built around one promise: style once in the morning, and forget about it. These 17 cute Christmas braids use real staying-power techniques – anchored bases, locked elastics, strategic pinning, tucked ends – so the festive charm you create at breakfast is still there at bedtime.
These ideas are for parents styling kids roughly ages 4 to 12 who need all-day hold without hourly touch-ups. Every braid includes the exact staying-power trick that makes it last, step-by-step instructions with tools and time estimates, which hair type it suits, and my honest stylist take on the best occasion. I have also added a guide on choosing the right long-wear style for your child’s hair and activity level, plus my best tips for making any braid last longer and the mistakes that cause braids to fall apart. Pick the one that matches her day, and enjoy a touch-up-free Christmas.
1. Tight Twin Dutch Braids with Red Ends
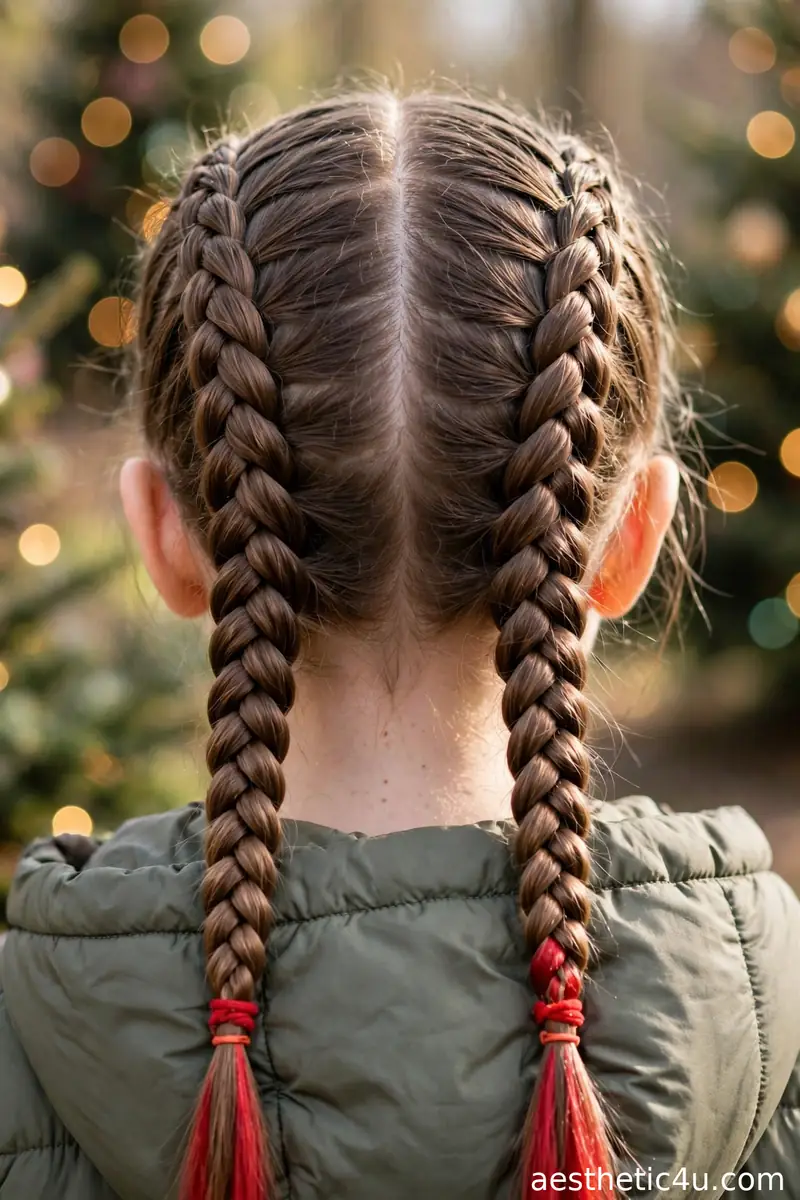
Part the hair cleanly down the middle with a rat-tail comb – a crisp part is the foundation of all-day neatness. Dutch braid each side from the hairline to the nape, crossing strands UNDER the middle and keeping your tension firm and even. Here is the staying-power trick: braid all the way to the very ends with no loose tail left unbraided, then secure each with a small red elastic wrapped three times instead of two. Mist the finished braids lightly with water before you start to control flyaways, and smooth a tiny drop of kid-safe gel along the part. This takes about 12 to 15 minutes.
I’d pick this as the gold standard for all-day holiday hair – it is my first recommendation for school days and long event days alike. The scalp-hugging Dutch weave simply does not loosen, and the red ends add Christmas cheer in one step. It suits every hair type and face shape. My honest tip: firm tension is the point here, but check in with her – snug should never mean painful. This braid looks as neat at dinner as it did at breakfast.
2. Secure Braided Low Bun
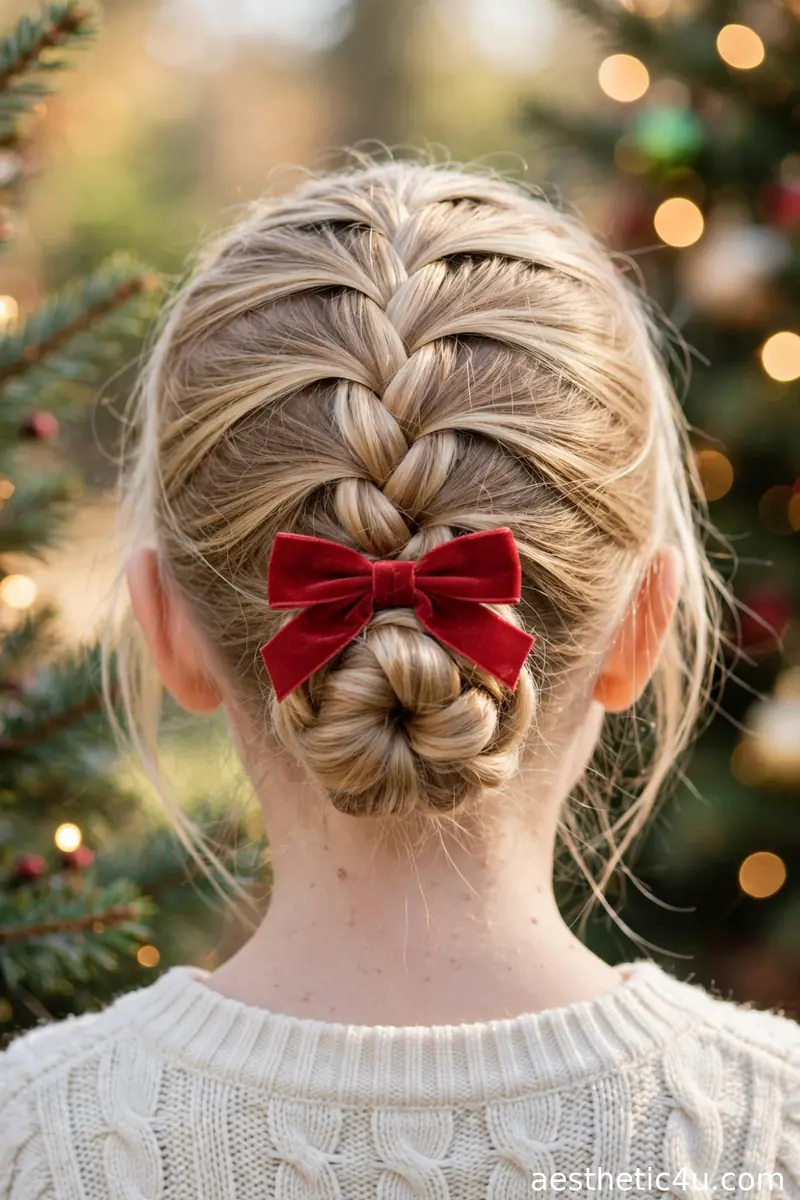
French braid from the crown down to the nape, keeping the braid snug against the scalp – this anchored braid is what prevents the bun from shifting. Coil the remaining braid into a low bun and pin it with 4 to 6 bobby pins, inserting each pin in a different direction (up, down, left, right) so they lock against each other. The multi-direction pinning is the staying-power secret; parallel pins slide out together, crossed pins hold. Cover the pins with a medium red bow clipped over the bun’s base. This takes about 12 minutes and the difficulty is easy-intermediate.
I’d pick this for holiday dinners and formal family photos where polished matters. Braided buns do not budge for hours, and the low placement keeps it comfortable against chair backs and car seats. It suits medium to long hair and flatters oval and heart-shaped faces. My honest tip: the red bow is doing double duty as decoration and pin camouflage, so choose one large enough to actually cover your pin work – about 3 to 4 inches wide.
3. No-Slip Cornrow Headband Braid
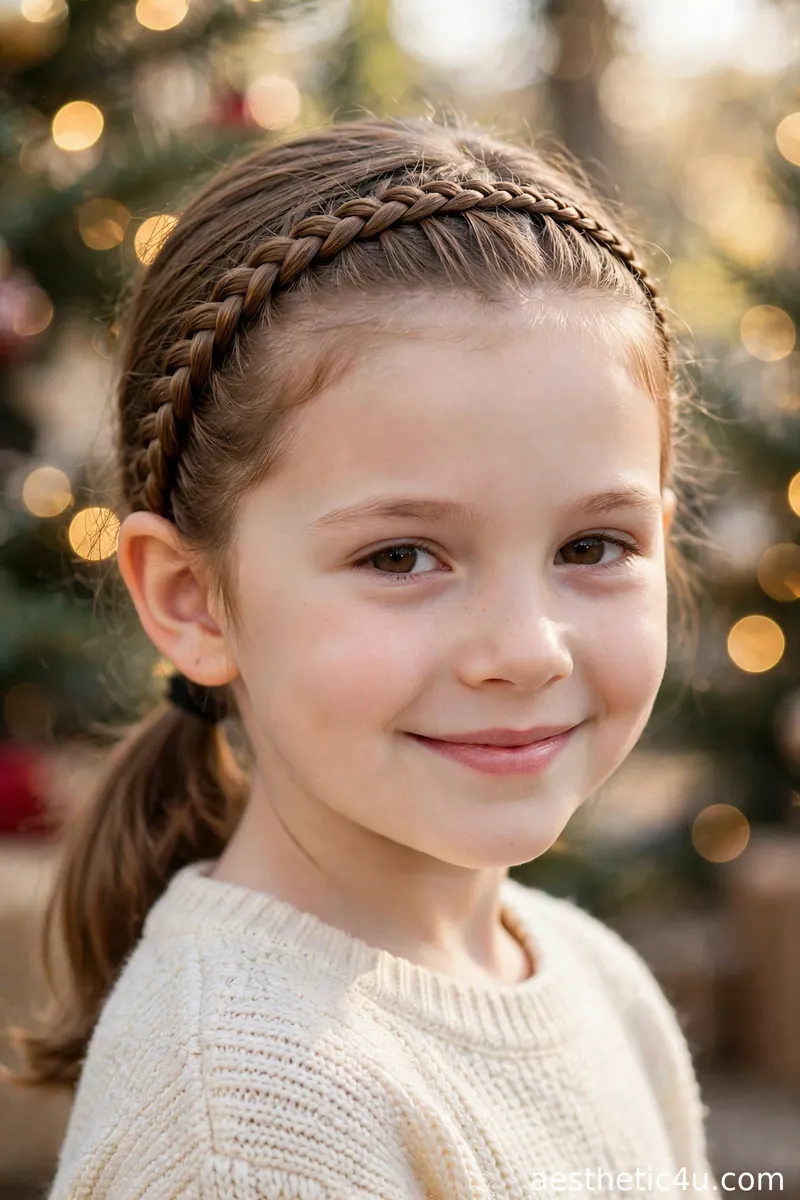
Take a 2-inch section of hair along the front hairline, from ear to ear. Cornrow it – braiding underhand while feeding in hair from the hairline side only – arcing across like a headband, and pin the end flat behind one ear with two crossed bobby pins. Gather the remaining hair into a low ponytail. The cornrow acts as a built-in headband that physically cannot slip, which is the entire staying-power trick: it anchors every flyaway at the hairline for the whole day. Lightly gel the hairline first for extra grip. This takes about 10 minutes.
I’d pick this for the flyaway-prone kid whose hairline frizz ruins every other style by noon. It is genius for fine hair that escapes elastics, and it looks incredibly neat and put-together. It suits all face shapes since the front stays swept clean. My honest caveat: cornrowing takes practice if you have never done it – the underhand feed feels backwards at first. Practice once on the weekend and you will have it; the all-day payoff is enormous.
4. Braided Pigtail Loops That Last
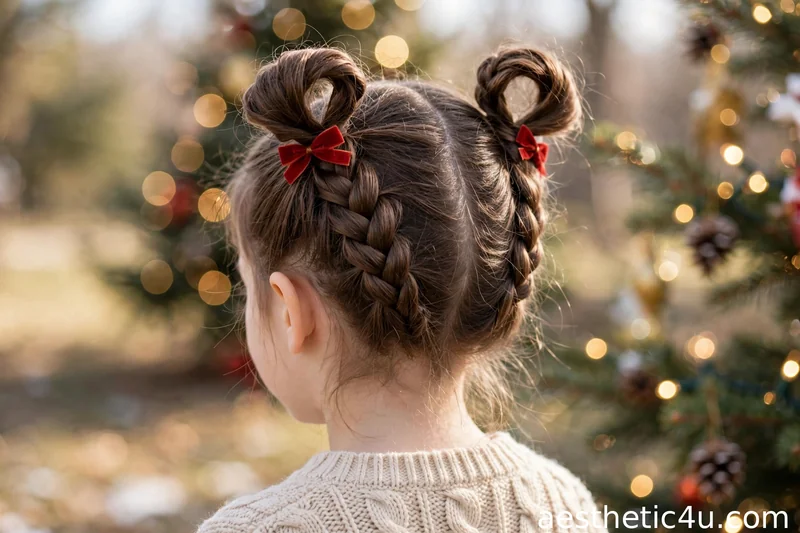
Part the hair down the middle and braid each side into a three-strand braid, tying off with a small elastic. Now the trick: fold each braid upward so the end meets its own base, forming a loop, and pin the end securely underneath with two crossed bobby pins. The looped shape physically cannot unravel the way a hanging braid can – gravity works for you instead of against you. Tug the loops gently outward to puff them into bouncy circles. This takes about 10 minutes. Add small red bows at the loop bases for Christmas charm.
I’d pick this for kids who destroy regular pigtails by lunchtime – the loop construction is clever engineering disguised as cuteness. It suits medium-length hair best; very long braids make oversized loops. My honest tip: crossed bobby pins are non-negotiable here, because a single pin lets the loop pivot and flop. Done right, these loops stay bouncy and neat from morning to night, and kids adore the fun shape.
5. Snug Dutch Braid into High Pony
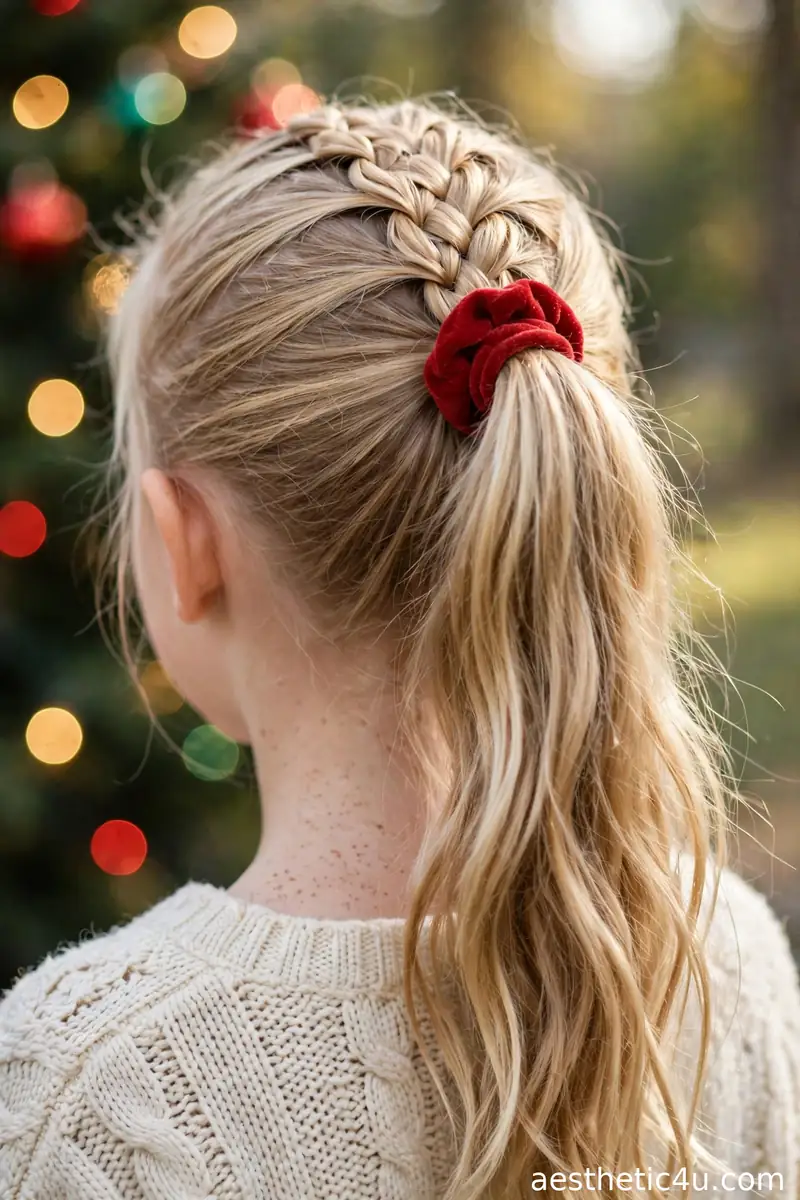
Dutch braid from the front hairline back toward the crown, adding hair from both sides as you go – this braided section is the anchor. When you reach the crown, gather everything including the braid’s tail into a high ponytail and secure with TWO elastics: one tight base elastic, then a second one wrapped just below it for backup. The double elastic is the staying-power trick; if one loosens, the other holds. Smooth the braided top with a little gel for a sleek finish and add a red scrunchie over the elastics. This takes about 10 minutes.
I’d pick this for the sporty kid who needs height and drama without the sagging. The braid anchors the ponytail so completely that there is no slipping and no midday re-tightening. It suits medium to long hair and flatters round faces with the lifted crown. My honest tip: the double elastic looks bulky, so the scrunchie is not optional – it hides the mechanics and adds the Christmas color in one step. This survives PE class and still looks party-ready.
Keep exploring: Christmas Hairstyles for Kids
6. Double Pull-Through Playground Braid
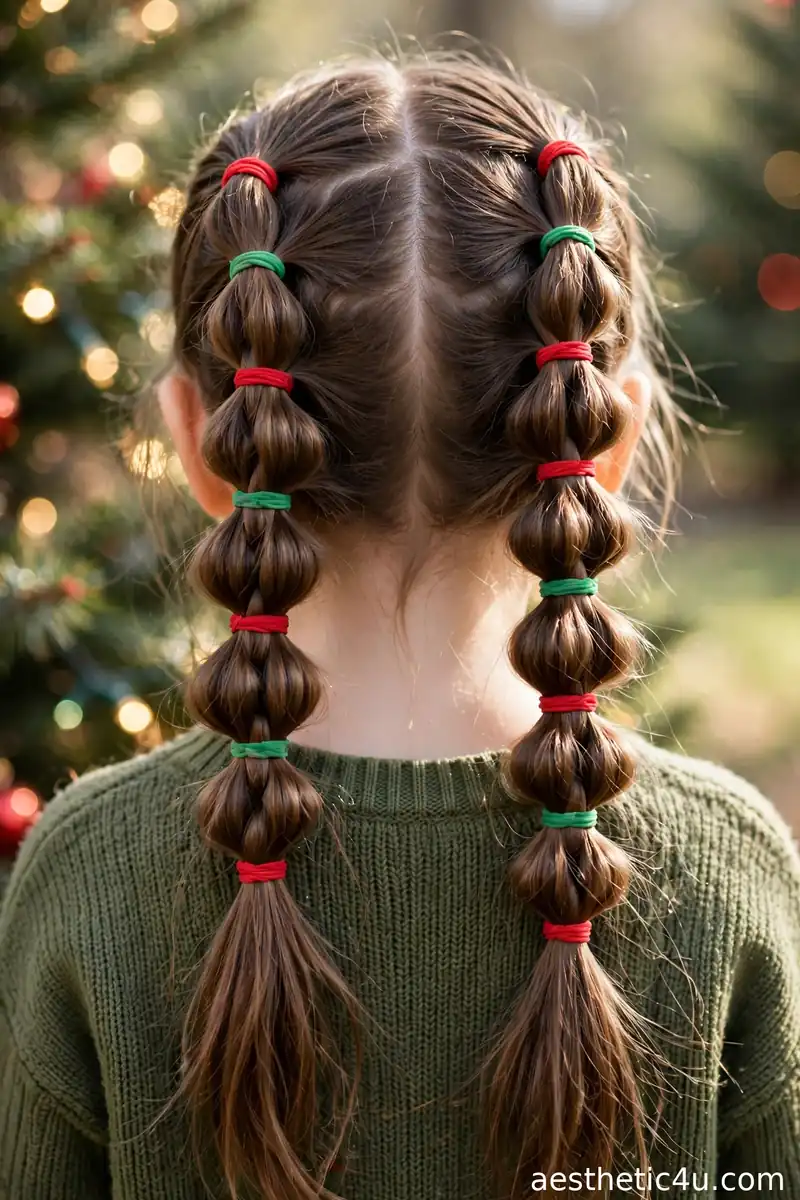
Part the hair down the middle. On each side, build a pull-through braid: take a top ponytail section, secure with a small elastic, then take the next section from the sides, pull it up and over, and secure with another elastic 2 inches down. Repeat down the head. Every single elastic is a lock point – that is the staying-power trick, and it is why pull-through braids are built like armor. Use red and green elastics alternately for built-in Christmas color. Gently pancake each section for fullness. This takes about 15 minutes for both sides and is beginner-friendly.
I’d pick this for the most active kid you know – the one who cartwheels through the party. Nothing in this guide holds like a pull-through, because a dozen elastics physically cannot all fail at once. It suits medium to long hair of any texture. My honest tip: buy quality small elastics that do not snap; cheap ones break mid-braid and you start over. This is the toughest, most playground-proof style on the list, full stop.
7. Anchor French Braid with Bow
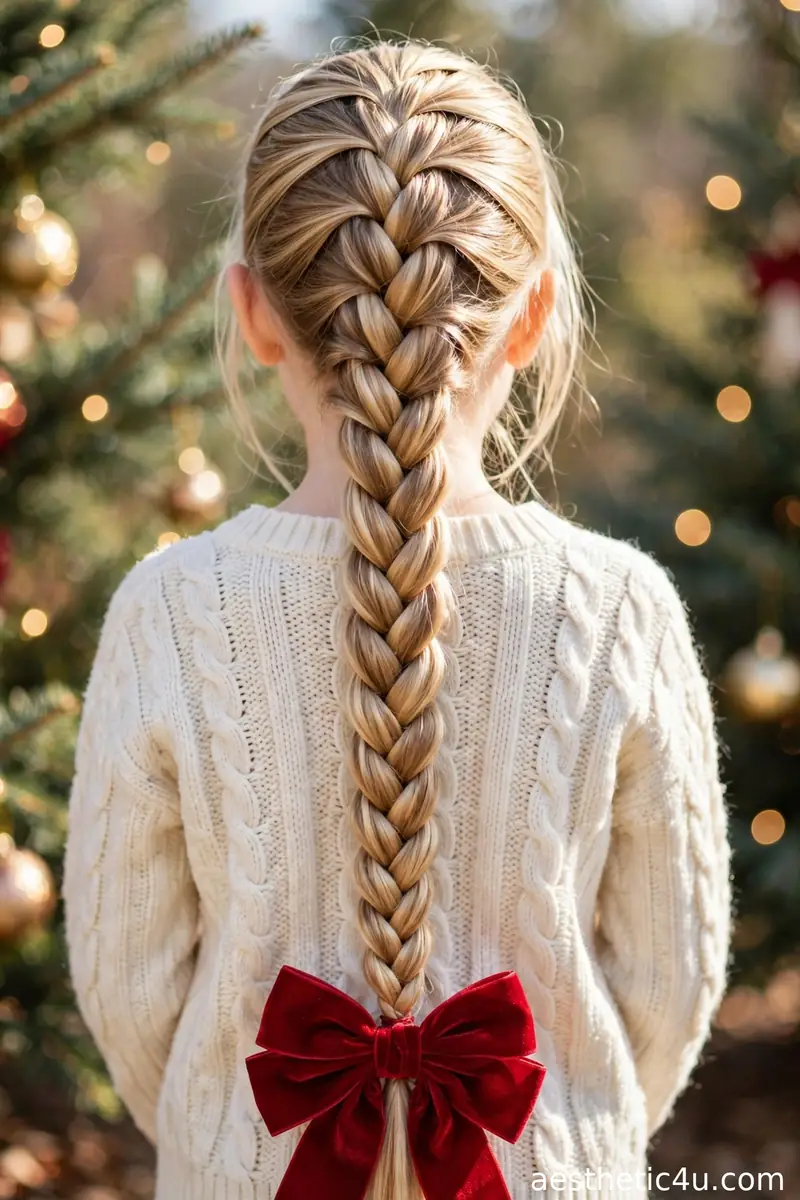
French braid from the crown straight down the back in one continuous braid – the full-length scalp anchor is the staying-power trick, because the braid is attached to the head for its entire upper half, not just hanging from a ponytail. Keep tension even and firm throughout. Braid to the very ends and secure with a small elastic, then tie a large Christmas bow – red velvet is gorgeous here – over the elastic. Smooth the crown with a dab of gel for a polished finish. This takes about 10 minutes and is beginner-friendly if you can French braid.
I’d pick this when you want the simplest possible route to all-day hair – one solid braid, one bow, done. It is hard to beat for staying power relative to effort, and it suits every hair type and face shape. My honest tip: the bow placement matters more than you would think – center it exactly over the elastic and fluff the loops evenly, because a crooked bow is all anyone notices. Simple, reliable, and festive in a single step.
8. Criss-Cross Elastic Braids That Lock In
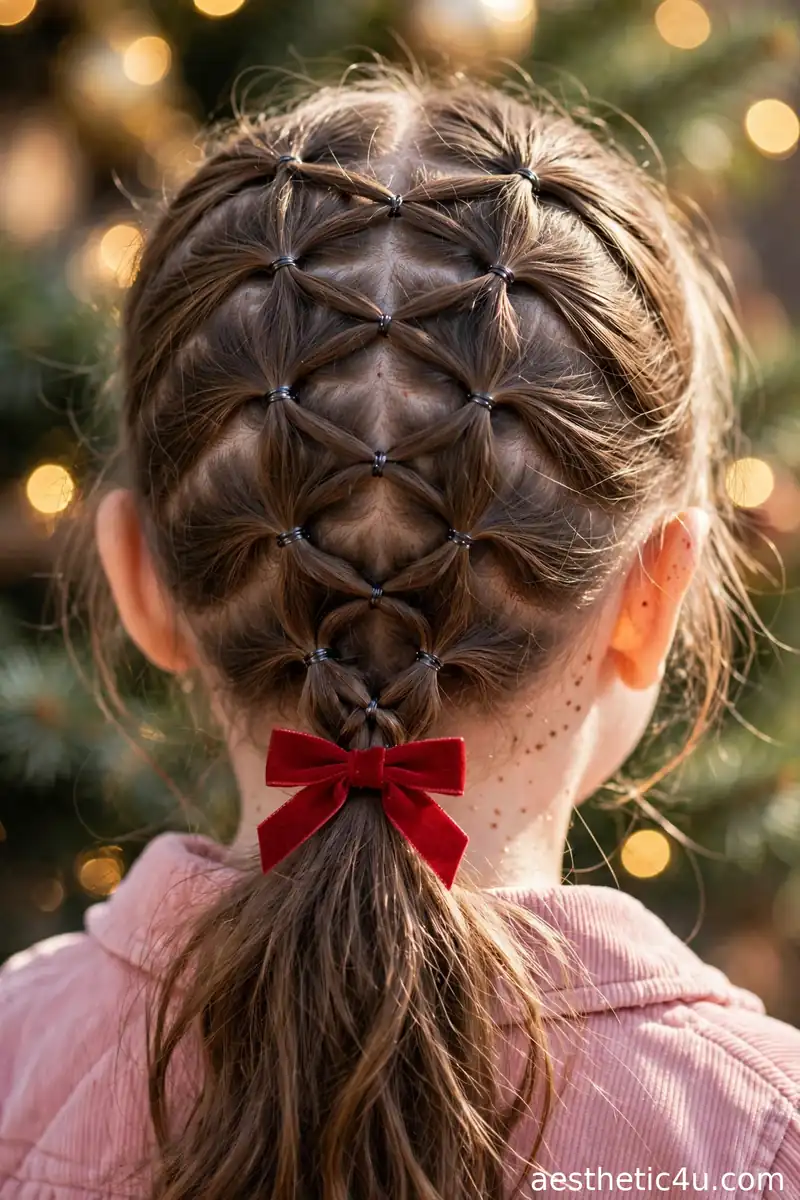
Starting at the crown, take two small side sections and cross them over each other, securing the crossover with a tiny elastic. Take two new sections just below, cross them over the first pair, and secure again. Continue this criss-cross pattern down the back of the head, each elastic locking the previous crossover in place – like a seatbelt for hair, nothing moves. Gather everything into a low ponytail and add a red bow. Lightly mist each section with water as you work for control. This takes about 12 minutes and is beginner-friendly; it is pattern work, not braiding skill.
I’d pick this for kids who love cool patterns – they think the criss-cross looks awesome, which means they actually leave it alone all day. It suits medium to long hair and works on straight or wavy textures. My honest tip: keep your sections small and your elastics snug; big loose sections defeat the locking mechanism. This holds through school, playdates, and parties without a single touch-up, and the pattern photographs beautifully.
9. Coiled Dutch Braid Low Bun
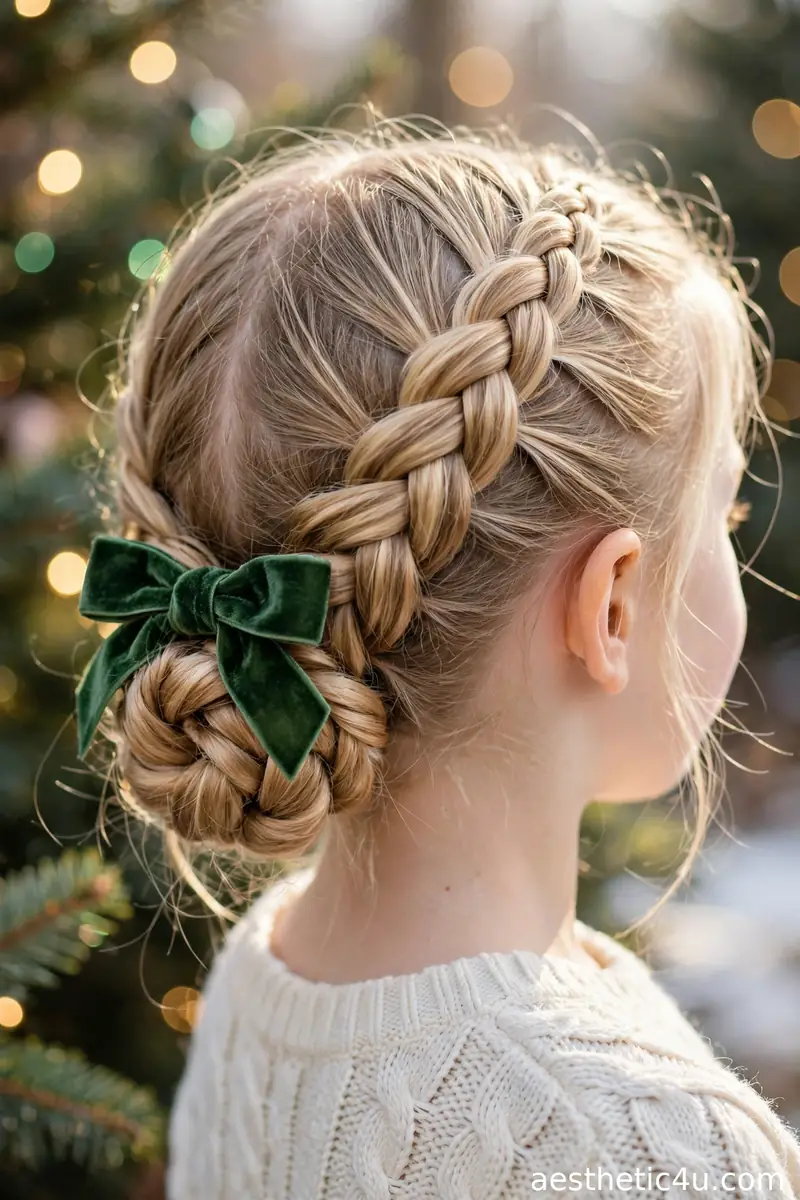
Dutch braid from the front hairline, working along the side of the head toward the back and adding hair only from the outer side as you curve – this sweeps everything neatly off the face. When you reach the nape, coil the braid around its own base into a low bun, tucking the end underneath and pinning in a full circle with 4 to 6 bobby pins in alternating directions. The coil is the staying-power trick: the braid’s own weight locks it in place, so it cannot catch on clothing or unravel. Pin a green velvet bow at the base of the bun. This takes about 12 minutes and is beginner-intermediate.
I’d pick this when you want a polished braided look with real-world durability – the coil turns a simple braid into an all-day style. It suits medium to long hair that can wrap at least once around its base. My honest tip: pin as you coil rather than at the end, because a finished coil is hard to pin from underneath. The bow hides the mechanics completely, so nobody knows your secret.
10. Braided Top Knot for Active Kids
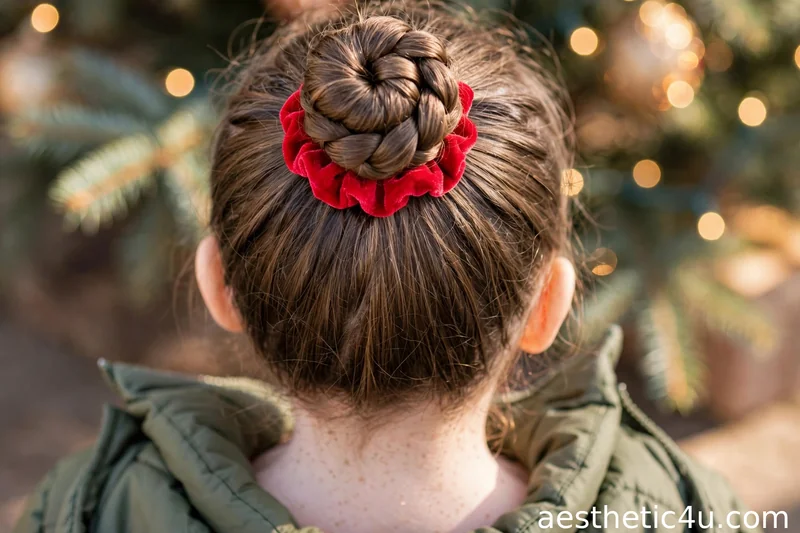
Flip the head forward and French or Dutch braid from the nape UP to the crown – the inverted braid is the anchor that makes this bulletproof. Gather everything into a high ponytail at the crown and braid the ponytail itself into a three-strand braid. Coil the braid around its base into a top knot and pin in a full circle with 4 to 6 bobby pins in alternating directions. With the ends locked inside the knot, nothing can come loose – that is the entire staying-power design. Add a red scrunchie or bow at the base. This takes about 12 minutes.
I’d pick this for Christmas sports days, dance performances, and any high-movement event – it is the ultimate active-kid style. The inverted braid plus the knotted ends create a structure that genuinely cannot fall apart. It suits medium to long hair and flatters round faces with the high placement. My honest tip: braiding upward feels awkward the first time, so have her sit on a low stool while you stand – the angle is much easier. Once it is in, it is in for the day.
Keep exploring: Christmas Hairstyles for School
11. School-Proof Side French Braid
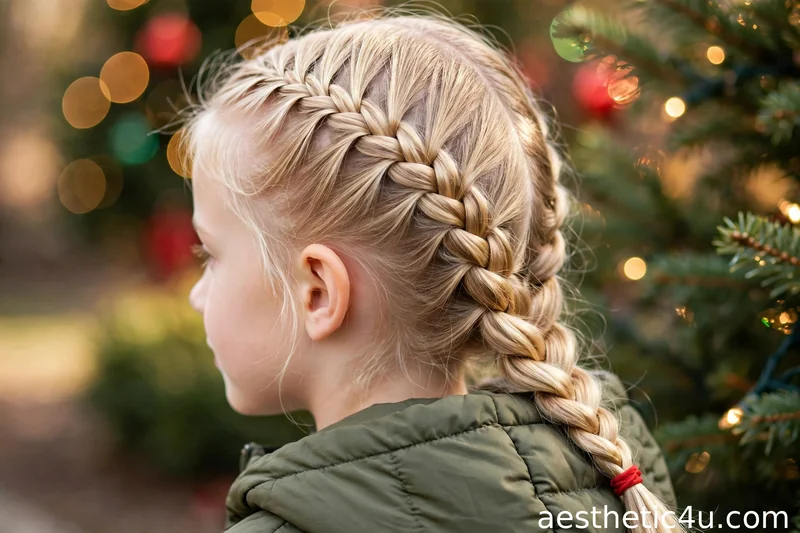
Part the hair deeply to one side and French braid from the heavy side, sweeping across the head toward the opposite shoulder – the diagonal path keeps every strand contained and off the face. Braid all the way to the ends, then tie off with a small clear elastic and slide a red elastic over it for the Christmas finish. The anchored scalp braid is the staying-power trick: the base holds the whole style, so nothing shifts or catches during the day. Smooth flyaways with a little gel along the part. This takes about 10 minutes.
I’d pick this for school days and any day she needs her hair completely out of her face – it stays neat through class, lunch, and recess. The side sweep flatters round and square faces beautifully. My honest tip: braid with slightly loose tension over the crown, then pull gently after – an already-tight braid pinches. Teachers compliment this one constantly, and it photographs sweetly from the front.
12. Reinforced Halo Braid
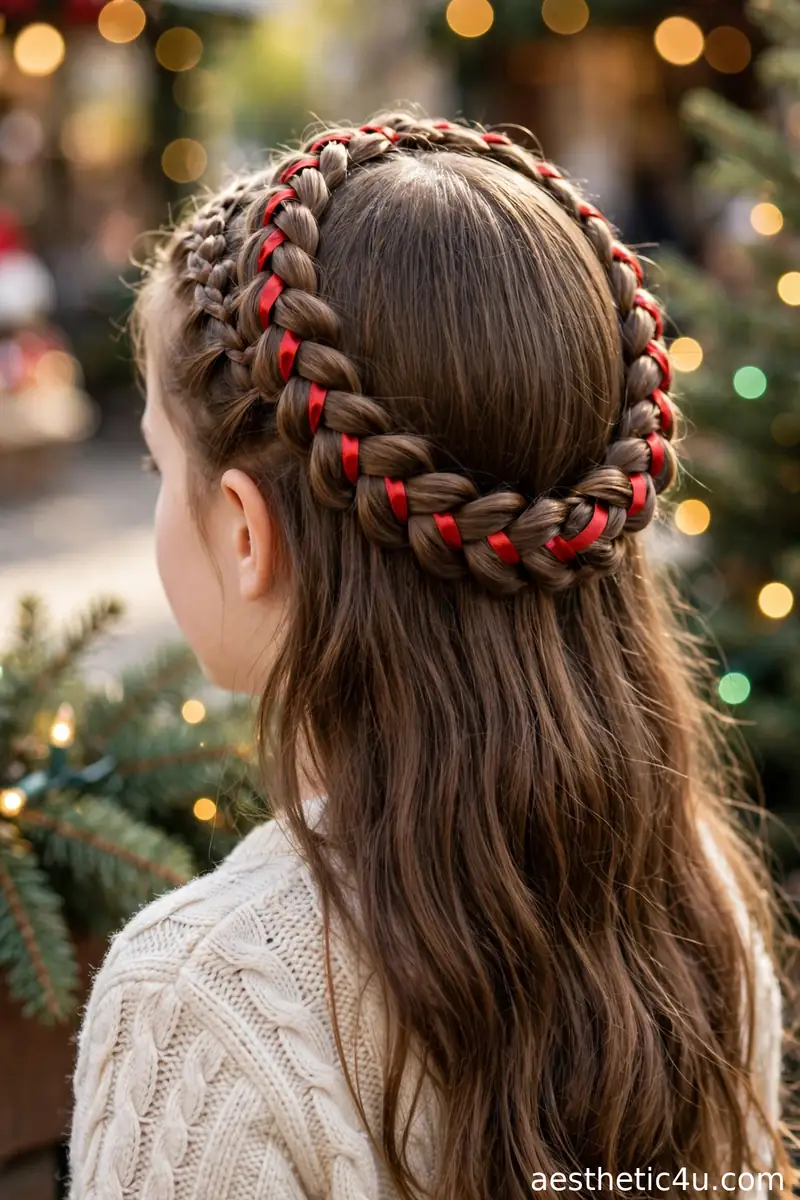
Dutch braid around the full hairline like a crown, working from a deep side part all the way around and pinning the tail under the start. Here is the reinforcement that makes it all-day: place a bobby pin every 2 to 3 inches along the braid’s underside as you work, not just at the end. The full-circle shape distributes the hair’s weight evenly so no single point bears the load – that is why halo braids never sag the way half-up styles do. Weave a thin red ribbon through for Christmas color – or swap it for small gold hair pins dotted along the crown if she prefers shine over ribbon. This takes about 15 to 20 minutes and is intermediate level.
I’d pick this as the prettiest all-day style in the guide – it stays perfect for hours and looks like a holiday crown. The all-around pinning means zero sagging, zero slipping. It suits medium to long hair and flatters every face shape. My honest tip: pin as you go, because trying to pin a finished halo from underneath is frustrating. This is worth the practice run – once you can do it, it becomes your secret weapon for every formal event.
13. Double Braids with Red Star Clips
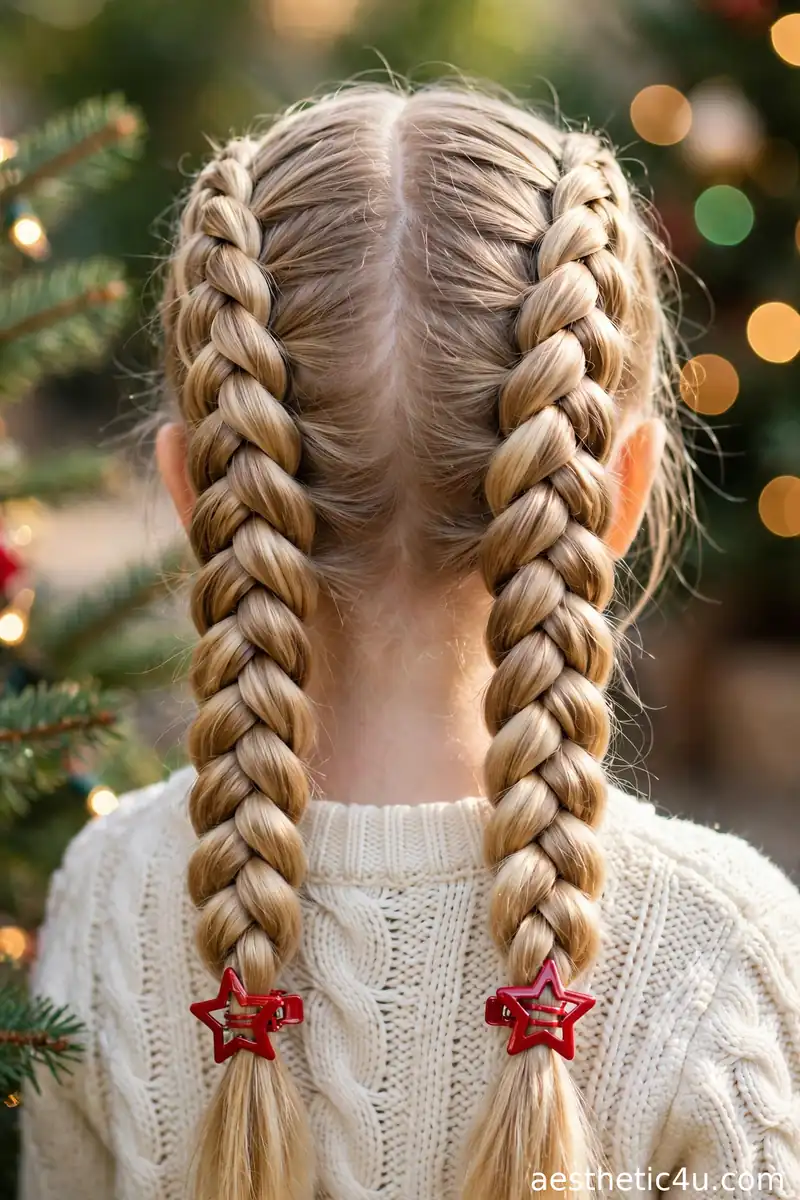
Part the hair down the middle. On each side, braid a thick, chunky three-strand braid from the temple all the way down, keeping the sections wide and even so both braids look bold and full. Secure the ends with small clear elastics. The staying-power trick is the chunky sections: wide, tight braids hold their shape far longer than thin ones, which unravel faster. Smooth a pea-sized dab of kid-safe gel along the part to keep it crisp. Finish by clipping a red star clip over each elastic, so the stars cap both braid ends. This takes about 8 minutes.
I’d pick this for busy mornings when you need a style that holds but still looks like real effort – chunky braids are faster than they look. They suit medium to long hair of any texture and are especially good on thick hair. My honest tip: keep the two braids the same chunkiness, because a fat braid next to a thin one looks lopsided in photos. The star clips add the Christmas touch in seconds.
14. Stay-Put Milkmaid Braids
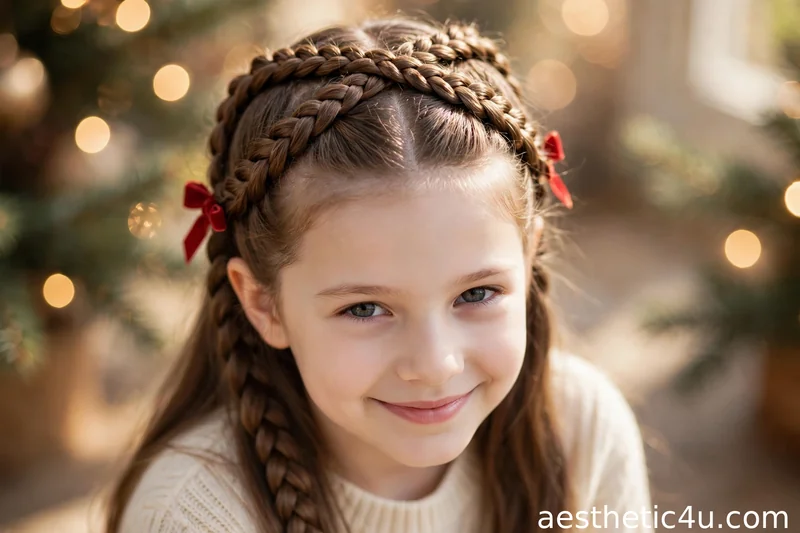
Part the hair down the middle and braid each side into a three-strand braid, tying off with small elastics. Cross the right braid over the top of the head to the left side and pin it flat with 3 crossed bobby pins tucked underneath. Cross the left braid over to the right, laying it just behind the first, and pin the same way. The crossover-and-pin-underneath construction is the staying-power trick: each braid’s weight locks the other in place, like a seatbelt. Tuck all ends completely under. Add small red bows where the braids meet the pins. This takes about 12 minutes.
I’d pick this for the classic Christmas look that never moves – milkmaid braids are adorable and they genuinely do not budge. It suits medium to long hair with enough length to cross the crown. My honest tip: crossed pins underneath, never parallel – parallel pins slide out in pairs, crossed pins grip. This is a classic for a reason: it survives hugs from every relative, naps on the couch, and still looks intentional at dinner.
15. Sports-Day Secure Braided Ponytail
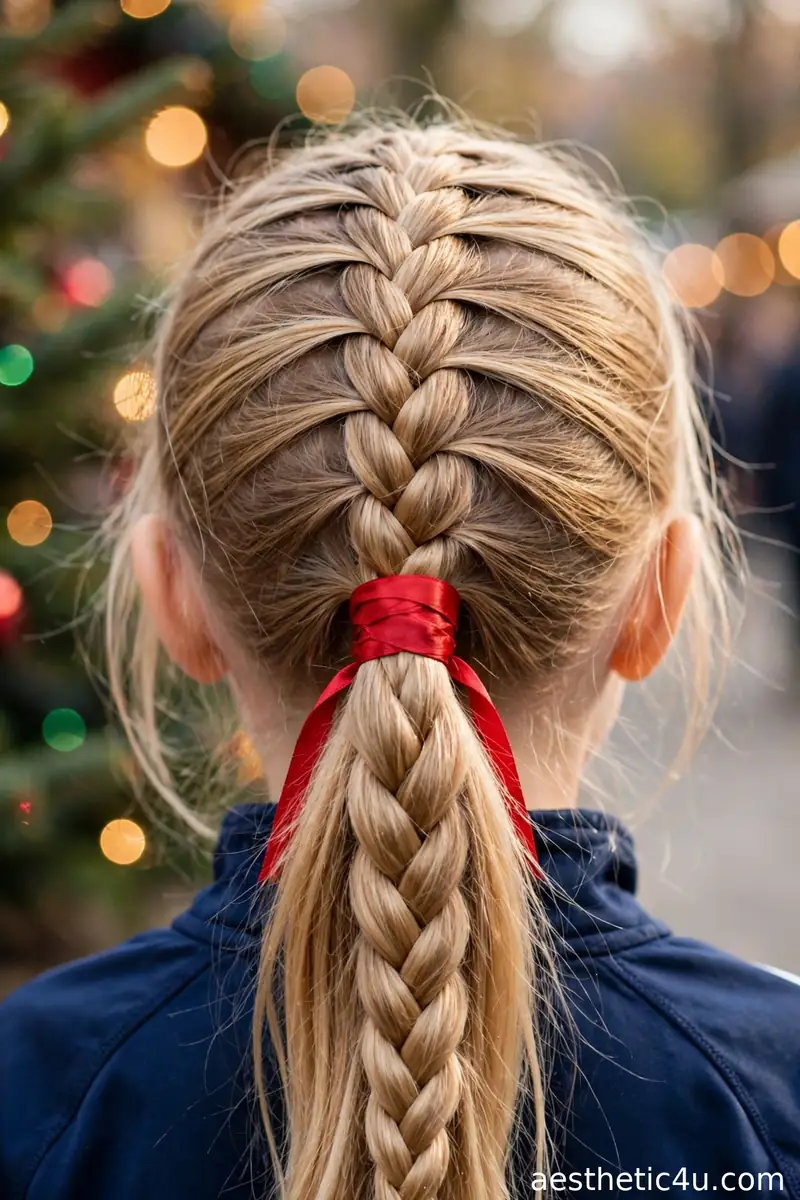
French braid from the crown feeding into a high ponytail – the scalp braid anchors the base so it cannot slide down. Secure the ponytail with a strong elastic, then add a SECOND elastic wrapped just below the first as backup; double elastics are the staying-power secret weapon, because if one stretches out during play, the other holds. Braid the ponytail itself into a three-strand braid and tie off. Wrap a red ribbon around the double elastic to hide the mechanics and add Christmas color. This takes about 10 minutes and the difficulty is easy-intermediate.
I’d pick this for the sportiest holiday days – Christmas fun runs, playground parties, anything with running involved. The double elastic plus the anchored braid base means this ponytail survives literally anything. It suits medium to long hair and flatters oval and heart-shaped faces. My honest tip: use thick, no-damage elastics for the base – thin ones snap under the double-wrap tension. Add the red ribbon and it is instantly Christmas-ready.
Keep exploring: Easy Christmas Hairstyles
16. All-Day Zigzag Part Braids
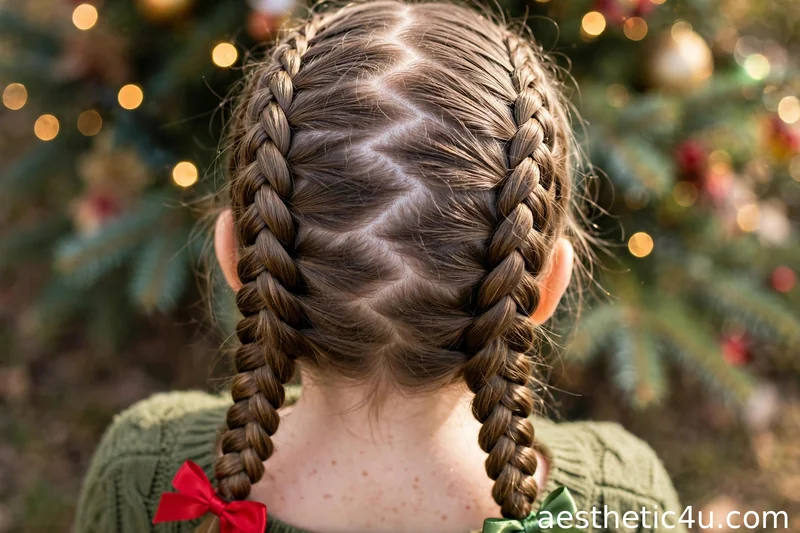
Create a zigzag part down the middle using the pointed end of a rat-tail comb – work in 1-inch zigzags from forehead to crown. The zigzag is the staying-power trick: the interlocking angles grip the hair at the scalp far better than a straight part, which shifts and widens by afternoon. Braid each side into a Dutch or French braid following the zigzag line, keeping tension firm. Tie off with small elastics and add red or green bows. Lightly gel along the zigzag for a crisp finish. This takes about 12 minutes and is beginner-friendly.
I’d pick this for the kid who wants something that looks cool AND lasts – the zigzag part gets compliments while secretly doing structural work. It suits medium to long hair and flatters round faces with the added visual interest up top. My honest tip: draw the zigzag with the comb tip first before braiding, because freehanding it mid-braid goes crooked. Kids love the fun pattern, and it genuinely holds better than a straight part all day.
17. Playground-Proof Triple Braid
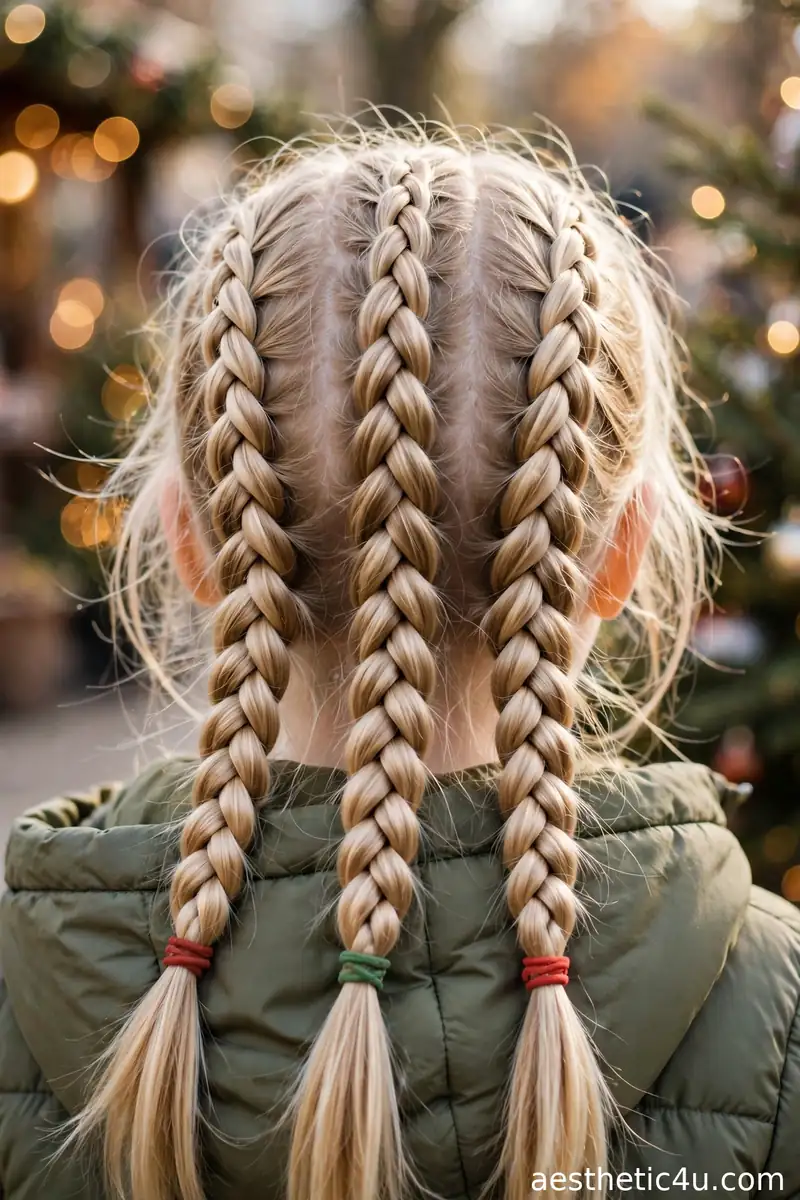
Braid three separate Dutch braids from the crown straight down the back, keeping each one tight and close to the scalp – a small French braid along each side plus one Dutch braid down the center back works perfectly. Tie off each braid separately with its own small elastic: red, green, and red again for the Christmas finish. The three independent braids are the staying-power trick – each one is fully anchored on its own, so if one loosens during play the other two stay perfect, making this the toughest style in the entire guide. This takes about 15 minutes and is intermediate only because of the time involved.
I’d pick this for the wildest playground days when nothing else survives – three braids are simply stronger than one. It suits medium to long hair with enough density for three substantial braids. My honest tip: this is overkill for quiet days, so save it for the days she truly needs armor. Keep all three braids the same tightness, because a loose braid next to tight ones looks uneven by afternoon.
How to Choose the Right Cute Christmas Braids for Kids Style for You
Start by matching the style to her activity level, because that is what this whole guide is about. For maximum-movement days – playground parties, sports days, school – choose the structural champions: the double pull-through braid, the triple braid, or the braided top knot. These use multiple lock points and simply cannot fail. For medium-activity days like family dinners and photo sessions, the French braid anchor styles, the milkmaid braids, and the halo braid give you all-day hold with more polish. For quieter days, any style here works – pick by looks alone.
Next, consider her hair type honestly. Fine, slippery hair needs the most help: choose styles with many elastics (pull-through, criss-cross) or add texturizing spray and gel, because smooth fine hair slides out of simple braids. Thick hair holds almost anything but takes longer, so budget extra time and use strong elastics that will not snap. Curly or textured hair grips beautifully in twists and Dutch braids – work with the texture using a little leave-in conditioner rather than fighting it with heavy brushing.
Finally, match the technique to your skill and schedule. The twist braids, criss-cross elastics, and bubble-style pull-throughs need no real braiding skill – just patience. French and Dutch braid styles need basic braiding confidence. The halo braid and the triple braid need a practice run. I always say: a simple style done well outlasts a complicated style done rushed. Do your trial run on a calm evening, time yourself on HER hair, and add 5 minutes of buffer for the real morning – holiday mornings always run late.
Styling Tips & Common Mistakes to Avoid
My first tip: prep the hair the night before – braid-friendly hair is slightly dirty hair, so wash the evening before and sleep in a loose braid to prevent morning tangles. Second, cross your bobby pins in X shapes instead of using them parallel; crossed pins lock against each other and hold three times longer. Third, double up elastics on any ponytail base – the backup elastic is invisible under a bow or scrunchie and saves the style if the first stretches. Fourth, finish with a light-hold hairspray misted from 10 inches away, focusing on the hairline and part where flyaways start.
The most common mistake is skipping the anchor – a ponytail or bun with no braided base WILL slide down by afternoon, no matter how tight the elastic. Always braid into the base first. The second mistake is parallel bobby pins, which slide out in pairs; cross them every time. The third mistake is braiding too tight at the hairline in the name of hold – snug is good, painful causes tears and can damage delicate edges. Real all-day hold comes from structure (anchors, crossed pins, tucked ends, double elastics), not from painful tension. Build the structure right and the style lasts without hurting.
Final Thoughts
These 17 cute Christmas braids prove that festive and long-lasting are not opposites – the right structure gives you both. Whether you choose the playground-proof triple braid, the elegant reinforced halo, or the simple anchor French braid with a red bow, the principle is the same: anchor the base, lock the ends, and let the structure do the work instead of tension. Style once in the morning, pack zero touch-up tools, and let her play, pose, and party. That is the real holiday magic – hair you never have to think about twice.
Follow Us On Pinterest: Easy To Find Next Style