Sana
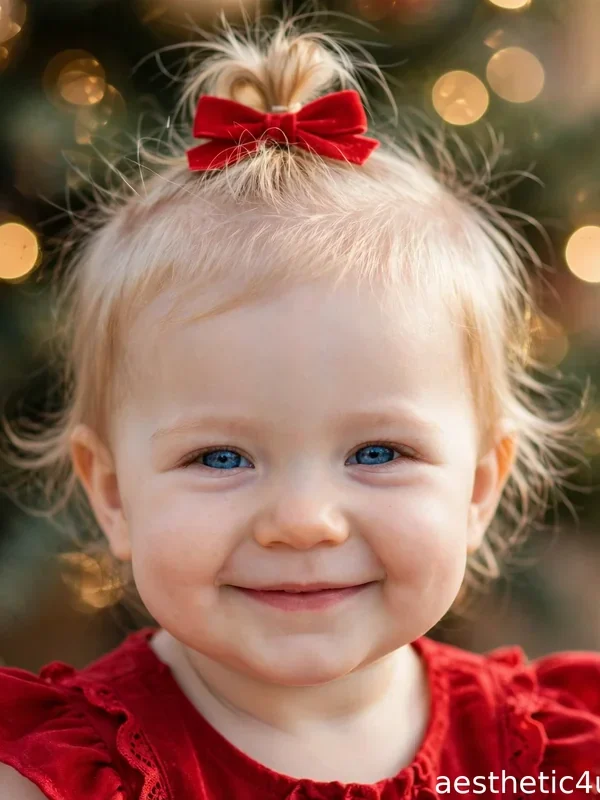
The holidays are the one time of year when cute is basically a requirement. Bows, braids, ribbons, and a little sparkle are all fair game in December, and honestly, it would be a shame not to use them. Cute Christmas hairstyles are having a real moment right now, with bows and playful braids all over Pinterest and holiday party photos. They are fun, they photograph beautifully, and they instantly put everyone in a festive mood.
These styles are sweet, playful, and full of Christmas charm, but cute does not have to mean childish. I have picked looks that work for teens, moms, and anyone who loves a little whimsy, with most taking under fifteen minutes. I will show you exactly how to do each one, which accessories make the biggest difference, and how to keep the look age-appropriate and polished. I have also included a guide to choosing the right cute style for your age, event, and hair type, plus my best tips for keeping playful looks polished instead of childish, so every style lands exactly right in photos this holiday season. Whether you are going for adorable or just a little festive, there is something here you will fall for.
1. Double Dutch Braids with Red Bows

Two Dutch braids run from the front to the back with a small red bow tied at the end of each one, pulled slightly loose for softness. Part your hair down the middle and braid each side in the Dutch style, keeping the braids relaxed. Secure the ends with small elastics, then tie a small red satin bow at the end of each braid. Gently pancake each braid by tugging the edges for fullness. It takes about fifteen minutes, the difficulty is easy to medium, and red or gold bows look the most festive.
I would choose this if you want cute with staying power. The braids hold all day long, which makes this perfect for Christmas markets, long party days, and anytime you need hair that survives everything. It suits oval, round, and heart-shaped faces. One tip: tie the bows firmly at the braid ends, since a bow that slides off halfway through the day ruins the whole effect.
2. Half-Up Space Buns with Red Bows

Two small buns sit on top of the crown with the rest of the hair left long and flowing, each bun finished with a small red bow at its base. Section off the top half of your hair and part it down the middle, gather each side into a small bun, and secure with elastics. Clip a small red velvet or satin bow at the base of each bun and leave the bottom half in soft waves. It takes about eight minutes, the difficulty is easy, and it works great on second-day hair.
I would pick this for a fun holiday party or a Christmas market day. The buns give you the playful look while the long hair underneath keeps it pretty and wearable. It suits oval and heart-shaped faces best, and it is a hit with teens and anyone young at heart. One honest tip: keep the buns small and neat, since oversized buns plus long hair can look unbalanced instead of cute.
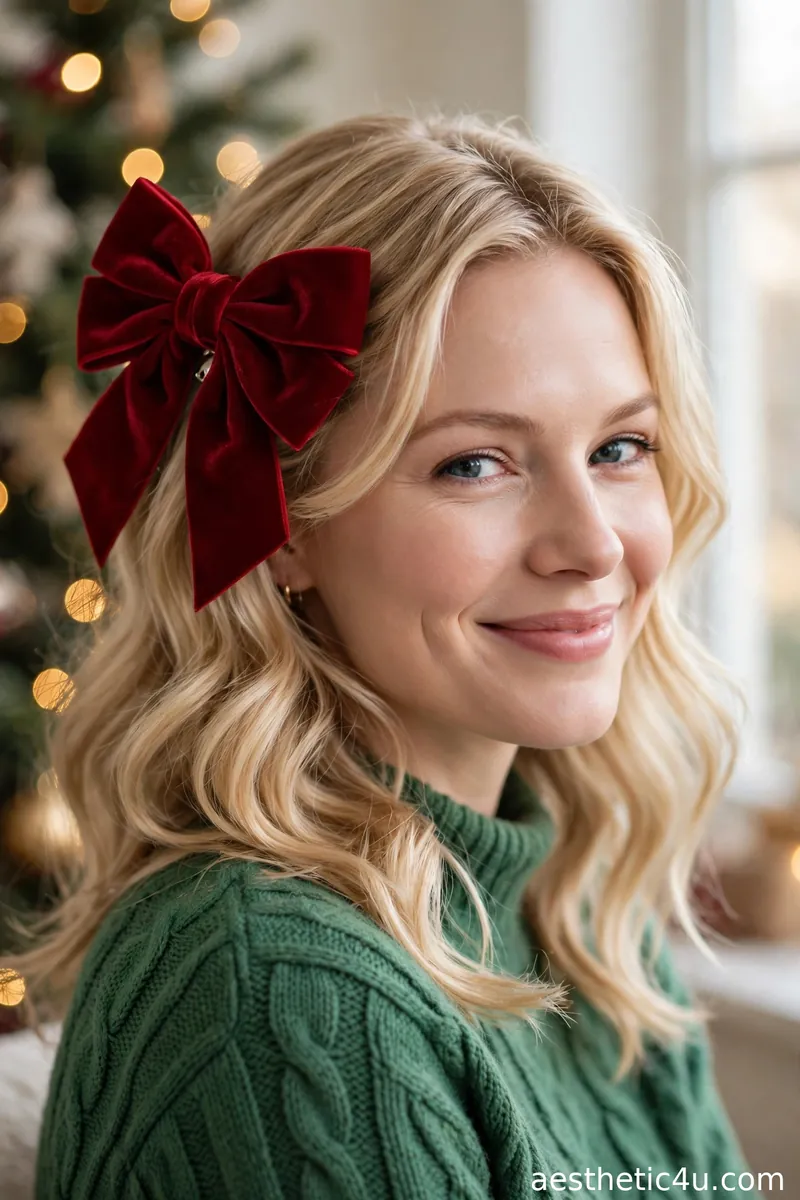
3. Half-Up Style with Velvet Bow
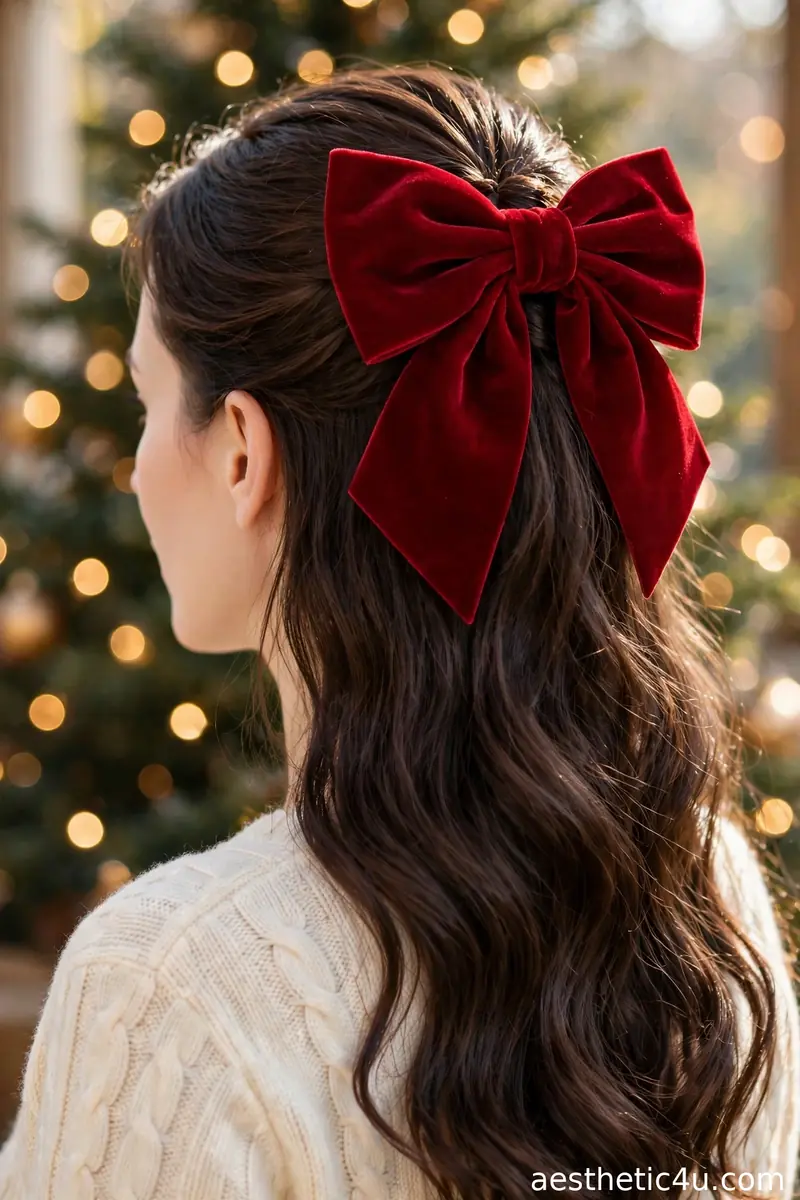
The top half of the hair is gathered back and secured with a large velvet bow, while the bottom half falls in soft waves. Curl your hair loosely with a 1.25-inch iron, gather the top half back, and secure it with an elastic. Then clip or tie a large velvet bow over the elastic and brush through the waves with your fingers. It takes about twelve minutes, the difficulty is easy, and deep red, emerald, or black velvet looks the most luxurious. It works on medium to long hair.
This is my go-to cute look that also feels grown-up. The velvet bow is the star here, and half-up styling keeps it sweet without going overboard. I would pick it for Christmas dinner and holiday parties alike. It flatters every face shape. One tip: choose a bow that is proportional to your hair, since an oversized bow on fine hair overwhelms the style instead of enhancing it.
4. Bubble Ponytail with Gold Elastics

A single high ponytail is turned into a bubble ponytail using gold elastics spaced down the length, each bubble puffed for fullness. Make one high ponytail, add small gold elastics every two inches down the tail, and gently tug each section outward with your fingertips to form soft, even bubbles. It takes about eight minutes, the difficulty is beginner, and it works best on medium to long hair. Metallic gold elastics catch the light beautifully and read instantly festive, especially in evening photos.
I would choose this when you want something trendy and adorable with half the effort of double bubbles. The gold elastics catch the light beautifully, and a single bubble ponytail is so easy that anyone can do it. It is perfect for Christmas parties and family photos. It suits oval and heart-shaped faces best. One tip: keep your bubble spacing even down the tail, since uneven spacing is the one thing that makes this look messy instead of cute.
5. Bouncy Curly Pigtails
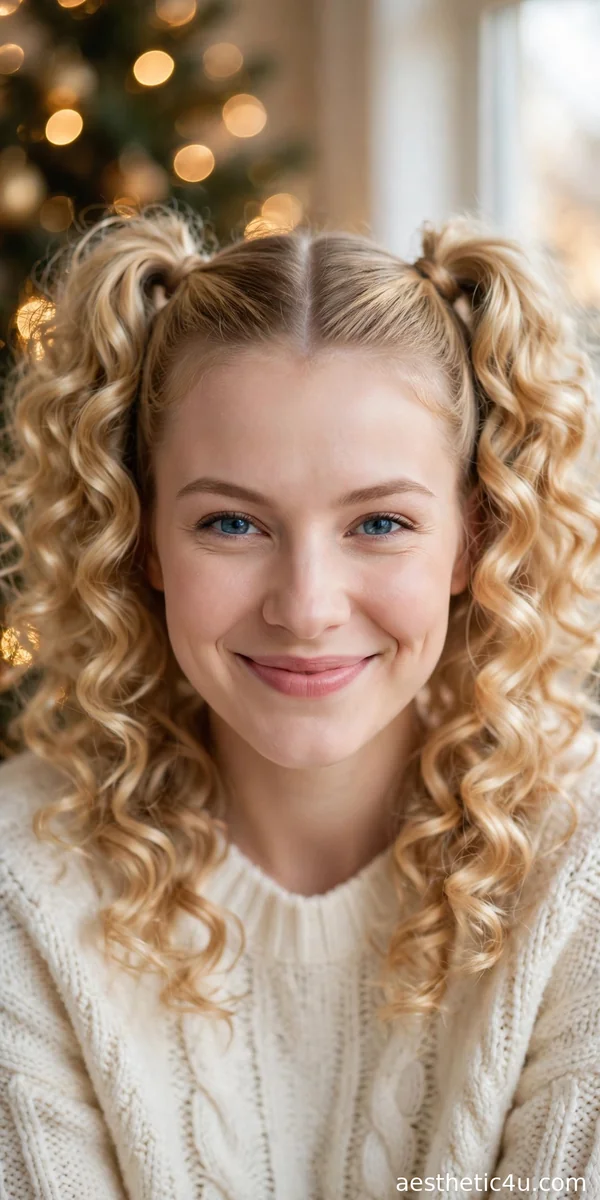
The hair is split into two high pigtails and curled into bouncy ringlets, full and springy with lots of movement. Part your hair down the middle, secure two high pigtails, and curl small sections with a 1-inch iron, letting each curl cool before touching it. Finger-comb gently for bounce and mist with a light-hold spray. It takes about fifteen minutes, the difficulty is easy, and small sections are the secret to defined, bouncy ringlets. It works best on medium to long hair.
I would pick this for pure holiday joy. It is sweet, it is fun, and bouncy curls in pigtails look amazing in every single photo. I love it for Christmas morning and casual holiday gatherings. It suits oval and heart-shaped faces best. One honest caveat: this is a young, playful look, so if you want it more grown-up, lower the pigtails slightly and keep the curls soft rather than tight.
Keep exploring: 22 Christmas Hairstyles for Short Hair That Prove Less Is More
6. Bow-Tied High Ponytail
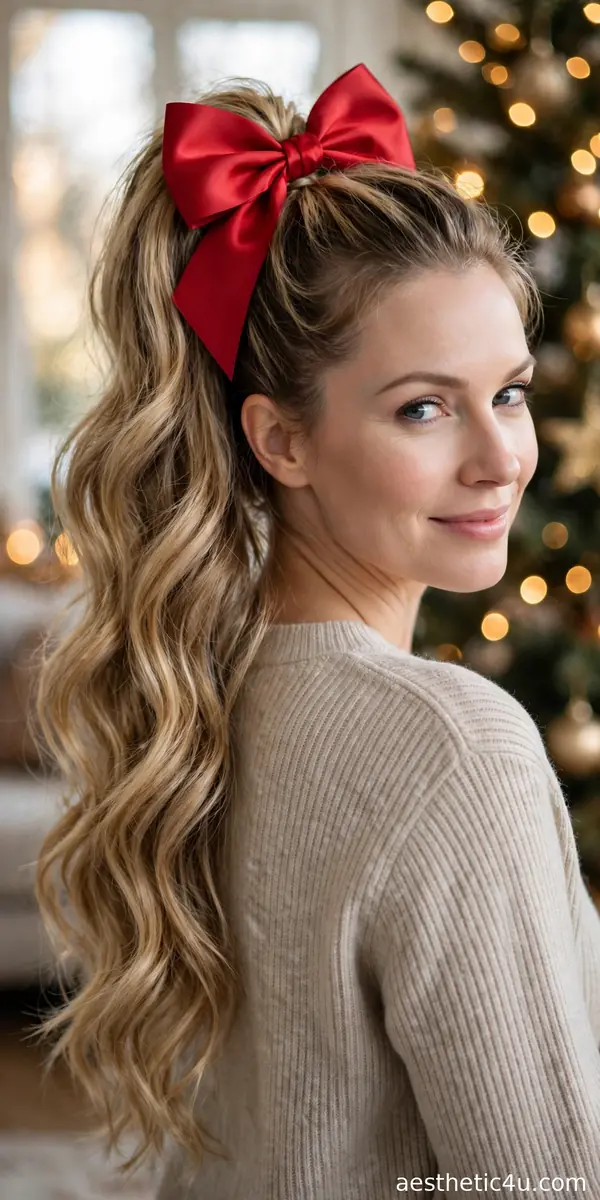
A high, bouncy ponytail is tied at the base with an oversized bow, and the bow sits front and center as the main detail. Secure a high ponytail with a strong elastic, backcomb the tail lightly for bounce and fullness, and tie a large satin or velvet bow around the base. It takes about five minutes, the difficulty is beginner, and red, green, or gold bows look the most festive. A little flexible-hold hairspray keeps the tail bouncy all day long.
I would choose this when you want maximum cuteness with minimum effort. The bow does all the work, and a high ponytail keeps the whole look fresh and lively. It is perfect for Christmas parties, school events, and family photos. It suits oval, round, and heart-shaped faces. One tip: pick a bow with a clip or a sturdy knot, since a floppy bow that slides down ruins the whole effect.
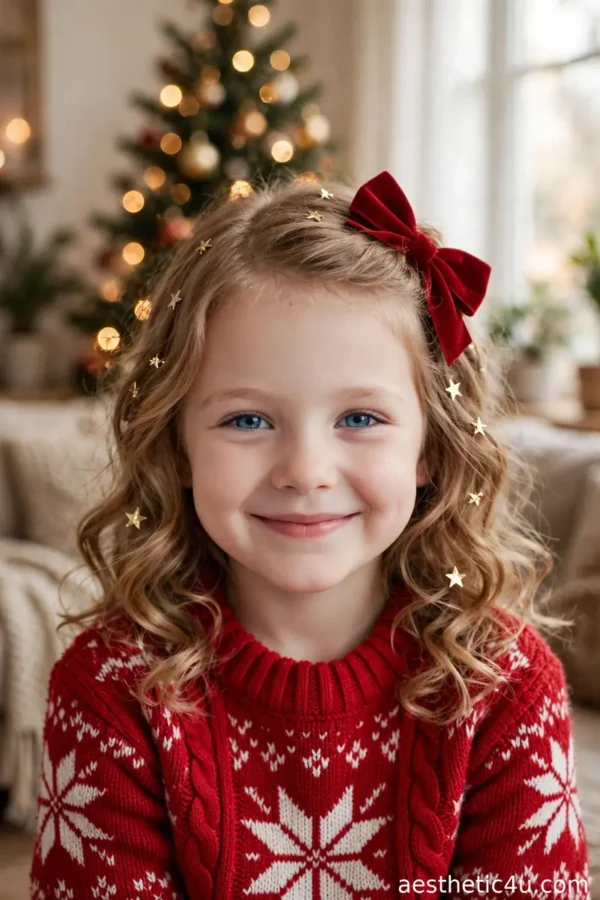
7. Mini Braids with Star Clips

Several tiny braids are made throughout loose hair, each finished with a small star-shaped clip, and the braids peek out from the waves. Curl your hair loosely with a large iron for soft waves, then make five or six tiny three-strand braids scattered through the hair, securing each with a small elastic and a star clip. It takes about twelve minutes, the difficulty is easy, and gold or silver star clips sparkle like tiny ornaments. It works on medium to long hair.
I would pick this for a whimsical touch that is not too much. The mini braids add texture and the star clips sparkle like tiny ornaments in your hair. It is lovely for Christmas Eve and holiday parties. It flatters every face shape. One tip: scatter the braids unevenly rather than in a pattern, since random placement looks effortlessly magical while symmetrical placement looks contrived.
8. Twisted Pigtails with Ribbon Ends

Two pigtails are twisted into ropes and tied off with ribbon bows at the ends, with the twists kept slightly loose. Part your hair down the middle, twist each side into a rope by wrapping two sections around each other, and tie each end with a ribbon bow. It takes about ten minutes, the difficulty is beginner, and twists are simpler than braids, which makes this the easiest cute style on the list. Red or green ribbon looks the most festive.
I would choose this as the easiest cute style on the list. Twists are simpler than braids, the ribbon ends make them feel festive, and the whole thing takes ten minutes. It is perfect for Christmas morning and casual holiday days. It suits oval and heart-shaped faces. One tip: twist the ropes tightly enough to hold but loosely enough to look soft, and secure the ends well since twists unravel faster than braids.
9. Twin Low Buns with Holly Pins

Two small buns sit low behind the ears, each decorated with a tiny holly hair pin, and the look is sweet and seasonal. Part your hair down the middle, twist each side into a small low bun behind the ear, and pin them securely. Tuck a holly pin into each bun and pull a few soft pieces loose around the face. It takes about eight minutes, the difficulty is easy, and it works on medium to long hair. The low placement keeps it soft and wearable.
I would pick this for a Christmas party where you want to look adorable. The holly pins are the perfect tiny detail, and low buns keep it soft and wearable. It flatters oval and heart-shaped faces especially well. One tip: keep the buns small and neat, since the charm of this style is in its delicacy, and oversized buns lose that sweet, petite feel.
10. Heart-Part Half Ponytail
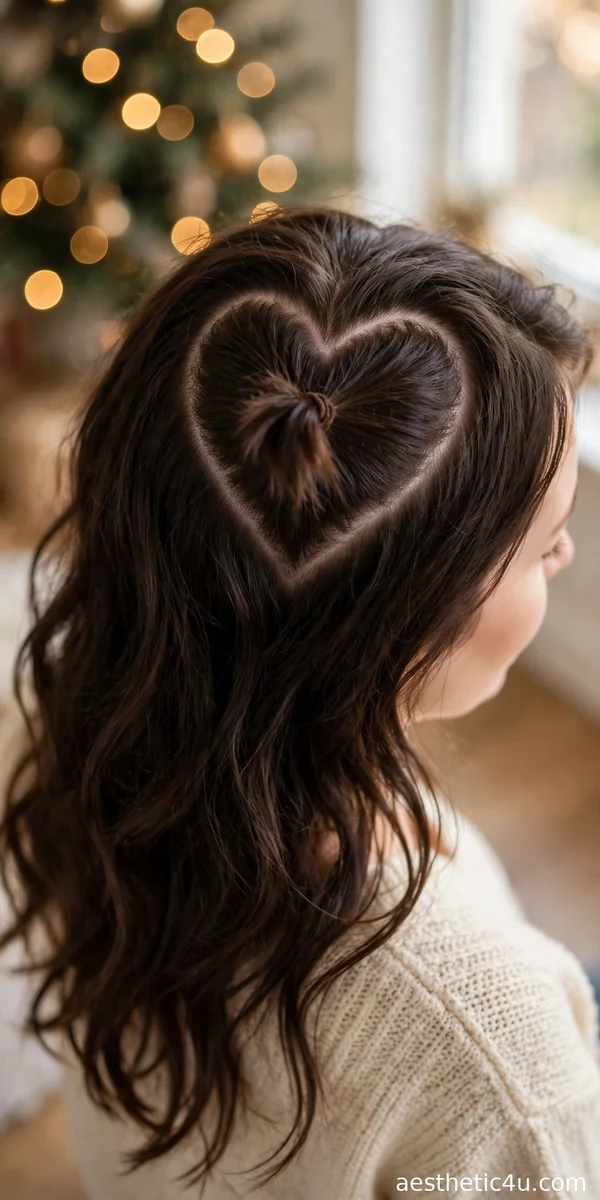
The hair is parted in a heart shape at the crown, and the top section is gathered into a half ponytail, with the heart part as the cute detail. Use the handle of a rattail comb to draw a heart shape at the crown, gather the hair inside the heart into a half ponytail, and secure it with an elastic. Smooth the rest of your hair and add soft waves if you like. It takes about ten minutes, the difficulty is easy to medium, and a steady hand with the comb is the main skill needed.
I would choose this when you want something people will actually notice. The heart part is such a sweet surprise, and the half ponytail keeps it easy to wear. It is perfect for Christmas parties and festive photos. It suits oval and heart-shaped faces best. One tip: draw the heart with the comb first and check it in the mirror before securing the ponytail, since fixing it afterward is much harder.
Keep exploring: 24 Christmas Hairstyles for Medium Hair That Hit the Sweet Spot
11. Rosette Bun
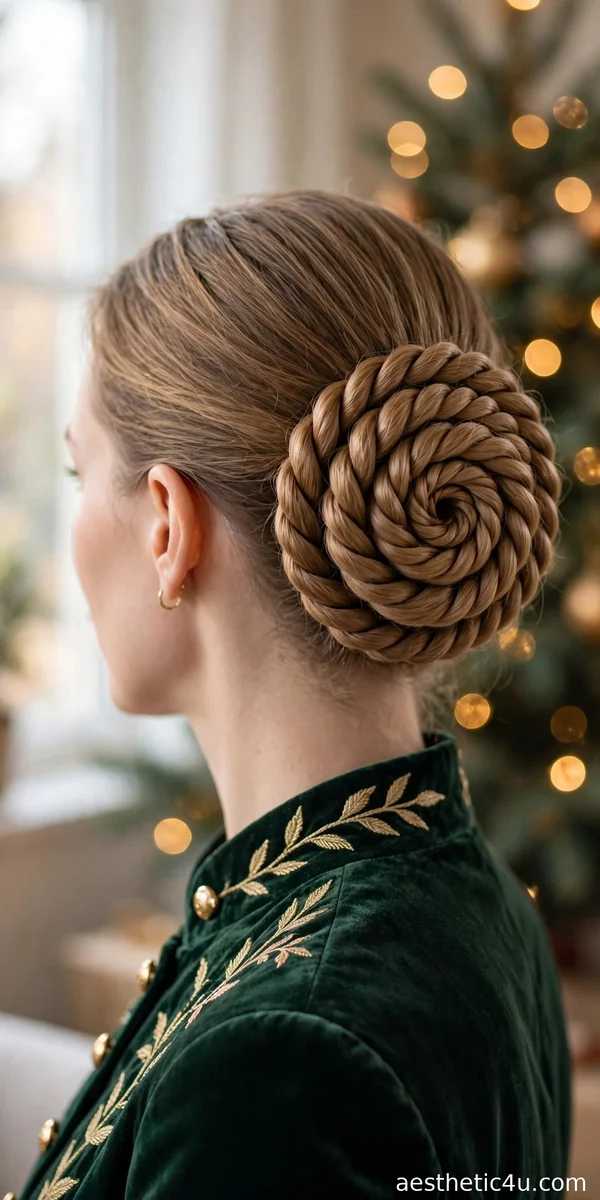
The hair is coiled flat into a rose-like swirl on the side or back of the head, with a neat, clearly defined spiral shape. Gather your hair to one side, twist it into a rope, and coil it flat against your head in a spiral, pinning as you go to define each layer of the rose. Tuck the ends underneath and mist with a medium-hold spray. It takes about ten minutes, the difficulty is medium, and the key is pinning each coil layer so the spiral reads clearly.
I would pick this when you want cute and a little bit fancy. The rosette shape looks delicate like a flower, and it is such a pretty change from a regular bun. It is lovely for Christmas dinner and holiday parties. It flatters oval and heart-shaped faces. One honest tip: this one deserves a practice run, since the spiral takes one try to understand and then becomes easy.
12. Messy Half-Up Knot with Festive Scrunchie
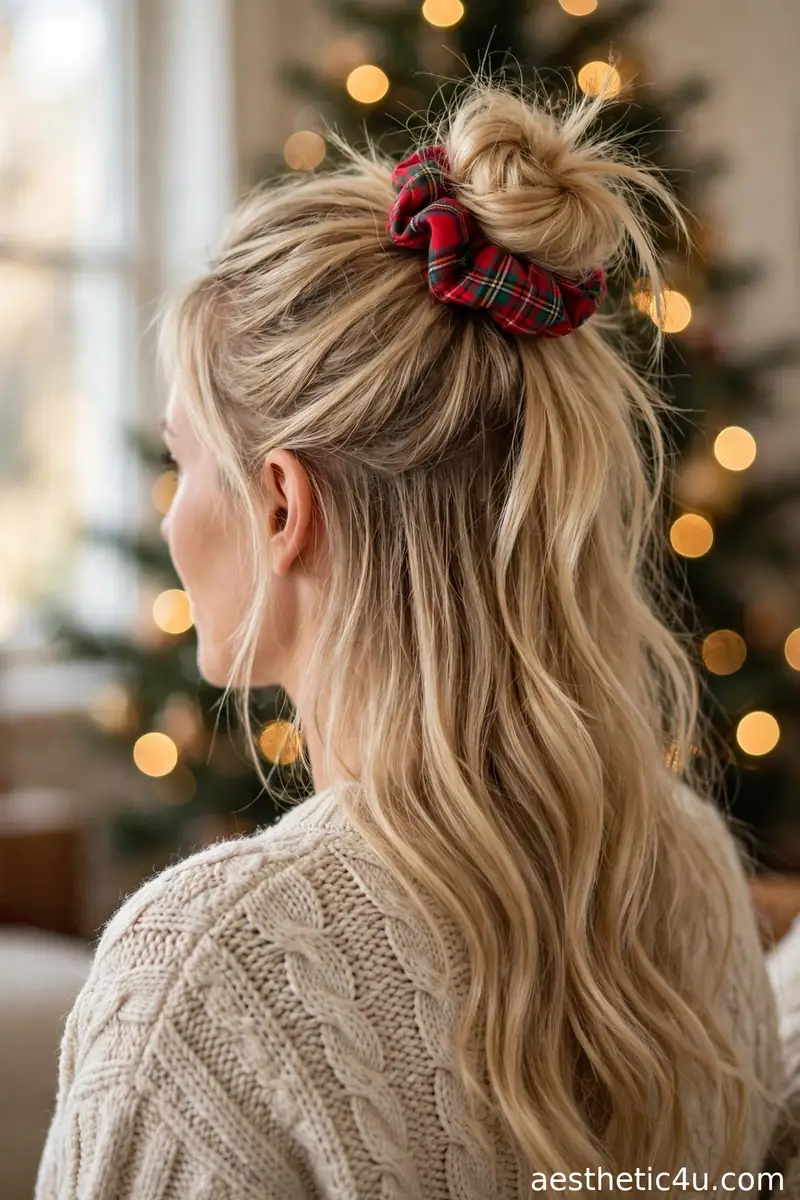
A loose messy knot sits on top of the crown with the rest of the hair left long and flowing, secured with a festive plaid scrunchie. Section off the top half of your hair, gather it into a loose high ponytail, and twist it into a messy knot secured with the plaid scrunchie instead of a plain elastic. Pull pieces loose around the knot and leave the bottom half untouched. It takes about five minutes, the difficulty is beginner, and plaid, velvet, or tartan scrunchies look the most festive. It works great on second-day hair.
I would choose this for Christmas morning when you want to look cute in photos with zero effort. The plaid scrunchie makes it festive, the messy knot keeps it real, and the long hair underneath keeps it pretty. It suits every face shape and every hair type. One tip: scrunchies are gentler than elastics, so this is also kind to your hair during the dry winter months when breakage is more common.
13. Side Braid with Charm Accents

A loose side braid is decorated with tiny hair charms clipped along its length, with small stars, bells, or snowflakes. Make a loose three-strand braid over one shoulder, starting just behind the ear, pancake it gently for fullness, and clip tiny charms along the braid at even intervals for a balanced look. It takes about eight minutes, the difficulty is easy, and it works best on medium to long hair. Small clip-on charms are easiest, and you can find affordable Christmas charm sets online.
I would pick this for a playful detail that gets compliments. The braid is simple, but the little charms make it look like you put real thought into it. It is perfect for Christmas parties and festive outings. It flatters round and square faces since the diagonal drape softens the features. One tip: keep the charms small and lightweight, since heavy charms drag the braid down and pull uncomfortably.
14. Double Bubble Ponytails
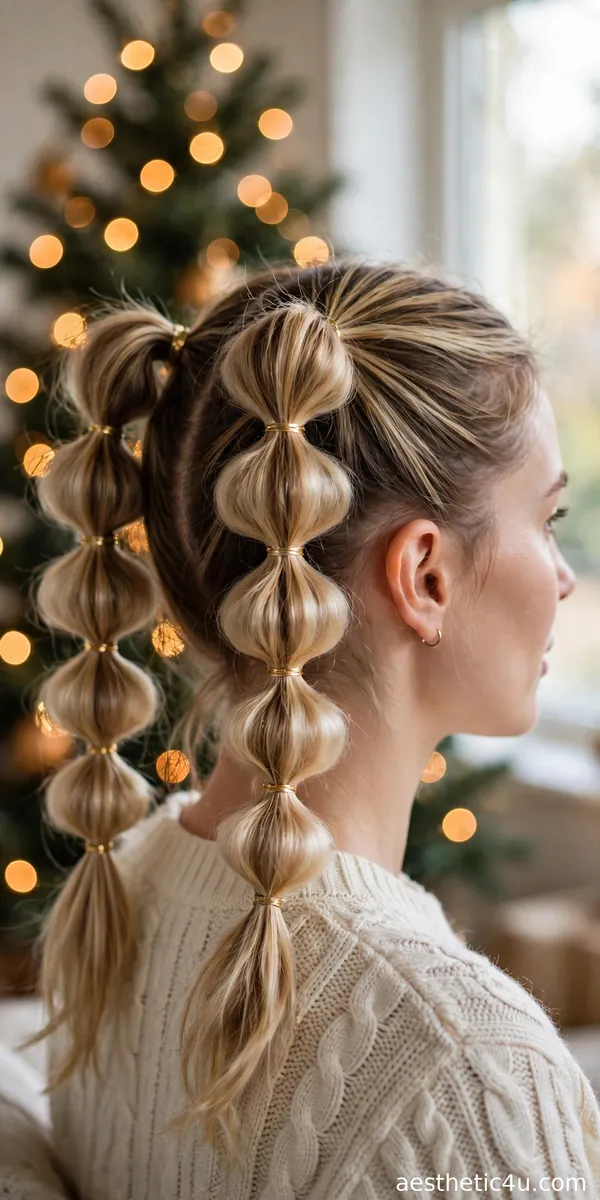
Two high ponytails are each turned into bubble sections with elastics, and the bubbles are puffed evenly for a full, fun shape. Make two high ponytails, add small elastics every two inches down each tail, and tug each section outward gently with your fingertips for perfectly even bubbles. It takes about eight minutes, the difficulty is beginner, and clear or gold elastics both work beautifully. It needs medium to long hair for the best bubble effect, since short tails only make two small bubbles.
I would choose this when you want something that looks amazing in motion. The bubbles bounce as you move, and double ponytails double the cuteness. It is a hit at Christmas parties and in photos. It suits oval and heart-shaped faces best. One tip: this style is all about symmetry, so measure your elastic spacing on the first ponytail and match it exactly on the second.
15. Side Braid with Red Ribbon

A loose side braid is woven with a red ribbon running through it, kept soft and romantic with gently pulled edges. Make a loose three-strand braid over one shoulder, weaving a thin red satin ribbon in as you braid so it travels through the braid. Pancake the edges gently for fullness and secure with a small elastic. It takes about ten minutes, the difficulty is easy, and a thin satin ribbon weaves most easily. It works best on medium to long hair.
I would pick this as the prettiest braid on the list. The red ribbon woven through the braid looks like something from a holiday movie, and it is easier than it looks. It is stunning for Christmas Eve and holiday parties. It flatters round and square faces since the diagonal drape softens the features. One tip: keep the ribbon slightly loose as you weave, since pulling it tight makes the braid pucker instead of lying smooth.
Keep exploring: 20 Christmas Hairstyles for Thin Hair That Fake Full Volume
16. Pearl-Pinned Braided Crown

A chunky braid is wrapped around the head like a full crown with every strand pinned up, and small pearl pins are dotted along the braids for sparkle. Braid your hair into two or three chunky braids, wrap them around your head in a crown shape, and pin them securely where they overlap. Dot small pearl pins along the braids at natural intervals. It takes about fifteen minutes, the difficulty is medium, and the key is pinning each section firmly so the crown holds all day. It works best on medium to long hair.
I would choose this when you want cute that also feels a little regal. The pearl pins look like tiny dewdrops caught in the braids, and a full crown keeps every strand in place. It is lovely for Christmas dinner and evening parties. It flatters oval and heart-shaped faces. One tip: use pins with a flat back that sit close to the hair, since bulky pins look cheap and catch on everything.
17. Braided Headband with Holly Accent
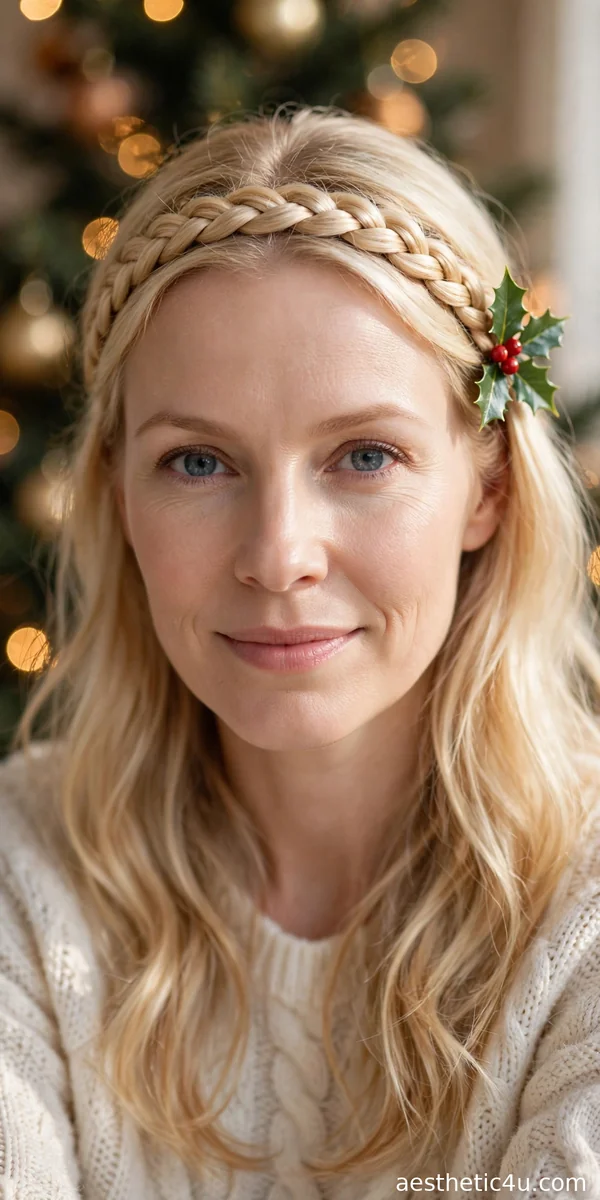
A braid is made from one side of the hair and pinned across the front like a headband, with a small holly clip decorating one end. Braid a section from behind one ear, pull it across the front of your head, and pin it behind the opposite ear, tucking the end underneath. Add a small holly clip near one end. It takes about eight minutes, the difficulty is easy, and pancaking the braid first makes it look fuller. It works on medium to long hair.
I would pick this for a sweet, storybook look. The braided headband keeps hair off your face, and the holly accent makes it unmistakably Christmas. It is perfect for Christmas church services and family gatherings. It flatters oval and heart-shaped faces. One tip: pin the braid in at least three places, since a headband braid that slips forward halfway through the day loses all its charm.
18. Curly High Ponytail with Velvet Bow

A high ponytail is left in full, bouncy curls with a burgundy velvet bow tied at the base, playful and festive. Pull your hair into a high ponytail and define the curls with a 1-inch iron or a curl cream, letting them bounce naturally. Tie a burgundy velvet ribbon around the base in a full bow with the tails hanging. It takes about ten minutes, the difficulty is easy, and the looser the curls, the more romantic it looks. Deep red or burgundy velvet is perfect.
I would choose this when you want a ponytail that still feels young and sweet. The curls keep it playful, and the velvet bow ties the whole Christmas look together. It is lovely for holiday parties and Christmas dinner. It flatters oval, round, and heart-shaped faces. One tip: fluff the curls at the crown for extra volume, since a flat crown plus a full ponytail looks unbalanced.
19. Mini Twist Buns
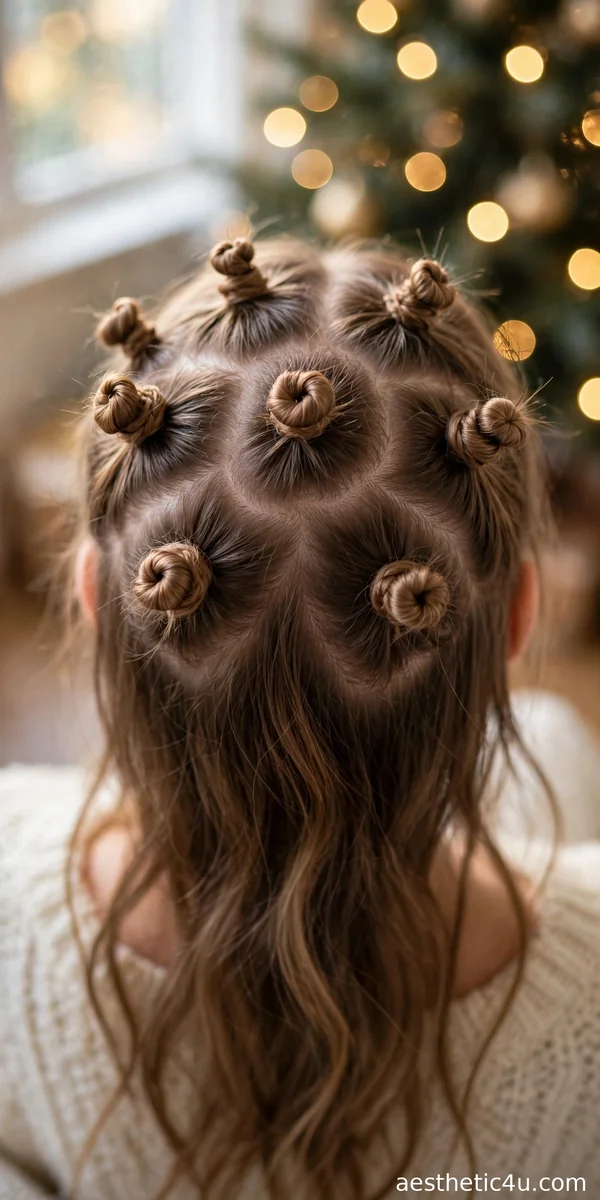
Several small sections are twisted into tiny buns scattered across the crown, kept petite and slightly messy. Section the top of your hair into six to eight small sections, twist each into a tiny bun, and pin them in place, scattering them across the crown. Pull a few wispy pieces loose around the buns for softness. It takes about twelve minutes, the difficulty is easy, and it works on medium to long hair. Small elastics help each mini bun hold its shape.
I would pick this for something different and adorable. The mini buns look like little ornaments in your hair, and the style is surprisingly easy to do. It is a fun choice for Christmas parties and festive photos. It suits oval and heart-shaped faces best. One tip: vary the placement slightly instead of lining the buns up in rows, since scattered placement looks playful while rows look severe.
20. Glitter-Part Ponytail

A sleek ponytail is finished with a line of cosmetic glitter pressed along the part, and the glitter catches the light with every move. Smooth your hair into a sleek ponytail, then use a small brush to press cosmetic-grade glitter gel along the part line. Keep the glitter to the part only for a chic effect. It takes about five minutes, the difficulty is beginner, and cosmetic-grade glitter is a must, since craft glitter is not safe for skin. Gold or silver both look stunning.
I would choose this for a holiday party where you want to shine. It is bold, it is fun, and the glitter part takes the simplest ponytail to a whole new level. It suits every face shape. One honest tip: apply the glitter last, after your makeup is done, and keep makeup remover wipes handy, since glitter migrates and you will want a quick cleanup option.
Keep exploring: 21 Christmas Hairstyles for Fine Hair With Serious Staying Power
21. Wispy Bangs with Loose Bun

Wispy bangs frame the forehead while the rest of the hair is gathered into a soft, loose bun, with an airy and sweet overall feel. Pull your hair into a loose low or medium bun, leaving the bangs and a few face-framing pieces out. Soften the bangs with a light pass of the flat iron if needed. It takes about six minutes, the difficulty is easy, and it works best if you already have bangs or curtain fringe. A light-hold spray keeps the bun soft.
I would pick this if you have bangs and want to show them off. The loose bun keeps the look relaxed, and wispy bangs always photograph beautifully. It is perfect for Christmas dinner and holiday photos. It flatters oval, round, and heart-shaped faces. One tip: do not over-style the bangs, since the whole charm is in their soft, wispy, touchable texture.
22. Soft Waves with Candy Bow
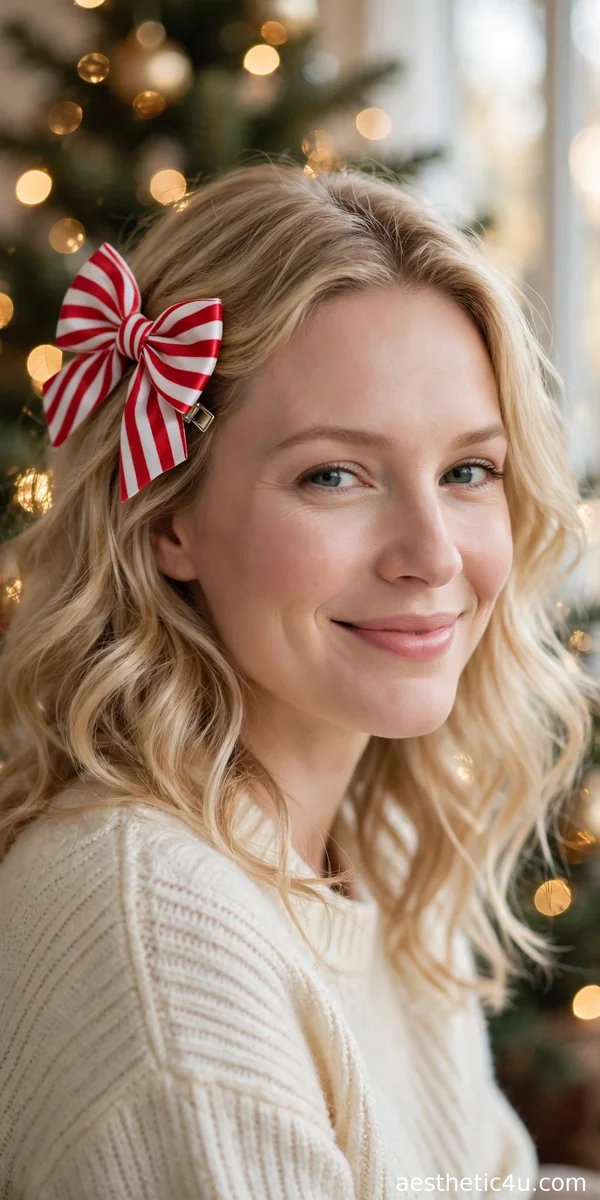
Loose, soft waves are finished with a large bow clip in red-and-white peppermint stripes, with the bow sitting to one side. Curl your hair loosely with a 1.25-inch iron, brush through with your fingers for soft waves, and clip a large bow to one side above the ear. It takes about twelve minutes, the difficulty is easy, and it works on medium to long hair. The bigger and bolder the bow, the more festive the result.
I would choose this to end the list because it is Christmas cute in its purest form. Soft waves plus a big bow never miss, and it works for every age. It is perfect for any Christmas event. It flatters every face shape. One final tip: clip the bow slightly above and behind the ear rather than right on top of your head, since side placement looks chic while top placement can look childish.
How to Choose the Right Cute Christmas Hairstyle for You
Cute styles are about balance, so start with your age and your event. Playful looks like space buns, bubble braids, and curly pigtails shine at casual parties, Christmas markets, and family mornings, while the velvet bow half-up, twisted pearl crown, and rosette bun work beautifully for dressier dinners. If you are worried about looking too young, choose one cute element instead of three: a single bow, one set of star clips, or one ribbon is charming, while all of them together can overwhelm. Let the accessory be the statement and keep the base style simple.
Then consider your hair type and skill level. Fine hair does best with styles that add visual interest without needing volume, like the mini braids with star clips, the charm braid, and the glitter part. Thick hair holds buns and twists beautifully, so the space buns, twin low buns, and curly updo are all great picks. For skill, the scrunchie knot, bow ponytail, and twisted pigtails need zero practice, while the rosette bun and heart part deserve one trial run. Always match the style to the time you actually have, since a rushed cute style stops looking cute fast.
Styling Tips & Common Mistakes to Avoid
My first tip is that cute styles live or die on the accessories. Invest in good-quality bows, velvet scrunchies, and proper cosmetic glitter, since cheap accessories look cheap in photos and fall apart by evening. My second tip is to keep your base smooth and neat, because messy bases plus cute accessories read as sloppy rather than adorable. Take five minutes to smooth, brush, and pin properly before adding the fun details. My third tip is placement: step back from the mirror and check your bow or clips from a distance, since what looks centered up close often sits crooked in photos.
The most common mistake is going overboard. Three bows, star clips, glitter, and charms all at once stops being cute and starts being chaotic, so pick one hero accessory per style. The second mistake is using accessories that do not stay put, which is how Christmas photos end up with a bow hanging sideways. Test every clip and pin by shaking your head before you leave the house. If something starts slipping midday, the fix is simple: smooth the style back, re-pin securely, and reposition the accessory. Secure cute always beats ambitious cute.
Final Thoughts
Cute Christmas hair is all about having fun, and that is the whole point of the season. Add the bow, clip in the stars, try the glitter, and do not overthink it. The holidays are short, the photos last forever, and the looks that make you smile are always the right ones. Pick your favorite style, wear it with total confidence, and enjoy every sparkly, silly, wonderful moment of the season. You have got this, and you are going to look absolutely adorable.
Follow Us On Pinterest: Easy To Find Next Style