Sana
December weather and great hair do not always agree. Cold wind, static, and flat hat hair can ruin a good style in minutes, and every winter we all face the same dilemma: stay warm or look good. But here is the secret I tell everyone: the right hairstyle and the right hat can actually look amazing together. Some of the prettiest winter looks I know are built around a beanie, a beret, or a festive Santa hat.
These looks are designed to work with hats, not against them. From cozy beanies to festive Santa hats, your hair will still look great when the hat comes off too. I will show you exactly which styles survive under each type of hat, how to beat static and flat hat hair, and how to pick the right combination for your plans. You will also learn my favorite tricks for keeping hats in place all day and reviving your hair in seconds when the hat comes off indoors, so you never have to choose between warm and beautiful again. Whether you are heading to a Christmas market, taking snowy photos, or just trying to stay warm in style, there is a hat-friendly look here for you.
1. Loose Waves with Beanie
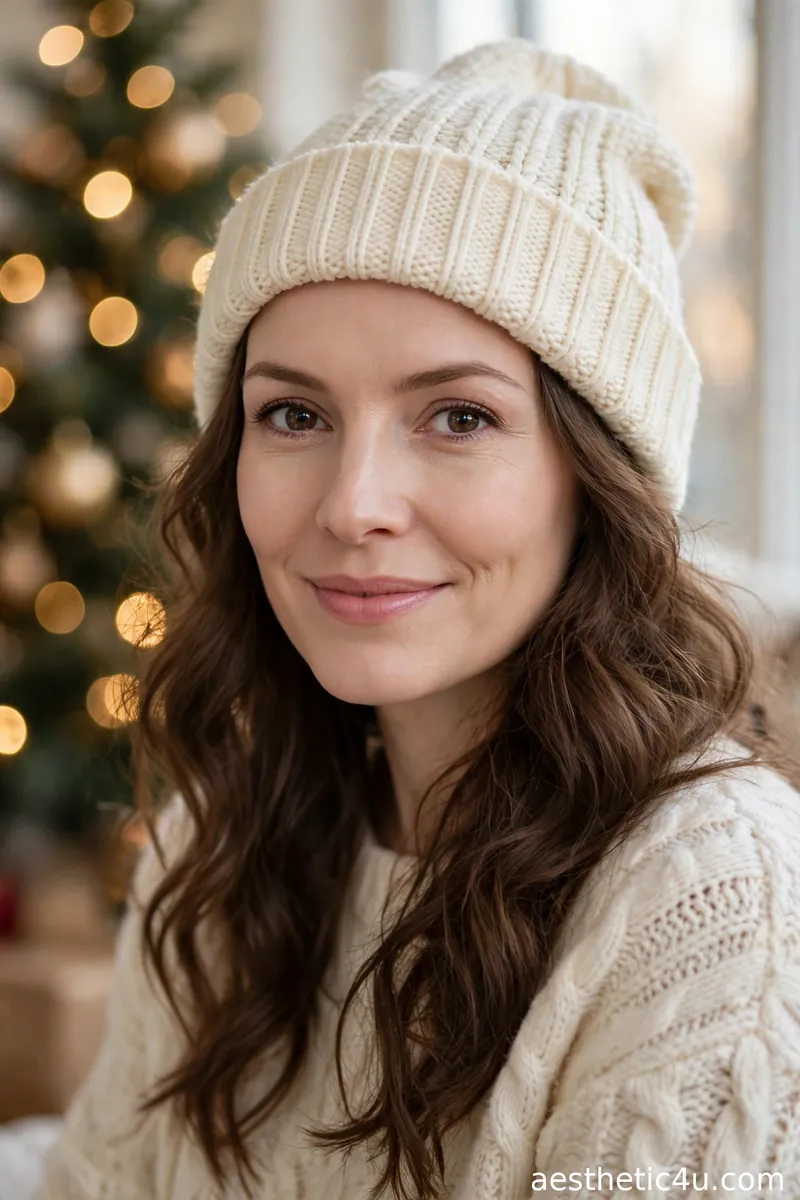
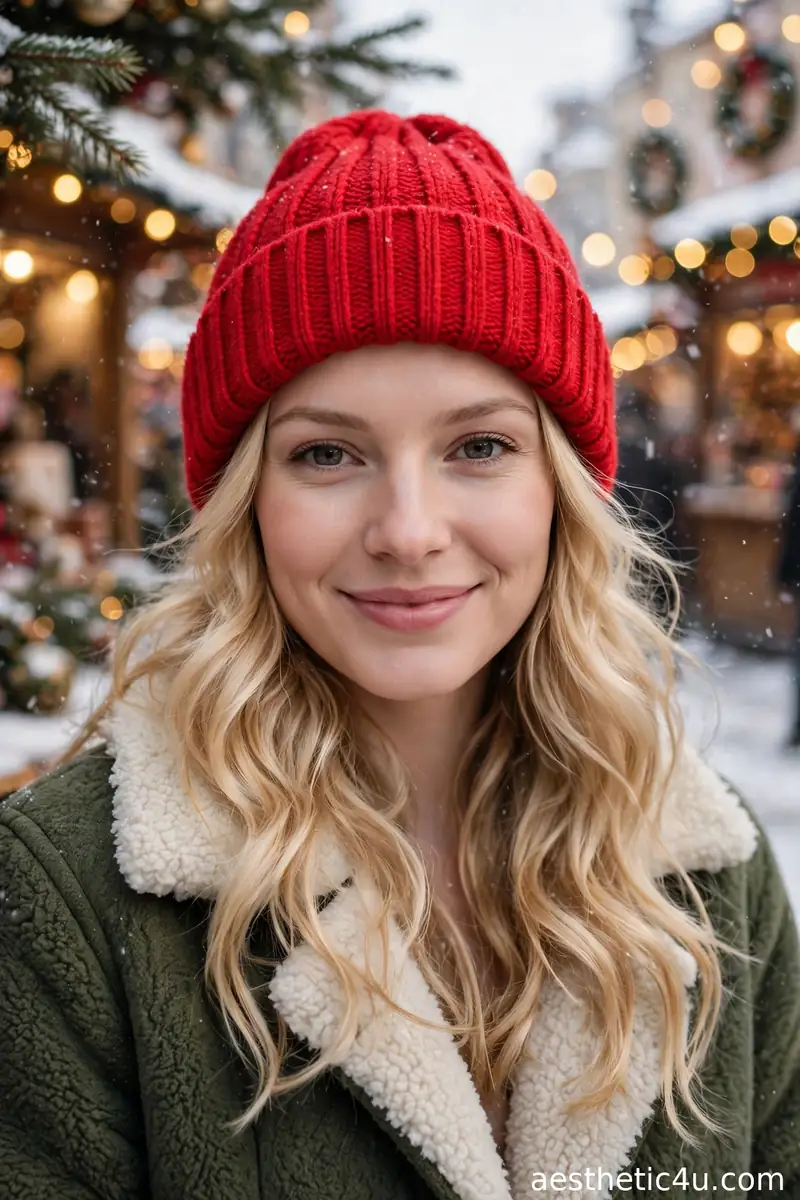
Soft, loose waves fall from under a cozy beanie, with texture and volume so they do not go flat under the hat. Curl your hair in large sections with a 1.25-inch iron, finger-comb for softness, and add texturizing spray for grip and body. Pull the beanie on loosely, leaving the waves to fall naturally underneath. It takes about twelve minutes, the difficulty is easy, and textured waves hold up under a beanie far better than sleek hair. A beanie with a folded brim sits most comfortably.
I would choose this as the classic winter look. Textured waves hold up under a beanie better than sleek hair, and the peek of waves at the bottom looks effortlessly pretty. It suits every face shape and works for Christmas markets, snowy walks, and casual holiday outings. One tip: put the beanie on loosely rather than pulling it tight, since a tight beanie crushes volume and guarantees flat hat hair.
2. Low Braid with Santa Hat
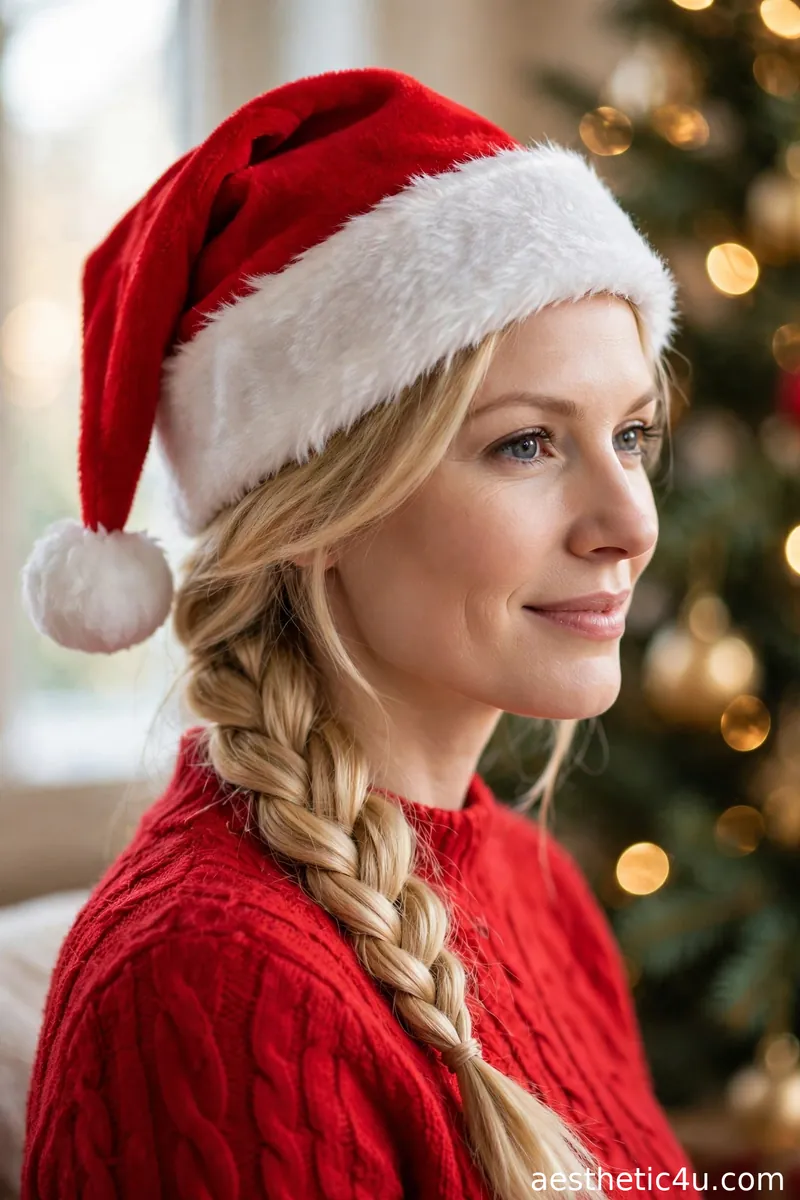
A loose braid rests over one shoulder while a Santa hat sits on top, keeping the hair neat and out of the way of the hat. Make a loose three-strand braid over one shoulder, pancake it gently for fullness, and place the Santa hat on top, letting the brim sit above your forehead. It takes about five minutes, the difficulty is beginner, and it works on medium to long hair. A slightly loose braid looks softer and more festive than a tight one.
I would pick this for Christmas morning photos. The braid stays tidy under the hat, and when you take the hat off, your hair still looks done. It flatters round and square faces since the diagonal braid softens the features. One tip: pin the Santa hat discreetly with two bobby pins at the sides, since Santa hats love to slide backward at the worst moments.
3. Sleek Bun with Beret

A smooth bun sits at the nape while a beret tilts to one side on top, and the combination is chic and very Parisian. Pull your hair into a low, smooth bun at the nape, sleek the sides with a little gel, and place the beret tilted to one side, securing it with two bobby pins. It takes about eight minutes, the difficulty is easy, and the low bun sits below the beret perfectly without creating bumps. A wool beret in red, black, or cream looks the most festive.
I would choose this when you want to look elegant in the cold. The low bun sits below the beret perfectly, and the whole look feels polished and intentional. It flatters oval, long, and heart-shaped faces. One tip: tilt the beret to the side opposite your part for the most flattering angle, and always pin it, since berets slide off smooth hair without help.
4. Side Ponytail with Beanie
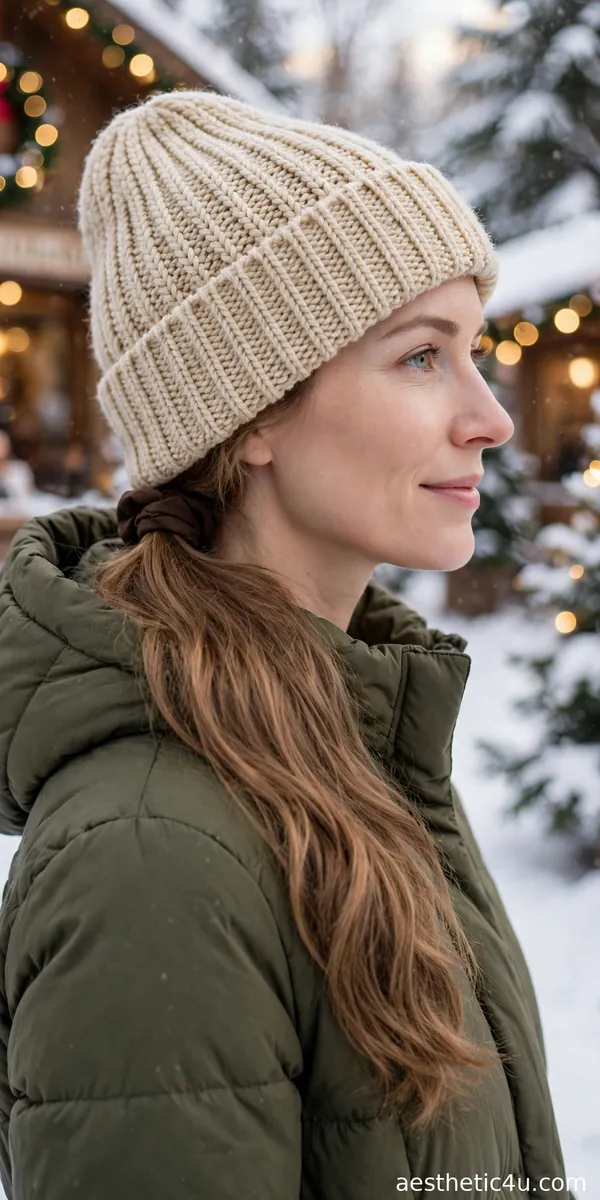
A low ponytail is swept to one side under a beanie, falling over the shoulder with soft texture. Gather your hair loosely to one side at the nape, secure it with a fabric-covered elastic, and pull the beanie on, letting the ponytail fall naturally over one shoulder. It takes about three minutes, the difficulty is beginner, and the side placement avoids the bump a back ponytail would make under the hat. A little texturizing spray adds softness and light texture to the tail.
I would pick this for a casual day out. The side ponytail avoids the bump a back ponytail would make, and it looks cute peeking out from under the beanie. It suits every face shape. One tip: keep the ponytail loose and low, since a high or tight ponytail under a beanie creates an uncomfortable lump and pushes the hat up.
5. Curly Ringlets with Wide-Brim Hat
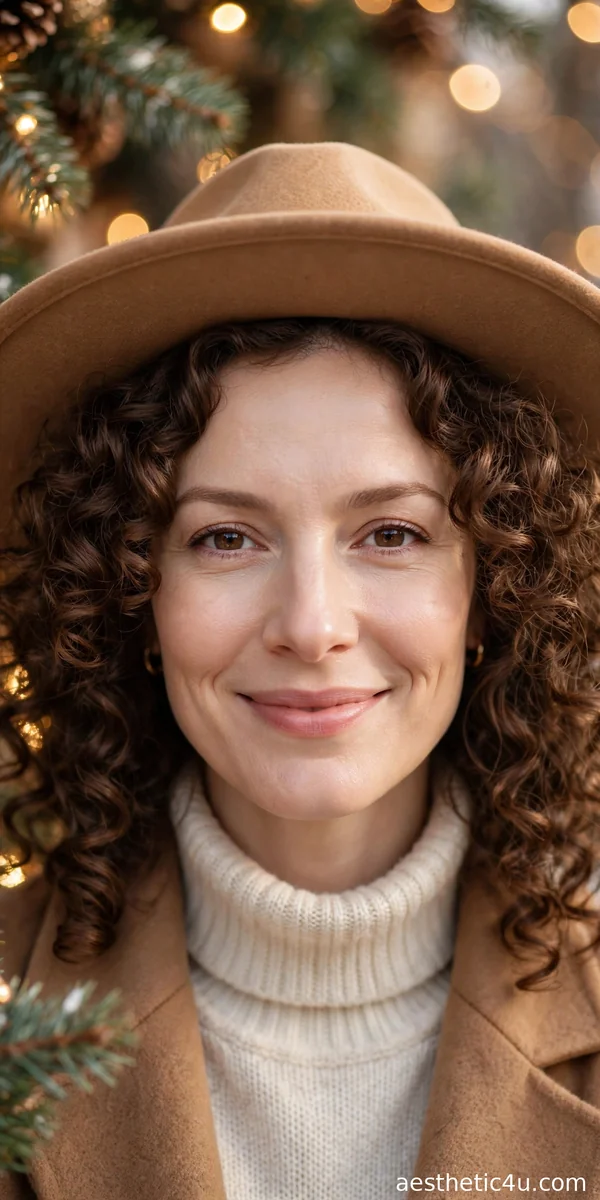
Full, defined ringlets frame the face under a wide-brim felt hat in camel, with natural volume from roots to ends. If your curls are natural, refresh them with a curl cream on damp hair and let them air-dry or diffuse. If not, curl small sections with a 0.75-inch iron for tight, defined ringlets. Place the wide-brim hat on top, letting the curls frame your face. It takes about fifteen minutes, the difficulty is easy, and defined curls hold their shape beautifully under a hat. A felt hat in black, camel, or burgundy looks stunning.
I would choose this for a dressy winter outing or a holiday evening event. The wide-brim hat plus voluminous curls looks glamorous and festive, and defined curls survive under a hat better than looser ones. It flatters oval, round, and heart-shaped faces. One tip: choose a hat with a slightly roomy crown so it sits on your head without crushing the curls at the roots.
Keep exploring: 23 Christmas Hairstyles for Curly Hair That Embrace the Volume
6. Double Braids with Beanie
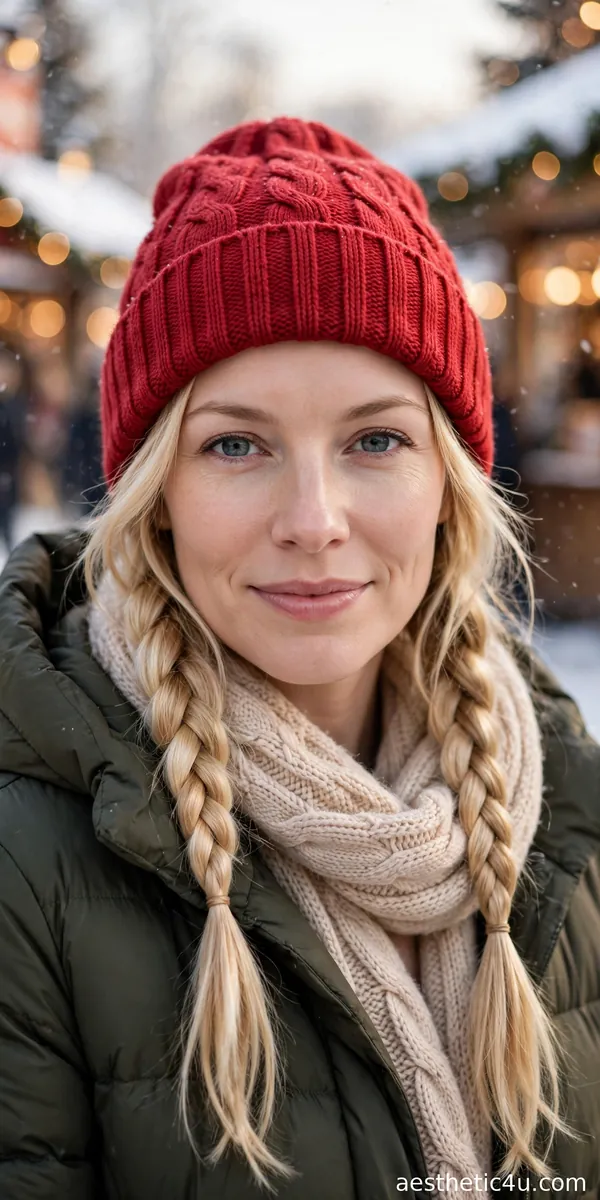
Two braids fall from under a beanie, one on each side, kept a little loose for a relaxed winter look. Part your hair down the middle, make two loose three-strand braids, and pull the beanie on over the top, letting the braids fall naturally in front of your shoulders. It takes about eight minutes, the difficulty is beginner, and braids are the most weatherproof style there is. Pancaking the braids slightly makes them look fuller and more romantic under the hat.
I would pick this for ski trips or snowy days. The braids stay neat no matter the weather, and they look adorable coming out from under a beanie. It suits oval and heart-shaped faces best. One tip: braid all the way to the ends and secure well, since wind loves to unravel loose braid ends, and tuck the ends into your coat for extra protection.
7. Low Ponytail with Santa Hat
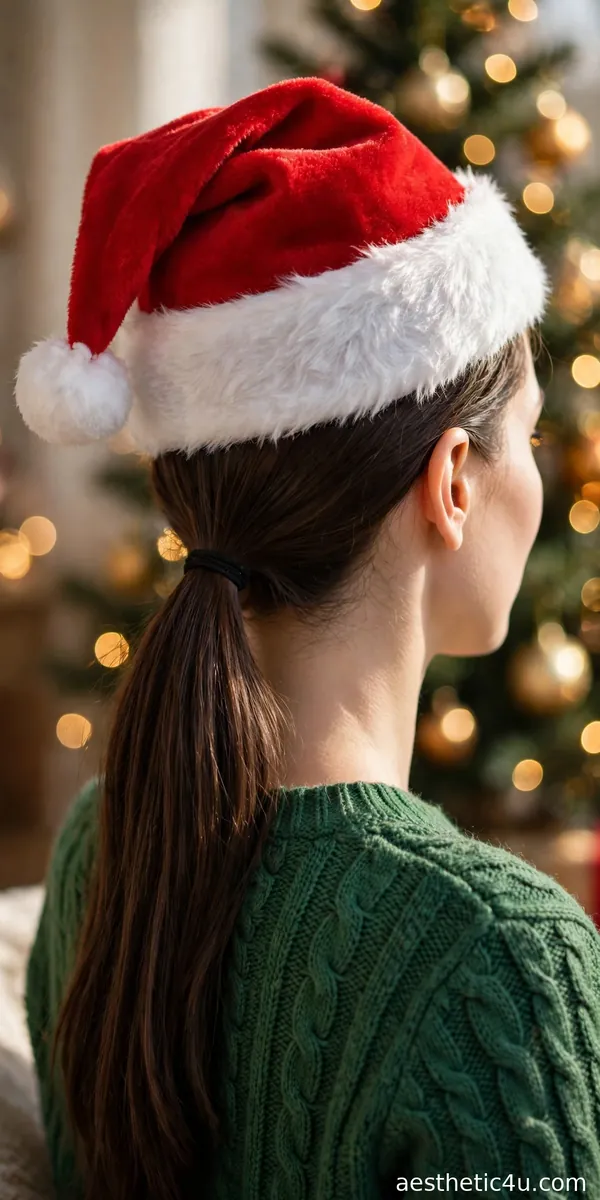
A smooth low ponytail sits at the nape under a Santa hat, sleek and simple so the hat is the star. Brush your hair back smoothly, secure it low at the nape with an elastic, and smooth the crown with a little serum. Place the Santa hat on top and pin it at the sides. It takes about four minutes, the difficulty is beginner, and keeping the ponytail sleek lets the festive hat do all the talking. It works on all hair lengths that can hold a ponytail.
I would choose this for holiday parties with a Santa hat dress code. The low ponytail keeps everything tidy, and it is comfortable to wear all evening. It suits every face shape. One tip: wrap a strand of hair around the elastic for a slightly more polished look, since even a simple style deserves a finished detail when the hat comes off for photos.
8. Messy Bun with Slouchy Beanie
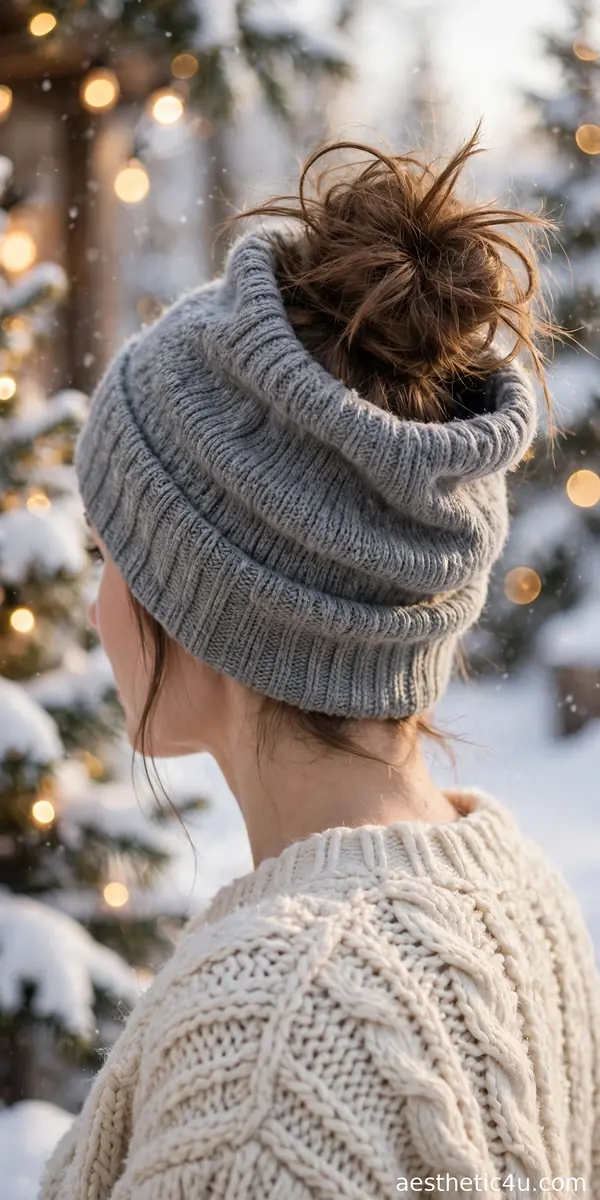
A loose top bun pokes through the top of a slouchy beanie, undone and textured for a casual feel. Pull your hair into a loose high bun, leaving it soft and messy, then pull the beanie on and poke the bun through the top opening, or wear the beanie behind the bun. It takes about five minutes, the difficulty is beginner, and a slouchy beanie works best since fitted beanies have no room for the bun. It works on medium to long hair.
I would pick this for the coziest winter days. It is the definition of cute, cozy, and comfortable, and the bun-through-the-beanie trick actually works beautifully. It suits oval and heart-shaped faces. One tip: keep the bun loose and soft rather than tight and neat, since a relaxed bun looks intentional with a slouchy beanie while a severe bun looks mismatched.
9. Half-Up Style with Beret
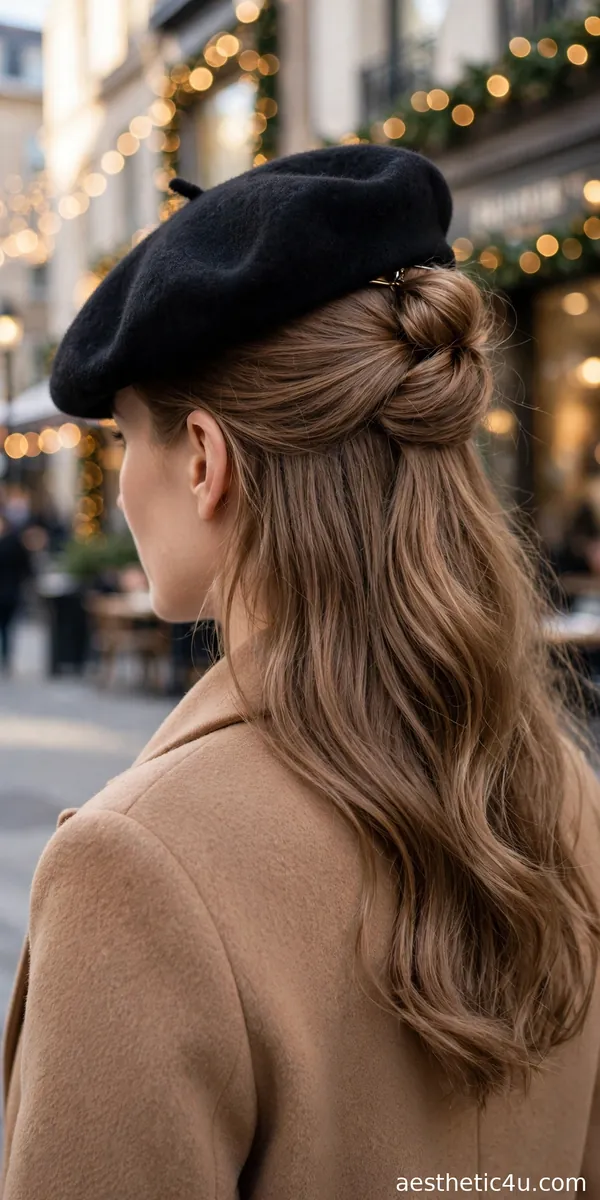
The top half of the hair is gathered back under a beret, while the rest falls in soft waves, and the beret sits tilted to one side. Curl your hair loosely, gather the top half back and pin it, then place the beret tilted to one side and secure it with bobby pins. It takes about twelve minutes, the difficulty is easy, and the pinned half-up section gives the beret something to grip. It works on medium to long hair.
I would choose this for a chic city Christmas look. The half-up section keeps the beret secure, and the waves underneath keep it soft and pretty. It flatters oval and heart-shaped faces especially well. One tip: place the beret slightly back on your head rather than right at the hairline, since that is the most flattering and modern beret position.
10. Side Braid with Fedora
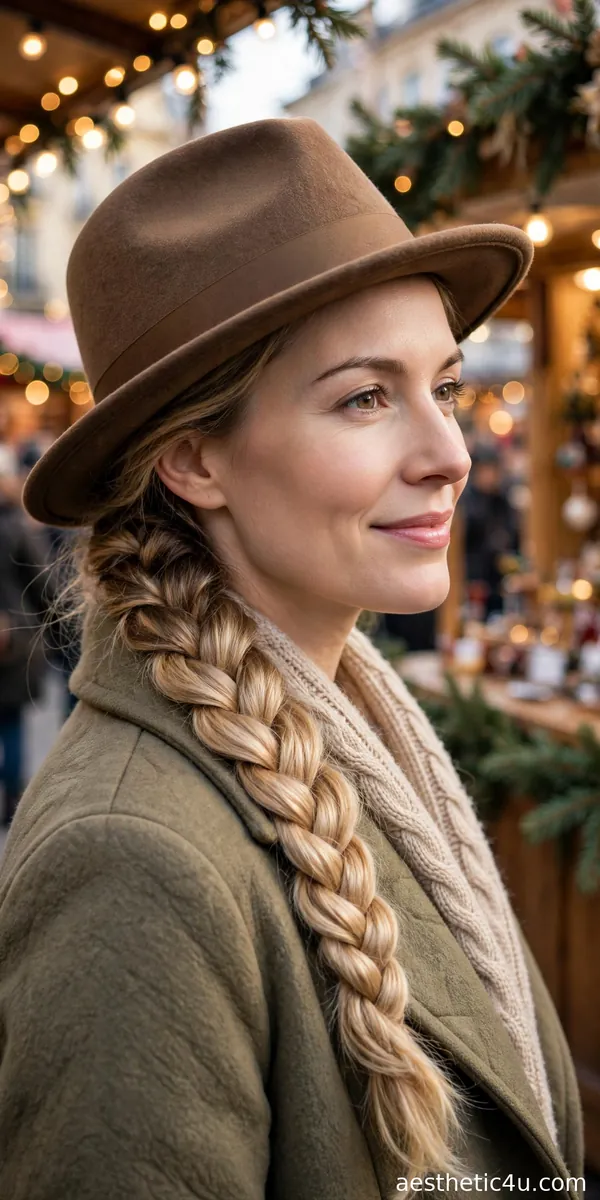
A chunky side braid drapes over one shoulder under a classic brown fedora, textured and full with a relaxed finish. Make a loose three-strand braid over one shoulder, pancake it gently with your fingertips for beautiful fullness, and place the fedora on top at a slight stylish angle. It takes about ten minutes, the difficulty is easy, and a little texturizing spray helps the braid pieces grip. It works best on medium to long hair with some natural texture.
I would pick this when you want edge with your festive look. The fedora adds style, the chunky braid adds texture, and together they look effortlessly cool. It suits oval, round, and heart-shaped faces. One tip: tilt the fedora slightly to one side for attitude, and keep the braid in front of your shoulder so both the hat and the braid show in photos.
Keep exploring: 25 Christmas Hairstyles for Kids Every Mom Is Saving Right Now
11. Sleek Low Bun with Santa Hat

A neat low bun sits at the nape while a Santa hat rests on top, smooth and compact so the hat sits flat. Pull your hair into a low bun at the nape, sleek the surface with a brush and a touch of gel, and place the Santa hat on top, pinning it at the sides. It takes about seven minutes, the difficulty is easy, and a compact bun is key, since a bulky bun tilts the hat. A firm-hold spray keeps everything neat.
I would choose this for a polished Santa hat look. A sleek bun keeps the hat from sliding around, and it looks neat and tidy in photos. It flatters oval, long, and heart-shaped faces. One tip: this is the best Santa hat style for long events, since the low bun stays comfortable for hours and the hat stays put with minimal adjusting.
12. Curly Afro with Beret
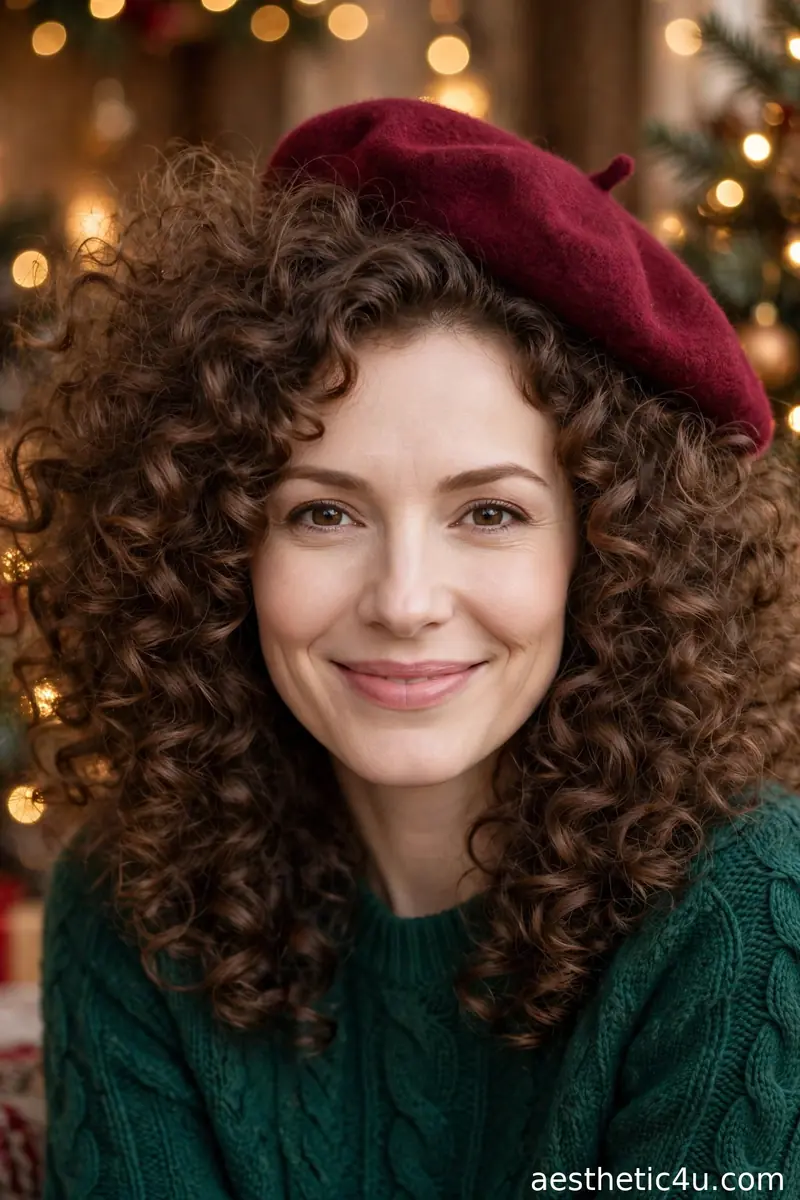
A full, rounded afro frames the face with a beret tilted on top, and the natural volume makes the combination bold and beautiful. Shape your afro as usual with a pick for fullness, then place the beret tilted to one side on top, securing it with a couple of bobby pins if needed. It takes about five minutes, the difficulty is beginner, and no extra styling is needed. A beret in a rich color like burgundy or forest green looks stunning against natural texture.
I would pick this because it is absolutely stunning. The beret on top of gorgeous natural volume is a look that turns heads, and it needs absolutely no extra styling. It suits every single face shape. One tip: place the beret toward the back of the crown rather than the front, so it perches on the volume instead of compressing it.
13. Sleek Straight Hair with Beanie
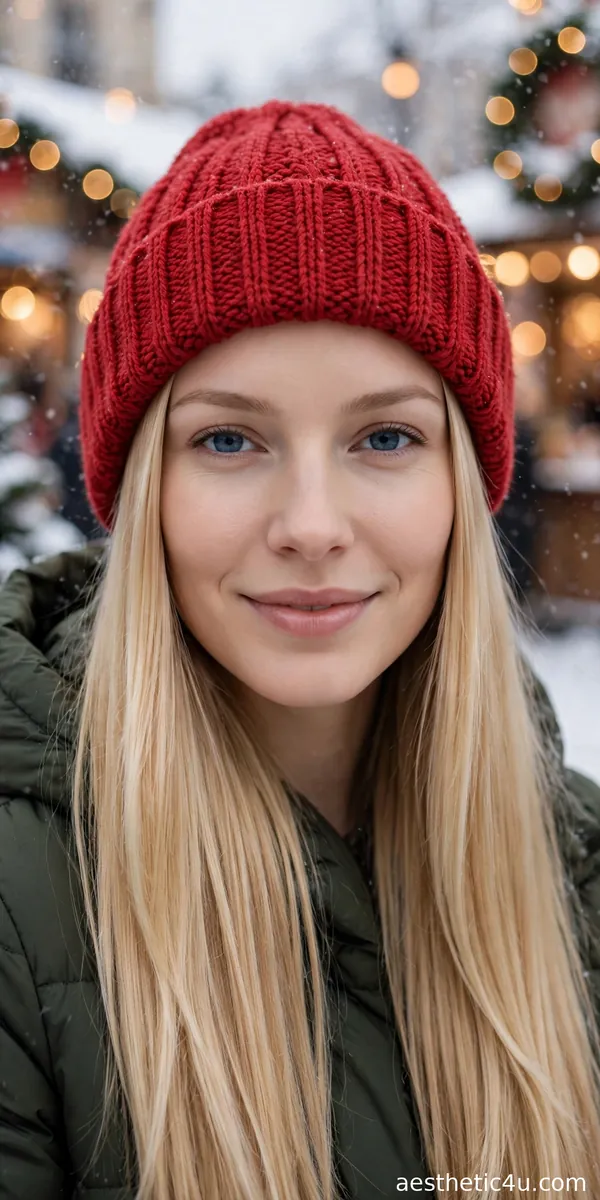
Long, sleek straight hair falls naturally from under a red beanie, smooth and simple with the beanie as the star. Straighten your hair smoothly with a flat iron, working in one-inch sections for the smoothest result. Add a drop of serum for shine, then pull the beanie on loosely, letting the hair fall naturally on both sides. It takes about ten minutes, the difficulty is easy, and the sleek texture contrasts beautifully with the chunky knit. A light-hold hairspray keeps the lengths smooth all day.
I would choose this for a simple but pretty winter look. The red beanie adds all the color and shape you need, and sleek hair keeps it chic. It suits every face shape, and it is perfect for Christmas markets and snowy walks. One tip: put the beanie on before you step outside, since rearranging straight hair under a beanie creates tangles and static.
14. High Ponytail with Santa Hat
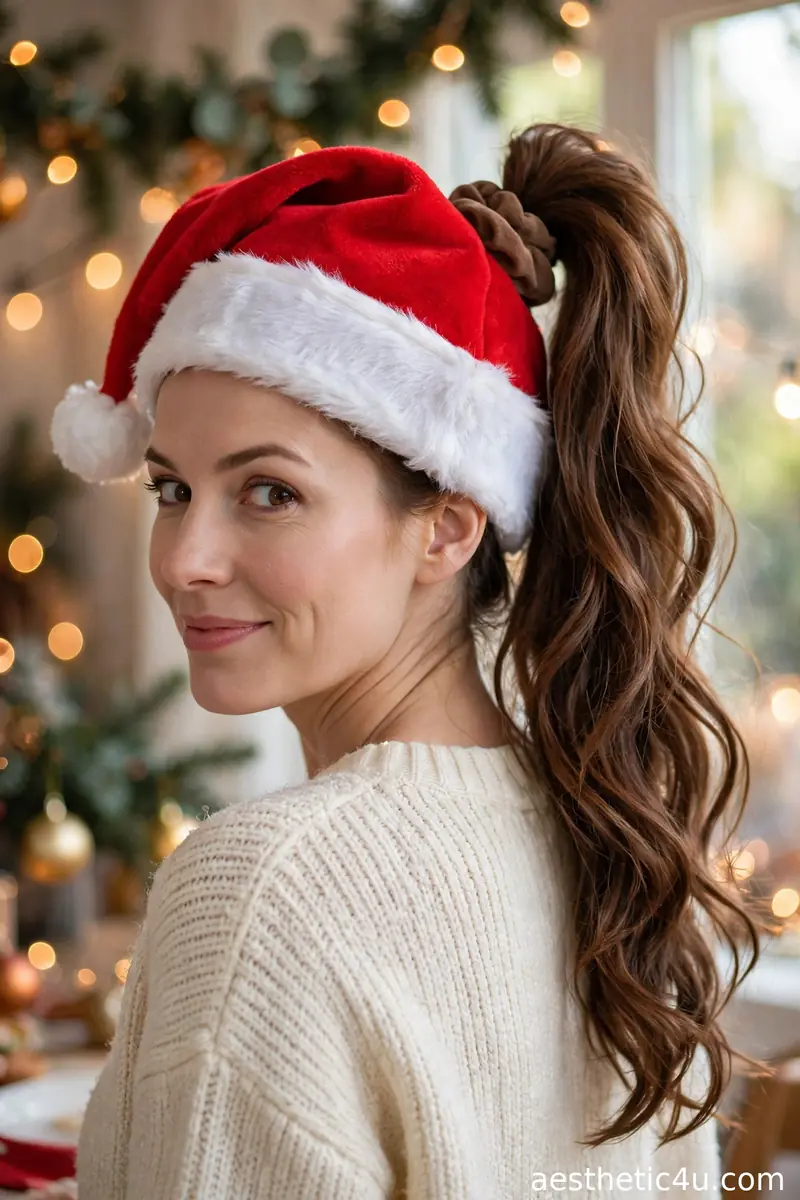
A high ponytail threads through the back opening of a Santa hat, full and bouncy with the hat sitting in front. Secure a high ponytail, pull it carefully through the back loop or opening of the Santa hat, and position the hat comfortably on your head, pinning it securely at the sides. It takes about five minutes, the difficulty is beginner, and backcombing the tail lightly at the crown gives it extra bounce and fullness. It works on medium to long hair.
I would pick this for a fun, playful Santa hat style. Pulling the ponytail through the hat keeps everything in place, and it looks adorable. It suits oval and heart-shaped faces best. One tip: if your Santa hat has no back opening, simply wear the ponytail high and perch the hat in front of it, securing both with bobby pins.
15. Loose Twist with Cloche Hat
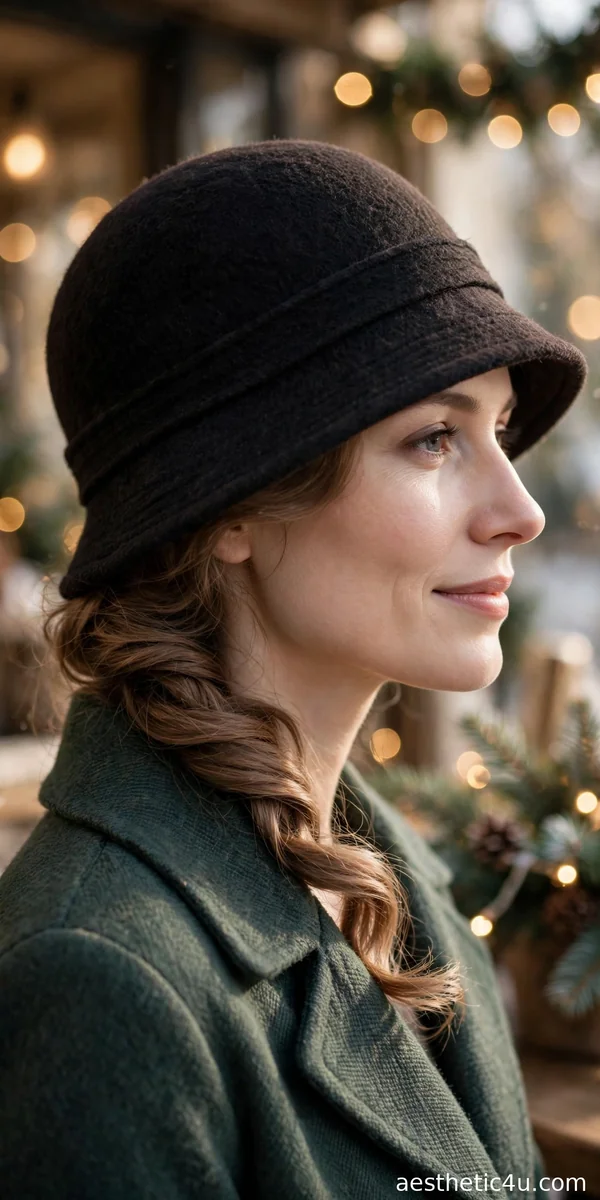
The hair is loosely twisted to one side under a vintage-style cloche hat, with soft waves peeking out from under the brim. Create soft, romantic waves with a large curling iron, twist everything loosely and softly to one side, and place the cloche hat on top, letting pretty waves peek out from under the brim. It takes about ten minutes, the difficulty is easy, and the cloche shape frames the face beautifully. It works beautifully on medium to long hair.
I would choose this for a romantic winter look or a vintage-inspired holiday outing. The cloche hat is so elegant, and the loose twist underneath keeps it from feeling too formal. It flatters oval and heart-shaped faces especially well. One tip: cloche hats sit low on the forehead, so keep the twist soft and low to match the hat’s vintage proportions.
Keep exploring: 18 Toddler Christmas Hairstyles Too Cute to Handle
16. Braided Crown with Beanie

A braid is wrapped around the head like a crown under a beanie, and the beanie sits just above the braid so the detail shows. Make two braids behind the ears, wrap them across the crown in opposite directions, pin them securely, and pull the beanie on just above the braid line. It takes about twelve minutes, the difficulty is easy to medium, and positioning the beanie just above the braid is what makes the detail visible. Pancake the braids for fullness.
I would pick this to end the list because it is the prettiest hat-proof style. The crown braid keeps everything secure no matter the weather, and the beanie frames it beautifully. It suits oval and heart-shaped faces. One final tip: this is the style to choose for the windiest, snowiest days, since nothing moves, nothing frizzes, and you still look gorgeous when the beanie comes off indoors.
How to Choose the Right Hat-Friendly Christmas Hairstyle for You
Start by matching the hairstyle to the hat, because each hat needs a different base. Beanies crush volume, so choose textured styles like loose waves, braids, and low ponytails that survive compression, and always wear the beanie loosely. Berets need a low, flat base, so low buns and half-up styles work best, and always pin the beret itself. Santa hats are top-heavy and slide, so low ponytails, low buns, and side braids keep them stable. Wide-brim hats and fedoras need room at the crown, so keep roots smooth and let the texture live at the ends.
Then think about your hair type and the weather. Fine hair goes flat under hats fastest, so add texturizing spray or dry shampoo at the roots before the hat goes on, and choose braids that hold their shape. Thick and curly hair has natural volume that hats compress, so embrace styles that work with it like the afro with a beret or loose curls under a wide brim. For brutal weather, braids win every time since wind and snow cannot undo them. And always plan for the hat coming off: pick a style that still looks intentional indoors, because the best hat hairstyle is one you never have to redo.
Styling Tips & Common Mistakes to Avoid
My first tip is to fight static before it starts. Winter air plus wool hats equals flyaways, so smooth a tiny amount of anti-frizz serum through your hair before the hat goes on, and keep a dryer sheet in your bag for emergency touch-ups. My second tip is to pin every hat: two bobby pins at the sides keep beanies, berets, and Santa hats exactly where you put them, even in wind. My third tip is to loosen up: a hat worn loosely preserves twice the volume of one yanked down tight, and it is more comfortable too.
The biggest mistake is choosing a style that fights the hat. A high bun under a beanie or a voluminous crown under a beret just creates lumps and frustration, so match the style to the hat shape. The second mistake is forgetting the reveal: if your style only looks good with the hat on, you will be stressed every time you step indoors. The fix is simple. When hat hair happens anyway, flip your head upside down, shake out the roots, add a spritz of dry shampoo, and smooth the ends. Two minutes and you are photo-ready again.
Final Thoughts
Hats and great hair can absolutely go together, and now you know exactly how to make it happen. The trick is choosing styles that work with the hat instead of fighting it, pinning everything that needs pinning, and planning for the moment the hat comes off. Winter is too beautiful to spend it worrying about your hair. So pick your hat, pick your style, and get out there. Stay warm, stay stylish, and enjoy every snowy moment of the season.
Follow Us On Pinterest: Easy To Find Next Style