Sana
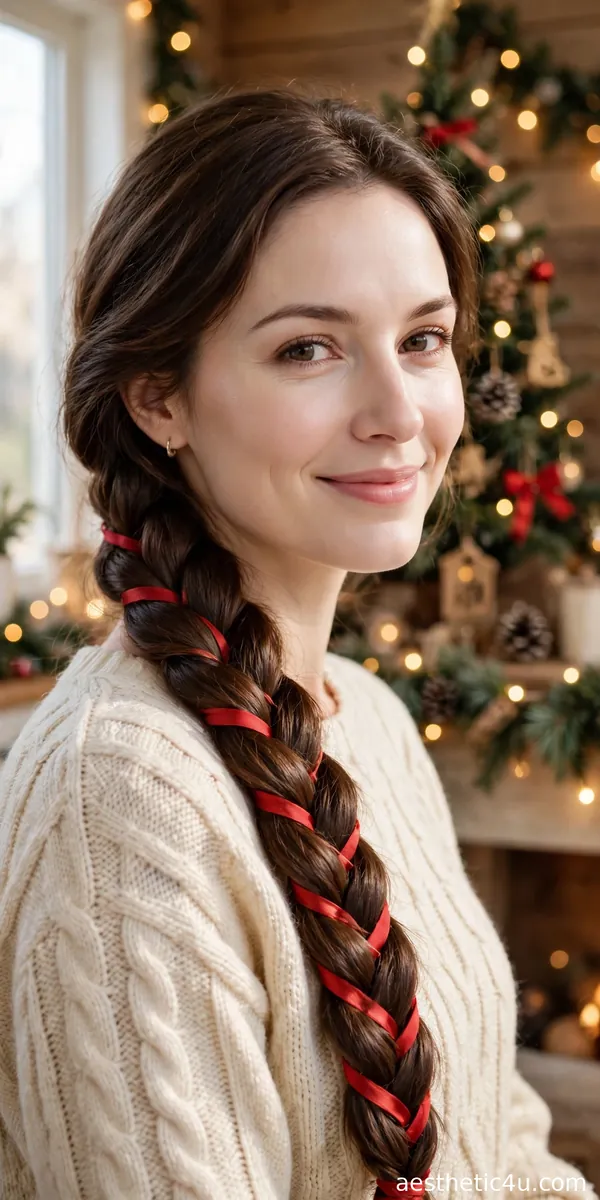
There is something about braids that just feels like Christmas. Maybe it is the way they look like garlands on a tree, or how they hold up through hours of cooking, hugging, and dancing without a single touch-up. Every November, braid searches surge on Pinterest as women hunt for styles that last from morning Mass to midnight – and braids deliver like nothing else. They photograph beautifully, keep hair off your face while you host, and turn even simple outfits festive with the right ribbon or gold thread.
I built this guide for every skill level, honestly. If you can manage a basic three-strand braid, you can do at least half of this list – pull-through braids, rope braids, and bubble braids need zero real braiding skill. The advanced ones – Dutch crowns, waterfall braids, infinity braids – come with honest difficulty ratings so you know which deserve a practice run. You will learn the exact tools that make braids work (texturizing spray is non-negotiable on silky hair), how to match each braid to your face shape and hair type, and the mistakes that make braids slip, frizz, or fall flat.
I have braided hair for over a decade, and my honest opinion is this: braids are the most generous holiday hairstyle. They give maximum visual payoff for minimum morning effort. Pick one beginner braid and one statement braid from this list, practice the statement once, and you are set for the whole season.
1. Classic French Braid with Red Ribbon
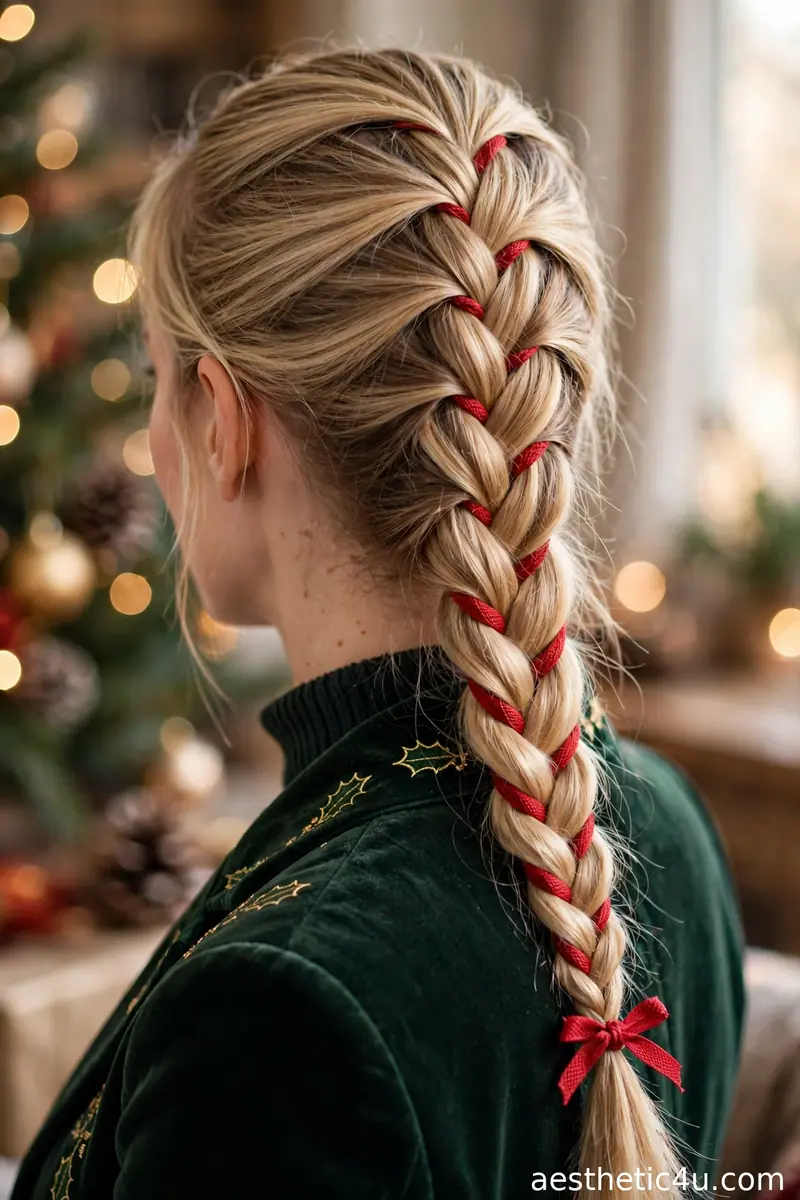
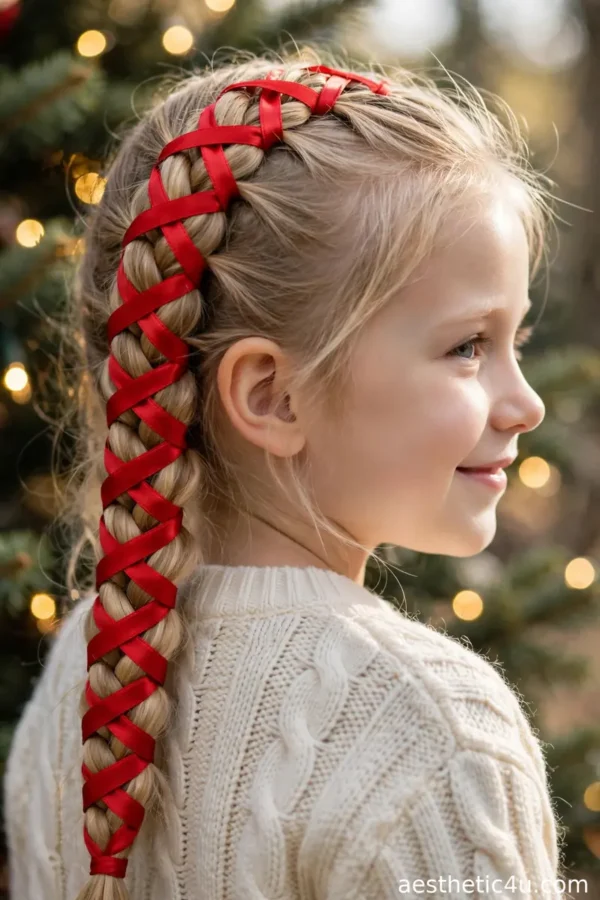
A neat French braid running down the back, with a thin red ribbon woven through the strands as you braid – the ribbon peeks out between sections like tinsel on a tree. Start with brushed hair; work texturizing spray through the lengths for grip. French braid from the crown, adding hair from each side. Halfway down, lay the ribbon along the center strand and braid it in, letting it weave visibly. Tie off and wrap the ribbon into a bow. Takes 10 to 15 minutes, easy to medium – the ribbon adds one fiddly step to a basic braid.
This is where every braid lover should start – timeless with a festive twist. It suits all face shapes and works on medium to long hair; the red ribbon takes thirty extra seconds and changes everything. I would wear this to literally any December event, from school runs to parties. Pro tip: use a wired ribbon if you want the bow to hold its shape all day – soft ribbon wilts by evening, while wired stays perky through every hug.
2. Fishtail Braid with Gold Thread
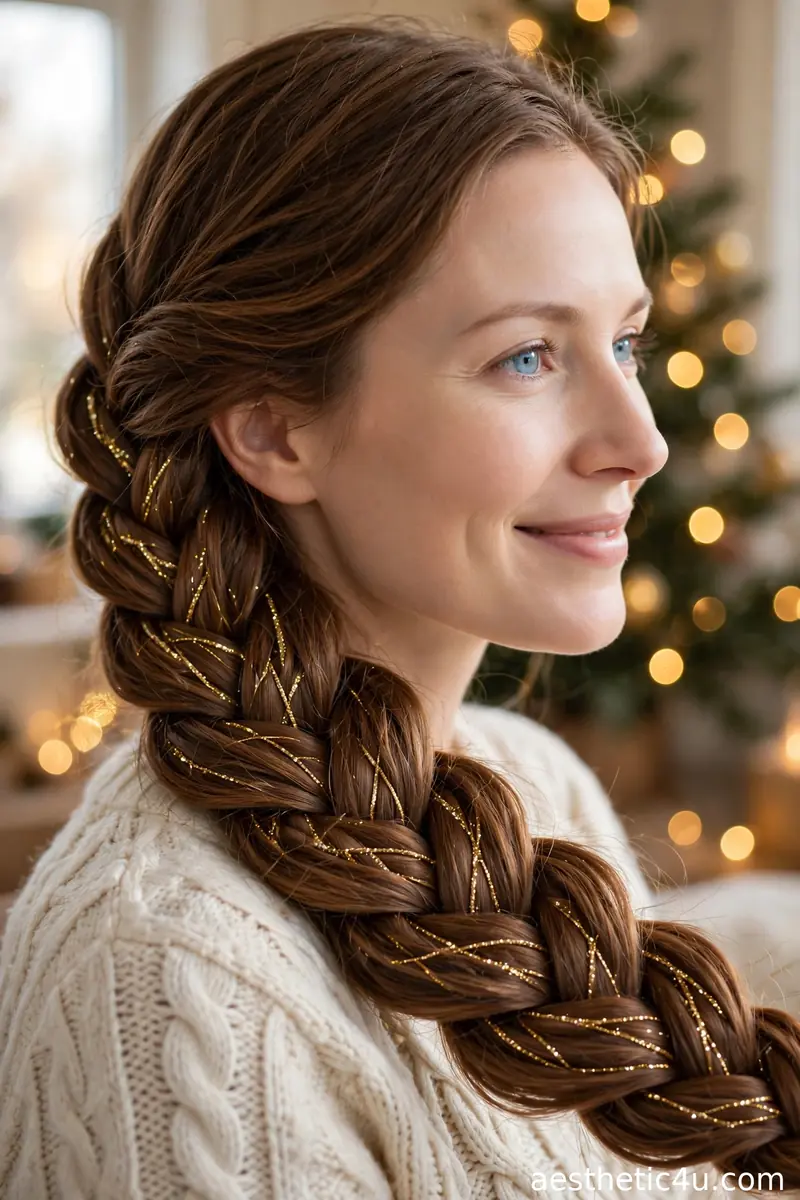
A loose, pancaked fishtail braid worn over one shoulder, with fine gold thread braided in alongside the hair so it catches the light with every movement. Gather hair to one side and split into two sections. Take a thin strand from the outside of the left section, cross it to the right, then mirror from the right – that is the whole technique. Weave the gold thread in with one of the sections from the start. Once done, gently tug the edges outward to pancake it wide and flat. Takes 15 minutes, medium – fishtails are slow, not hard.
Fishtails look complicated but are honestly just two strands – you have got this. The gold thread makes it feel like jewelry for your hair. It suits oval and heart faces – the side placement softens asymmetry – and needs medium to long hair for the width to show. I love this for evening parties when you want soft glow. Caveat: fishtails loosen faster than three-strand braids, so mist with flexible-hold spray and carry two bobby pins for end-of-night repairs.
3. Dutch Braid Crown
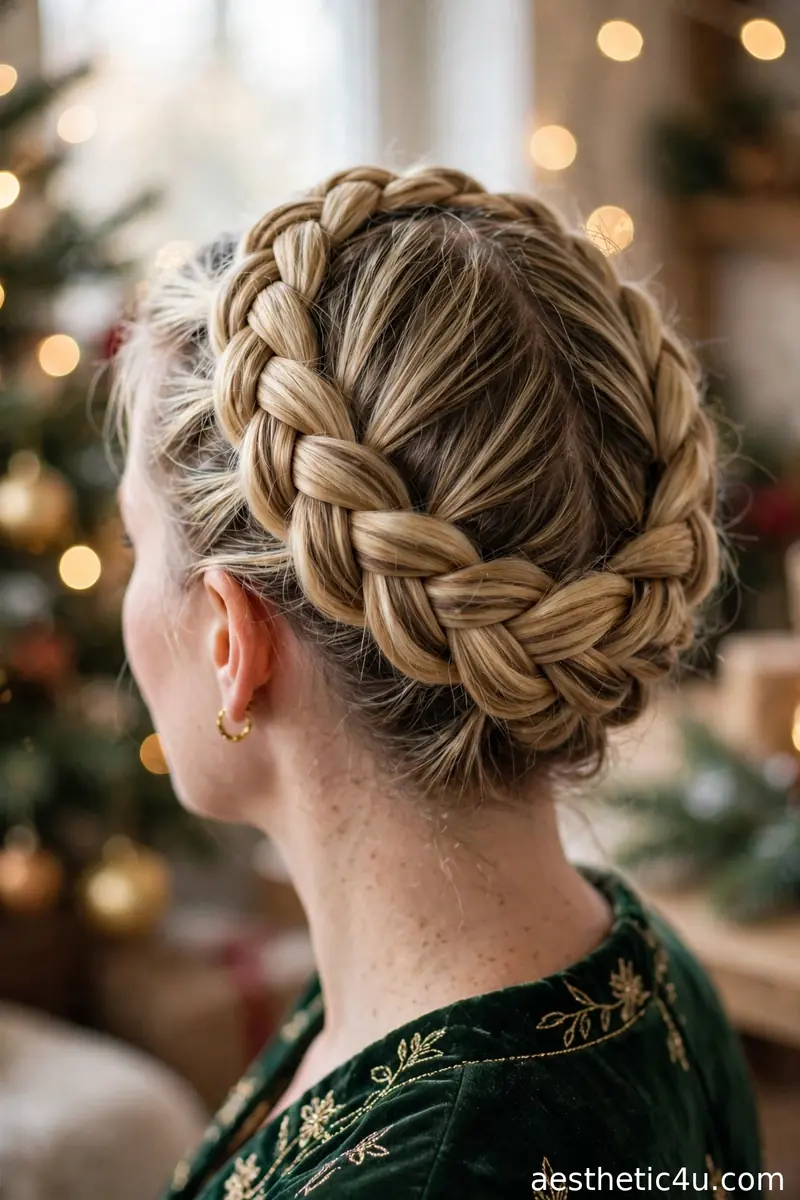
A Dutch braid that travels all the way around the head like a crown, tucked and pinned at the nape, with all hair up and off the neck. Start behind one ear, Dutch braiding (strands crossed under) along the hairline, adding hair from both sides as you circle the head. Keep tension firm and even. When you reach the start, braid the tail and tuck it under the beginning, pinning flat with 4 to 6 bobby pins. Takes 25 to 35 minutes, hard – a hand mirror is essential for the back.
The queen of Christmas braids, and I do not say that lightly. It keeps you cool in a warm kitchen, suits oval and long faces, and looks stunning from every angle – ideal for hosting. It needs medium to long hair with enough length to circle fully. Practice once before the big day – it is worth it. Caveat: very heavy hair can drag the crown down; anchor the start and end points with crossed pins, not single ones.
4. Side-Swept Chunky Braid

All hair swept to one side and worked into one thick, loose braid resting over the shoulder, gently pulled apart for extra fullness. Sweep everything over with a paddle brush – no part needed. Braid loosely with a standard three-strand technique, keeping the tension relaxed from the start. Tie off, then pancake aggressively: tug each edge outward until the braid looks twice as thick. Tuck a sprig of baby’s breath or a small clip near the tie. Takes 10 minutes, easy – the looseness means mistakes disappear into the texture.
Chunky side braids are so flattering – they soften the face and show off the braid detail. I think this is the prettiest option for long hair on the list. It suits round and square faces especially, since the diagonal line breaks up width. Pro tip: braid over the shoulder opposite your part for the most natural drape, and if layers poke out, that is fine – a few wisps make it romantic, not messy.
5. Double Dutch Braids with Holiday Clips
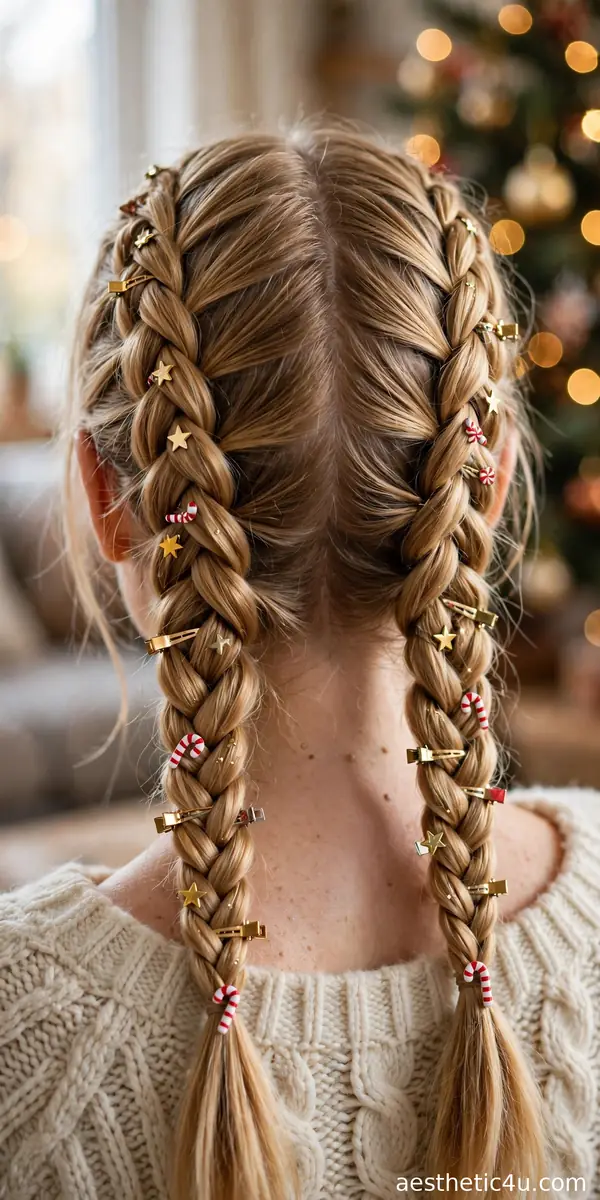
Two Dutch braids running from the hairline to the nape, finished as pigtail braids, with tiny holiday clips – stars, trees, candy canes – dotted along each braid. Part down the middle with a rat-tail comb. Dutch braid each side from the front hairline back, crossing strands under and adding hair as you go. Braid the tails to the ends and tie off, then clip 3 to 4 mini holiday clips along each braid, spacing them evenly. Takes 20 minutes, medium – two matching braids demand symmetry. A little edge-control gel along the part keeps it crisp.
Playful, cute, and surprisingly grown-up when the braids are neat – the clips do the festive heavy lifting. It suits younger faces and heart shapes, and works on medium to long hair of any texture. I would wear this to a casual party or while wrapping gifts with friends. Caveat: tight double braids on very fine hair can look sparse – pancake each braid lightly after finishing to fake fullness before adding the clips.
Keep exploring: 19 Christmas Eve Hairstyles Too Gorgeous to Save for Christmas Day
6. Waterfall Braid with Soft Curls
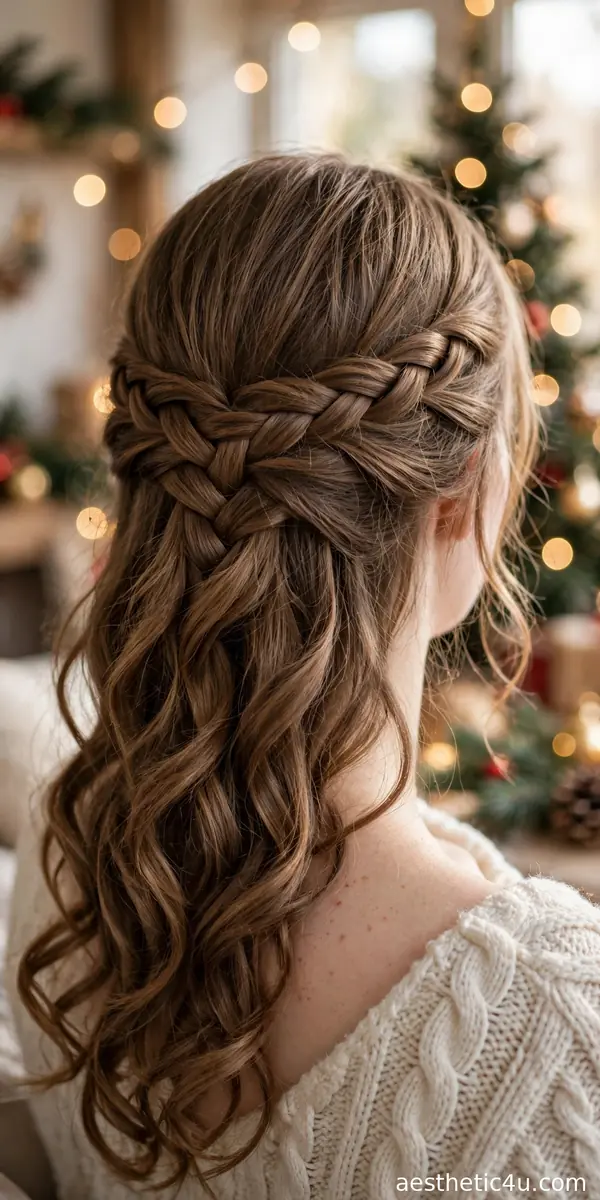
A waterfall braid across the back of the head, with the dropped strands left to fall into soft curls – the braid looks like it is floating through the hair. Start a French braid at one temple, but instead of adding the bottom strand in, drop it and pick up a new section behind it – that is the waterfall. Travel across to the other side and pin. Curl the fallen strands with a 1.25-inch iron for soft, uniform waves. Takes 20 to 25 minutes, hard – the drop-and-replace rhythm takes practice, so watch one tutorial first.
The dreamiest braid on the list – it genuinely looks like magic. I find it works best on longer hair, where the falling strands have room to curl and show the effect. It suits oval and heart faces, framing them softly. Wear it to Christmas dinner and accept the compliments gracefully. Pro tip: curl the waterfall strands before braiding, not after – it is far easier to handle loose hair around the iron, and the curls survive the braiding untouched.
7. Braided Ponytail Hybrid
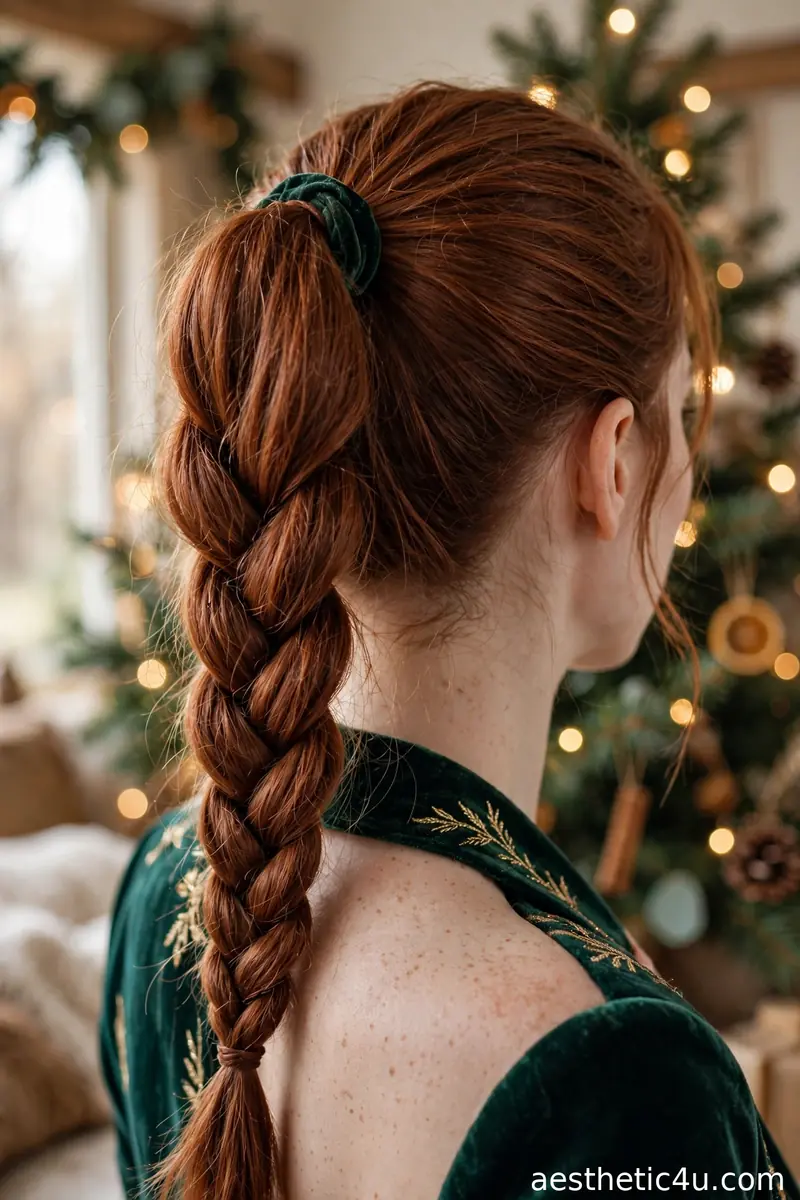
A high ponytail where the tail itself is braided – three-strand or fishtail – hanging from the pony base. Best of both worlds. Secure a high, tight pony with two stacked elastics for hold. Braid the tail in your chosen technique, keeping tension even so the braid hangs straight. Pancake a fishtail lightly; keep a three-strand neat. Tie off with a clear elastic and wrap a strand or ribbon around the pony base. Takes 12 minutes for three-strand, 18 for fishtail – easy to medium, since braiding a ponytail tail is simpler than braiding from the scalp.
I love hybrids because they end the braid-or-ponytail debate. The high base keeps it youthful, the braid keeps it interesting, and this survives dancing – my pick for the office party. It suits oval and long faces and needs medium-plus length. Caveat: a heavy braided tail swings and can loosen the base elastic, so anchor the pony with two crossed bobby pins pushed up into the base before you braid.
8. Rope Braid Low Ponytail
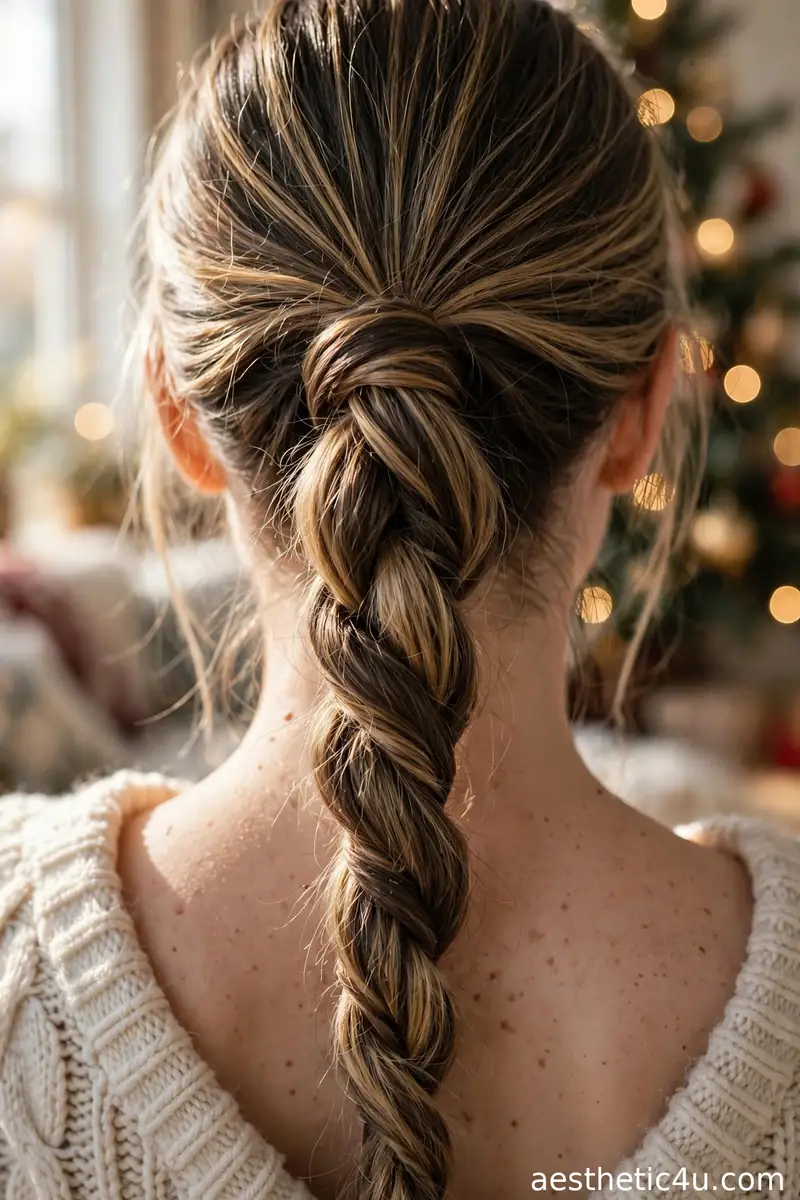
Hair gathered into a low ponytail, then twisted into a rope braid – two sections twisted in the same direction, then wrapped around each other in the opposite direction. Clean and sculptural. Secure a low pony, split the tail in two, and twist each section clockwise individually. Then wrap the two twisted sections around each other counter-clockwise, keeping tension firm – the opposing directions are what lock it. Tie off and mist with flexible-hold spray. Takes 8 minutes, easy – genuinely the simplest braid that looks hard, and I tell everyone this.
Two twists and you are done, but it looks so polished. It suits every face shape and works on all hair types – even very silky hair holds a rope braid well, since the opposing twists grip each other. A great choice for a sleek, minimal Christmas look. Pro tip: if the rope starts untwisting at the end, you wrapped the sections the same direction as the individual twists – reverse it, and it will lock tight all day.
9. Lace Braid Headband
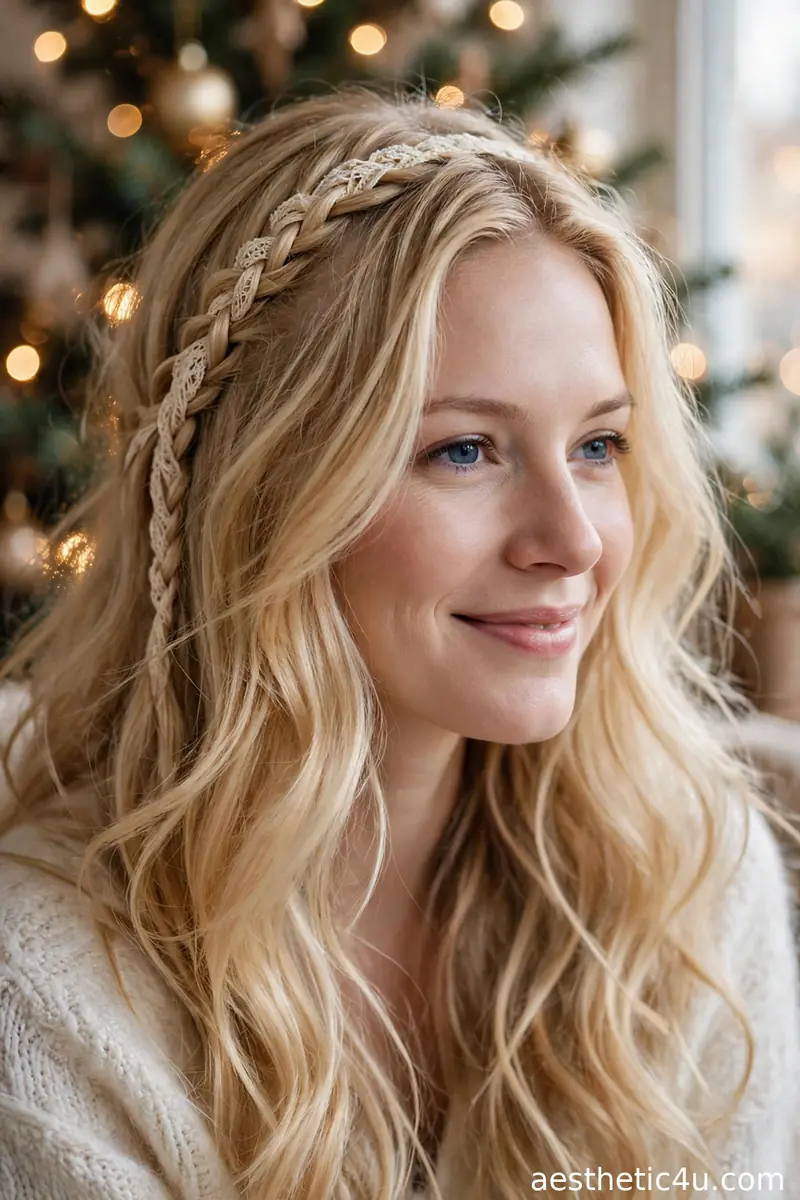
A delicate lace braid – adding hair from only one side – running along the hairline like a headband, with the rest of the hair left loose and flowing. Part the hair where you want the headband to sit, usually a deep side part. Begin a small three-strand braid at the part, adding hair only from the front as you travel along the hairline. Pin the end flat behind the ear, hidden under the loose hair. Takes 12 minutes, medium – the one-sided adding feels strange until the third try. Style the loose lengths in waves or straight.
Such an elegant way to keep hair off your face without a real headband. I think it is perfect for anyone wanting braid detail without committing to a full updo – it frames the face so prettily. It suits round and heart faces, drawing the eye across rather than down. Caveat: lace braids loosen if the added sections are too large – take small, consistent additions, and pin the tail securely, since there is no elastic holding this one.
10. Pull-Through Braid with Star Pins
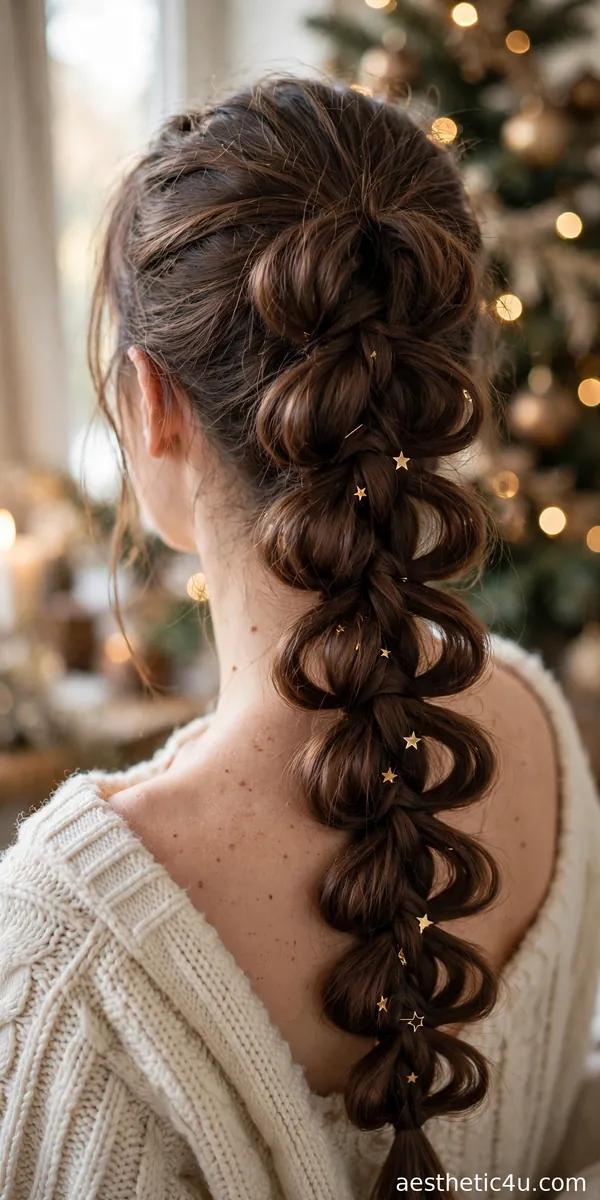
A pull-through braid made with stacked ponytails looped through each other, creating a chunky faux-braid effect, with small gold star pins tucked into the loops. No actual braiding required. Gather the top section into a small pony, then gather the next section below it – flip the first pony up, clip it, secure the second pony including the first one’s tail, and repeat down the head. Gently pull each loop outward to puff it into the chunky shape. Tuck in the star pins last. Takes 15 to 20 minutes, easy – just elastics and patience.
I love recommending this to braid beginners because the result looks so impressive with zero braiding skill. It suits all face shapes and rescues thick hair that resists real braids – the elastics do the structuring. The star pins make it unmistakably Christmas. Pro tip: use clear mini elastics and match your hair color where visible – and do not puff the loops until the whole chain is built, or the top sections collapse while you work downward.
Keep exploring: 17 Christmas Dinner Hairstyles That Look Expensive (But Aren’t)
11. Four-Strand Braid
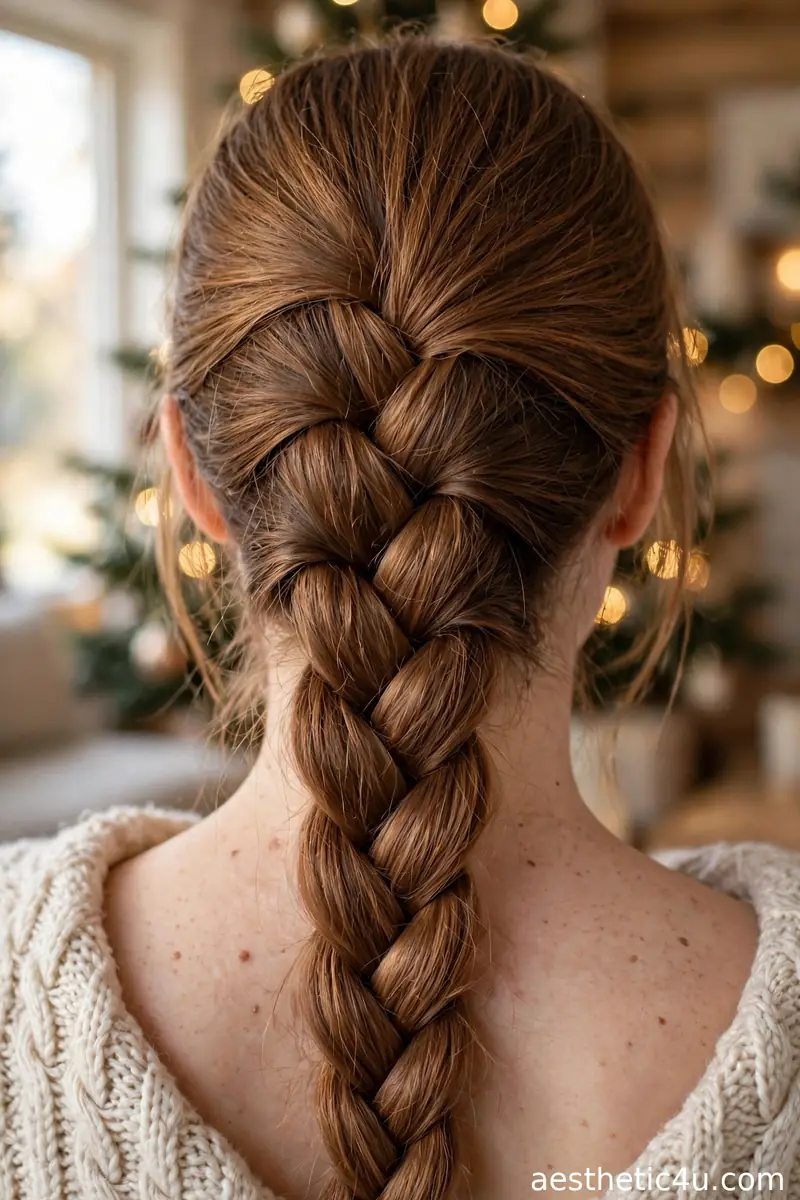
A braid woven with four strands instead of three, creating a flat, ribbon-like pattern that looks intricate and almost woven, like a piece of trim. Divide hair into four equal sections. The pattern: take the outermost left strand over the next, then under the third, then over the fourth – then mirror from the right. Repeat steadily; rhythm matters more than speed. Keep sections even and tension consistent. Takes 15 to 20 minutes, hard – the pattern is simple but keeping four strands sorted takes concentration. Worn over one shoulder, it shows the woven detail best.
For the braid enthusiast who has mastered the basics and wants a new challenge – the woven texture is genuinely beautiful up close. It suits oval and long faces and needs medium to long hair for the pattern to read. I would wear it over one shoulder so people can actually see the detail. Caveat: four-strand braids on layered hair get messy fast, since short layers escape – smooth a little pomade on the sections first to keep everything contained.
12. Braided Top Knot
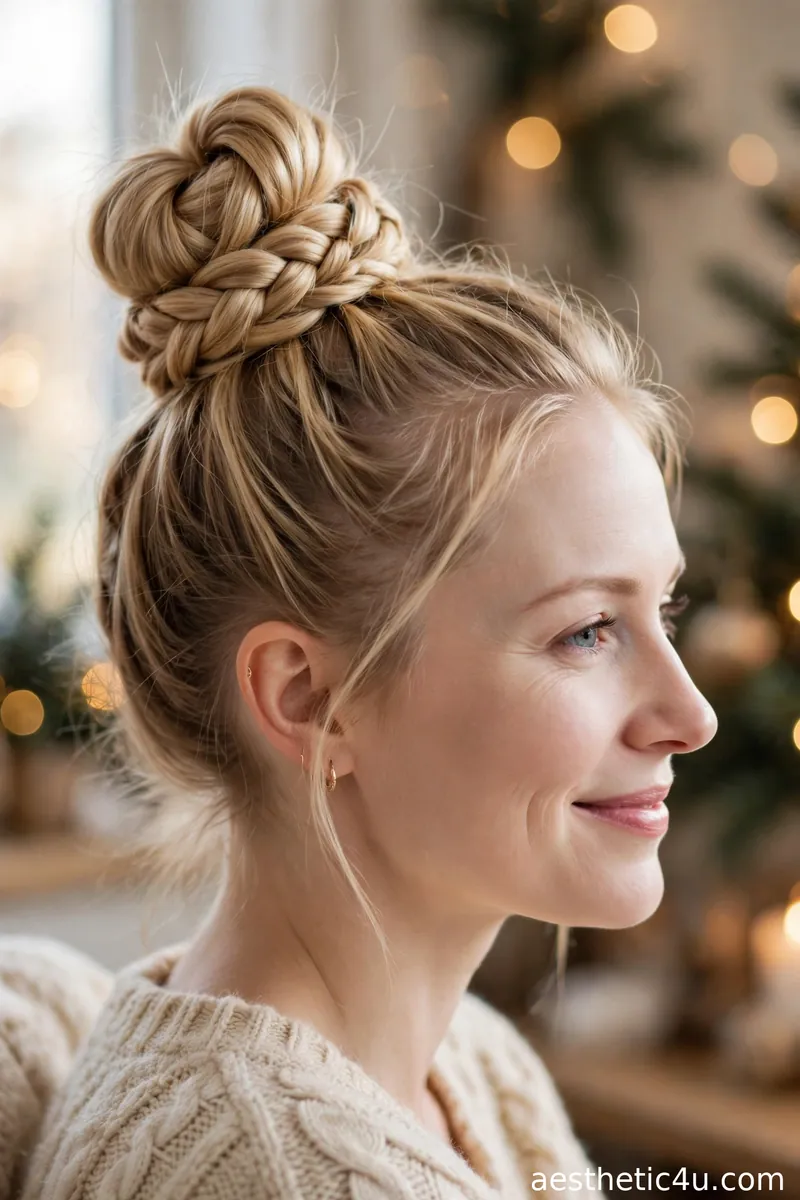
Hair pulled into a high ponytail, braided, then wrapped into a top knot and pinned – the braid texture shows through the bun for extra interest. Secure a high pony tightly. Braid the tail in a simple three-strand, pancaking it lightly for fullness. Wrap the braid around the pony base, tucking the end underneath, and pin generously – 6 to 8 bobby pins in a star pattern. Pull a few edges loose for softness. Takes 15 minutes, medium – wrapping evenly is the skill. The braided structure makes this knot far more secure than a regular twisted bun.
Top knots can look plain, but braiding first fixes that completely. I love this for a chic, put-together Christmas look that still feels relaxed – and it holds better than a regular bun, which is a real bonus on long days. It suits oval and heart faces and all hair types. Pro tip: position the knot slightly forward on the crown, not dead center – it photographs better and keeps the silhouette from looking severe from the side.
13. Halo Braid with Evergreen Sprigs
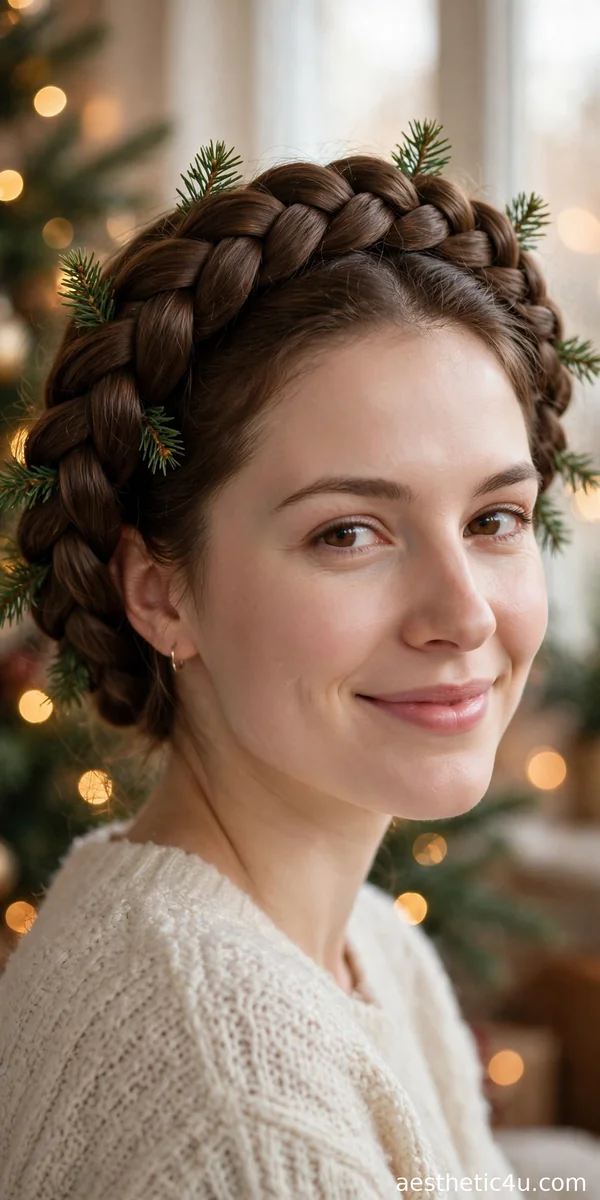
A halo braid circling the head, with tiny sprigs of faux evergreen tucked into the braid at intervals – it looks like a living Christmas wreath. Build a Dutch crown braid around the head as in idea 3, pinning securely. Then tuck 6 to 8 small faux evergreen sprigs into the braid’s edges at even intervals, angling them outward. Use the sprigs’ wire stems pushed under braid sections – no pins needed if the braid is snug. Takes 30 to 40 minutes total, hard – the braid alone is advanced, and placing greenery evenly takes an eye for symmetry.
Pure holiday romance. The greenery makes it look incredible – use faux sprigs so nothing wilts or sheds needles down your back. I would save this for Christmas Day itself; it is a whole moment. It suits oval and long faces and needs long, thick-enough hair to circle fully. Caveat: this is heavy – the braid plus sprigs – so build it on freshly washed, fully dry hair for maximum grip, and do a full wear-test hour before guests arrive.
14. Boxer Braids with Velvet Bows
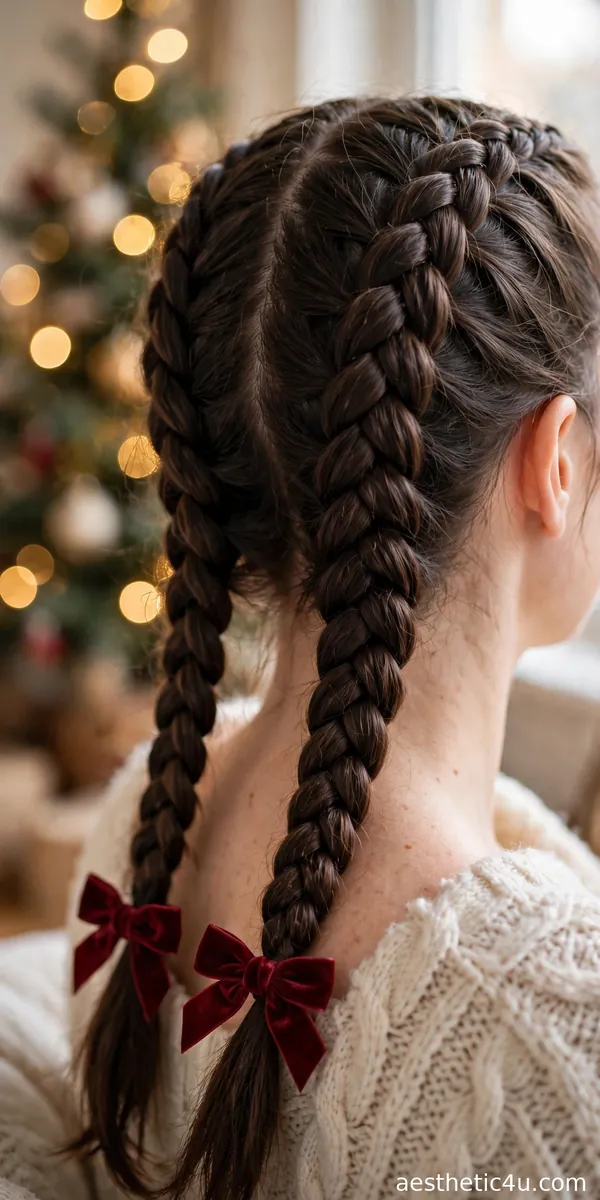
Two tight Dutch braids from front to back, each finished with a small velvet bow at the end – sporty braids meet holiday sweetness. Part cleanly down the middle. Dutch braid each side tightly from the hairline to the nape, keeping close to the scalp with firm, even tension. Braid the tails to the ends, tie off with small elastics, and tie a velvet bow over each elastic – wired ribbon holds the bow shape. Takes 20 minutes, medium. Smooth edges with a little gel on a toothbrush for that crisp, athletic finish.
Boxer braids keep every strand locked down, which I appreciate on busy December days – cooking, shopping, hosting, all handled. The velvet bows soften the athletic vibe perfectly. Cute, practical, festive: the triple threat. It suits round and heart faces, with the center part balancing symmetry. Caveat: braiding this tight on dry, fine hair can cause breakage at the hairline – braid on slightly damp hair with a leave-in, and do not re-tighten once set.
15. Snake Braid with Pearl Pins
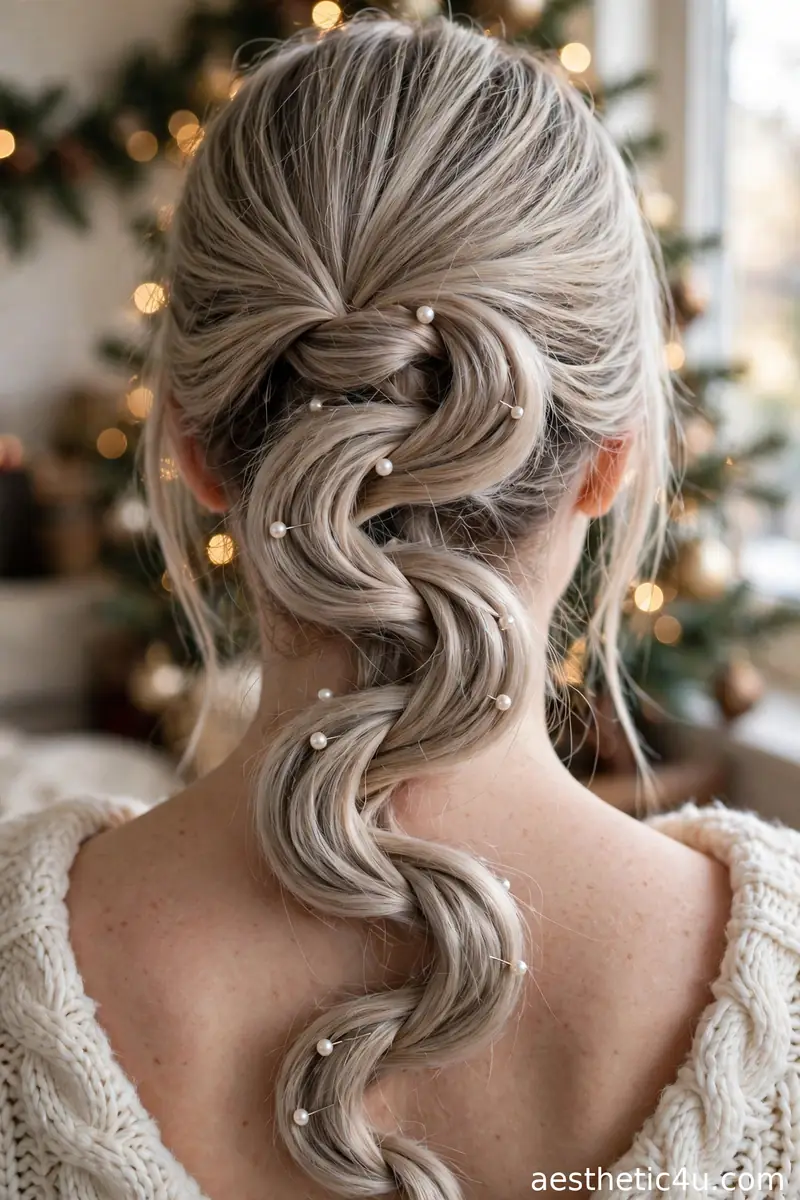
A single braid that zigzags down the back in an S-shape – the snake braid – decorated with small pearl pins along its curves. Start a Dutch braid at the crown, but angle it diagonally instead of straight down; every few stitches, redirect to build the S-curves, pinning turns lightly as you go. Braid to the ends and tie off. Tuck 5 to 6 pearl pins along the outer curves where they catch the light. Takes 20 to 25 minutes, hard – steering the zigzag on the back of your own head is the challenge; a hand mirror is mandatory.
If you want a braid nobody else at the party will have, this is it. The S-shape is easier than it looks once you find the rhythm, and the pearls add just the right holiday shine. It suits oval and long faces and needs medium-plus length for the curves to show. Pro tip: sketch the S-path lightly with clips first, or have a friend check the back – the curves look obvious to everyone except the person braiding.
Keep exploring: 15 Christmas Hairstyles for School That Teachers Can’t Resist Complimenting
16. Chunky Bubble Braid
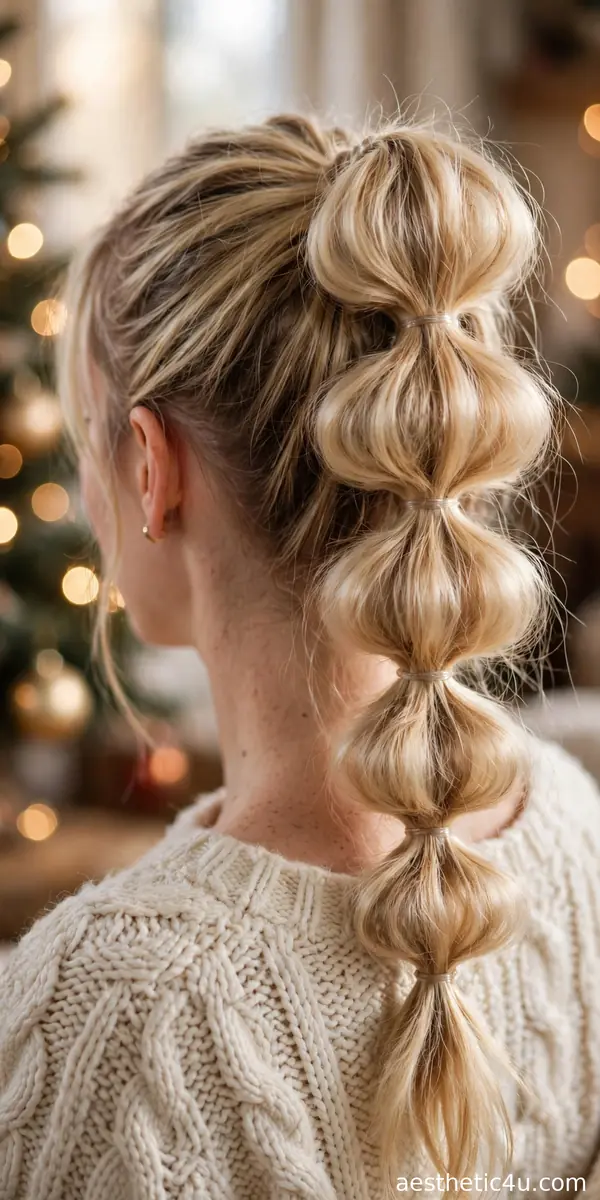
A high ponytail sectioned with elastics and puffed into big, chunky bubbles all the way down – maximum volume, minimum braiding skill. Secure a high, tight pony. Place elastics every 2 inches down the tail, then pull each section outward firmly with your fingertips to inflate it – bigger pulls, bigger bubbles. Weave a thin red ribbon through the elastics in a spiral for the Christmas finish. Takes 10 minutes, easy – the only technique is even spacing. Mist with flexible-hold spray so the bubbles keep their shape through the evening.
The statement braid for people who want drama without technique – I love how modern and fun it looks. It suits round and oval faces, with the vertical line elongating, and works on medium to long hair. Caveat: bubbles deflate on very silky, heavy hair – backcomb each section lightly before puffing, or start with texturizing spray, so the volume has something to grip.
17. Braided Bangs into Loose Waves
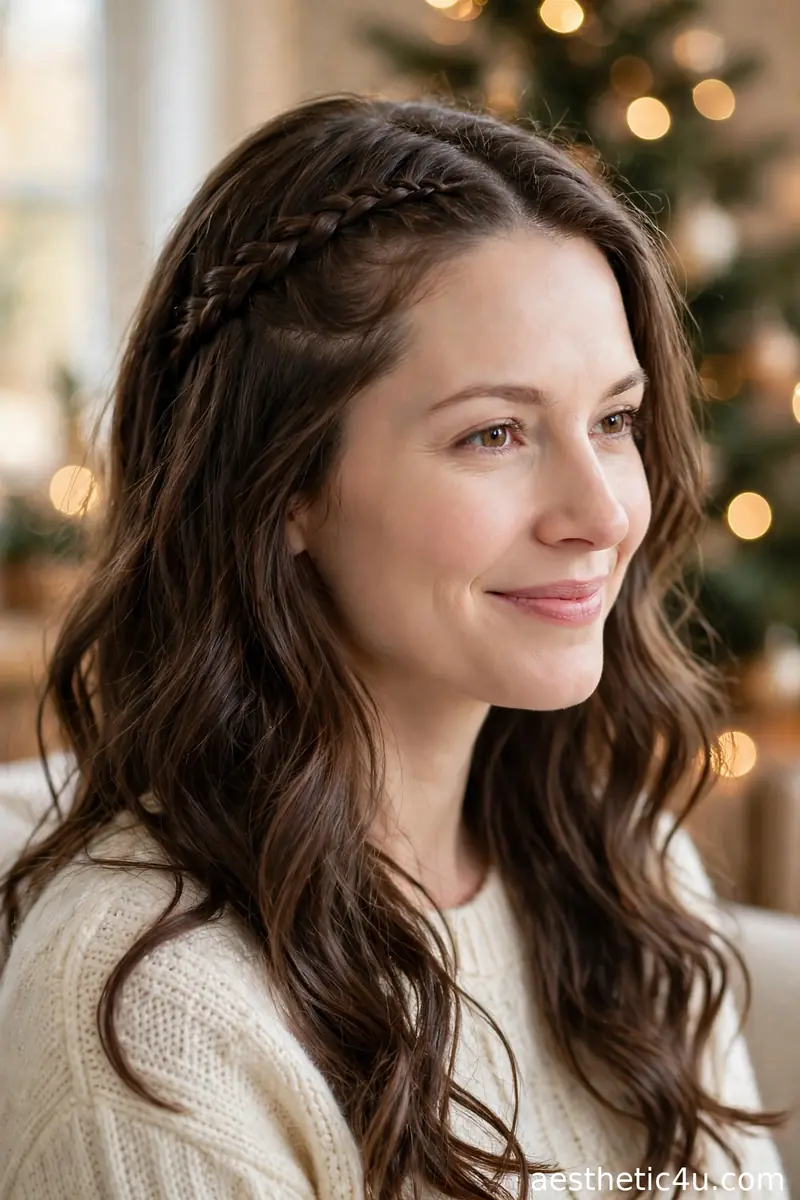
The front section braided back from the face – a small French or Dutch braid along the hairline – while the rest falls in loose waves. Just a whisper of braid. Section the front hair from temple to temple. French braid it back along the hairline toward one side, adding hair only from the front, and pin the tail flat behind the ear under the loose hair. Wave the remaining lengths with a 1.25-inch iron, alternating directions. Takes 15 minutes, easy to medium – the braid is small, so even beginners can manage it with one practice run.
For anyone who loves wearing hair down but wants a little something extra – the braided front keeps hair out of your eyes during dinner. I think this is the most wearable braid on the whole list. It suits every face shape and all hair types. Pro tip: braid on the side your hair naturally falls toward – fighting your natural part makes the braid lift and look forced by midday.
18. Infinity Side Braid
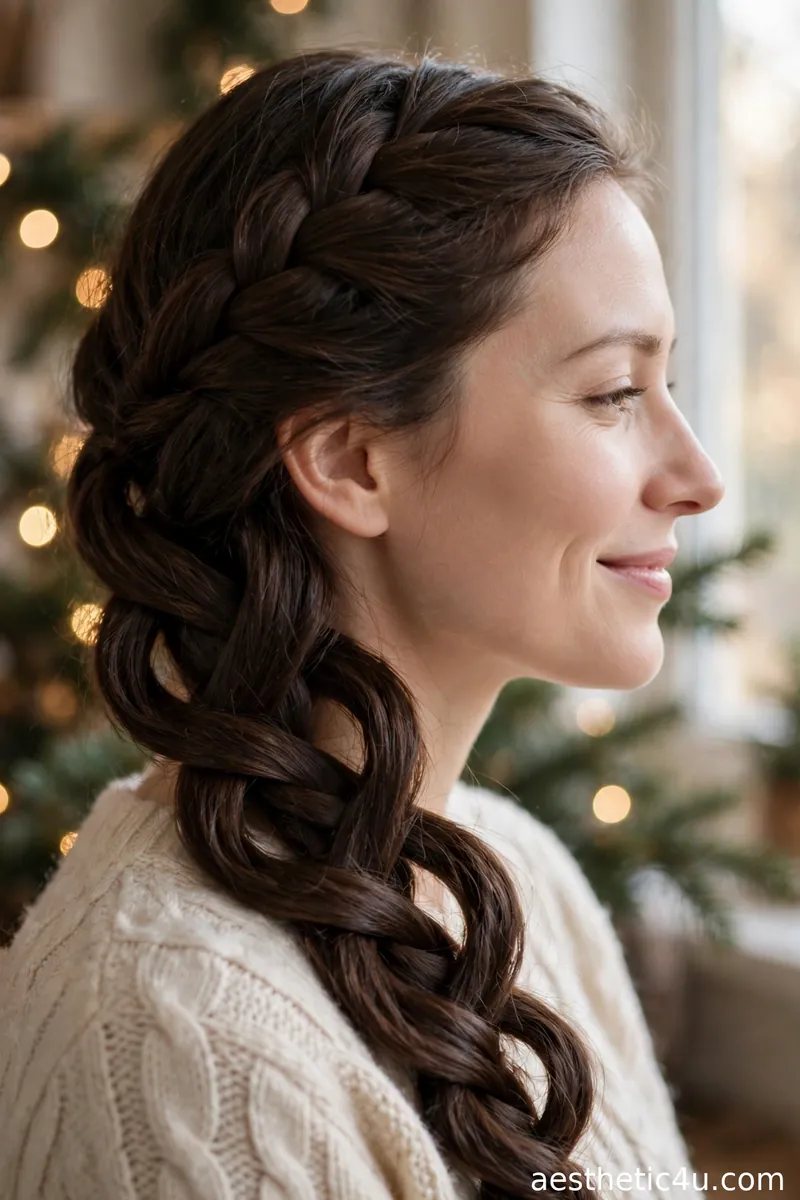
A side braid woven in a figure-eight pattern, where strands loop around each other in an infinity motion – the result looks like a continuous knot running down the braid. This is an advanced technique: hold two main sections and loop a third strand in a figure-eight around them, alternating sides with each pass. Keep the loops even and snug. It demands patience – expect 25 to 30 minutes, hard difficulty, and watch a video tutorial twice before attempting. Worn over one shoulder, the knot pattern stays visible all evening.
This one gets gasps – people always ask how it is done. It takes practice, but the payoff is huge. I would wear it to the fanciest event on your calendar; it looks like hair art. It suits oval and heart faces and needs long hair for the pattern to develop. Caveat: this is not a morning-of hairstyle – learn it a week ahead, because the figure-eight rhythm only clicks after several attempts.
19. Twist Pigtails with Tinsel
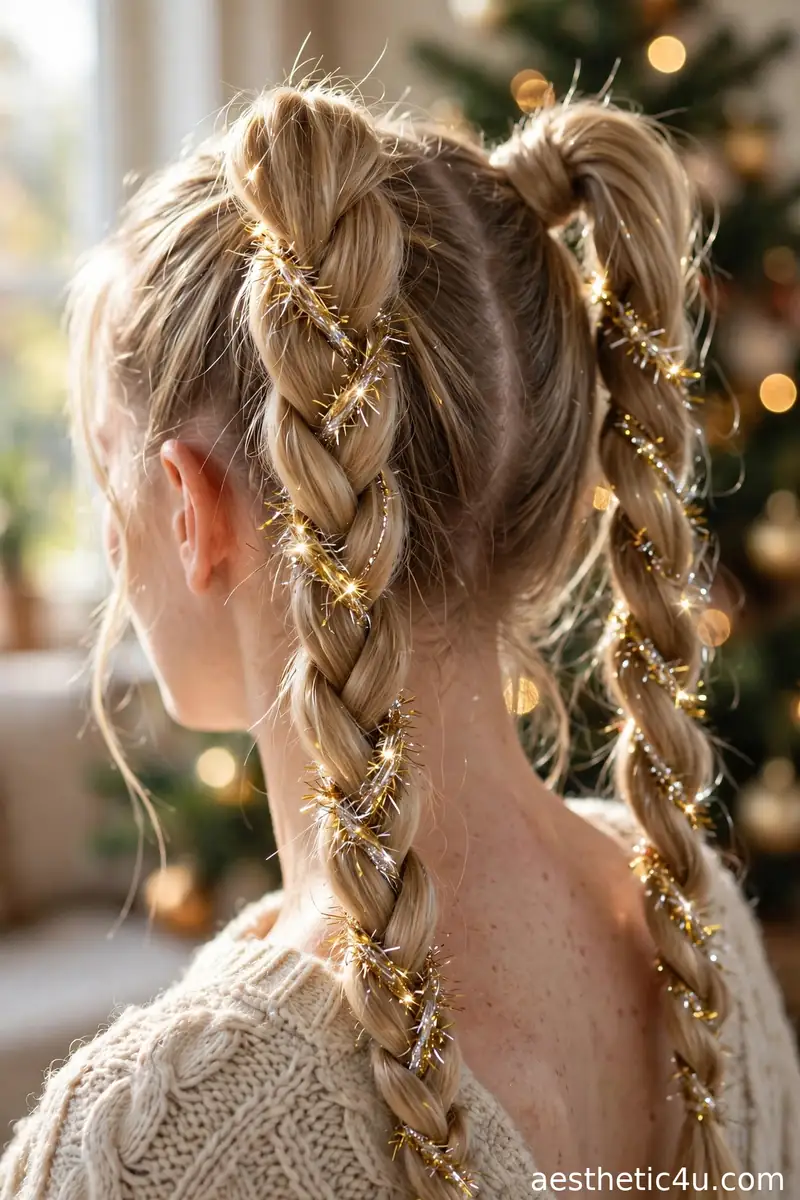
Two high twist braids – simple two-strand twists – with strands of fine gold or silver tinsel twisted in, so they sparkle with every movement. Part down the middle, split each side’s hair in two, and twist each pair around each other, feeding a tinsel strand in with one section from the start. Secure with small elastics. The twists take 10 minutes and are easy; the tinsel just rides along. Keep tinsel strands thin – one or two per twist – so they glint rather than overwhelm. A little smoothing serum on the parts is the only product needed.
Tinsel hair is having a moment and I am fully on board – the twists are quick and the tinsel does the decorating. This is the look for the friend who goes all-out every December; you know who you are. It suits all face shapes and hair types. Pro tip: buy hair-specific tinsel, not craft tinsel – craft versions shed glitter everywhere and can be too stiff, while hair tinsel is designed to move naturally and remove cleanly.
20. Upside-Down French Braid into Messy Bun
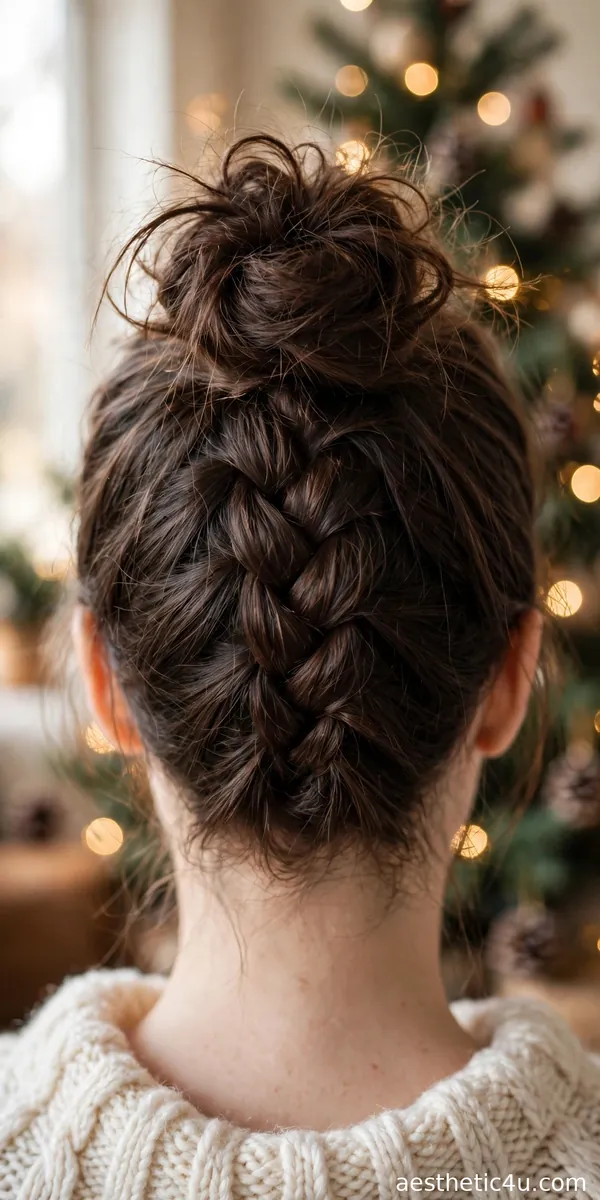
A French braid starting at the nape and traveling upward, ending in a messy bun at the crown – the braid detail shows at the back while the bun sits pretty on top. Flip your head upside down and French braid from the nape toward the crown, adding hair as you climb. When you reach the crown, gather everything into a high pony and twist it into a loose, textured bun, pinning generously. Flip back up and pull a few pieces loose. Takes 15 to 20 minutes, medium – braiding upside down feels odd the first time but clicks quickly.
Flip your head over, braid up, bun it – easier than it sounds, I promise. I love the surprise braid detail at the back: sporty-cute from behind, polished from the front. It suits oval and round faces – the crown height elongates – and all hair types. Caveat: upside-down braiding makes arms ache, so rest your elbows on a table edge if needed, and secure the nape start firmly – a loose start unravels the whole climb.
Keep exploring: 20 New Years Eve Hairstyles That Outshine the Fireworks
21. Sleek Braid with Gold Cuffs
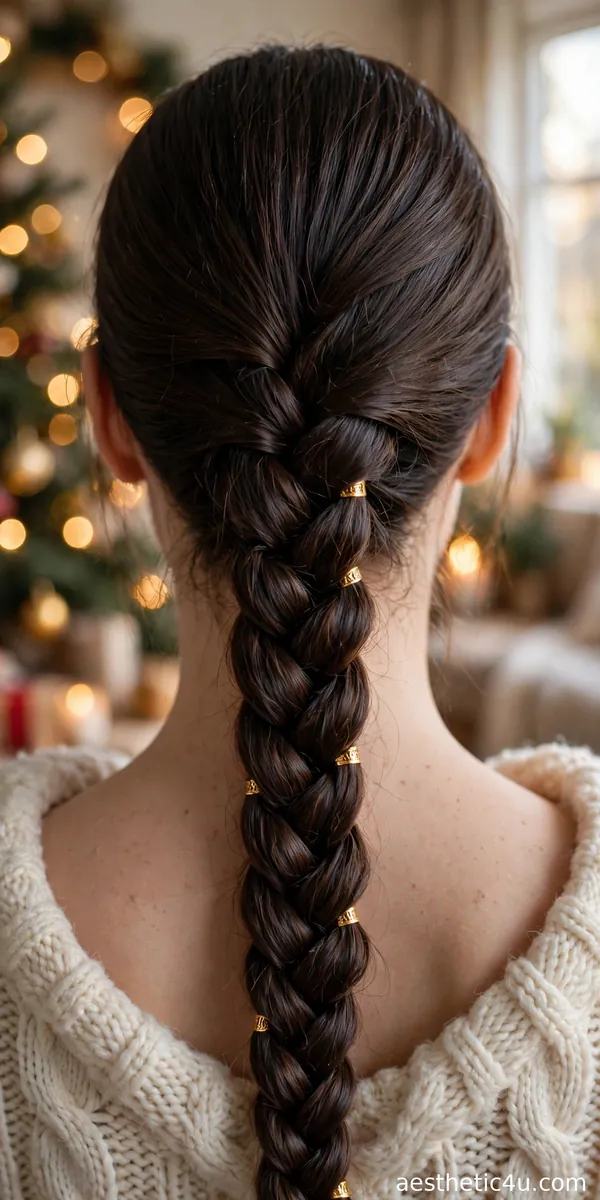
One tight, sleek braid – Dutch or three-strand – worn straight down the back, with small gold cuffs clamped onto sections of the braid. Minimal and striking. Brush hair smooth with a paddle brush and a little smoothing serum. Braid tightly from the crown down, staying close to the head for the sleek finish. Tie off, slide 3 to 5 gold cuffs over the braid, and pinch closed – odd numbers look best. Takes 12 minutes, easy to medium – the sleekness demands neat parts and no flyaways, so take your time at the crown.
Sometimes less really is more. The sleek finish keeps it modern, the gold cuffs add the holiday note. I would pair this with a bold red lip and simple earrings – the braid is the accessory. It suits oval and long faces and straight to wavy hair. Pro tip: choose lightweight cuffs and clamp them over the thickest part of each braid section – cuffs placed on thin spots slide down within the hour.
22. Mermaid Braid
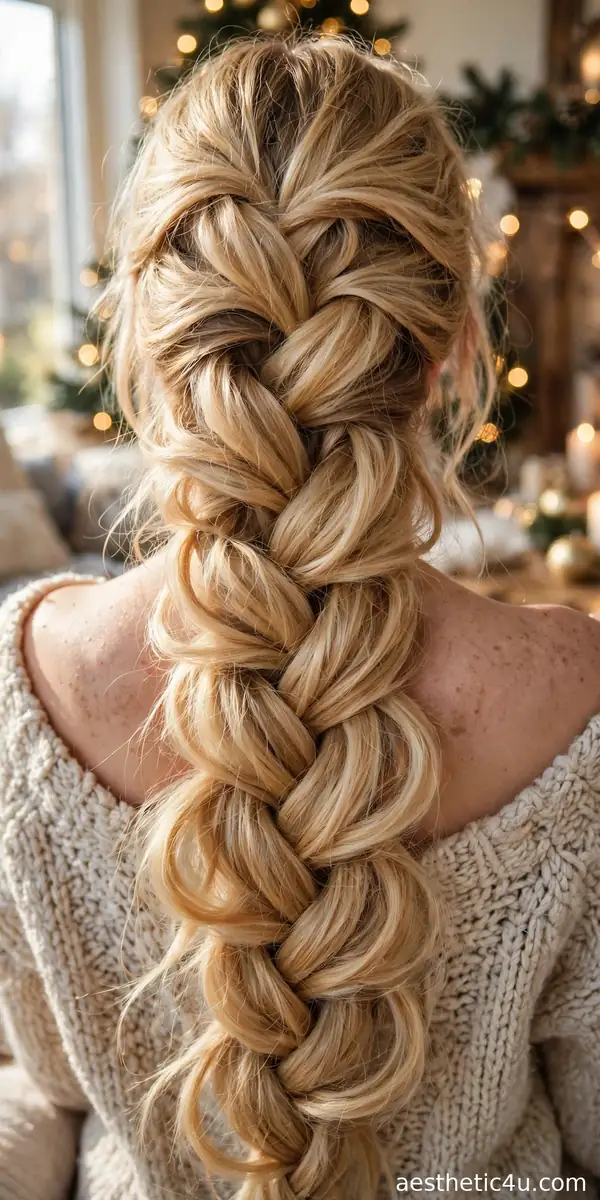
A soft, heavily pancaked braid – pulled wide and loose – that looks thick and romantic, like a mermaid’s braid. Strands are loosened until the braid looks twice its size. Braid tightly first – counterintuitive but essential – with a standard three-strand or Dutch over one shoulder. Tie off, then pancake: from the bottom up, gently tug each edge outward until the braid is wide, flat, and airy. Mist with flexible-hold spray to freeze the fullness. Takes 12 minutes, easy to medium – the braiding is basic, but pancaking without pulling the braid apart takes a light touch.
Pancaking is the trick that turns a normal braid into a showpiece. I always say: braid tight, then pull it apart – scary but worth it. This one is pure romance, perfect for a candlelit Christmas dinner. It suits all face shapes and rescues fine hair spectacularly. Caveat: pancaked braids are fragile – once loosened, they cannot be re-tightened, so finish the braid completely before you start pulling, and do not touch it again after the hairspray sets.
23. Braided Headband with Curled Ponytail
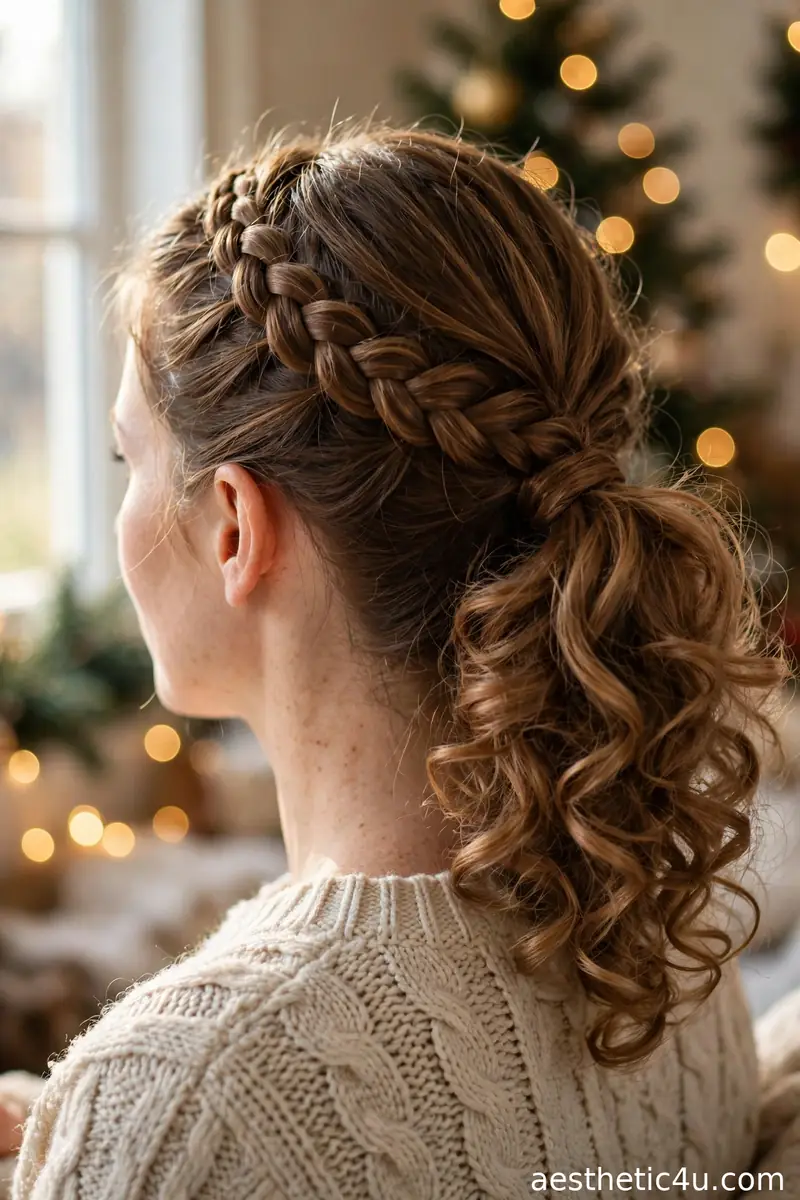
A Dutch braid headband across the crown, with the remaining hair gathered into a bouncy curled ponytail at the back – braid detail in front, party in back. Dutch braid from one temple across the crown to the other ear, adding hair as you go, and pin the tail behind the opposite ear. Gather the rest into a mid-high pony and curl the tail in sections with a 1.25-inch iron for bounce. Wrap a strand around the pony base. Takes 20 minutes, medium – two techniques in one style, but each is straightforward on its own.
I love a hairstyle with a front view and a back view. The braided headband frames your face beautifully in photos, and the curled pony keeps it fun – a strong finish to our braid list. It suits oval and heart faces and medium to long hair. Pro tip: curl the ponytail before you braid the headband, not after – hot tools near a finished braid risk loosening it, and working the pony first keeps the front detail pristine.
How to Choose the Right Christmas Braid Style for You
Start with honesty about your skill level, because braids punish overconfidence. Beginners should stick to pull-through braids, rope braids, bubble braids, and simple three-strand styles with ribbons – all genuinely easy and all festive. Intermediate braiders can handle French braids, fishtails, lace braids, and braided hybrids. Save Dutch crowns, waterfall braids, snake braids, and infinity braids for after a practice run – they are beautiful but technical, and a frustrated morning ruins the whole day. Next, consider your hair. Fine, silky hair needs texturizing spray and tighter braiding – loose styles slip out by noon. Thick hair needs patience and strong elastics, but holds every braid beautifully. Curly hair braids gorgeously with natural texture; just stretch the curls slightly first so the pattern reads. Then match face shape: side braids flatter round faces with their diagonal line, crown braids elongate and suit hosting (great from all angles), and sleek center styles suit oval faces. Finally, match the occasion – tight, neat braids for formal dinners; loose, accessorized braids for casual parties.
Styling Tips & Common Mistakes to Avoid
First: texture is everything. Clean, silky hair slips out of braids – braid on second-day hair, or fake it with texturizing spray and a little dry shampoo at the roots. Second: pancake for fullness. Almost every braid on this list looks better gently pulled apart – braid tight, then widen. Third: pin like you mean it. Bobby pins crossed in an X hold four times better than single pins, and pins should match your hair color to disappear. Fourth: finish with flexible-hold spray, not maximum hold – braids need to move naturally, and crunchy braids look dated. The mistakes: braiding too tight at the hairline, which causes breakage and headaches – snug is secure, painful is not, so ease the first inch. Second: skipping the mirror check on the back – braids are 360-degree styles, and a hand mirror takes ten seconds. Third: adding accessories before the braid is finished – clips and pins placed early get buried or shift; always accessorize last, after the hairspray has set.
Final Thoughts
Braids are the gift that keeps on giving – they look intricate, hold all day, and photograph like a dream. Whether you go for a simple ribbon braid or a full crown, you cannot go wrong this Christmas. My advice: choose one easy braid for busy mornings and one statement braid for the big event, practice the statement once ahead of time, and keep spare pins and a travel hairspray in your bag. Pick one, practice once, and enjoy every compliment that comes your way.
Follow Us On Pinterest: Easy To Find Next Style