Sana
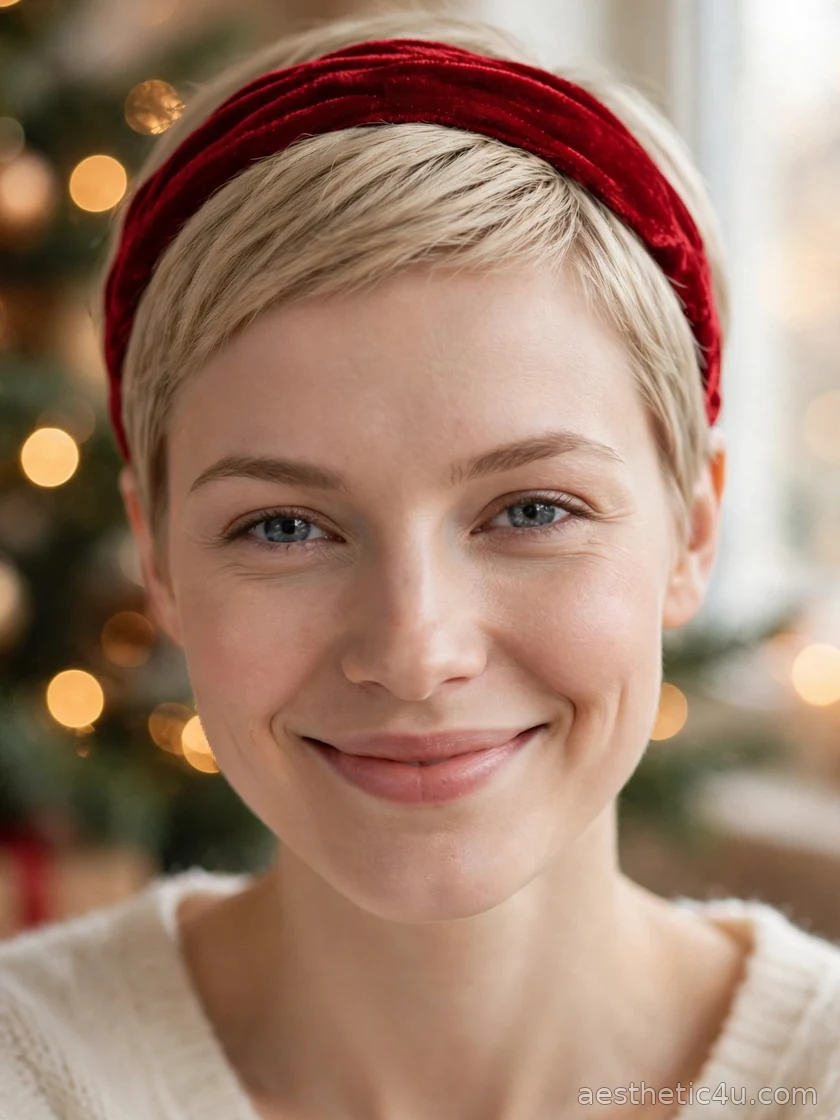
Short hair does not mean fewer holiday options. In fact, I would argue the opposite: a great pixie, bob, or lob plus the right accessory can steal the whole show with a fraction of the effort long hair demands. Every December I watch short-haired clients discover that their cut is actually an advantage, since most festive styles take five minutes or less and lean on accessories, texture, and shine for the holiday feel. These twenty-two styles prove that less really is more.
This guide is built for pixies, bobs, and lobs of every kind, on straight, wavy, curly, and coily hair. Most styles here take five minutes or less, and I have marked the few that need more time or skill so you can plan ahead. You will learn how to choose accessories that flatter your cut instead of fighting it, the styling products that make short hair look intentional, and the mistakes that make festive short hair look costume-y. As a stylist, my short-hair rule is simple: let the cut be the star and let one accessory do the holiday talking. One great headband beats five competing clips every time. I will also flag which styles need real time or skill, so you never get caught out on a party morning.
1. Sleek Pixie with a Red Velvet Headband
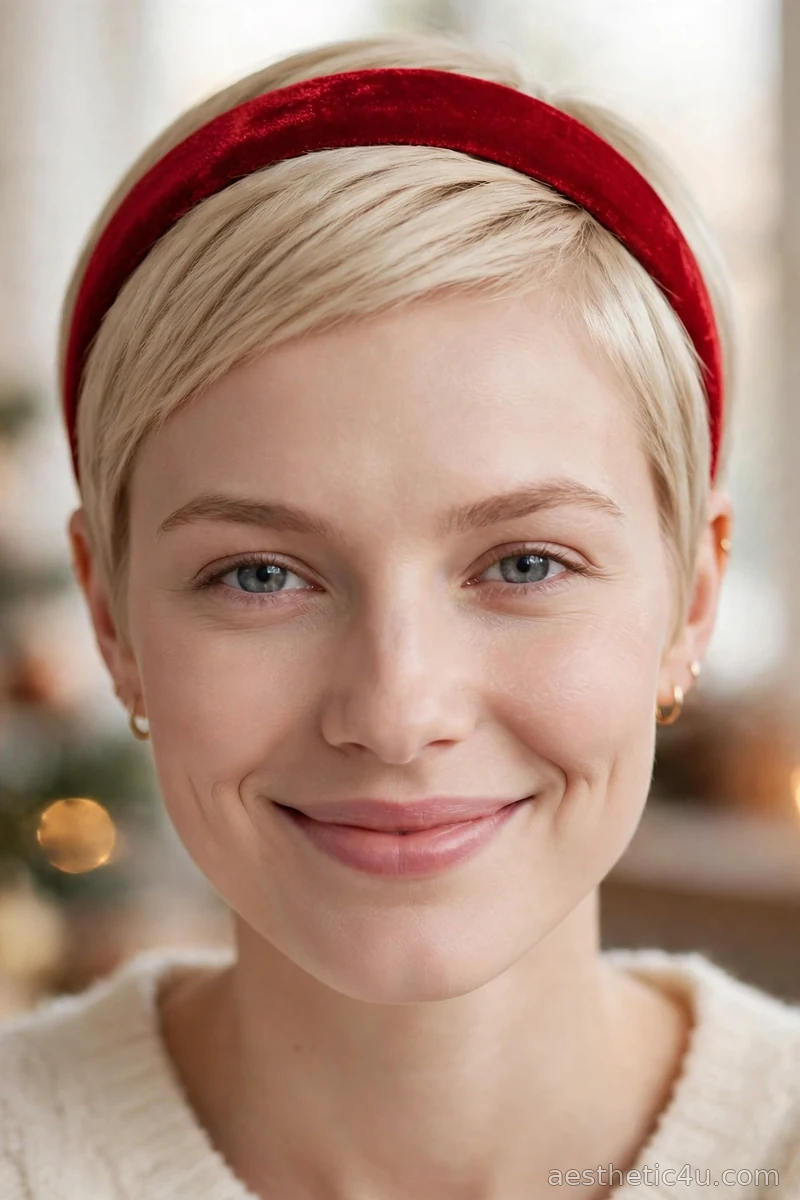
A sleek black pixie is smoothed flat with styling cream, with a wide red velvet headband sitting about an inch behind the hairline as the whole holiday statement. Work a pea-sized amount of styling cream through damp or dry hair and comb it smooth toward the face. Slide the red velvet headband on and make sure it sits flat and centered. The plush velvet catches the light and does all the festive work. Three minutes, beginner level. Choose a band with a soft inner lining so it stays comfortable for hours of party wear.
This suits oval, heart, and square faces and is made for pixie-length hair. I would pick this if you have a pixie and want instant Christmas cheer, since the red velvet headband changes the whole look in seconds. The honest caveat is headband pressure: a tight band on short hair causes headaches fast, so choose one with a comfortable fit and never wear it pushed too far back.
2. Textured Bob with a Red Bow Clip

A bob is tousled with texture spray for a lived-in finish, with a small red bow clip pinning back one side for a modern, festive detail. Spray texturizing spray through dry hair, scrunch and tousle with your fingers for piece-y texture, then clip the bow above one ear, pulling that side back slightly. The texture keeps it modern and the bow keeps it festive. Five minutes, easy difficulty. Flip your part to the opposite side first if your hair lies too flat for texture.
This suits oval and heart-shaped faces and works on straight to wavy bobs. I would pick this if you like casual hair with a sweet detail, since the bow clip is charming without being childish. My pro tip: keep the bow small and the texture undone, because a big bow on a sleek bob can read much younger than intended.
3. Soft Center-Part Waves on Long Hair
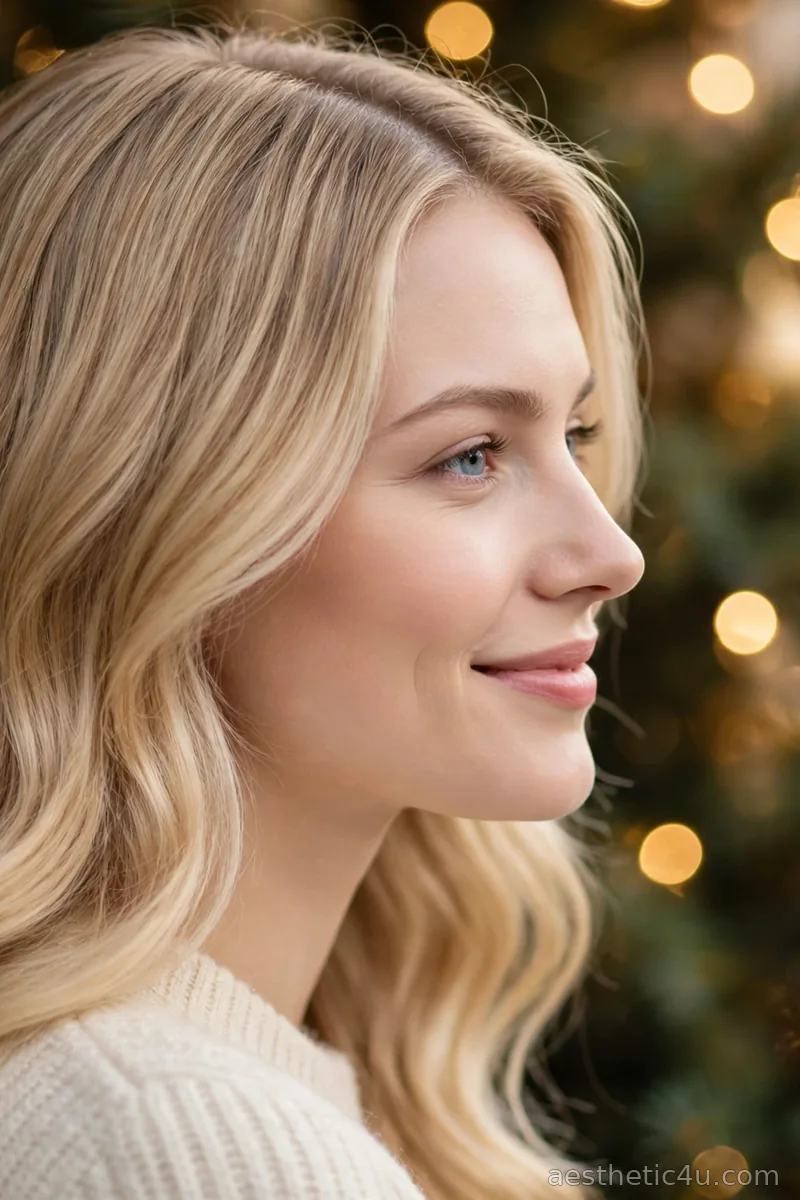
Long dark hair is curled into soft, glossy waves with a gentle center part, worn loose and flowing for an elegant holiday look. Part the hair down the middle with a rattail comb, curl sections with a 1.25-inch iron away from the face, and brush through with fingers for soft, touchable waves. Let the hair fall evenly on both sides over the shoulders. Fifteen minutes, easy to medium difficulty. Mist with light hairspray so the waves hold their bounce through the evening.
This suits oval and heart-shaped faces and works on straight to wavy long hair. I would pick this when you want classic glamour for a Christmas party, since the glossy waves look luxurious in candlelight. The honest caveat is weight: long waves can fall flat fast, so mist the hairspray and avoid over-brushing the curls. It pairs beautifully with statement earrings and a bold red lip.
4. Curly Pixie with Sparkle Pins
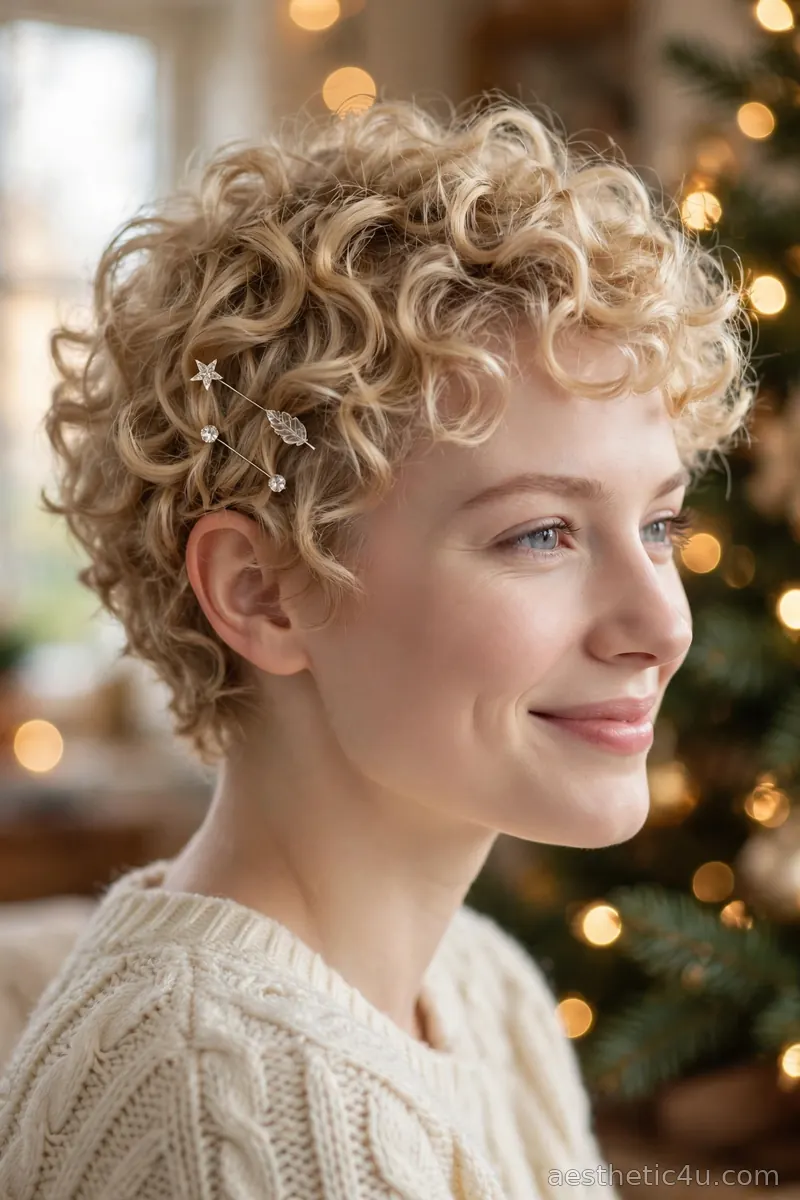
A curly pixie is defined with curl cream for bouncy texture, with a few sparkle pins tucked into the curls on one side so they glint as you move. Scrunch curl cream through damp curls, diffuse or air-dry for definition, then slide three or four sparkle pins into the curls above one ear at different angles. The pins are the only styling needed beyond curl definition. Eight minutes on prepped curls, easy difficulty. Let the curls cool fully before adding pins so the definition sets properly.
This playful style suits oval and heart-shaped faces and is made for curly pixies. I would pick this if you have natural curls in a short cut and want festive style with almost no effort. My pro tip: push the pins in with the decorative heads facing outward and slightly upward, since pins buried in curls disappear completely. A tiny touch of curl cream on dry ends revives the shape beautifully.
5. Classic Bob with a Velvet Band
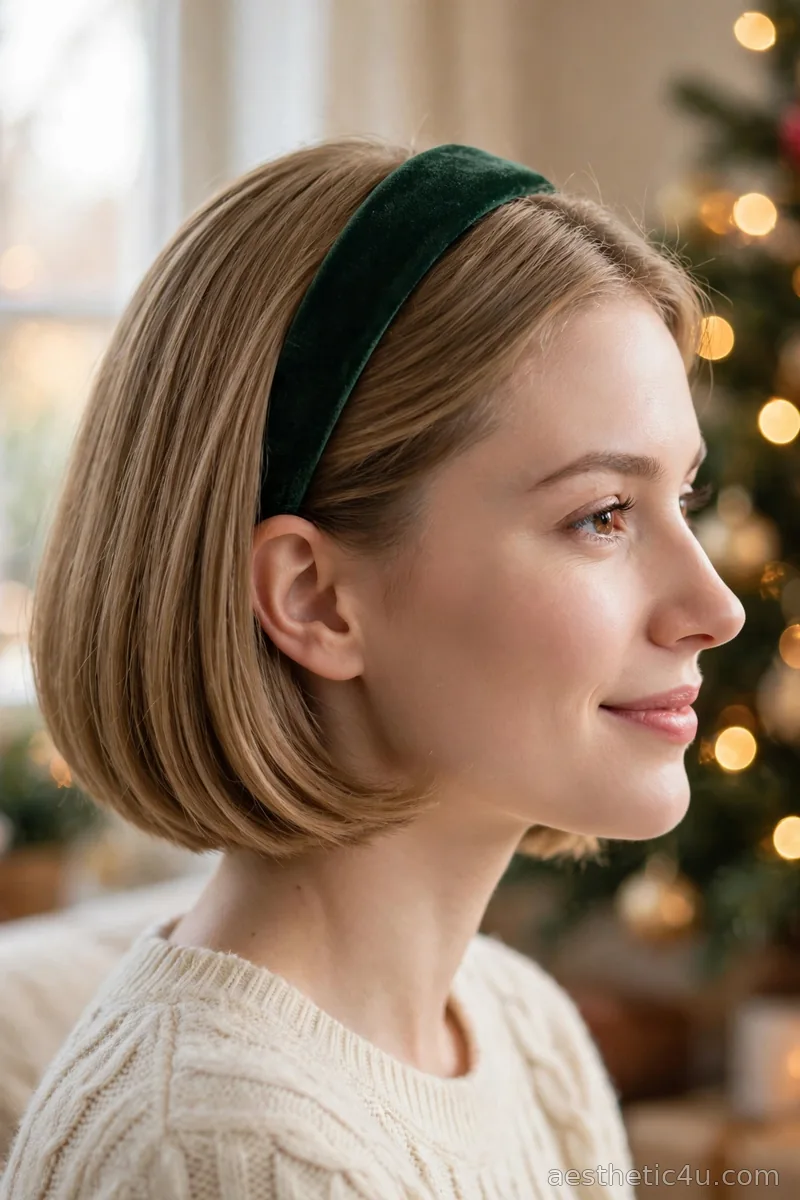
A chin-length bob is blow-dried smooth with the ends tucked under, with a wide velvet band in a holiday color sitting behind the hairline for a polished, timeless look. Blow-dry smooth with a paddle brush, curve the ends under, then slide the velvet band on about an inch behind the hairline. The band should sit flat and comfortable. Eight minutes, easy difficulty. Slide the band on carefully and check from both sides that it sits evenly behind the hairline.
This suits oval and heart-shaped faces and works on straight to wavy bobs. I would pick this when you want an elegant holiday style, since the velvet band feels luxurious against a sleek bob. The honest caveat is band width: a very wide band on a short bob can overwhelm the cut, so choose a medium width that complements rather than covers your hair.
Keep exploring: Easy Christmas Hairstyles
6. Messy Pixie with a Gold Clip
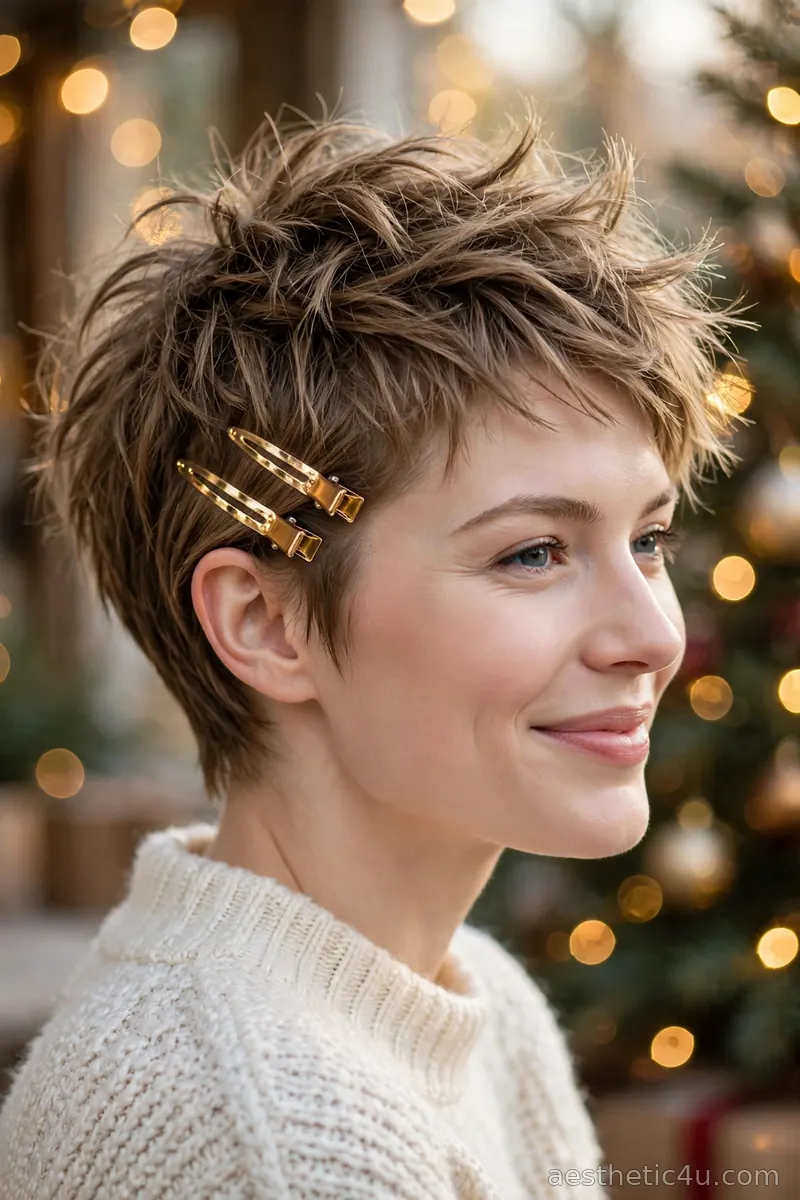
A pixie is roughed up with texturizing paste for piece-y definition, with a gold hair clip pinning back one side for a chic contrast of messy texture and polished shine. Warm a pea-sized amount of paste between your palms, rake through dry hair, and pinch sections for definition. Slide the gold clip above one ear, pulling that side sleek against the head. Four minutes, beginner level. Warm the paste thoroughly between your palms so it distributes evenly without clumping or stiffness.
This suits oval, heart, and diamond faces and works on straight to wavy pixies. I would pick this if you like edgy, undone hair, since the gold clip adds just enough shine to feel festive. My pro tip: the contrast is the point, so keep one side genuinely messy and the clipped side genuinely sleek rather than blending the two.
7. Sleek Straight Bob with a Center Part
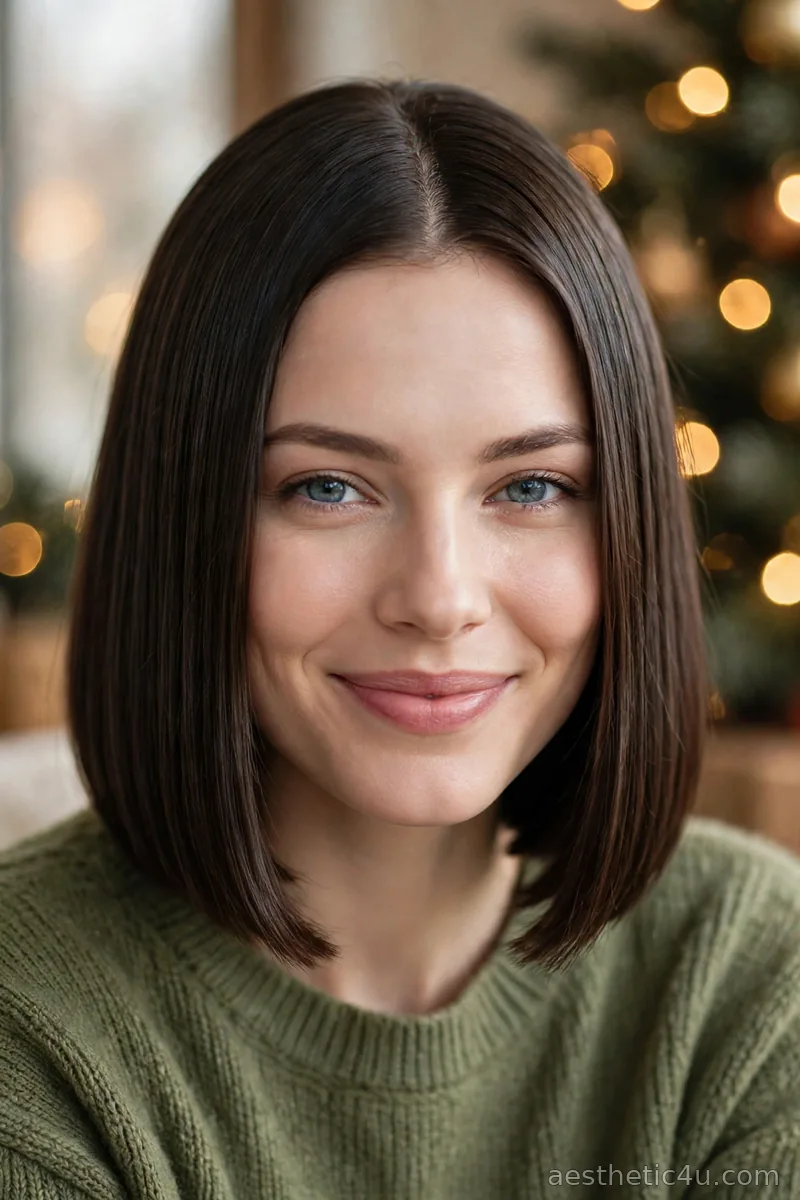
A bob is flat-ironed perfectly straight with a crisp center part, shine serum smoothed over the surface for a glassy, precise finish. Create the center part with a rattail comb, flat-iron in thin sections with heat protectant, and smooth a small amount of shine serum over the top layer. Press the sides flat with your palms. Ten minutes, easy difficulty. Run the iron slowly over each section, since rushed passes leave tiny waves behind that ruin the sleek glass effect completely.
The center part flatters oval and heart-shaped faces, and this needs a bob-length cut. I would pick this when you want a sharp, confident look that is minimal and striking at once. The honest caveat is that sleek bobs show regrowth and uneven cuts mercilessly, so this style earns a fresh trim a week before any big event. It is power hair in its simplest, most polished form.
8. Twisted Half-Up with Festive Star and Berry Pins
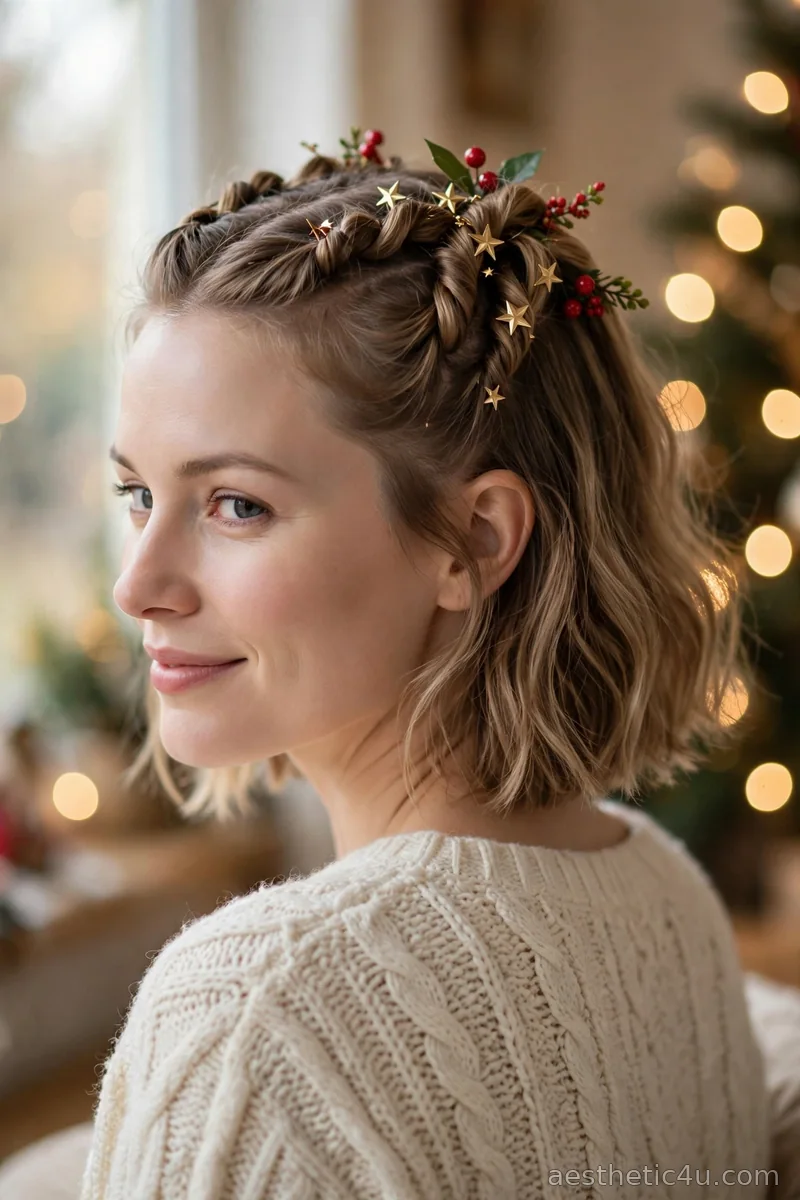
Two small front sections are twisted back and pinned at the crown while the rest of the bob falls naturally, with gold star pins and red berry sprigs tucked into the twists for a festive finish. Take a one-inch section above each ear, twist away from the face, join at the back of the crown, and pin with two crossed bobby pins. Slide two or three gold star pins into the twists and tuck a small berry sprig beside them. Eight minutes, easy difficulty. Keep the twists small and close to the head so they read as deliberate detail.
This suits oval and heart-shaped faces and works on bobs and lobs with enough front length to twist back. I would pick this when you want your bob to feel dressed for Christmas rather than just worn. My pro tip: crossed bobby pins grip far better than parallel ones on short hair, so always cross them in an X, then place the star pins over them to hide the base.
9. Wavy Lob with a Plaid Headband

A long bob is waved loosely through the lengths, with a plaid headband pushing the front back for instant Christmas charm. Curl sections with a 1.25-inch iron, brush through for soft waves, then slide the plaid headband on about an inch behind the hairline. The plaid pattern brings the holiday feel with zero extra effort. Ten minutes, easy difficulty. For the prettiest result, break up the waves with your fingers and finish with a light mist of texturizing spray for soft, touchable movement.
This suits every face shape and works on wavy to straight lobs. I would pick this when you want a cozy holiday look for casual December days. The honest caveat is pattern scale: a large plaid on a narrow headband looks best, since oversized checks can look more lumberjack than holiday chic. It is comfortable, festive, and effortlessly charming for everything from gift shopping to casual parties.
10. Slicked-Back Pixie with High Shine
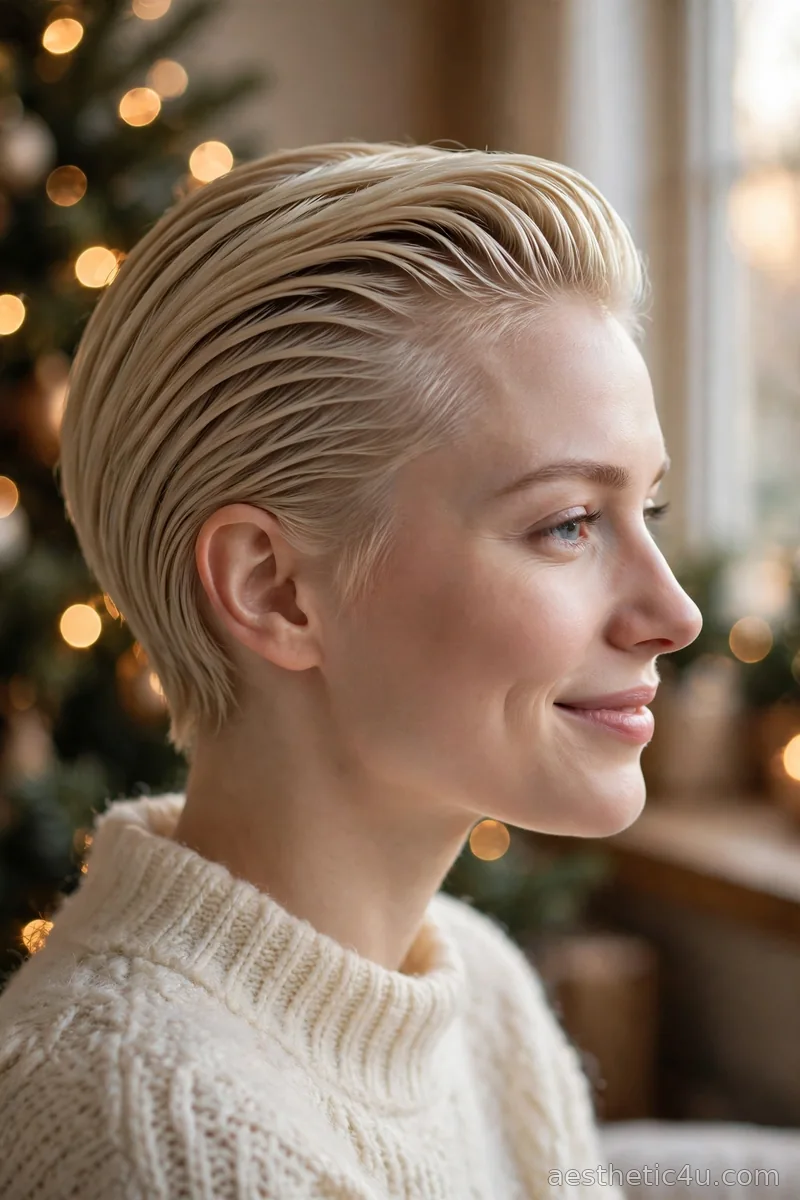
A pixie is combed straight back with strong-hold gel for a glossy, sculpted finish where nothing is left to chance. On damp hair, rake strong-hold gel through from roots to ends, comb everything straight back with a fine-tooth comb, and press the sides flat. Let it set without touching. A final smoothing of shine serum adds the gloss. Eight minutes plus setting time, easy difficulty. Press the sides flat with your palms as it sets for the cleanest sculpted lines.
This bold look suits oval and heart-shaped faces and needs pixie-length hair. I would pick this when you want a fashion-forward statement that shows off your features beautifully. My pro tip: commit completely, since a half-slicked pixie just looks wet, and keep the sides tight to the head for the full sculpted effect. Pair it with strong brows and a bold lip for maximum impact.
Keep exploring: Cute Christmas Hairstyles
11. Bob with a Braided Front Section
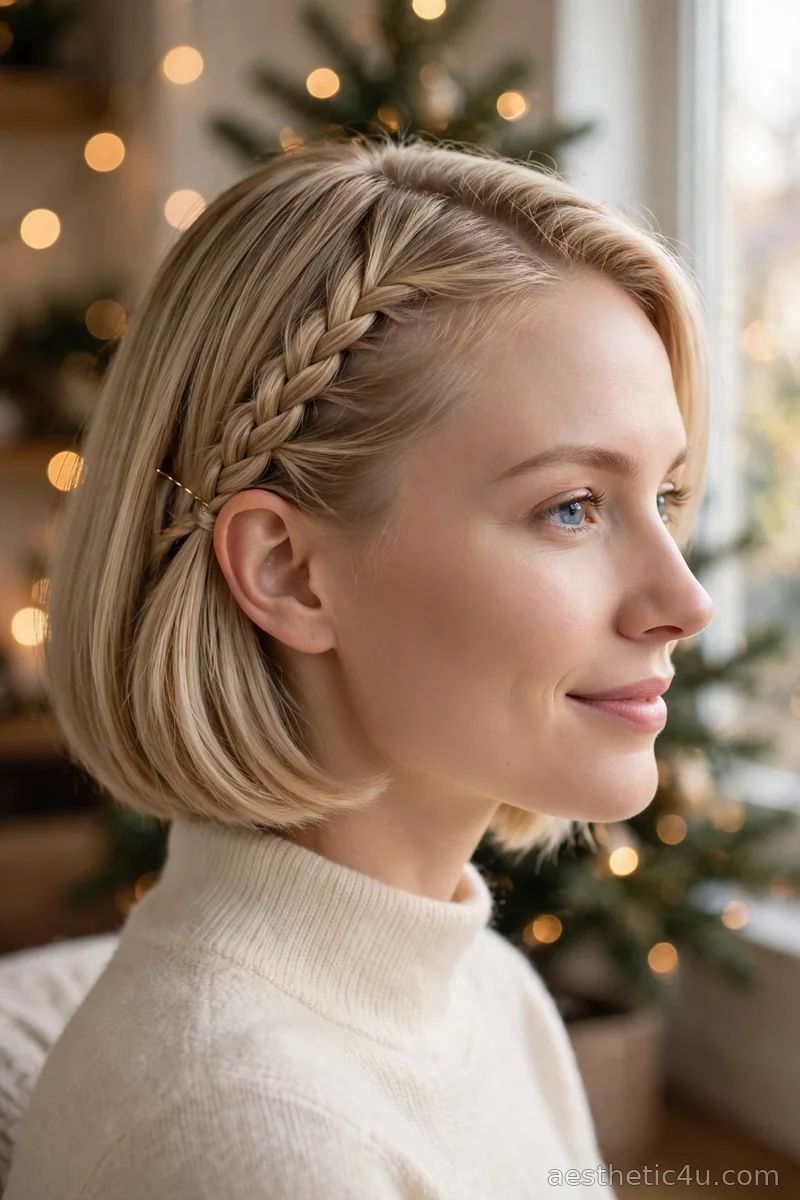
A small section at the front of a bob is braided back along the part and pinned behind the ear while the rest of the bob stays smooth. Take a one-inch section at the front hairline, braid it back along your part in a simple three-strand pattern, and pin the end tucked behind your ear. Smooth the rest of the bob as usual. Seven minutes, easy to medium difficulty. Keep the braid soft rather than tight so it blends naturally into the bob.
This suits oval and round faces and works on bobs with enough front length to braid. I would pick this when you want a little detail on your bob that also keeps hair out of your face. The honest caveat is braid tension: braid too tightly and it pulls the whole side flat, so keep it soft and slightly loose.
12. Tousled Bob with a Bow Barrette

A bob is tousled with salt spray for airy texture, with a bow barrette clipping one side back for a charming mix of undone hair and sweet detail. Spray salt spray through damp or dry hair, scrunch for texture, let it set, then clip the bow barrette above one ear. The undone texture against the neat bow is the whole appeal. Five minutes, easy difficulty. For extra staying power, backcomb the roots lightly before tousling, which gives the salt spray something to grip.
This suits oval and heart-shaped faces and works on straight to wavy bobs. I would pick this when you like effortless hair with a feminine touch. My pro tip: salt spray works best on second-day hair, since freshly washed hair often goes flat instead of tousled with salt spray alone. It is cute, quick, and perfect for any holiday outing.
13. Retro Curls on a Short Bob
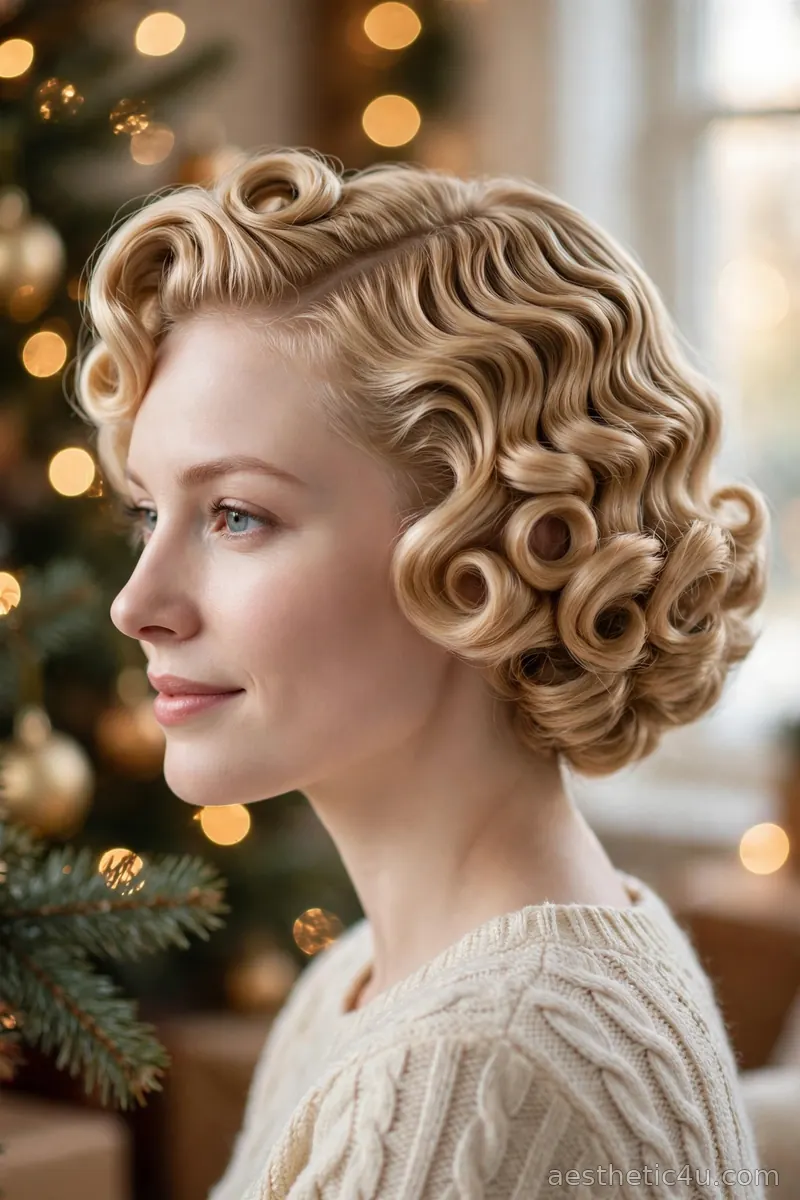
A short bob is set in tight, vintage-style curls, brushed out slightly for a soft retro shape that channels classic Hollywood. Set small sections on hot rollers or curl with a half-inch iron, let cool completely, then brush gently with a soft brush just enough to form a unified wave pattern without losing the curl. Twenty-five minutes, medium difficulty. Work in small sections and do not rush the setting, since even heat creates the smoothest, most beautiful vintage finish.
This suits oval and heart-shaped faces and needs a bob with enough length to curl. I would pick this when you want a vintage holiday moment that feels glamorous and fun. The honest caveat is the cooling rule: brushing curls before they cool completely destroys the pattern, so patience is non-negotiable here. Finish with red lips and vintage-inspired makeup for the full effect.
14. Sleek Center-Part Bob with a Red and Gold Statement Clip
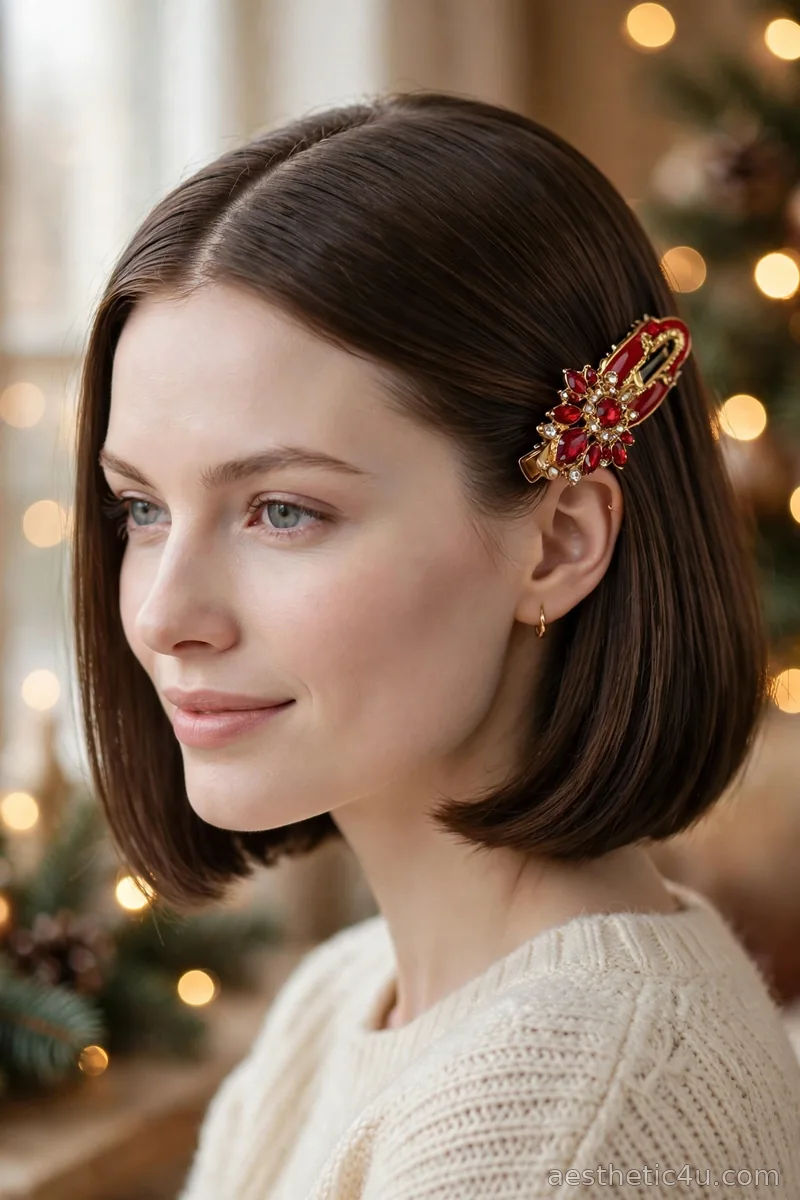
A sleek black bob is parted down the center and smoothed flat, with a large red and gold jeweled statement clip pinning one side back as the centerpiece of the style. Create the center part with a rattail comb, smooth both sides flat with serum and a comb, then slide the statement clip in above one ear where it catches the light. The clip does everything. Five minutes, easy difficulty. Smooth a tiny amount of serum over the surface so the sleek base looks intentional and polished.
This suits oval, heart, and square faces and works on pixies, bobs, and lobs. I would pick this when you want maximum impact with minimum effort, since it is sleek, chic, and party-ready. My pro tip: invest in a genuinely beautiful clip, because at this scale the accessory is the entire style and a cheap one shows. One great clip beats a drawer full of mediocre ones every time.
15. Chin-Length Bob with Soft Waves

A chin-length bob is curled into gentle, soft waves that add volume and movement to the short cut, with a center or side part both working beautifully. Curl sections with a 1-inch iron, brush through with fingers for softness, and set your preferred part. The waves should look touchable, not sculpted. Twelve minutes, easy difficulty. Alternate the curl direction in each section so the waves look naturally soft and modern, then finish with a light mist of flexible-hold hairspray for touchable movement that lasts.
This suits oval, round, and heart-shaped faces and works on straight to wavy chin-length bobs. I would pick this when you want a soft, feminine holiday look that feels romantic. The honest caveat is wave size: on a chin-length bob, keep the curls small and soft, since large waves on short hair can flip outward in unflattering ways.
Keep exploring: Christmas Hair Accessories
16. Edgy Pixie with Tinsel Strands
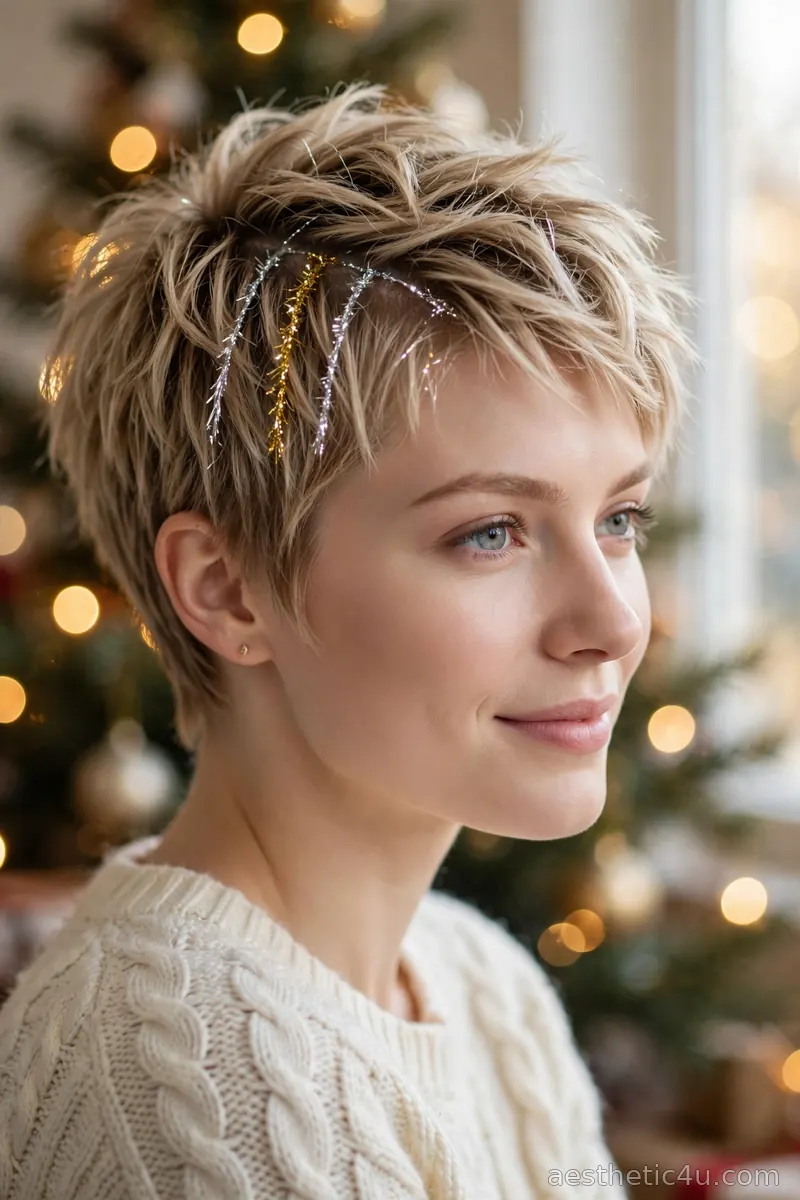
A textured pixie gets a few thin tinsel strands clipped in near the part, sparkling against the short hair while the rest of the pixie stays edgy and undone. Style the pixie with texturizing paste first, then clip two or three thin tinsel strands near the part with tiny clips, letting them blend into the texture. Four minutes, easy difficulty. Keep the tinsel near the part line where it catches the light with every turn of your head as you move through the party.
This suits oval and heart-shaped faces and works on textured pixies. I would pick this when you want a fun, unexpected holiday look that stays cool rather than cute. My pro tip: keep the tinsel minimal, since three strands read festive while ten strands read costume, and remove them gently to avoid tangling. It is festive without trying too hard, which is the whole point.
17. Half-Up Mini Bun on a Bob
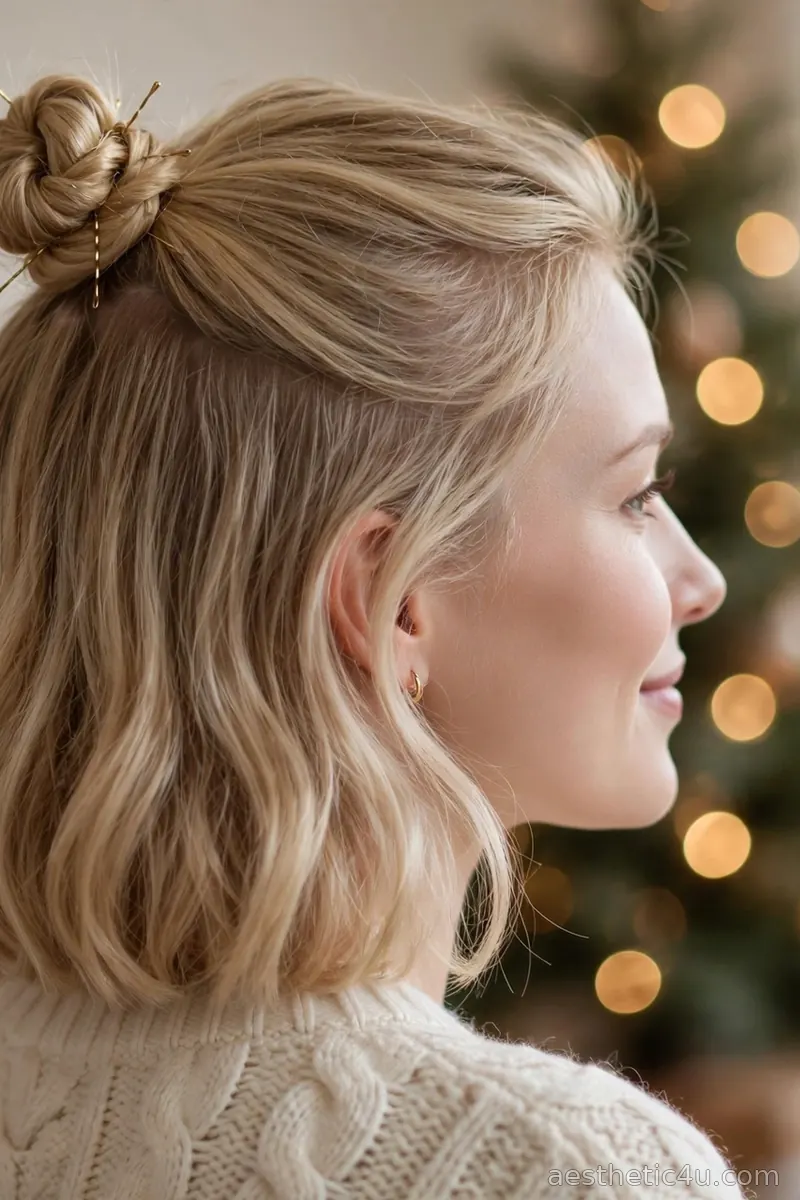
The top section of a bob is twisted into a tiny bun at the crown while the bottom half falls naturally, a cute, youthful take on the half-up style. Gather the top section from temple to temple, twist it, coil into a mini bun, and pin with two small bobby pins. Leave the bottom half completely natural. Four minutes, easy difficulty. Cross the bobby pins in an X underneath the bun so the tiny knot stays secure through all your holiday plans.
This suits oval and heart-shaped faces and works on bobs with enough top length to gather. I would pick this when you want a playful look on short hair for casual holiday plans. The honest caveat is bun size honesty: if your top section is very short, use a mini clear elastic and embrace the tiny knot rather than forcing a bun that will not hold.
18. Polished Lob with a Velvet Bow
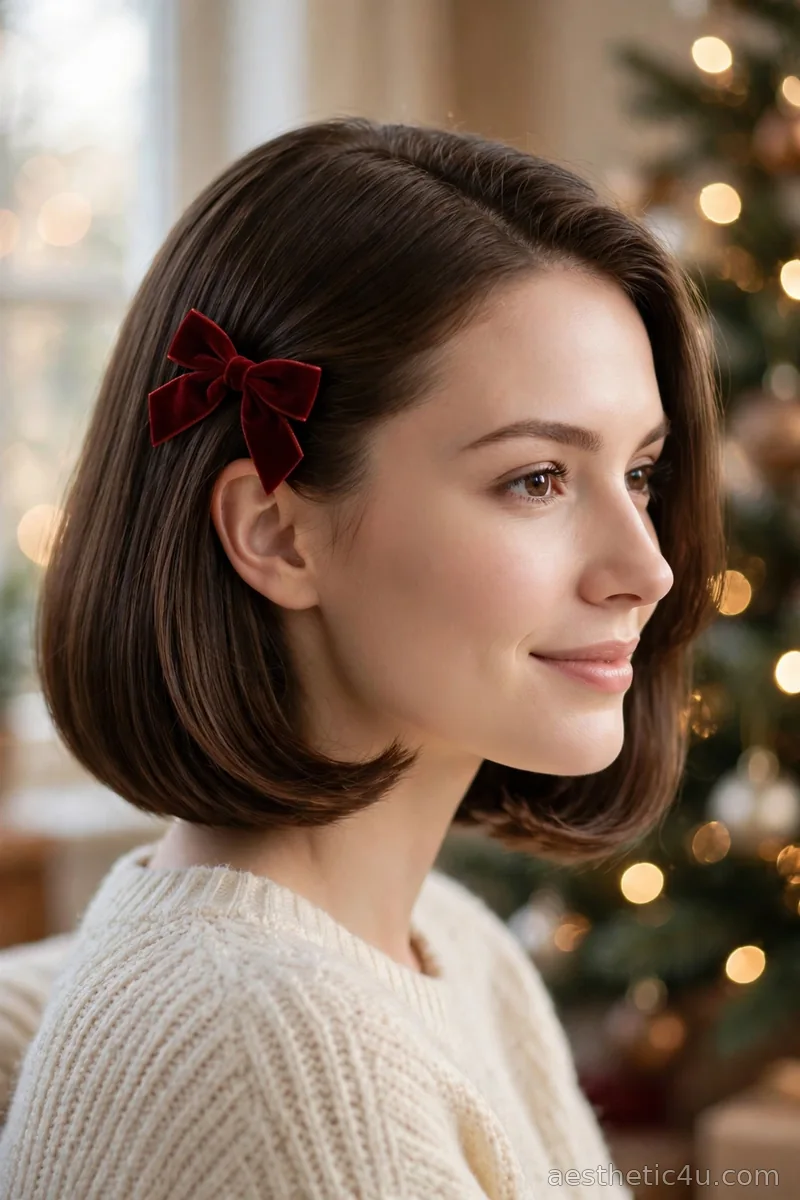
A long bob is blow-dried smooth with the ends curved under, with a small velvet bow pinned at the side for a sleek look with a sweet accent. Blow-dry smooth with a round brush, curving the ends under, then pin the small velvet bow above one ear. The lob stays sleek and the bow adds the festive note. Ten minutes, easy difficulty. Use a concentrator nozzle on your dryer and work in sections for the smoothest, most polished blowout finish.
This suits oval and heart-shaped faces and works on straight to wavy lobs. I would pick this when you want polished hair with a festive accent that feels elegant and easy. My pro tip: place the bow slightly back from the hairline rather than right at the front, since a side-back placement looks more sophisticated. It transitions effortlessly from daytime events to evening parties.
19. Finger Waves on Short Hair
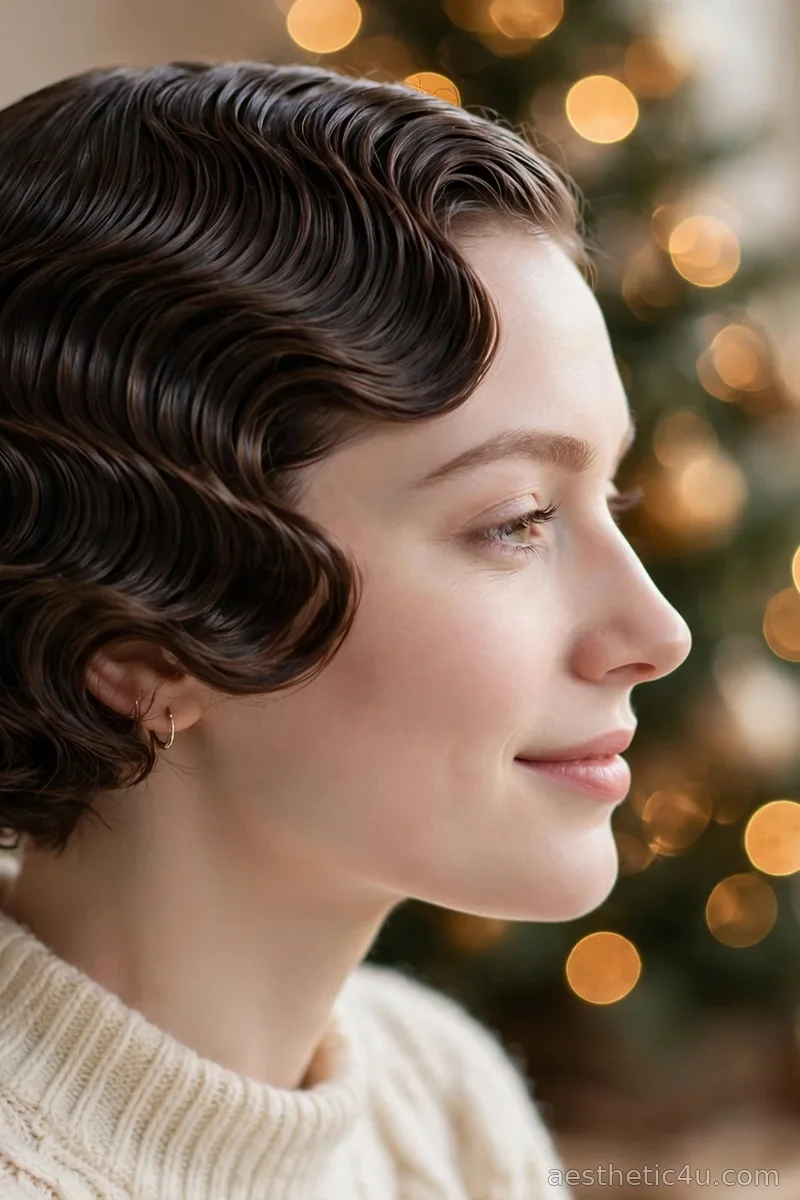
Sculpted finger waves are set close to the head on short hair, glossy and precise, a vintage technique that looks stunning on bobs and pixies. On damp hair with setting foam, sculpt the S-waves with a fine-tooth comb and fingers, clipping each ridge in place. Dry completely, remove clips carefully, and smooth with serum. Forty minutes plus drying, advanced difficulty. Work methodically from one side to the other so the wave pattern stays consistent and beautifully even across the whole head.
This suits oval and heart-shaped faces and needs short hair with enough length to sculpt. I would pick this when you want a true vintage statement made for holiday parties. The honest caveat is the learning curve: finger waves are genuinely difficult, so do a full practice run well before you need them. The dramatic result is absolutely worth the practice time.
20. Asymmetrical Bob with a Festive Pin
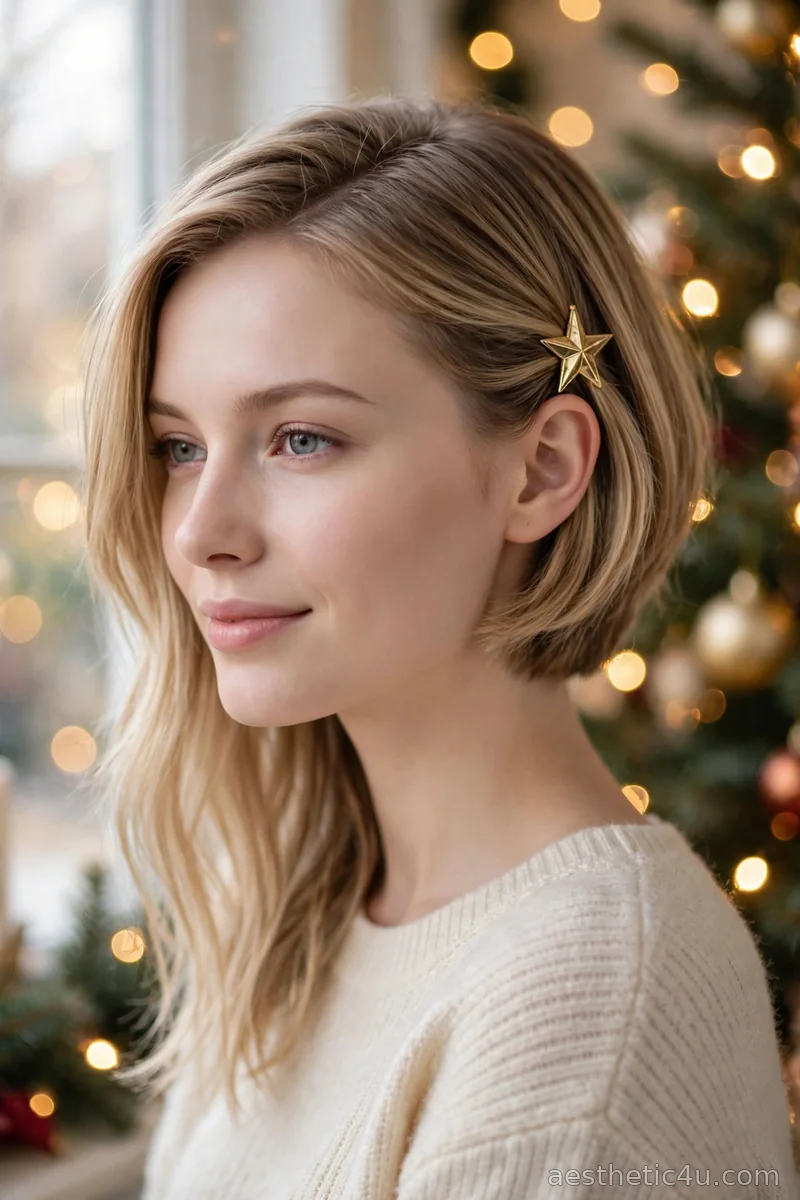
An asymmetrical bob with one side longer than the other is smoothed straight, with a festive pin securing the shorter side back while the cut itself stays the statement. Flat-iron smooth with heat protectant, tuck the shorter side behind the ear, and pin it with the festive pin placed visibly above the ear. Let the longer side fall forward. Ten minutes, easy difficulty. Keep the longer side sleek and falling forward so the asymmetry stays sharp, striking, and clearly intentional.
This suits oval and square faces and needs an asymmetrical cut. I would pick this when you have an edgy cut and want to dress it up with holiday sparkle. My pro tip: the pin placement matters enormously here, so try it in a mirror from the front and adjust until the pin is clearly visible rather than hidden in the tuck.
Keep exploring: Christmas Hairstyles with Hats
21. Curly Bob with a Red Scrunchie Headband

A curly bob is defined and full of bounce, with a red scrunchie worn as a headband pushing the curls back for a fun pop of color. Define curls with cream, diffuse or air-dry, then stretch the scrunchie over your head like a headband, positioning it about an inch behind the hairline. Arrange the curls over and around it. Eight minutes on prepped curls, easy difficulty. Choose a soft, wide scrunchie so it sits comfortably without flattening your curls.
This suits oval, heart, and round faces and is made for curly bobs. I would pick this when you have curly short hair and want easy festive style that keeps curls out of your face. The honest caveat is scrunchie tension: a tight scrunchie headband flattens curls and aches, so choose a soft, stretchy one and position it gently. It is playful, practical, and perfect for busy December days.
22. Sleek Tucked Bob with Pearl Pins
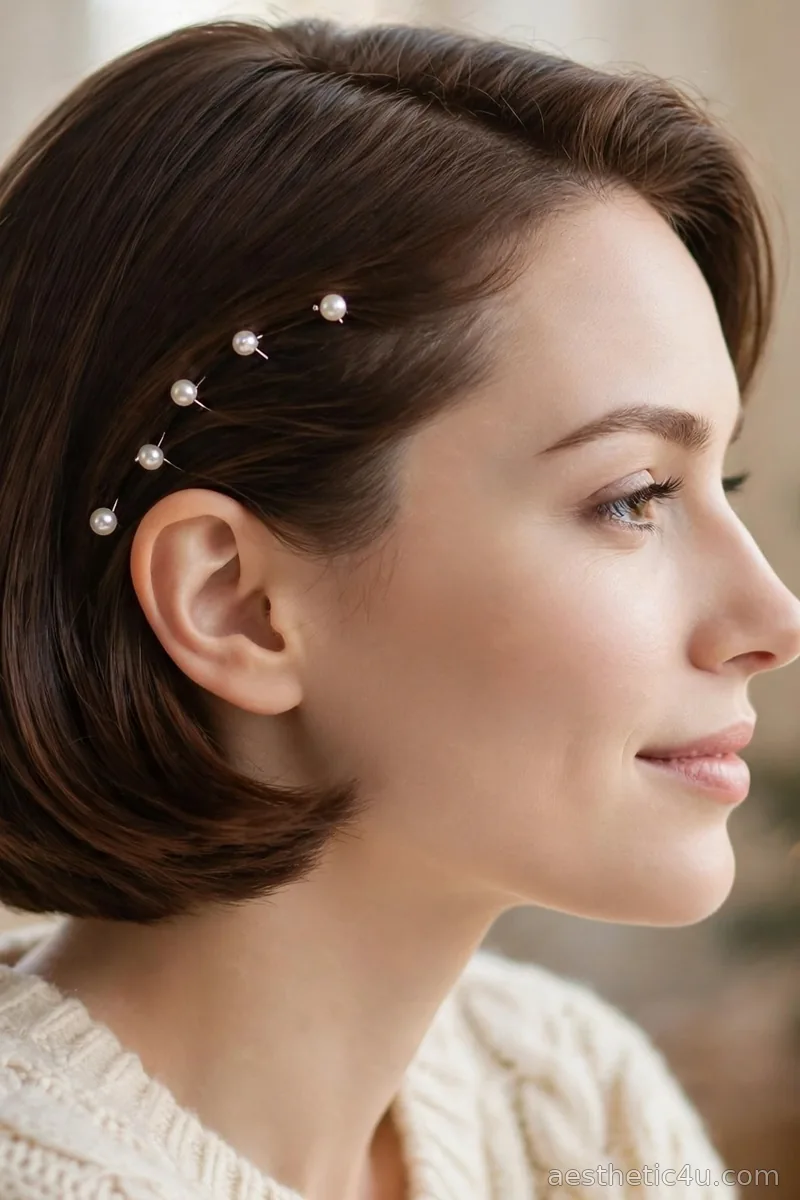
A bob is tucked neatly behind the ears and smoothed flat, with small pearl pins lining one side for a delicate, refined, minimal finish. Flat-iron smooth, tuck both sides firmly behind the ears, then slide four or five small pearl pins along one side in a gentle curve following the hairline. Eight minutes, easy difficulty. Press the tucked sections flat with your palms first, then use a light-hold hairspray over the tucks so they stay neatly in place without looking stiff.
This suits oval and heart-shaped faces and works on straight to wavy bobs. I would pick this when you want understated elegance for a formal holiday event. My pro tip: odd numbers of pins look more natural than even rows, so use three or five pins and vary their spacing slightly for an effortless feel. It is refined, minimal, and quietly luxurious.
How to Choose the Right Short Christmas Hairstyle for You
Start with your exact cut, since short hair styling is all about working with what you have. Pixies shine with headbands, clips, and texture, because the short length makes accessories the focal point. Bobs have the most versatility: they can be sleek, wavy, textured, tucked, or accessorized a dozen ways. Lobs can borrow almost any medium-length trick, including twists, mini buns, and braided sections. Match the accessory scale to your hair: pixies need delicate pieces, while lobs can carry a wide headband or a larger bow.
Then consider your face shape and your texture. Round faces benefit from height on top, so try the textured pixie, the deep side part, or anything with crown volume. Long faces do better with width at the sides, like the wavy lob or curls that fill out the silhouette. Heart-shaped faces look great with volume at the jawline, which bobs deliver naturally. Work with your texture rather than against it: curly pixies and bobs should lean into curl definition with pins and headbands, while straight hair should lean into sleekness and shine. And be honest about effort: most of these take five minutes, but finger waves and retro curls are project styles, so save them for days when you have real time.
Styling Tips & Common Mistakes to Avoid
Short hair rewards the right products, so here is what I recommend. First, use less product than you think: a pea-sized amount of cream or paste is plenty on short hair, and overloading makes it look greasy fast. Second, refresh short styles with water, not more product, since a light mist reactivates yesterday’s paste or cream beautifully. Third, invest in good accessories sized for short hair, because pieces designed for long hair overwhelm a pixie or bob. Keep a few bobby pins that match your hair color in your bag, since short styles show every pin and mismatched ones ruin the illusion.
The short-hair mistakes I see every December are consistent. The biggest is piling on multiple accessories at once, so follow the one-statement rule: one headband, one clip, or one bow, never a combination. Another is fighting your natural texture into submission every day, when working with it gives better results in half the time. And do not skip trims during the holidays: short cuts lose their shape fast, and a style built on a grown-out pixie or bob never looks as sharp. A quick trim in early December keeps every style on this list looking intentional through New Year’s.
Final Thoughts
Short hair is a gift during the holidays because styling takes minutes, not hours, and now you have twenty-two ways to make those minutes count. Pick the style that suits your cut and your plans, choose one accessory you love, and remember that confidence is the real statement piece. A sharp pixie or a polished bob with the right detail turns heads faster than the most elaborate long-hair style. Prove that less really is more, and enjoy every festive moment this season.
Follow Us On Pinterest: Easy To Find Next Style