Sana
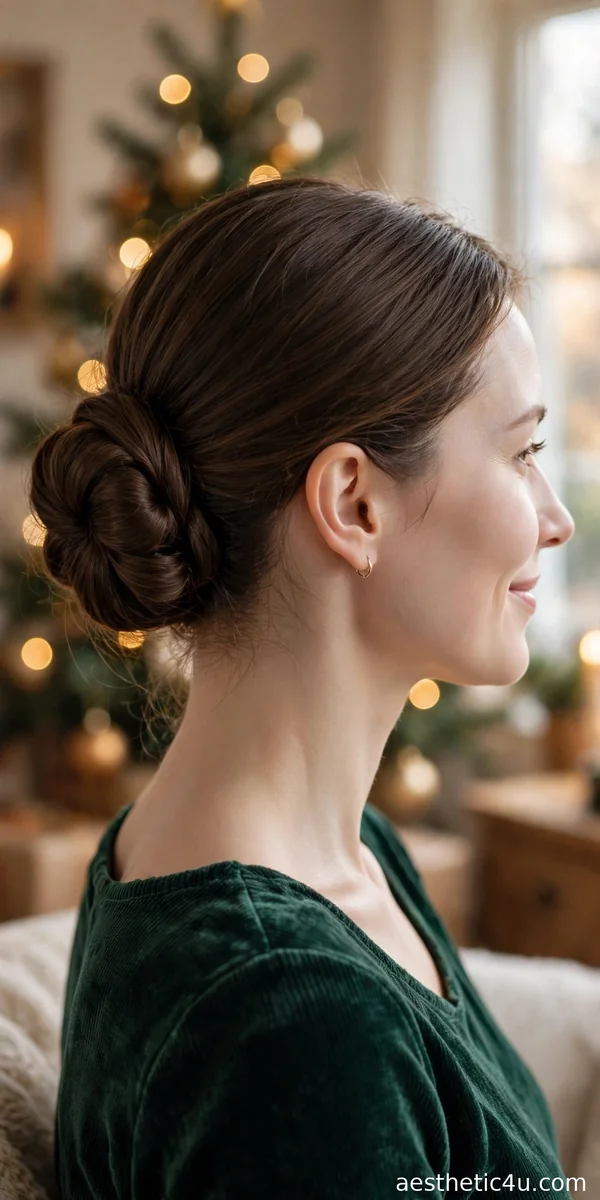
The low bun is the quiet luxury of Christmas hairstyles – elegant without shouting, polished without stiffness. It sits pretty at the nape, shows off your neckline and earrings, and stays put through the longest holiday dinner. While statement styles come and go, the low bun trends every single December, because it solves the real holiday problem: looking pulled-together from the first photo to the last dance without touching your hair once.
This guide covers 18 low buns – sleek versions, messy versions, and everything in between – because the perfect low bun depends on your mood, your hair, and your plans. You will learn the pinning techniques that keep a bun secure for twelve hours, how to choose between sleek and textured finishes for your face shape, which accessories actually elevate a bun (and which cheapen it), and the mistakes that turn an elegant bun lumpy or severe. I have pinned thousands of buns in my career, and my honest opinion is this: the low bun is the most forgiving formal style there is. It flatters nearly every face, works on almost every hair type, and hides a multitude of sins.
All of them are doable at home with a few pins and ten to twenty minutes. Let us find yours.
1. Sleek Twisted Low Bun
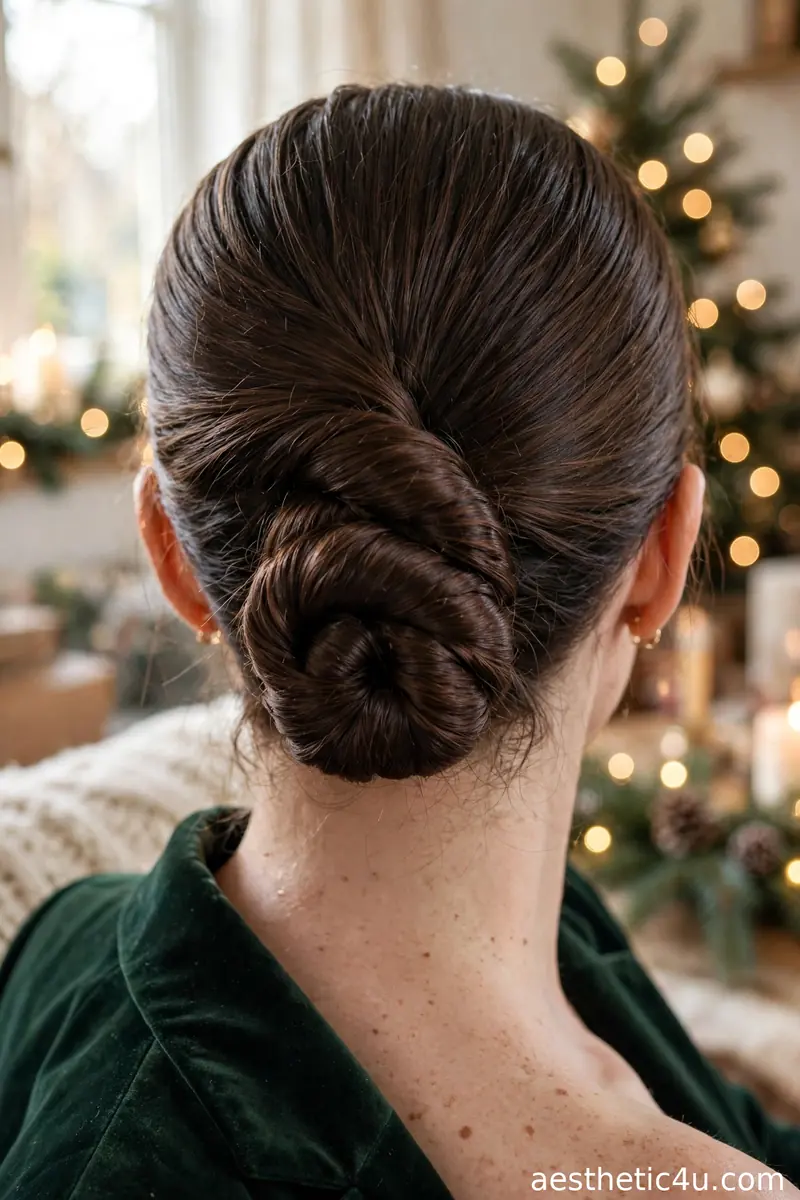
Hair smoothed back and twisted into a neat low bun at the nape, with every strand in place – the twist gives the bun beautiful texture and dimension. Brush hair back sleekly with a paddle brush and smoothing cream. Gather into a low pony, twist the tail tightly, and coil it around the base, tucking ends under. Pin in a star pattern with 6 to 8 bobby pins pushed into the bun’s underside so none show. Smooth the crown and mist with medium-hold spray. Takes 15 minutes, easy to medium – the twisting is simple; the neat pinning takes care.
The definition of polished – I recommend it for formal Christmas dinners and holiday weddings. The twisted texture keeps it from looking flat or severe. It suits oval and long faces, and works on straight to wavy medium-plus hair. Pro tip: twist the tail in the same direction all the way down – reversing mid-twist creates bumps that show through the finished bun, and you will feel them every time you lean back.
2. Messy Low Bun with Face-Framing Pieces
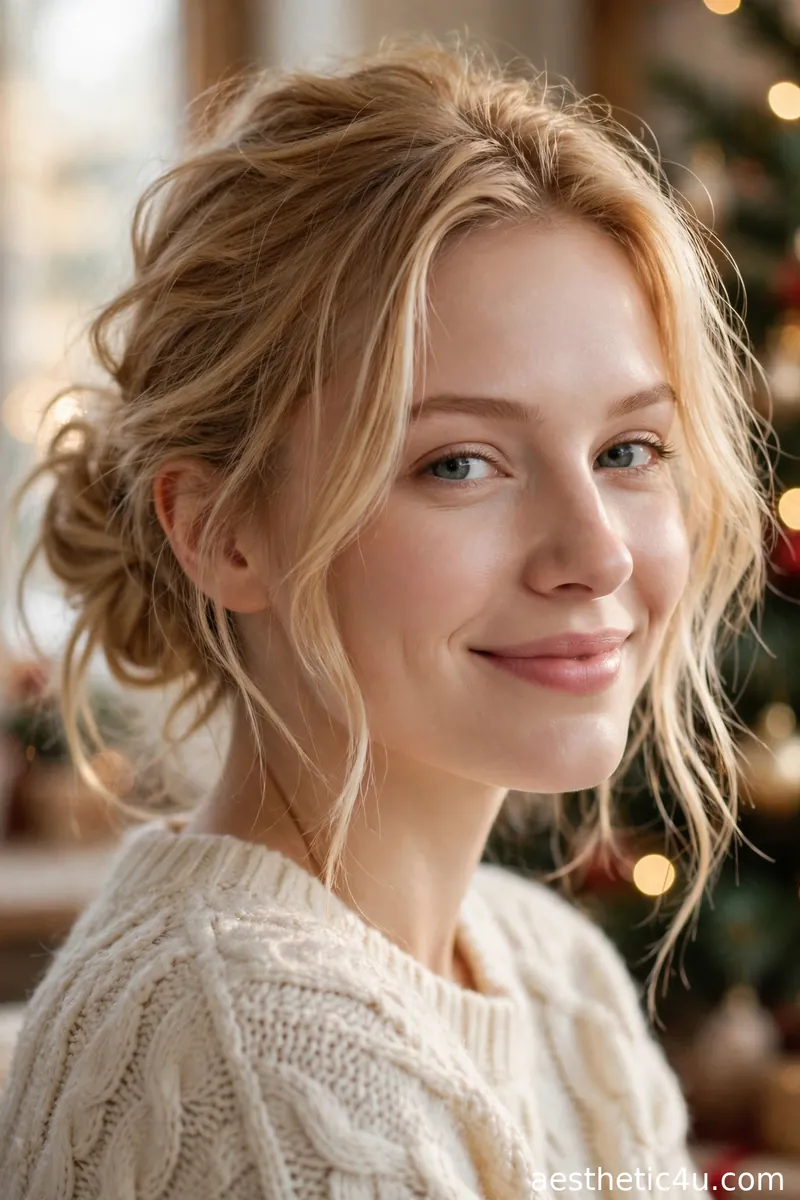
A relaxed, textured low bun with soft pieces pulled loose to frame the face. Deliberately undone, but in the prettiest way. Work texturizing spray through dry hair for grip. Gather loosely at the nape – not tight – twist loosely, and pin with the bun slightly off-center for a natural feel. Pull two soft pieces free at the front, plus a few at the crown, and tug the bun’s edges outward for airiness. Takes 10 minutes, easy – the looseness means there is no wrong way, which is exactly why this style is so forgiving for beginners.
The face-framing pieces are what make this work – they soften everything. I love this for Christmas Eve at home or a cozy dinner out; it looks romantic without any real effort. It suits every face shape, especially square and heart, where the soft pieces break up strong lines. Caveat: “messy” still needs anchoring – pin the bun’s core firmly even while the surface stays loose, or the whole thing slides south by the second course.
3. Braided Low Bun
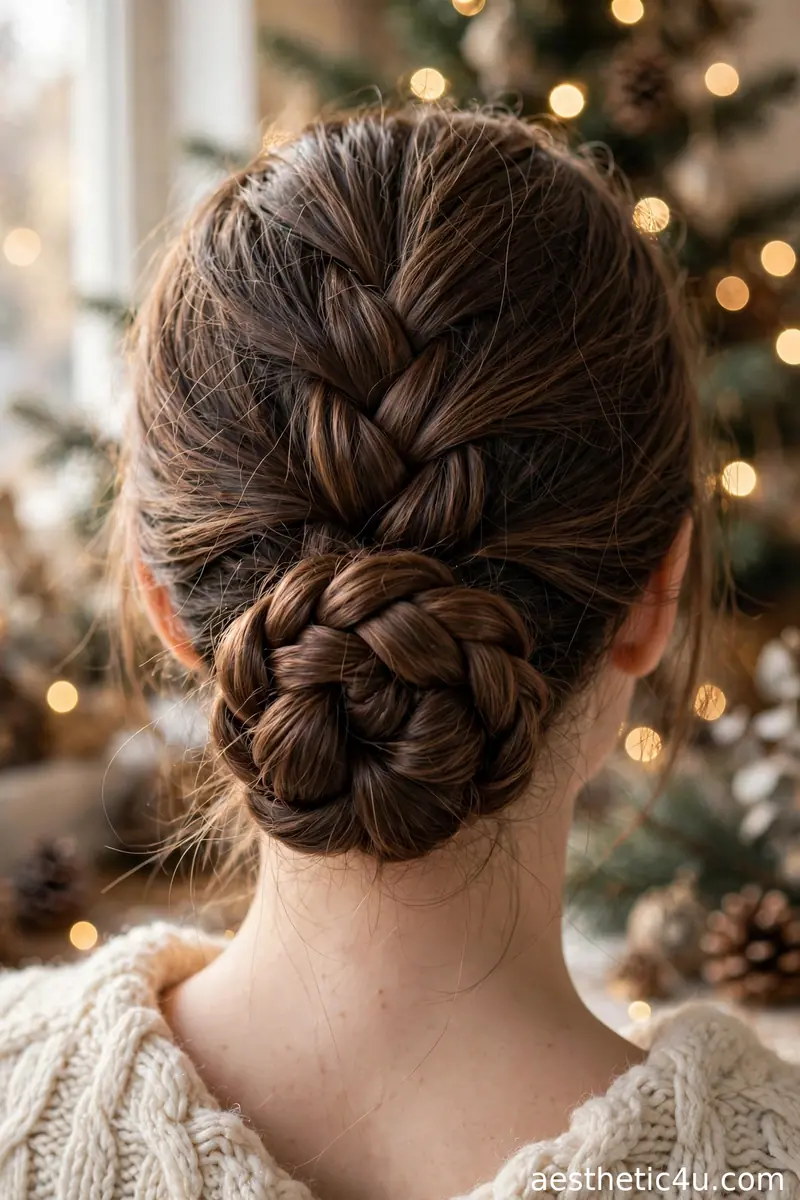
Hair braided first – a simple three-strand or Dutch braid – then coiled into a low bun and pinned, so the braid texture shows through the finished bun. Braid from the nape down in your chosen technique, keeping it snug. Coil the braid around its own base, tucking the tail end underneath, and pin generously – the braid’s ridges give pins plenty to grip. Pancake the braid lightly before coiling for a fuller bun. Takes 15 minutes, easy to medium – if you can braid, you can do this; the coiling is just wrapping.
Braiding before bunning is my favorite trick for adding interest to a simple shape – the texture makes it look so much more special. I think this is lovely for anyone who finds plain buns a bit boring. It suits oval and round faces. Pro tip: a Dutch braid shows more texture through the bun than a French braid, since it sits raised – choose Dutch when you want the braid detail to really read in photos.
4. Low Chignon with a Deep Side Part
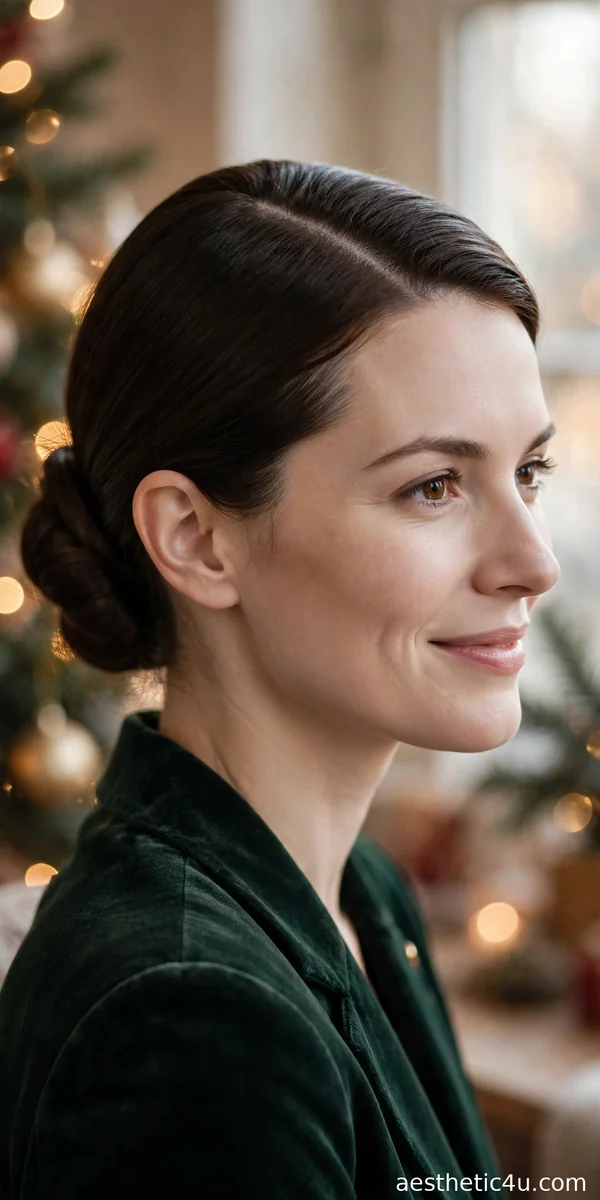
A smooth chignon tucked low at the nape, paired with a dramatic deep side part – the side part adds instant glamour to the classic shape. Create the deep part with a rat-tail comb, about two inches off-center. Smooth hair back with serum, twist into a low chignon, and pin until seamless. The deep part needs to stay crisp, so set it with a light mist of spray and smooth any lifting roots with a toothbrush and gel. Takes 15 minutes, easy to medium – the chignon is basic; keeping the deep part sharp all evening is the real task.
The deep side part is doing so much work here – it makes the whole style feel red-carpet. I would wear this to the fanciest Christmas event on the calendar; it is elegant from every single angle. It suits heart and square faces beautifully, the asymmetry softening strong features. Caveat: deep parts collapse on fine, silky hair – backcomb the roots lightly along the part line before smoothing over, or the part migrates back to center by dinner.
5. Textured Low Bun with Pearl Pins
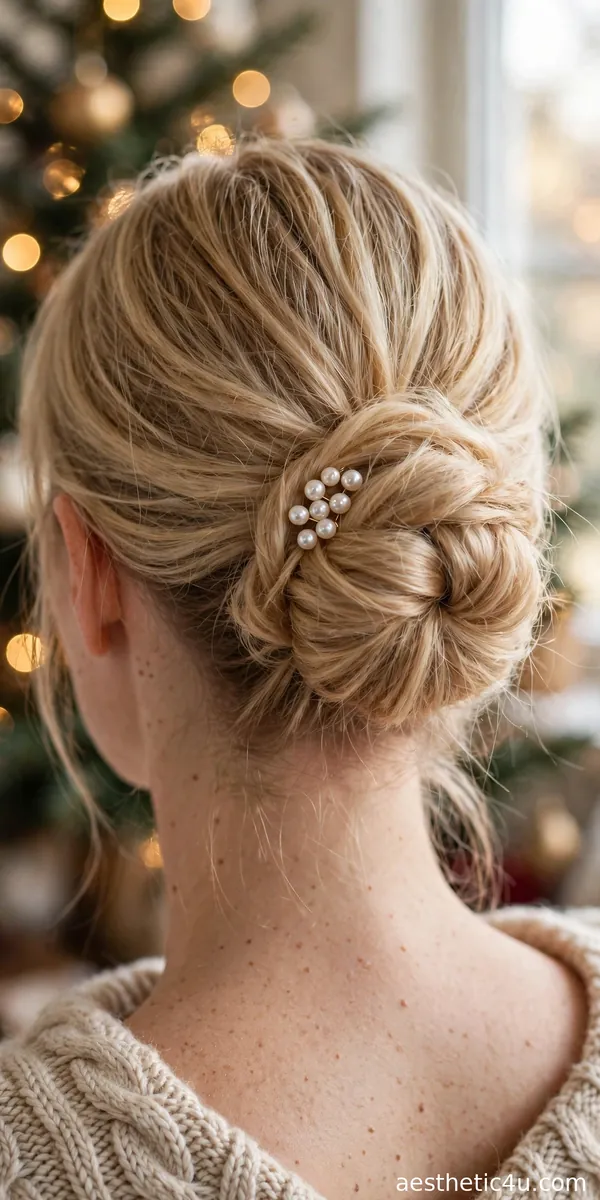
A soft, textured low bun with a few pearl pins tucked in around the shape – the pearls look like little drops of light in the hair. Build a loose, textured bun: gather at the nape, twist loosely, pin with airiness. Tug edges for softness. Then place 5 to 7 pearl pins asymmetrically around the bun – cluster two or three on one side, scatter the rest. Push pins in at an angle so the pearl heads sit on the surface. Takes 12 minutes, easy – the bun is beginner-friendly, and pin placement is pure instinct.
Pearls and Christmas just belong together. The pins take a simple bun and make it feel special-occasion – I love this for holiday photos, since the pearls catch the light beautifully. It suits every face shape and all hair types. Pro tip: buy pins with flat, secure pearl heads, not glued craft pearls – cheap ones shed their pearls into your hair mid-evening, and fishing them out of a bun is nobody’s idea of fun.
Keep exploring: 20 Christmas Hairstyles for Thin Hair That Fake Full Volume
6. Double-Twist Low Bun
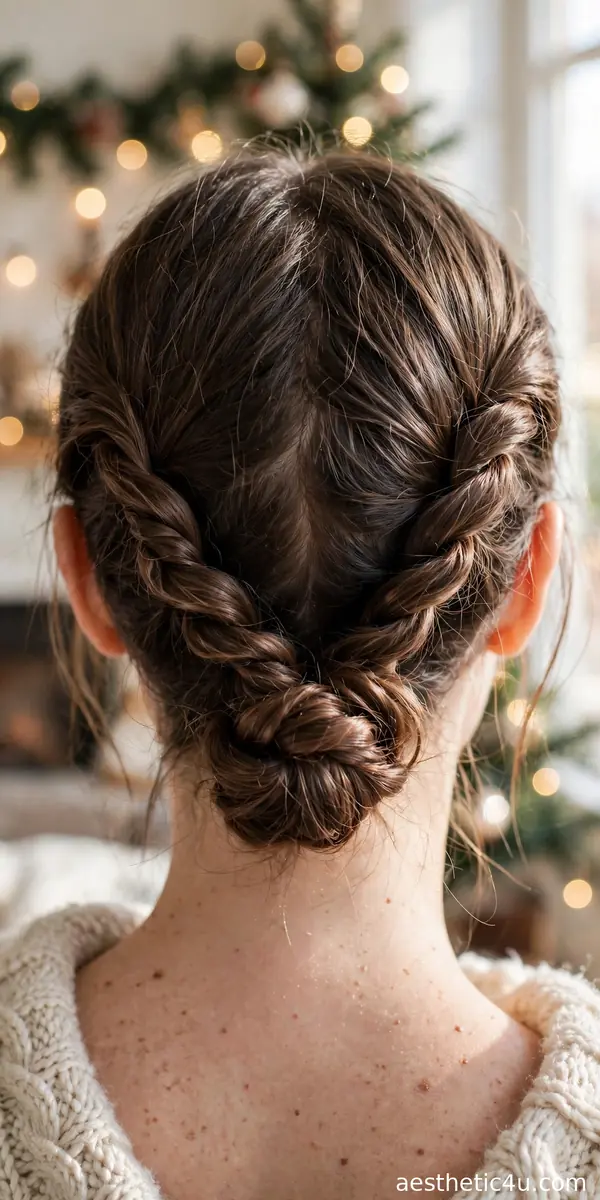
Two twisted sections – one from each side – that meet at the back and coil together into a low bun, the twists creating a pretty rope detail leading into it. Part down the middle or slightly off-center. Twist a 2-inch section back from each side, adding hair as you go, and join both twists with the remaining hair at the nape. Coil everything into a bun together and pin. The twists should stay visible – do not over-smooth them into the bun. Takes 12 minutes, easy – twists are simpler than braids and look just as pretty.
Twists are easier than braids and look just as pretty, which is why I love this one. The double-twist detail makes the back view interesting – a great choice if you want something a little different. It suits oval and long faces, the side twists adding width. Caveat: twists unravel if the ends are not secured before coiling – pin each twist’s tail under the forming bun first, then shape the bun around them, or the rope detail disappears.
7. Half-Up Bun with a Velvet Bow
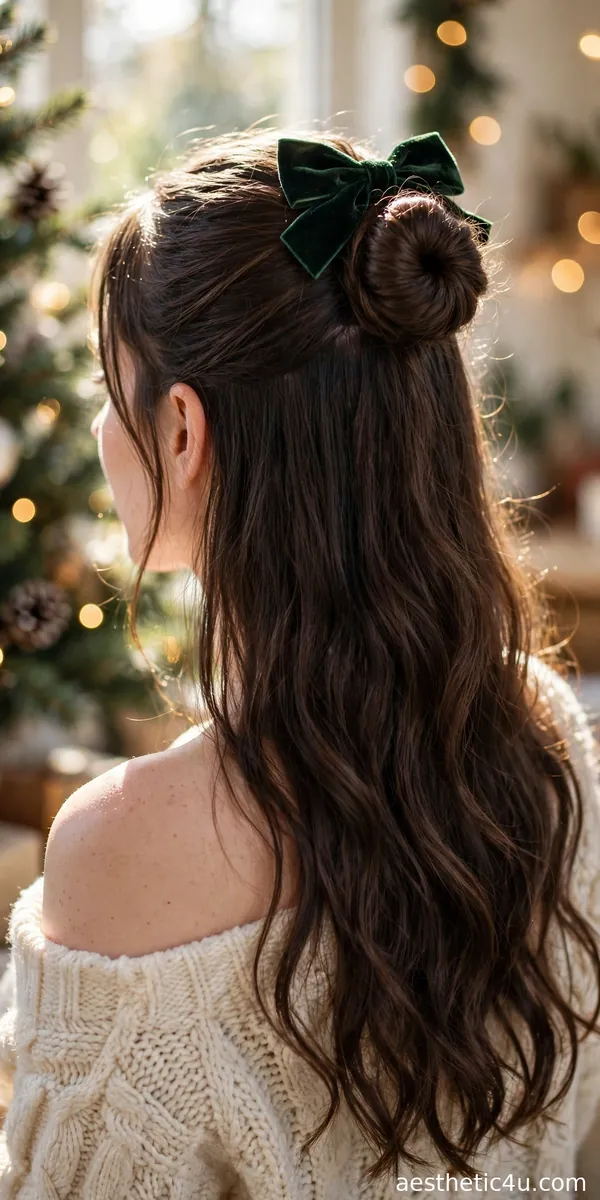
A small, smooth bun built from just the top half of the hair at the back of the head, with the rest of the long dark hair falling loose in waves – and a green velvet bow pinned above the bun for the Christmas finish. Brush hair smooth and section the top half from temple to temple. Twist the section into a bun around ear level and pin flat. Pin the bow above the bun, anchoring its backing through the bun so it cannot droop. Smooth the loose lengths with serum. Takes 12 minutes, easy – half-up styles forgive everything.
This is for anyone who loves wearing hair down but wants it off the face – the bun keeps the front tidy while the loose waves stay romantic. It suits every face shape and long hair of any texture. I would pick this for Christmas morning or a family dinner, when you want to look festive without a full updo. Tip: pin the bow through the bun, not the loose hair – it slides within the hour.
8. Romantic Loose Low Bun with Curls
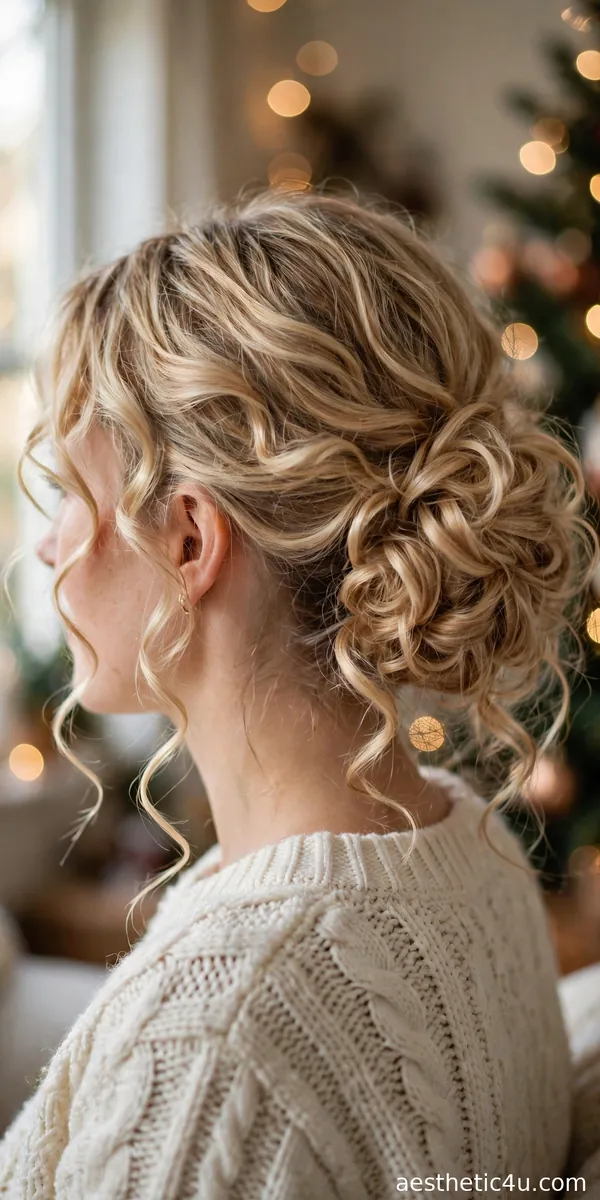
Hair curled first, then loosely gathered into a soft low bun with curls left tumbling. Wispy and romantic, never tight or severe. Curl all the hair with a 1.25-inch iron, alternating directions, and let the curls cool completely – this is essential. Gather loosely at the nape, leaving the curls intact, and pin the bun loosely so curl shapes survive. Pull a few curls free around the face and at the nape. Takes 20 minutes, easy to medium – the curling is the time investment; the bun itself is deliberately loose.
Curling first is the secret to a bun that looks soft instead of scraped-back. I adore this for date-night Christmas plans – the most romantic bun on the list. It suits oval and heart faces and all hair types with enough length to curl. Caveat: never build this bun on warm curls – they fall flat the moment you pin them. Cool curls hold their shape; warm ones surrender. Patience here pays off all evening.
9. Polished Ballerina Low Bun
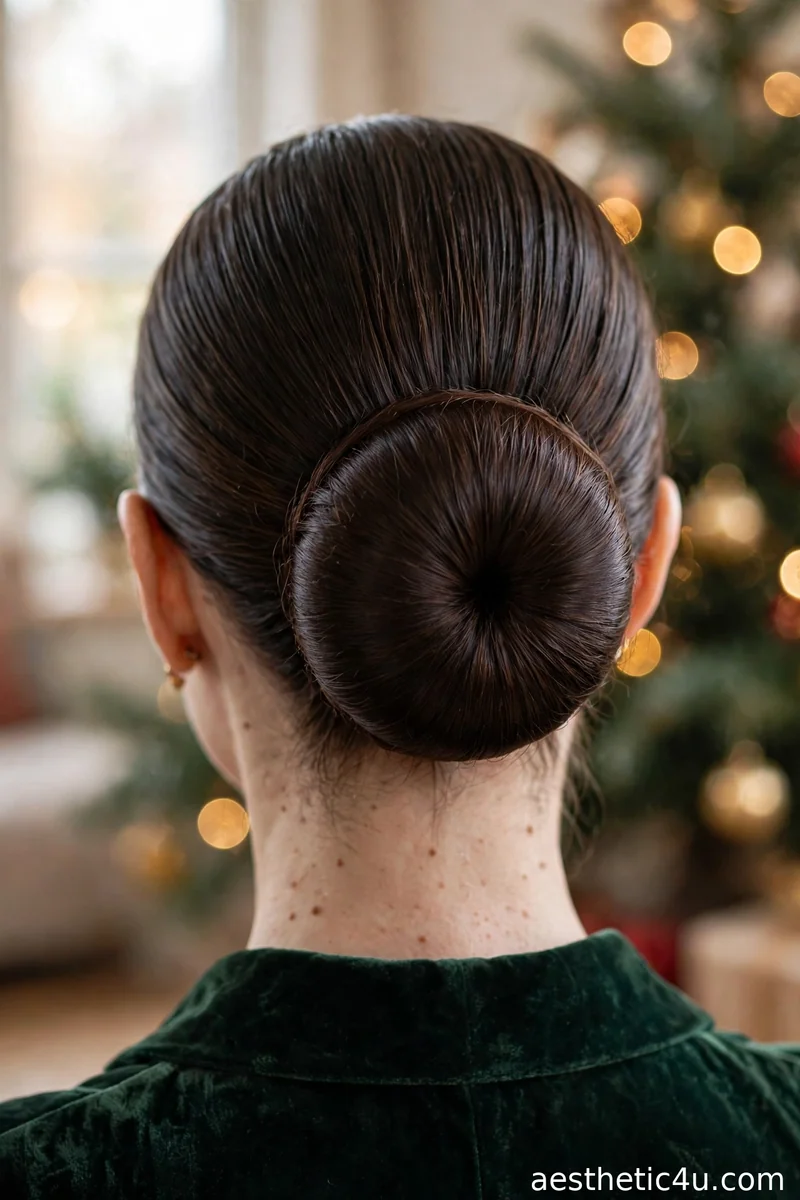
A perfectly smooth, round bun sitting low at the nape – the ballerina bun, just worn lower – every hair slicked into place for a flawless finish. Brush hair back with gel smoothed through the roots for grip. Gather into a tight low pony, twist the tail, and coil it into a compact, round bun. Pin in a tight star pattern, then smooth the surface with a brush and a final pass of serum. Check for bumps by running your palm over the bun. Takes 15 minutes, medium – the smoothness standard is high; every lump shows.
When you want to look completely put-together, this is the answer. I think of it as the power bun – it means business but still feels festive with the right earrings, and it survives the longest days without a touch-up. It suits oval and long faces. Pro tip: a hair donut helps enormously on fine hair – wrap your own hair over the donut so no synthetic shows, and you get a perfectly round bun with half the pinning.
10. Low Bun with a Wrapped Hair Base
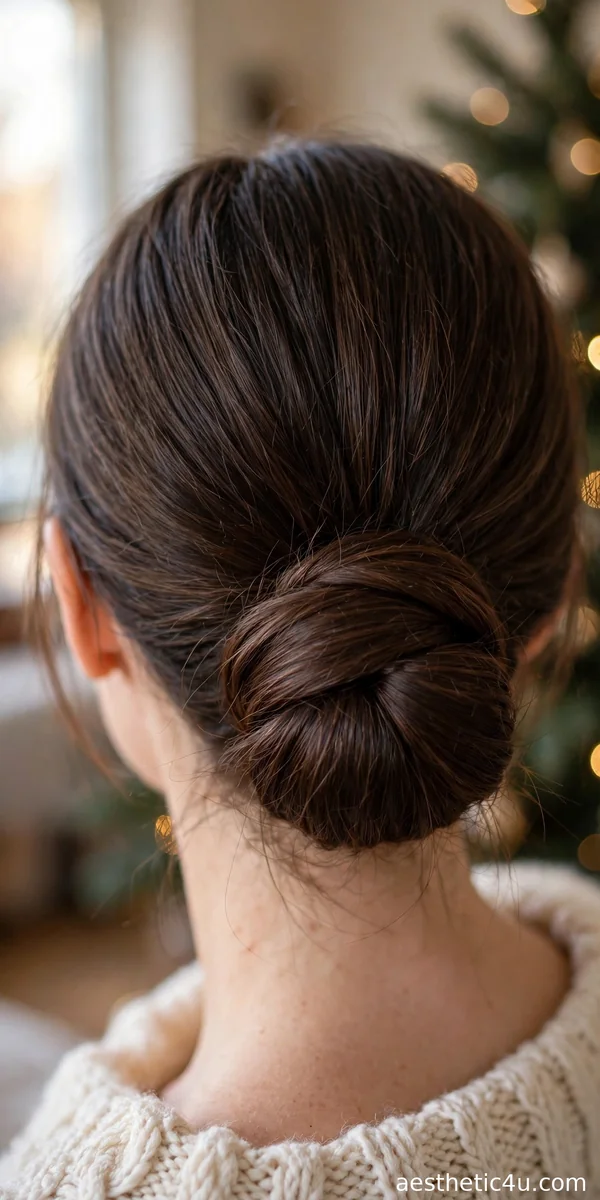
A low bun where a section of hair wraps around the base, hiding the pins and elastic for a seamless, professional finish. Build your low bun – any technique – and pin it securely. Take a 1-inch section from the bun’s underside or from behind one ear, smooth it with serum, wrap it around the bun’s base covering all hardware, tuck the end under, and pin flat with two crossed pins. Takes 12 minutes plus the bun itself, easy – one extra minute that changes everything about how the bun reads.
The wrapped base is the detail that separates a homemade bun from a salon bun. I teach this trick to every client who wears buns regularly – it takes one extra minute and changes everything. It suits all face shapes and works with any bun style. Caveat: the wrapping section must be smooth – a frizzy wrap looks worse than visible pins, so serum it well, and on very short hair use a section from the nape where length hides.
Keep exploring: 21 Christmas Hairstyles for Fine Hair With Serious Staying Power
11. Knotted Low Bun
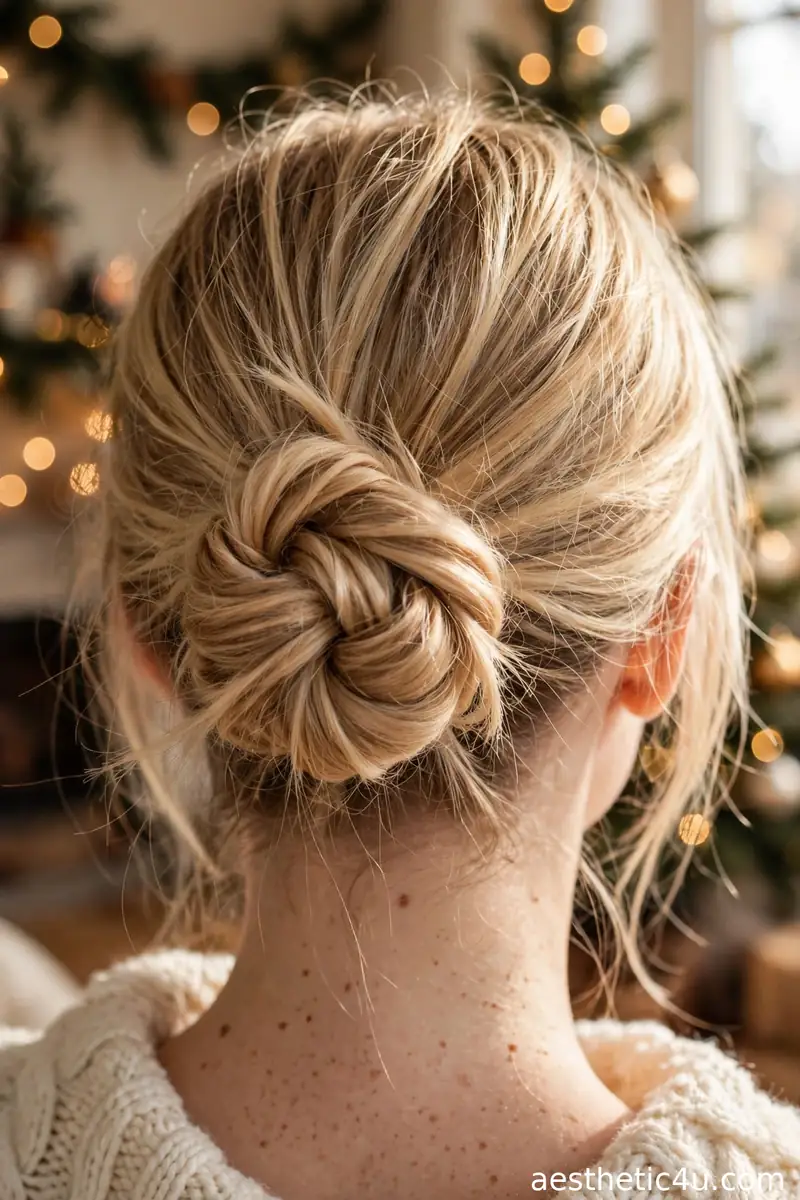
Hair literally tied in a loose knot – or two – at the nape and pinned in place, the knot creating natural texture and an interesting organic shape. Gather into a low pony, split the tail in two, tie a loose overhand knot, and pin the knot flat against the head. For longer hair, tie a second knot with the remaining ends and pin. Tuck stray ends under – and do not pull the knot tight, since looseness creates the shape. Takes 10 minutes, easy – you are just tying your hair like a shoelace, and imperfection is the aesthetic.
Knotted buns look intricate but are genuinely easy. I love the organic shape it creates – a cool, modern take on the low bun that suits oval and square faces. It works best on medium to long hair with some texture. Pro tip: this knot loosens over hours, so pin through the knot’s center – not just around it – with two pins crossed in an X, and mist the finished shape with medium-hold spray.
12. Low Bun with an Evergreen Sprig
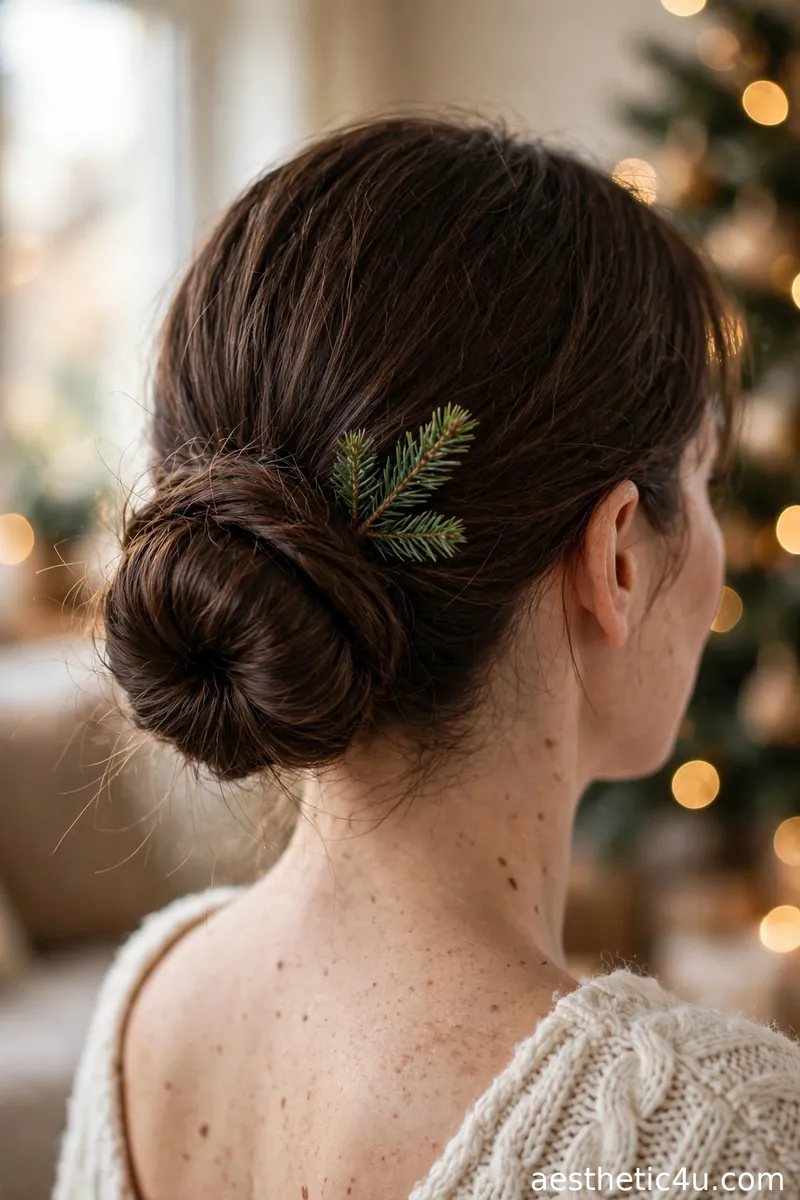
A simple low bun with a small faux evergreen sprig tucked into one side – just a touch of green against the hair. Build any neat low bun – smooth or lightly textured. Take a small faux evergreen sprig (about 3 inches) and slide its wired stem under a bun section on one side, angling it slightly upward. One sprig is enough; two maximum. If the stem will not stay, pin it with a bobby pin crossed over the wire. Takes 10 minutes plus the bun, easy – the sprig placement takes seconds once the bun exists.
Sometimes one tiny detail is all you need. The evergreen sprig is so Christmas without being over the top – I would wear this to Christmas dinner; subtle, pretty, and smell-free since it is faux. It suits every face shape. Caveat: use faux, never real – real evergreen sheds needles down your back and wilts within hours under indoor heat, while a good faux sprig looks fresh all day and packs away for next year.
13. Side-Parted Low Bun with Gold Cuffs
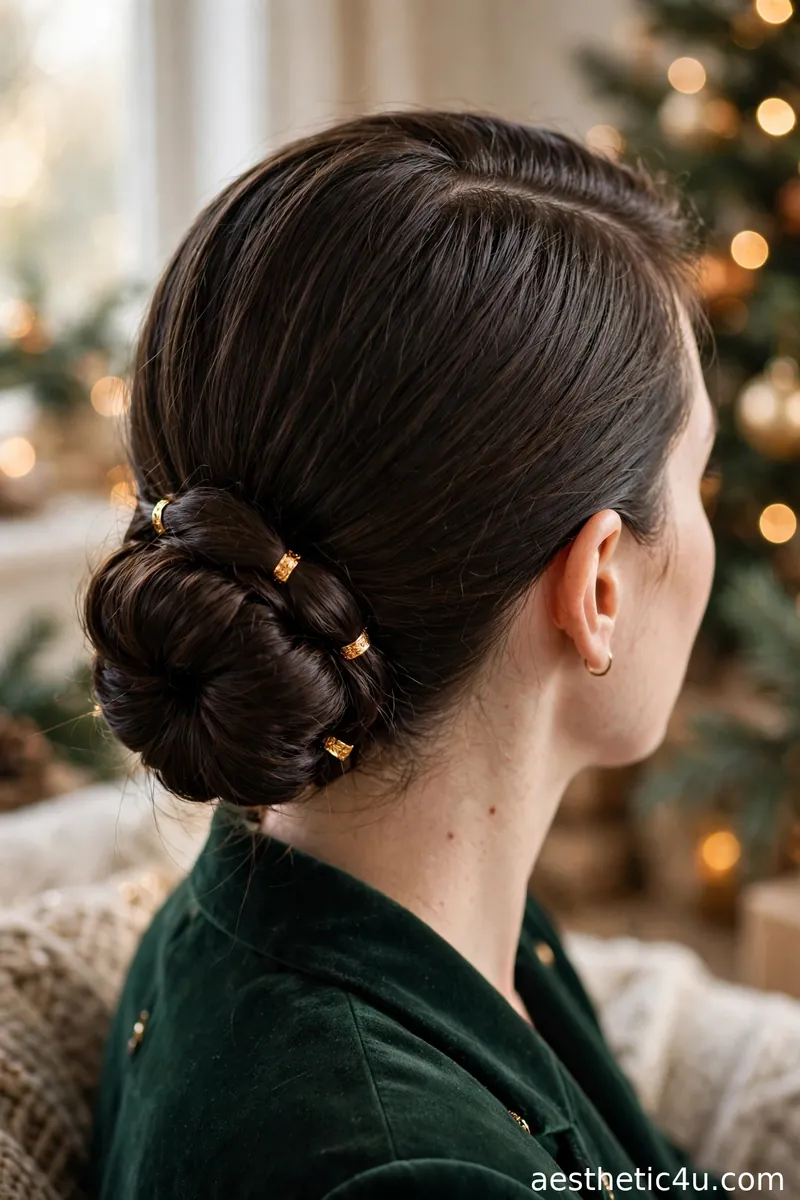
A sleek side-parted low bun with a few small gold hair cuffs placed around the bun – the gold adds warmth and holiday shine. Create a clean side part with a rat-tail comb. Smooth hair back with serum into a low bun, keeping the part crisp. Pin until seamless. Slide 3 to 4 small gold cuffs onto the bun’s outer edges – not the center – spacing them evenly, and pinch each closed. The cuffs should catch light from every angle. Takes 15 minutes, easy to medium – the sleekness demands neatness; the cuffs take seconds.
Gold cuffs are jewelry for your bun, and I am obsessed – they elevate the simplest style instantly. My pick for New Year-adjacent Christmas parties when you want a little extra sparkle. It suits oval and heart faces. Pro tip: choose lightweight aluminum cuffs over heavy metal – heavy cuffs drag and loosen the bun’s edges by evening, while light ones stay exactly where you pin them.
14. Undone Low Bun with Wispy Bangs
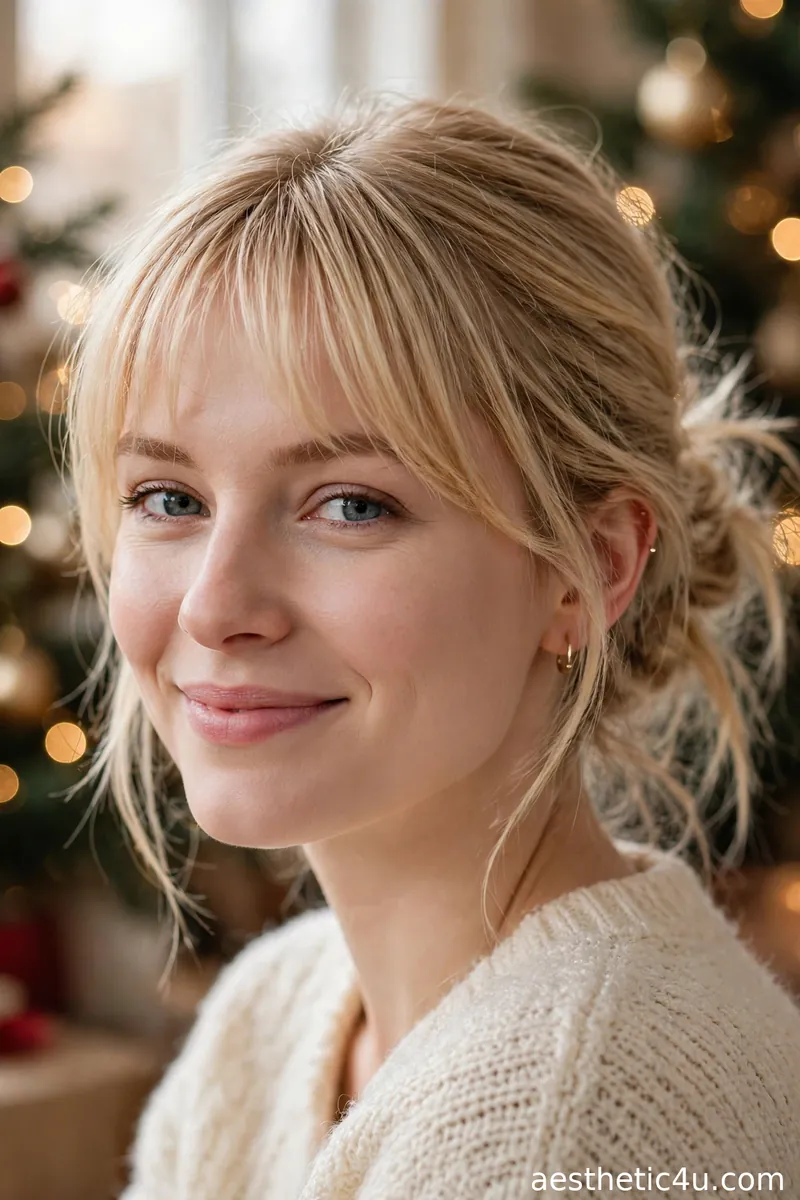
A loose, airy low bun paired with soft wispy bangs across the forehead – the bangs keep the look youthful and fresh. If you have bangs, style them first: blow-dry with a round brush, sweeping gently for softness. Build a loose, textured low bun at the nape – gather softly, twist loosely, pin with airiness. Pull a few pieces free at the sides to blend the bangs into the style. Do not scrape the crown tight; softness is the point. Takes 12 minutes, easy – the bangs do the styling work here.
Wispy bangs change the whole feeling of a bun – suddenly it is soft and sweet. I think this is the most flattering low bun for round faces, since the bangs break up forehead width and the loose bun avoids adding height where it is not needed. It is relaxed but still party-ready. Caveat: bangs plus a bun can read flat if the crown is too smooth – keep some airiness at the crown so the silhouette stays balanced.
15. Braided Crown into a Low Bun
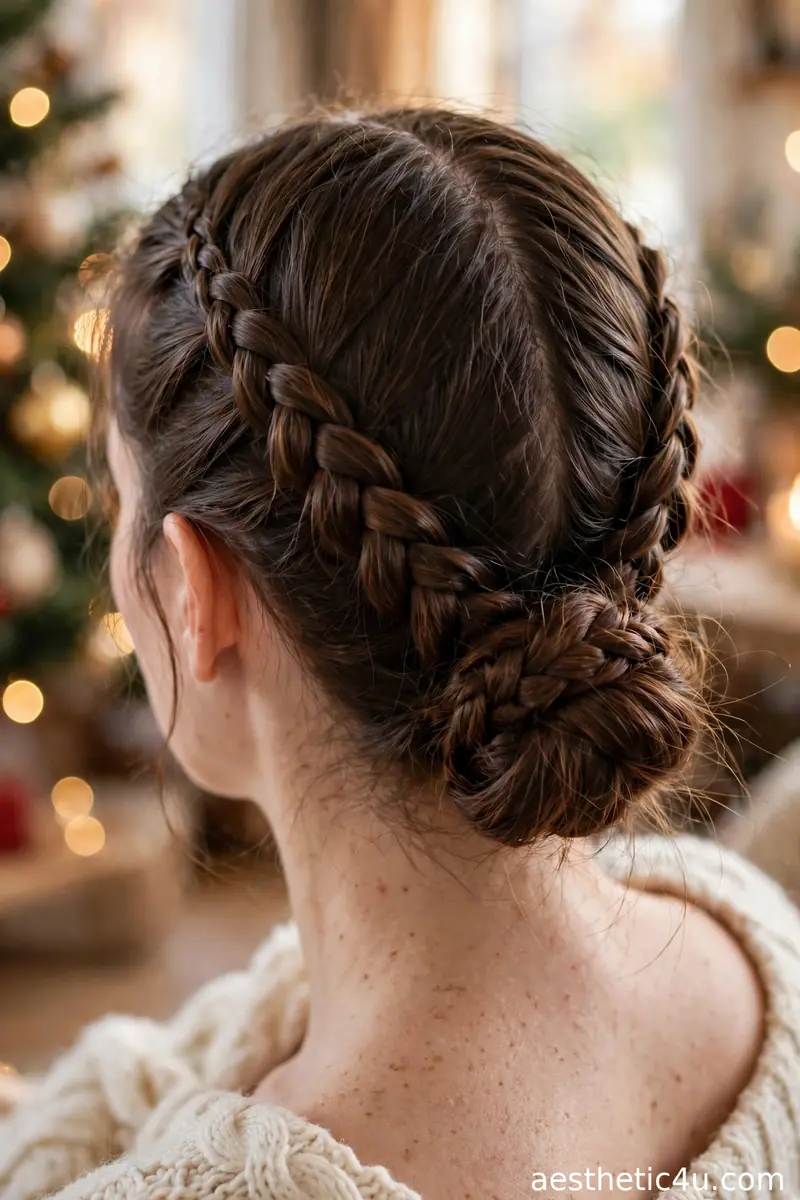
Two braids – one from each side – that travel back and merge into a low bun at the nape. Braid detail in front, bun simplicity behind. Part down the middle. French or Dutch braid each side from the temple back to the nape. Join both braids with the remaining hair into a low pony, then twist and coil into a bun, pinning securely. The braids should stay visible along the sides – do not pull them into the bun’s mass. Takes 20 minutes, medium – two braids plus a bun is three techniques, but each is simple.
I love a style with two acts: the braids frame your face in photos, and the bun keeps everything neat. A little more work, but so worth it for Christmas Day – it holds beautifully all day long. It suits oval and heart faces. Pro tip: braid with even tension on both sides, checking symmetry in the mirror as you go – mismatched braid tightness is the one flaw that shows in every photo.
Keep exploring: 23 Christmas Hairstyles for Curly Hair That Embrace the Volume
16. Half-Up Bun with a Satin Scrunchie
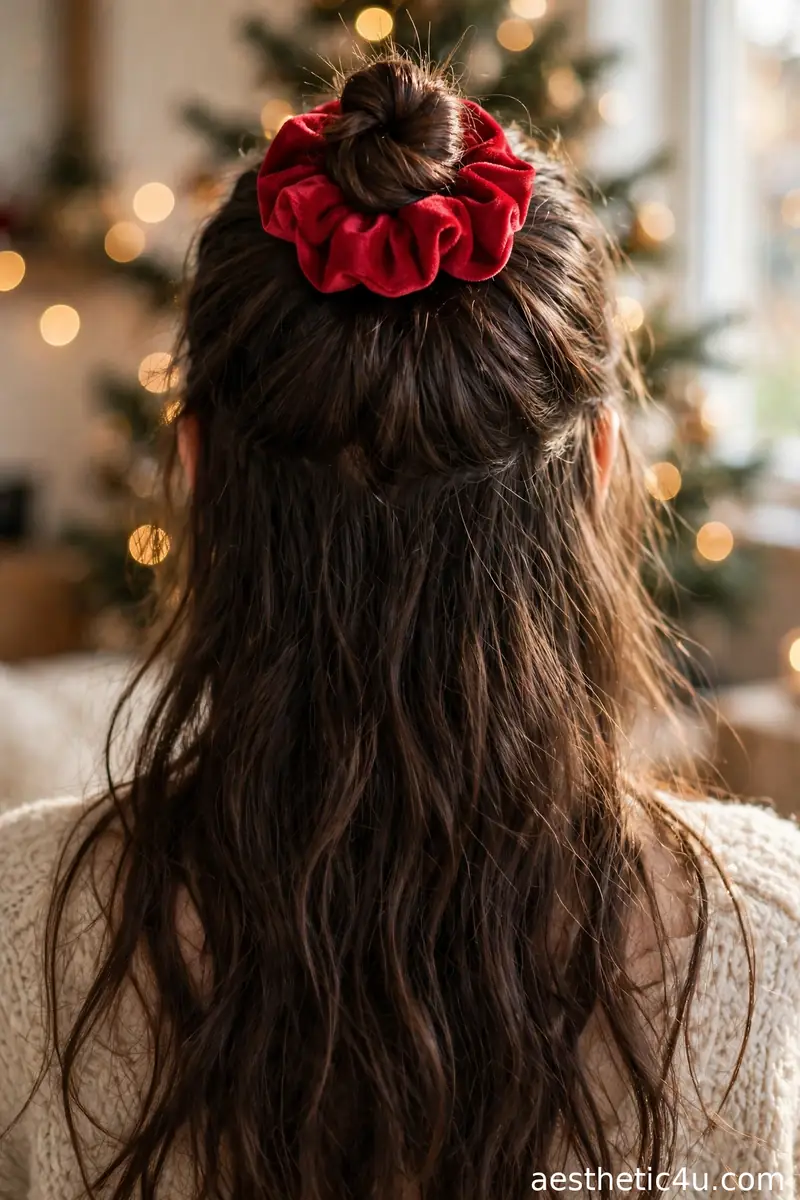
A small bun built from the top half of the hair at the back of the head, wrapped at its base with a plush red satin scrunchie – the scrunchie sits fully visible like jewelry while the rest of the long dark hair flows loose. Brush hair smooth and section the top half from temple to temple. Twist into a small bun around ear level and pin it. Wind the scrunchie twice around the bun’s base until it sits full and even, positioned deliberately visible. Smooth the loose lengths with serum. Takes 10 minutes, easy.
Scrunchies are back and this is the easiest way to wear one – half your hair up, half down. It suits every face shape and all hair types with enough length for a bun. I would pick this for a Christmas outing or a dinner, when you want a festive touch with zero effort. Caveat: satin scrunchies with weak inner elastics stretch and slide – buy one with a strong core and wind it twice, or it migrates by evening.
17. Vintage Rolled Low Bun
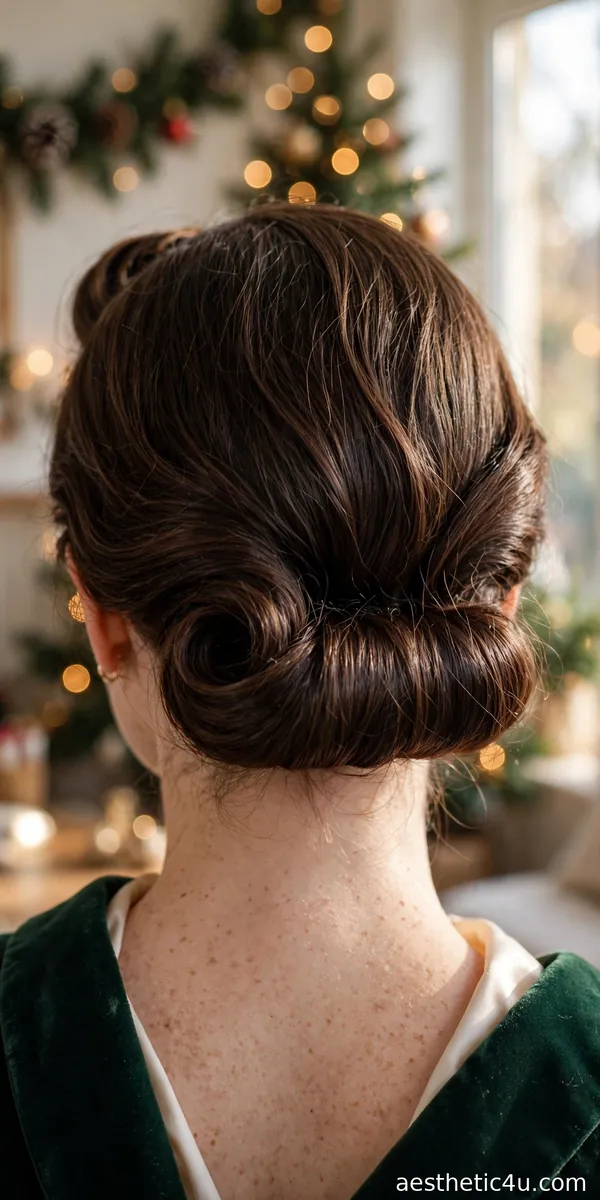
Hair rolled upward and tucked into a smooth roll at the nape – the classic Gibson tuck. Vintage, elegant, and beautifully simple. Gather hair into a low, loose pony (or skip the elastic). Roll the tail upward toward the nape, tucking it into itself, and pin along the roll’s underside – the pins hide inside the roll. Smooth the surface with a brush and serum. For extra hold, backcomb the tail lightly before rolling. Takes 15 minutes, medium – the rolling motion feels strange until the second attempt, then it clicks.
The Gibson tuck is over a century old and still perfect – that tells you everything. I love it for anyone who adores vintage style; it looks stunning with a red lip and simple pearls. It suits oval and long faces. Pro tip: this tuck holds best on hair with some texture – second-day hair or texturizing spray – since squeaky-clean hair slips out of the roll. Pin generously along the underside where nobody sees.
18. Half-Up Bun with a Glittering Hair Vine
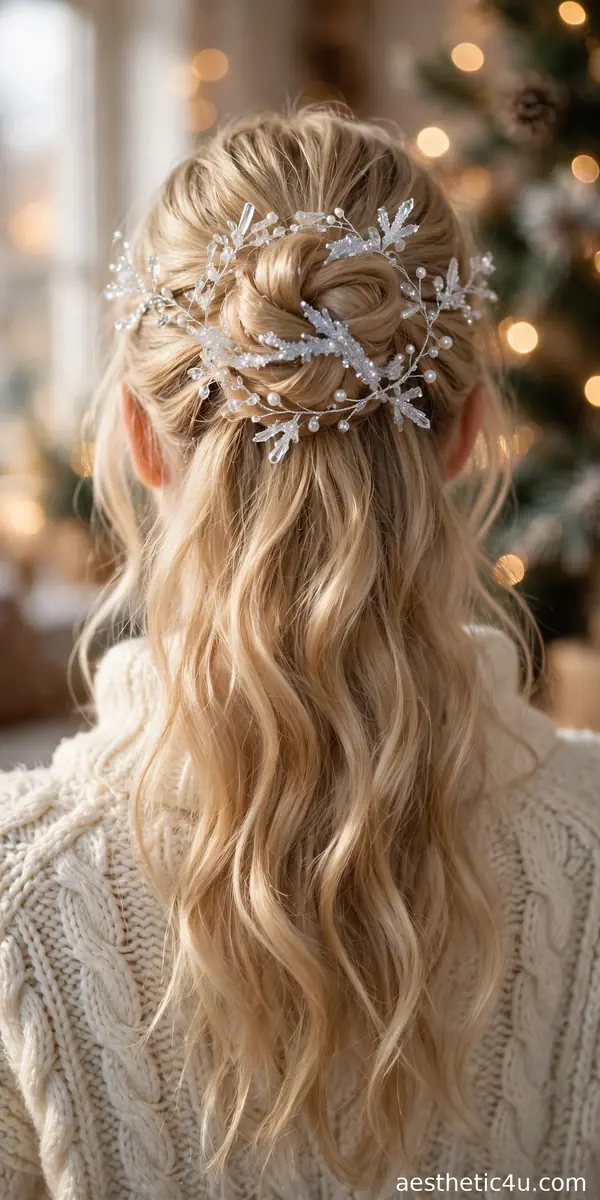
A bun built from the top half of the blonde hair at the back of the head, with a flexible crystal and pearl hair vine woven around it – the vine sparkles like frost while the long wavy hair flows loose underneath. Brush hair smooth and section the top half from temple to temple. Twist into a bun around ear level and pin it. Weave the vine around the bun’s perimeter in soft curves, tucking both ends under the bun. Smooth the loose waves with serum. Takes 15 minutes, easy – the vine is pre-made.
Ending with the most glamorous half-up of all. A hair vine turns a simple bun into bridal-level beautiful, and the loose waves keep it soft instead of severe. It suits every face shape and needs enough length for both the bun and the flow. I would save this for the biggest night of the season; you will look unforgettable. Caveat: vines snag on knitwear and wool coats, so put the vine in after you arrive, not before the car ride.
How to Choose the Right Low Bun Style for You
Start with your hair’s texture, because it decides your finish. Fine hair suits textured, pancaked, or accessorized buns – sleek buns can look sparse. Thick hair suits sleek, twisted, and wrapped buns – texture happens naturally. Curly hair makes gorgeous buns with minimal effort; just gather and pin, letting the curls do the work. Next, consider your face. Round faces want height or asymmetry – a slightly off-center bun or a deep side part. Long faces want width – side twists or volume at the sides, never extra crown height. Oval faces can wear anything; square faces soften with loose pieces around the jaw. Then match the occasion. Formal dinners and weddings want sleek, smooth, or vine-dressed buns. Casual gatherings allow messy, knotted, scrunchie, and sprig styles. And be honest about your pinning skill: if bobby pins defeat you, choose scrunchie, bow-clip, or donut-assisted buns over freeform sculpted ones. My stylist rule: a secure simple bun always beats an ambitious collapsing one. Nobody ever complimented a bun that fell apart – but everyone notices one that lasts.
Styling Tips & Common Mistakes to Avoid
First: pin in a star pattern, pushing pins into the bun’s underside where they disappear – visible pins are the mark of a rushed bun. Second: cross two pins in an X at every stress point; crossed pins hold four times better than singles. Third: build on second-day hair or texturizing spray – clean, silky hair rejects pins. Fourth: always finish with hairspray, but apply it in two light layers from 10 inches away rather than one heavy blast – even coverage without crunch. The mistakes: making the bun too tight and too high, which reads severe and gives you a headache – low buns should sit at the nape and feel comfortable, not strapped. Second: skipping the back check – every bun is a 360-degree style, and a hand mirror takes ten seconds. Third: under-pinning. Most collapsing buns simply needed four more pins – when you think you are done, add four more. A bun should survive you leaning back in a chair, hugging your aunt, and dancing – pin for your real evening, not your mirror.
Final Thoughts
The low bun is proof that simple can be stunning. Pick the version that matches your plans – sleek for formal nights, messy for cozy ones – and let your earrings do the rest. My advice: master one ten-minute everyday bun and one polished party bun, keep a handful of bobby pins and a travel hairspray in your bag, and always do the back-mirror check before leaving. Effortless chic is yours this Christmas – pin it, spray it, and go enjoy every minute of it.
Follow Us On Pinterest: Easy To Find Next Style