Sana
Christmas dinner is the one meal where everyone is watching, and your hair should be ready for it. These christmas dinner hairstyles look expensive and polished, but none of them cost a salon visit. I picked styles that are simple to do, comfortable to wear through a long evening, and beautiful in every photo around the table. This season the dinner-table trends I keep seeing are sleek chignons, velvet ribbons, pearl pins, and glass-like shine.
This guide is for hosts setting the table and guests taking their seats: anyone who wants to look refined without spending an hour in the bathroom. It covers every hair length and texture, with beginner-friendly styles you can do in ten minutes and a few polished classics worth practicing. Whether your dinner is formal or family-casual, there is a look here that fits.
The secret to looking expensive is not the style itself. It is the finish: smooth, neat, and intentional. In this guide you will learn exactly how to build each look, which tools and products create that polished finish, how long each style really takes, and the small mistakes that make dinner hair look tired by dessert. I will be straight with you: pick your favorite, practice it once, and enjoy dinner without touching your hair all night.
1. Polished Low Chignon
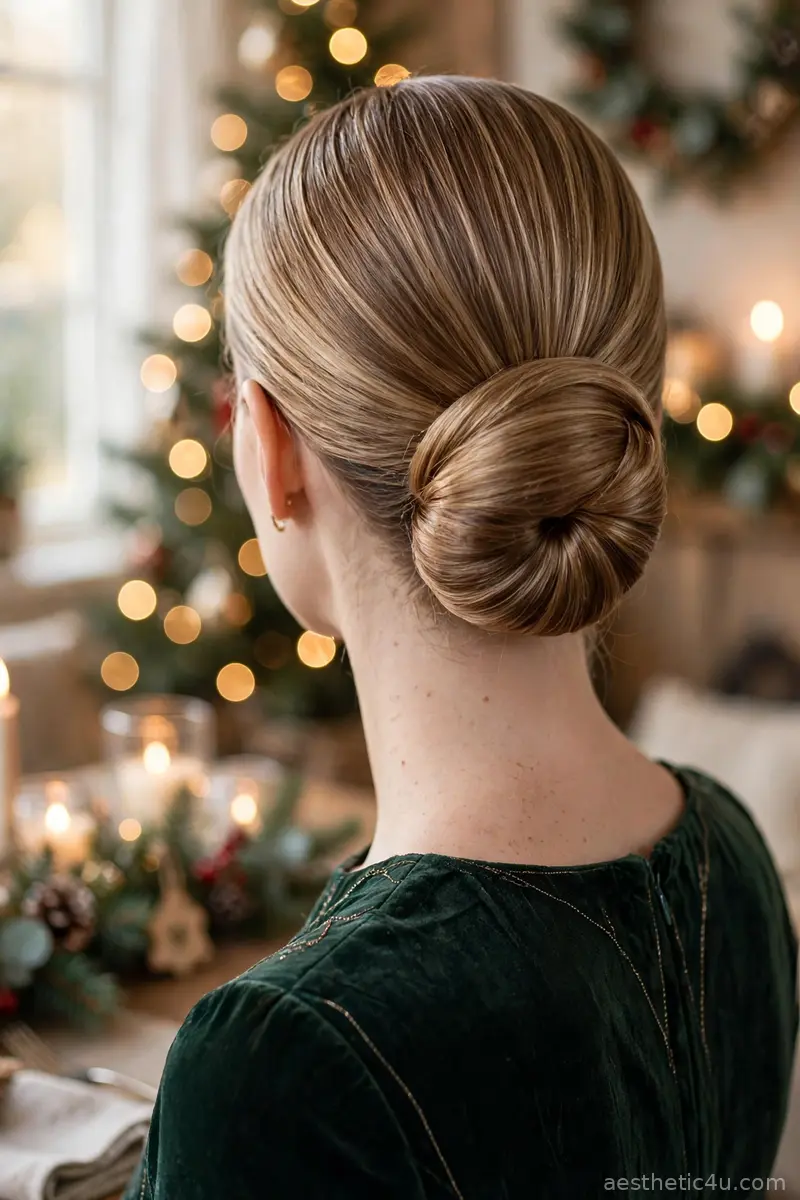
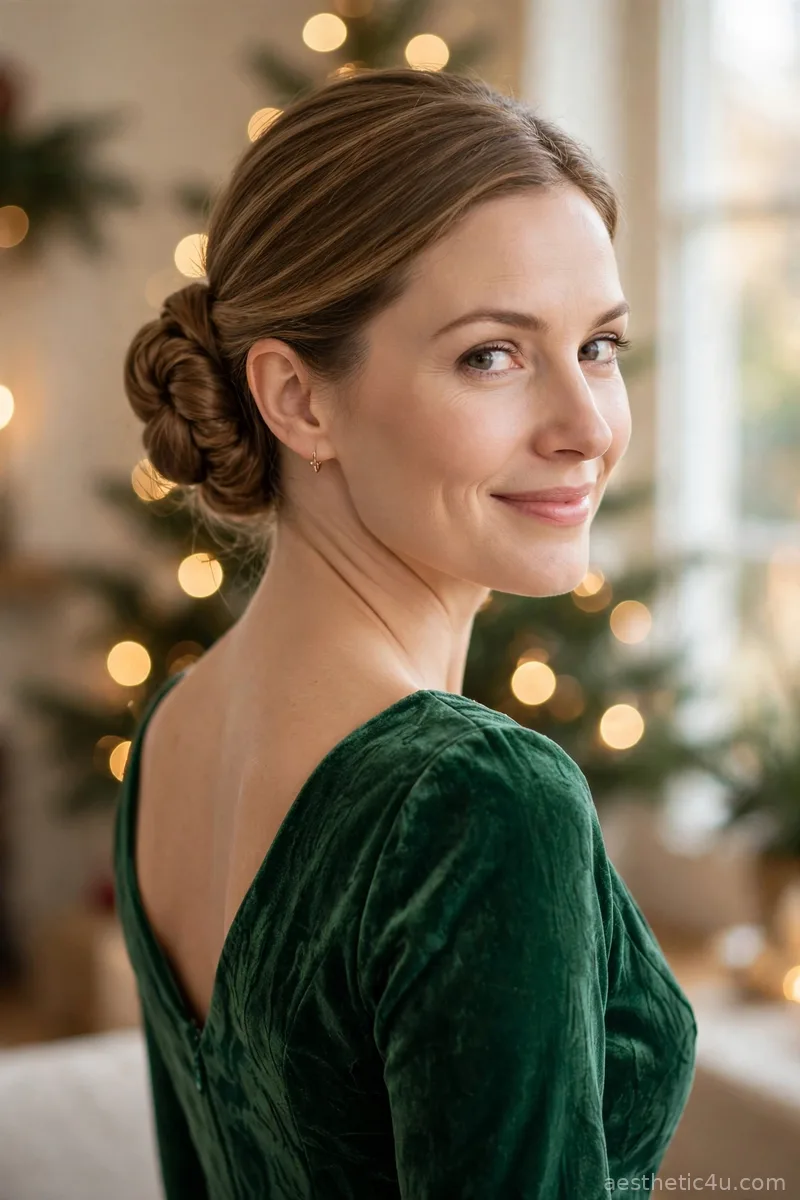
A smooth, neat chignon sitting low at the nape, every strand in place with a glossy finish: it looks like you hired a stylist, but it takes ten minutes. Gather the hair low, twist into a tight coil, pin securely with long bobby pins, then smooth the top with a serum and mist lightly with a shine spray. Keep the part clean and precise. It is beginner to intermediate, and the neatness is what reads expensive here. Pin in a star pattern with at least six pins so the chignon never loosens.
This is my ultimate expensive-look recommendation, suiting every face shape and every dinner dress. I’d pick this when I want to look flawless with minimal risk. Pro tip: keep a smoothing serum on hand to tame flyaways right before you sit down, because dinner lighting shows every stray hair. Mist the finished chignon with a light shine spray so it glows in dinner lighting.
2. Velvet Ribbon Ponytail
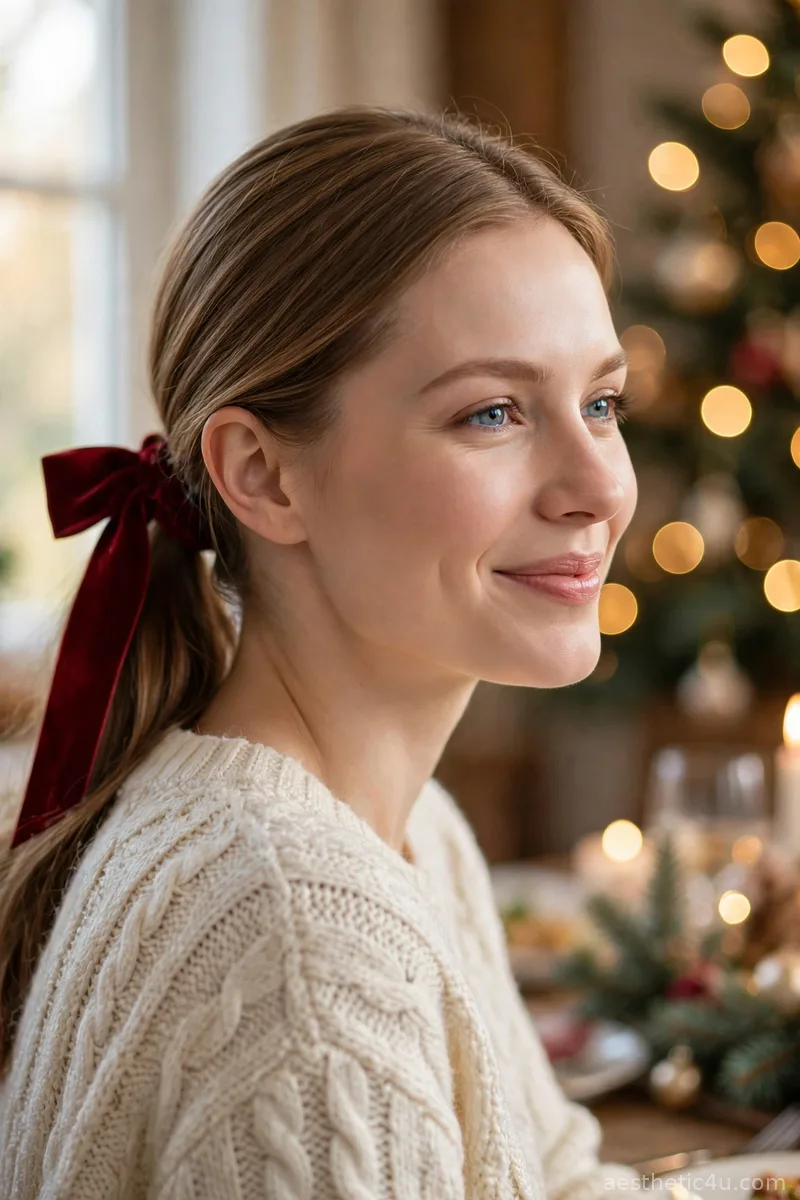
A sleek low ponytail tied with a wide velvet ribbon, the hair smooth and the ribbon the only decoration: simple and striking. Brush the hair back with a smoothing serum, secure low at the nape with a snag-free elastic, then tie a wide velvet ribbon over it in a full, even bow. It takes under ten minutes, is beginner-easy, and it looks intentional in every photo around the table. Brush the hair back with a boar-bristle brush so the top lies perfectly smooth.
This is perfect when you are hosting dinner and need hair that stays put through cooking and serving. I’d pick a black or deep red ribbon for a rich, expensive feel. Honest caveat: a narrow ribbon can look lost on thick hair, so choose a wide ribbon, at least 1.5 inches, for real presence. Tie the bow snugly over the elastic and fan the loops wide for fullness.
3. Classic French Twist
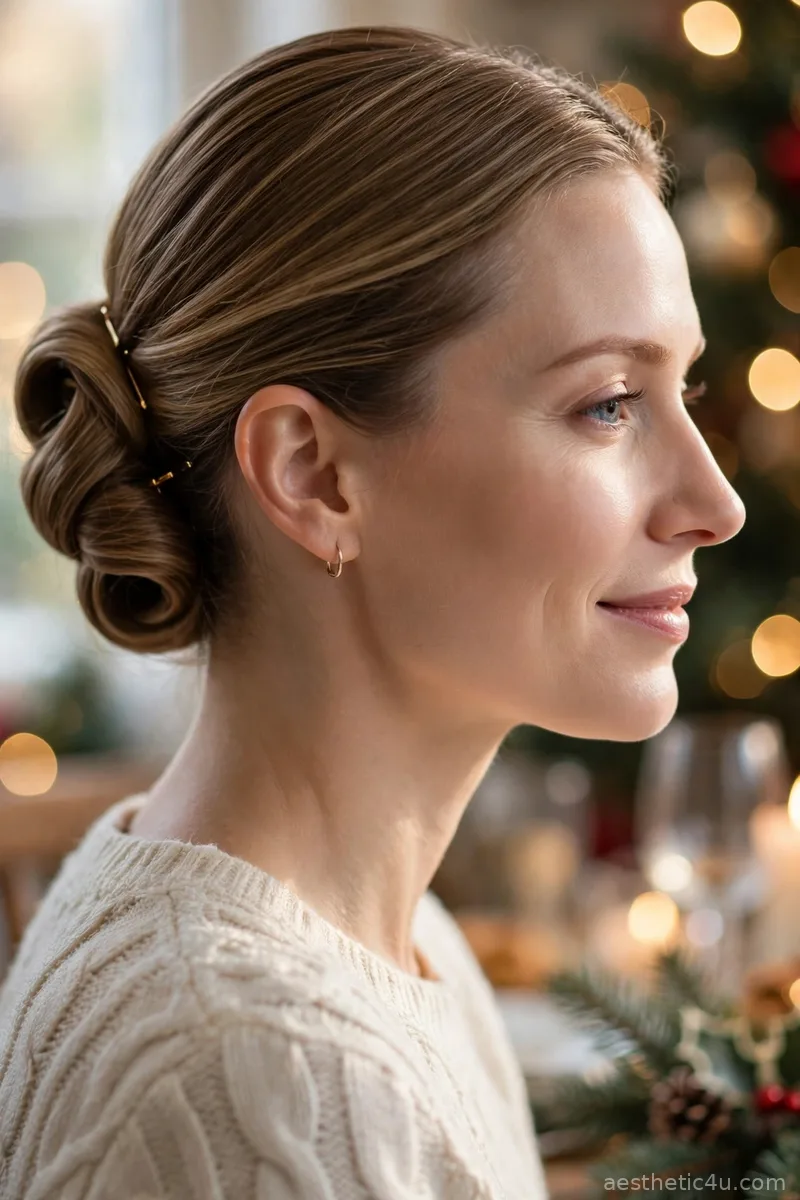
The timeless French twist, rolled smooth and pinned tight, with a clean vertical shape: the most elegant updo there is. Tease the crown lightly, gather the hair to one side, roll upward firmly against the head, and pin with long bobby pins tucked inside the roll. Smooth the surface with a serum. It takes 15 to 20 minutes, is intermediate, and the crisp shape is what makes it timeless. Tuck every pin fully inside the roll so no metal shows from the outside.
This suits oval, oblong, and heart-shaped faces and works on medium to long hair. I’d pick this when I want to feel like the best-dressed person at the table. Pro tip: practice the roll once and it becomes second nature; use at least six long pins, because a twist held by three pins will not survive the evening. It pairs beautifully with statement earrings and a bare neckline.
4. Sleek Center-Part Blowout
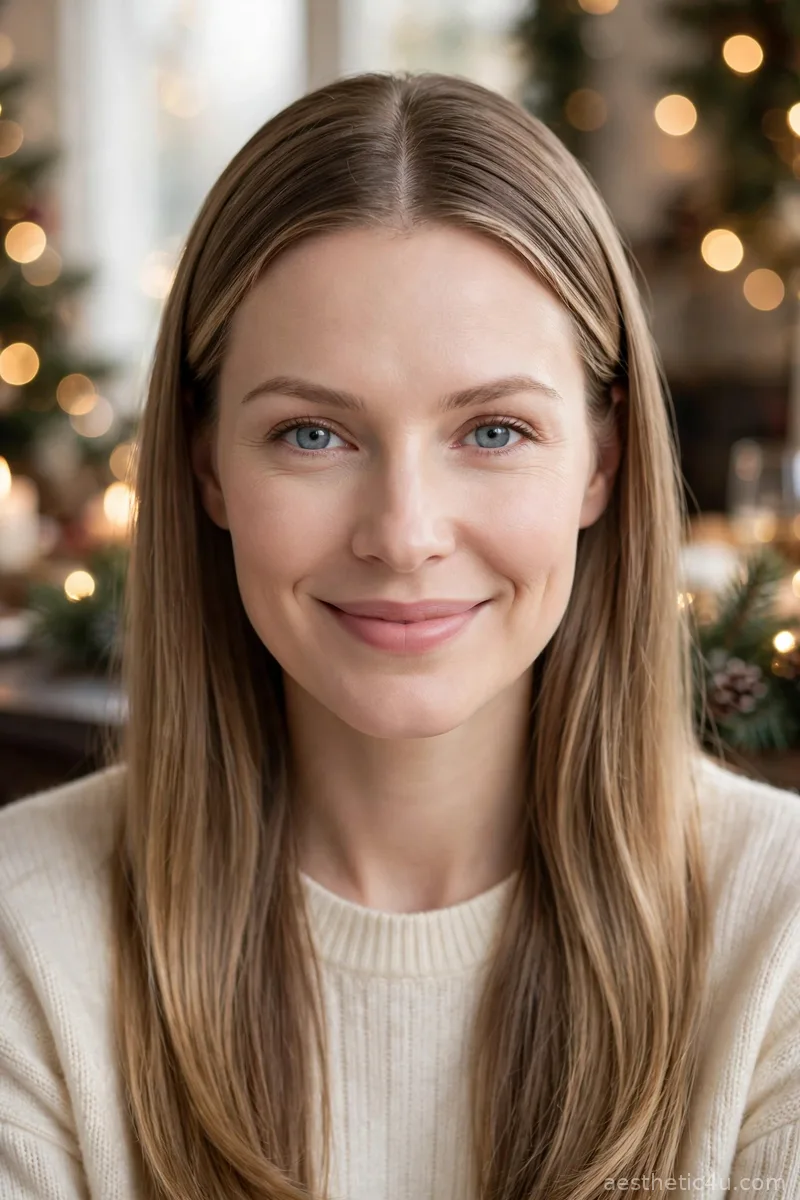
Hair blown out smooth with a sharp center part and glossy ends: modern, minimal, and all about shine. Blow-dry in sections with a large paddle brush for smoothness, create the center part while damp so it sets cleanly, then press a shine serum through the lengths and finish with a cool shot. It takes 25 to 35 minutes, is intermediate, and shine is everything here. Work a volumizing mousse into damp roots first so the blowout keeps its body through the evening.
This suits oval, heart, and long faces and works on medium to long hair. I’d pick this with a simple dress and bold lipstick when I want expensive without an updo. Honest caveat: the center part must be truly straight, so part it with the handle of a tail comb and check in the mirror, because a wobbly part ruins the minimalism.
5. Elegant Wrapped Top Knot
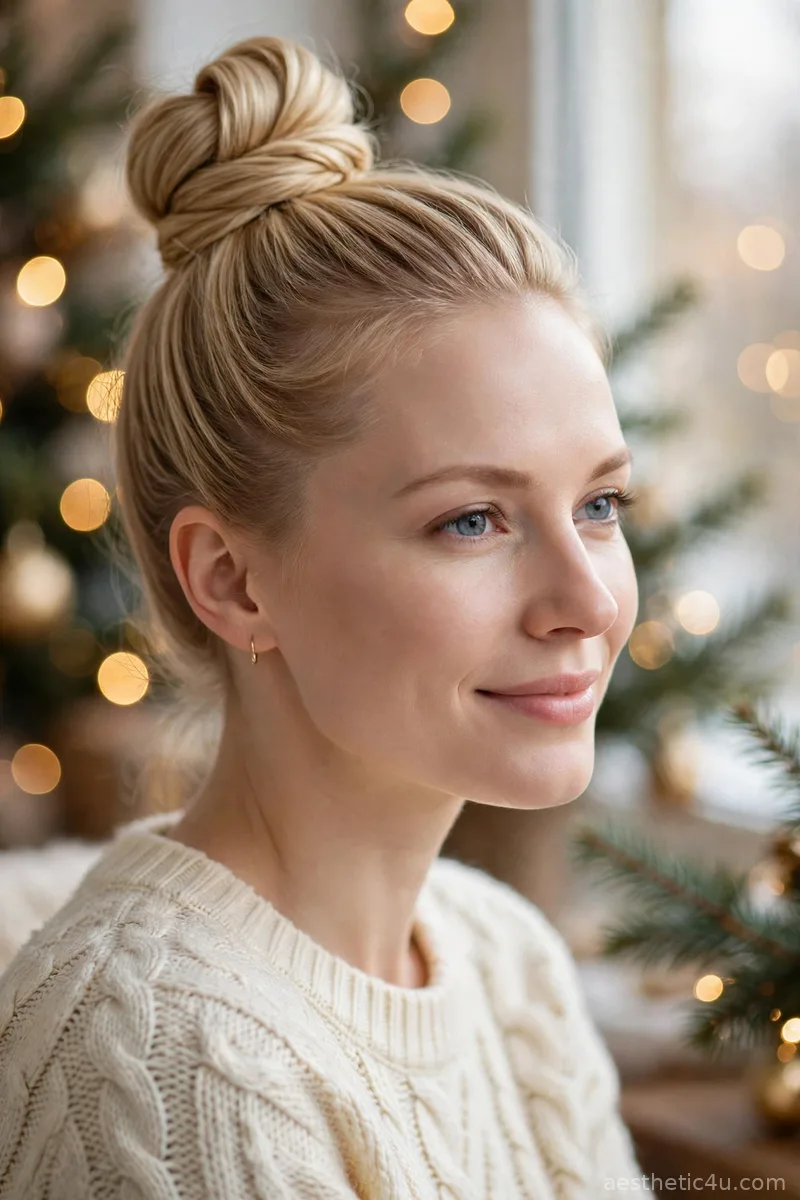
A smooth top knot with the hair wrapped neatly around its base: clean, sculpted, and completely off your face and shoulders. Gather into a high ponytail, twist the tail, wrap it around the base, and pin securely, smoothing the sides with a little gel. It takes 10 to 15 minutes, is beginner to intermediate, and it looks far more polished than a casual bun. Smooth the sides with a pea-sized amount of gel applied with a toothbrush along the hairline for a flawless finish.
This suits oval, heart, and long faces and works on medium to long hair. I’d pick this when I am serving dinner and need hair out of the way. Pro tip: keep the sides smooth with a little gel for that expensive finish, and use a donut form underneath if your hair is fine so the knot looks full. It keeps you cool in a warm kitchen, which hosts will appreciate.
Keep exploring: 21 Elegant Christmas Hairstyles That Never Go Out of Style
6. Soft Twisted Half-Up
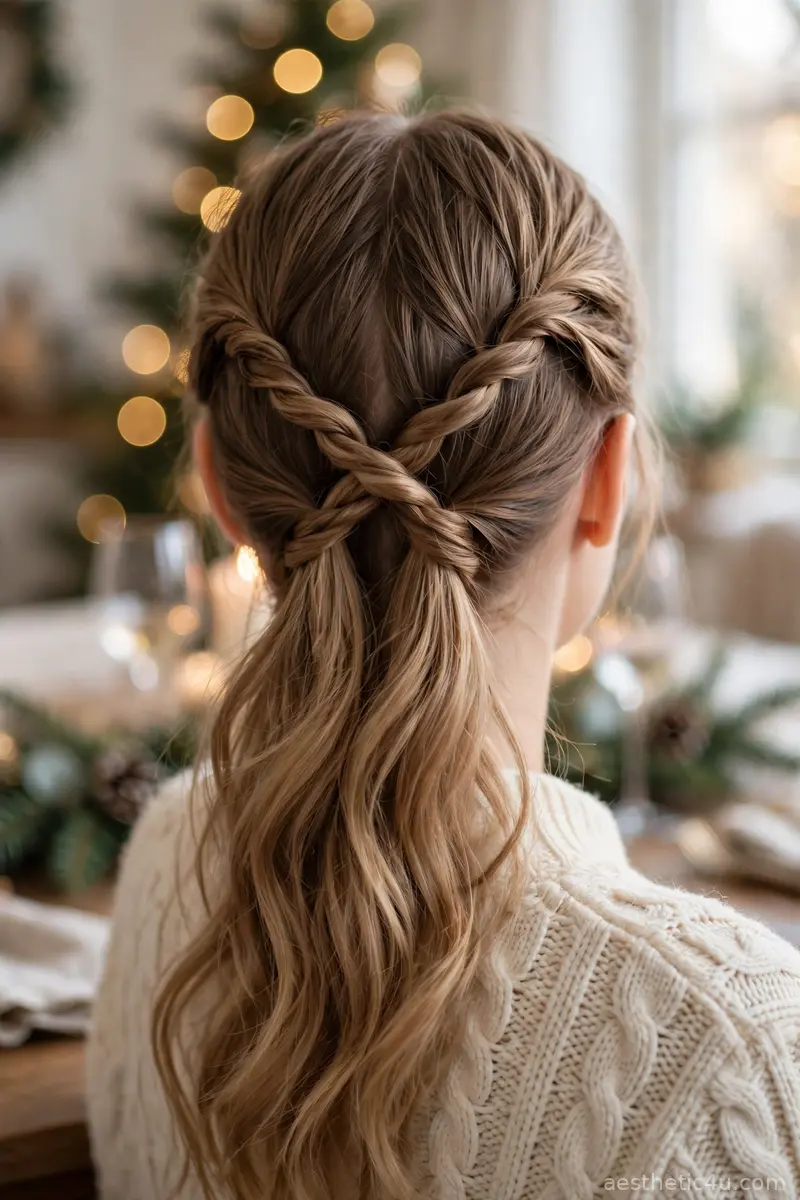
Two soft twists pinned at the back with the rest of the hair loose: gentle, not tight, relaxed and pretty. Take a two-inch section from each temple, twist loosely back, cross at the back of the head, and pin underneath, then soften the loose lengths with a large iron or leave natural. It takes about ten minutes, is beginner-easy, and it keeps hair out of your face while you eat and talk. Backcomb the crown lightly before twisting for a little extra lift.
This suits almost every face shape and works on shoulder-length to long hair. I’d pick this for a family dinner where comfort matters. Honest caveat: loose twists slip on silky hair, so mist the sections with a texturizing spray first, and pin in an X pattern for the strongest hold. It keeps hair out of your face while you eat, talk, and laugh.
7. Pearl-Pinned Low Bun
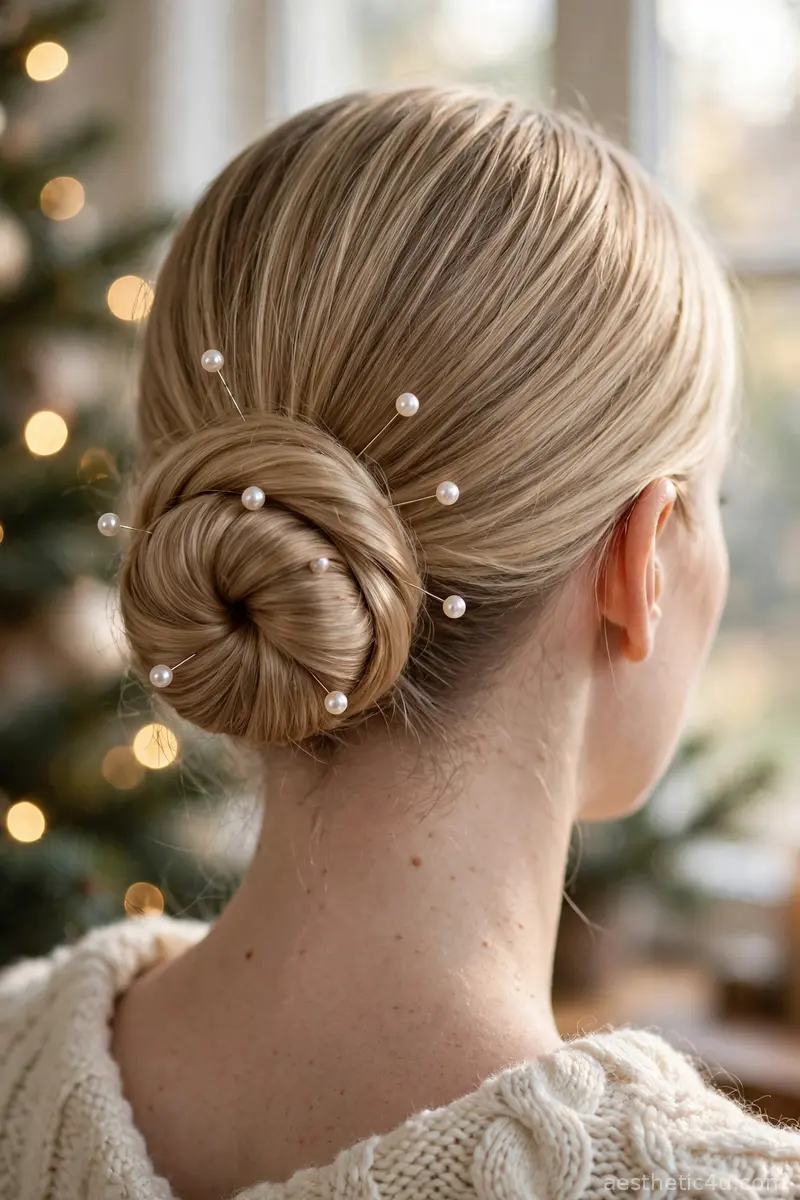
A neat low bun scattered with small pearl pins: the bun itself simple and smooth, the pearls making it look like jewelry. Twist the hair into a tidy low coil, pin securely, smooth the top with serum, then place six to eight pearl pins at varying angles and depths through the coil. It takes 10 to 15 minutes, is beginner-easy, and the pearls elevate the simplest base. Vary the pin depths so some pearls sit on top and others nestle into the coil.
This suits every face shape and works on medium to long hair. I’d pick this when I want elegance on a budget, because pearl pins cost almost nothing but look so refined. Pro tip: they suit every hair color and every dinner dress, so keep a mixed-size set in your kit; place the largest pearls where the light hits first.
8. Glossy Straight Lob
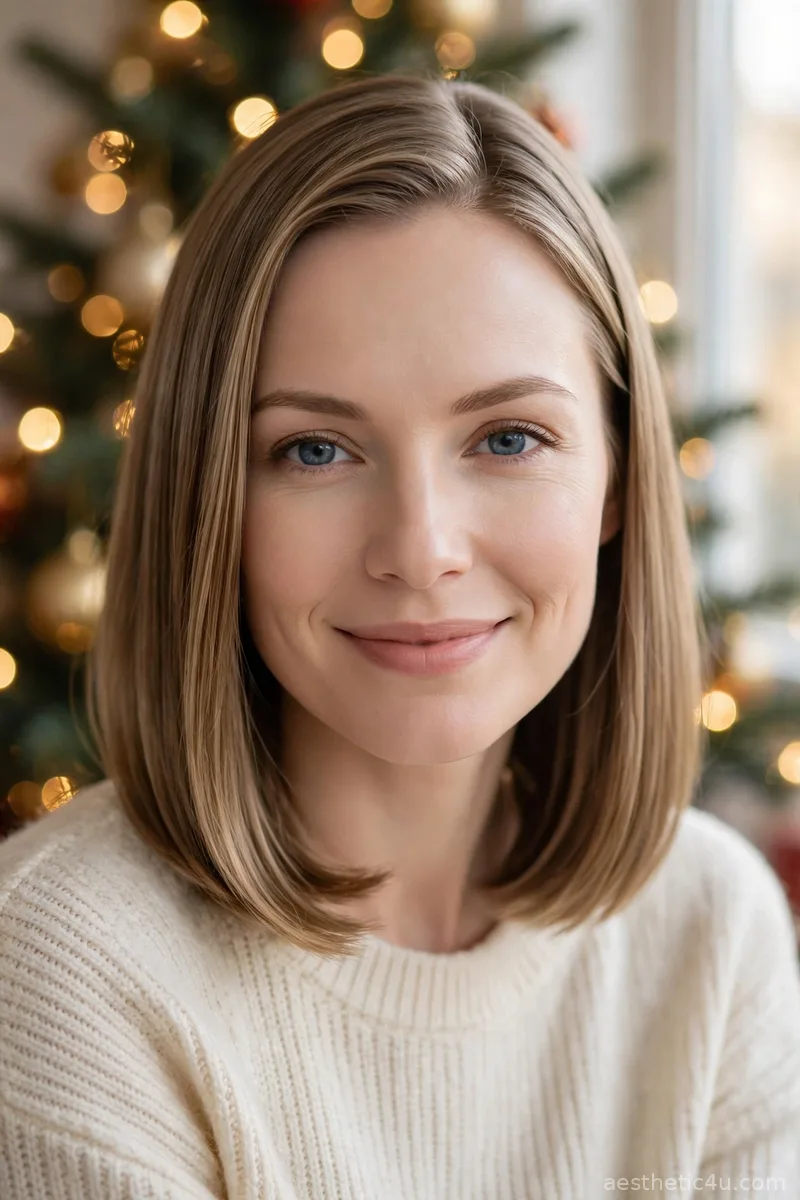
A shoulder-length cut styled pin straight with a mirror shine, the ends tucked slightly under for a sleek, modern finish. Flat-iron in thin sections with a heat protectant, bend the ends under slightly with the iron, then press a shine spray through the lengths. It takes 20 minutes, is beginner-easy, and a shine spray on the ends is the only product you need. Run the iron slowly down each section only once to get maximum shine without heat damage or frizz.
This suits oval, heart, and square faces and is made for the lob. I’d pick this when I have a lob and want it dinner-ready, because it is chic and low maintenance. Honest caveat: pin-straight hair shows dry ends mercilessly, so get a dusting trim before the holidays and keep the ends moisturized with a light oil. A weekly glossing treatment keeps the mirror shine going all season.
9. Braided Crown with Ribbon

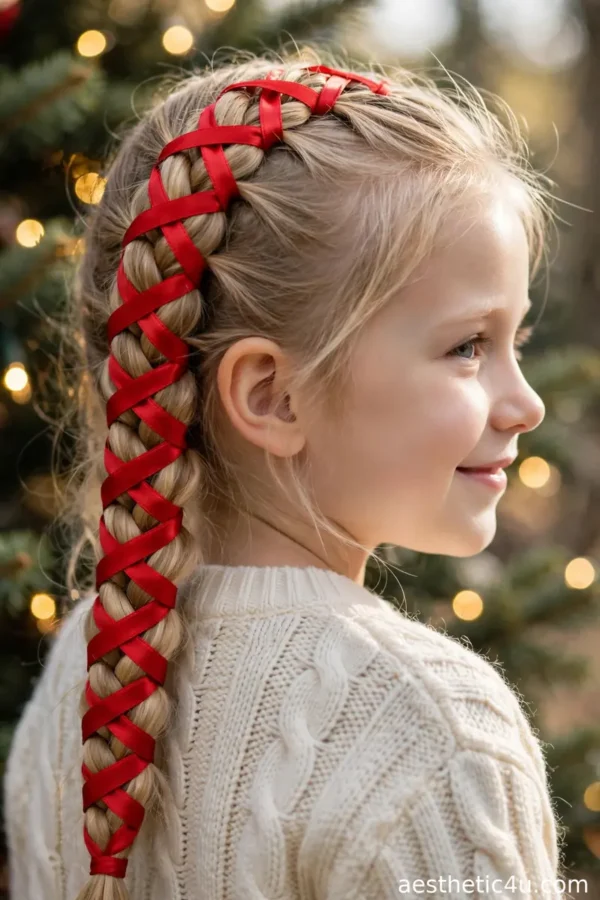
A braided crown wrapped around the head, finished with a ribbon woven through the braid for color and softness, keeping everything in place. Dutch-braid from one ear around to the other, feeding a velvet ribbon in as you go, then pin the tail underneath and tie the ribbon ends in a bow. It takes 20 to 30 minutes, is intermediate, and it survives cooking, serving, and hugging. Keep the ribbon flat as you braid so it shows in a clean line along the crown.
This suits oval and heart-shaped faces and works on medium to long hair. I’d pick this when I am hosting and need all-day hold. Pro tip: a velvet ribbon in a holiday color makes it dinner-table beautiful; braid on day-old hair so the pins grip, and use plenty of them in X shapes. It also keeps every strand off your neck through a warm, busy evening.
10. Sophisticated Side Bun
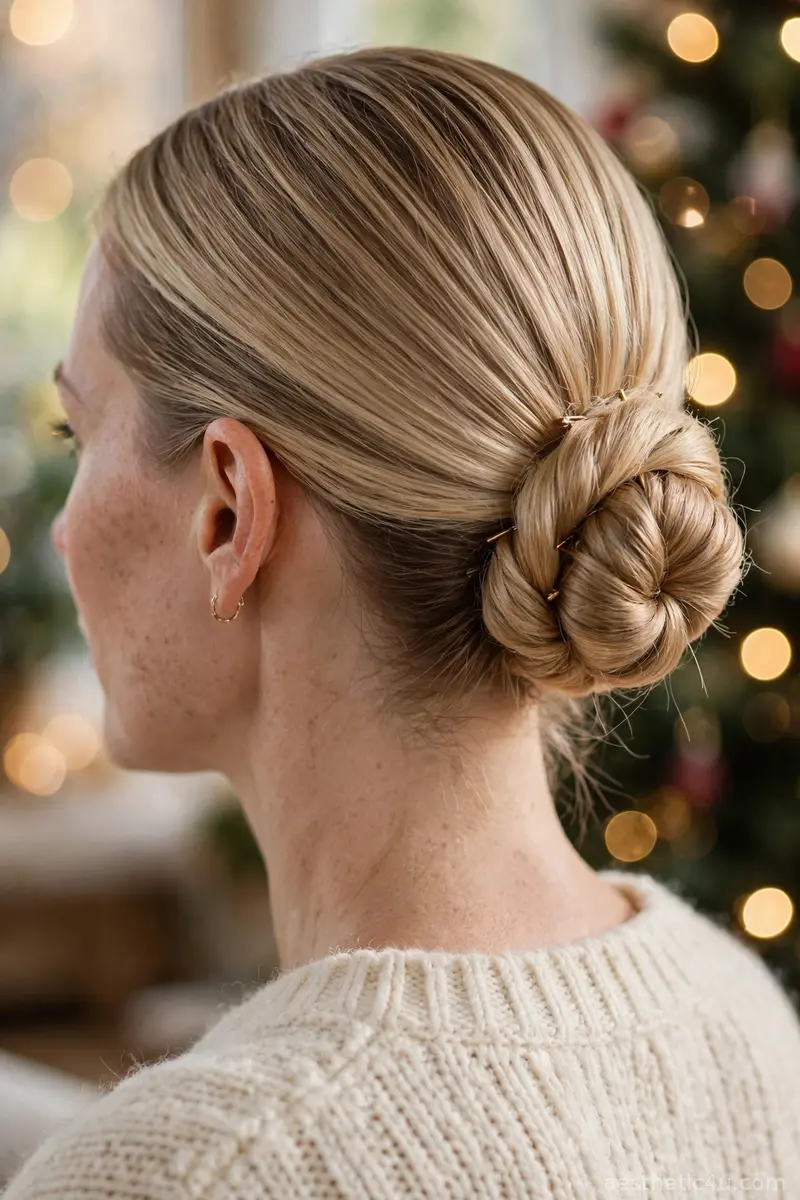
A smooth bun pinned low on one side of the neck, the asymmetry making it interesting while the finish stays polished and neat. Sweep the hair to one side, twist into a tidy bun at the nape’s side, pin securely, and smooth the top with serum. It takes 10 to 15 minutes, is beginner-easy, and it looks graceful in every photo. Sweep the hair smoothly to one side with a paddle brush before twisting so the top lies flat and polished.
This suits oval, heart, and long faces and works on medium to long hair. I’d pick this with an off-shoulder top so the bare side shows. Honest caveat: the side placement loosens faster than a centered bun, so anchor it with at least six pins and keep two spares in your bag for the evening. It leaves one shoulder bare, which suits off-shoulder tops beautifully.
Keep exploring: 19 Christmas Eve Hairstyles Too Gorgeous to Save for Christmas Day
11. Simple Satin Headband Look

Hair styled smooth and simple, finished with a satin headband that can be thin and subtle or wide and bold while the hair itself stays calm. Blow-dry or flat-iron smooth with a heat protectant, press a shine serum through the lengths, then place the headband about an inch behind the hairline. It takes 20 minutes, is beginner-easy, and it is the easiest expensive-looking trick I know. Push the band gently back after placing it to create a little lift at the crown.
This suits every face shape and works on short to long hair. I’d pick a deep red or black satin headband for dinner when I want to look put together in seconds. Pro tip: choose a band with a silicone grip strip so it stays put through the whole meal without sliding forward. It dresses up even freshly washed hair with zero real styling.
12. Textured Messy Ponytail
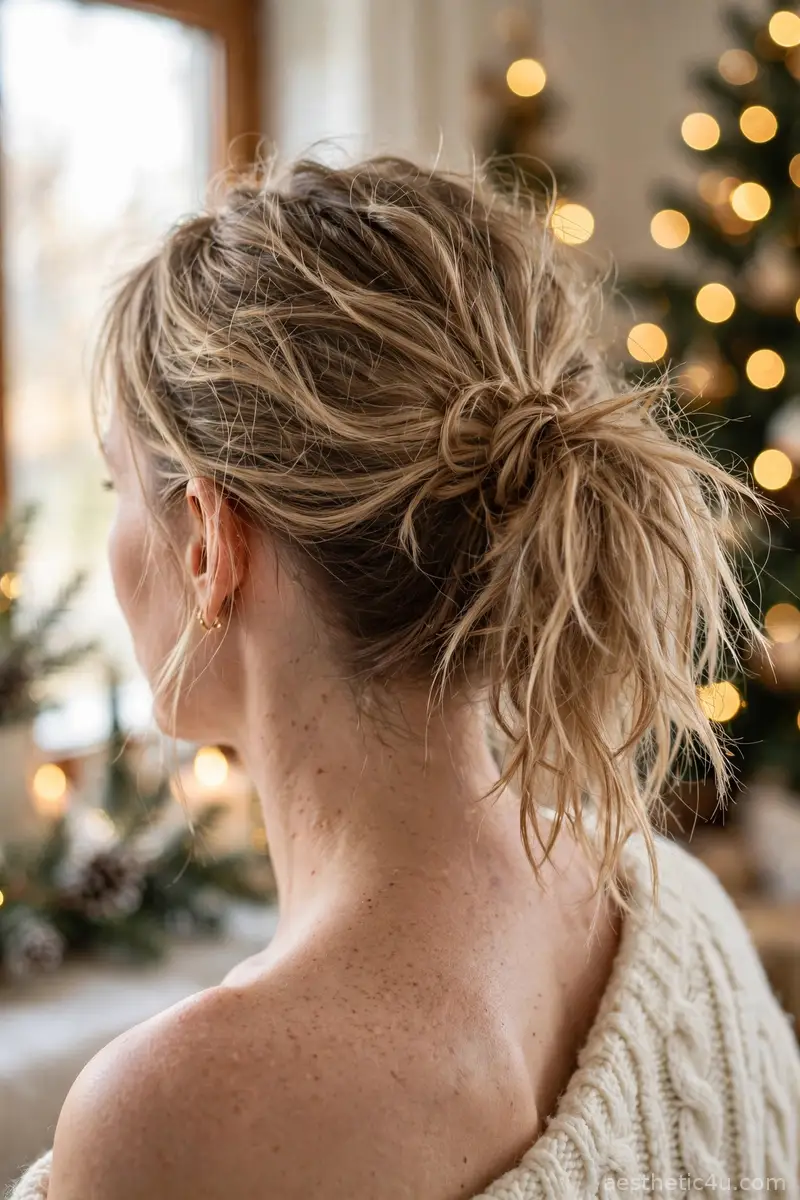
A relaxed ponytail tied at the back of the head with tousled, piece-y texture through the crown and tail, wispy face-framing strands left loose for softness. Gather the hair with your fingers instead of a brush, secure mid-back with a snag-free elastic, then tug gently at the crown and pinch small sections of the tail to break up the smoothness. Pull two thin strands out in front and mist with a light texturizing spray. It takes under ten minutes, is beginner-easy, and the undone texture is what keeps it modern.
This suits oval, heart, and round faces and works on medium to long hair. I’d pick this for a family-casual dinner when I want to look effortless. Honest caveat: there is a line between textured and tangled, so keep the crown smooth-ish and concentrate the messiness in the tail; a mirror check from the back keeps it intentional. It is comfortable enough to wear from the first toast to dessert.
13. Romantic Loose Waves
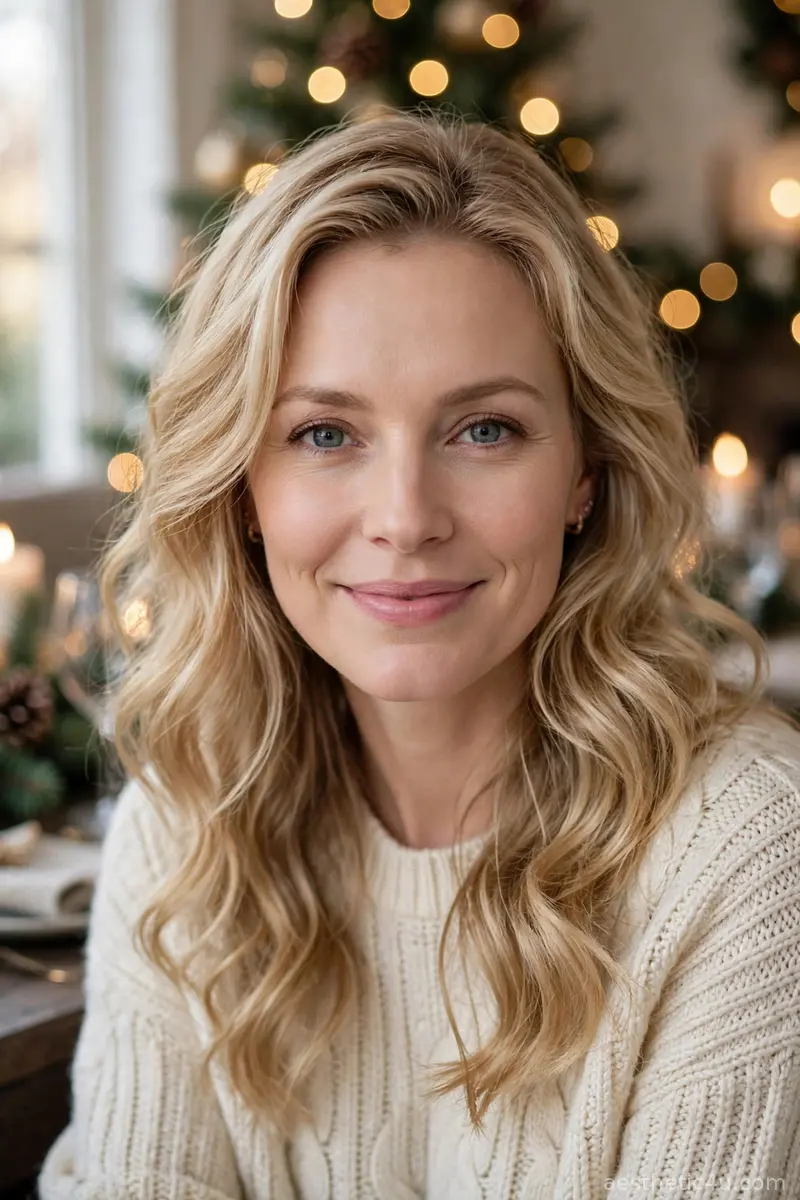
Soft, loose waves falling naturally around the shoulders, brushed out for a touchable finish: romantic without being fussy. Wrap 1.5-inch sections around a large iron away from the face, let them cool, then brush through thoroughly with a paddle brush until they relax into soft bends. It takes 25 to 35 minutes, is beginner to intermediate, and the brushed-out softness is what keeps it dinner-appropriate. Let each section cool completely before brushing so the soft wave pattern sets properly and lasts.
This suits every face shape and works on medium to long hair. I’d pick this for a family gathering where I want to look nice but stay comfortable. Pro tip: brush the waves out fully, because half-brushed curls look unfinished; finish with a shine spray rather than a heavy hairspray to keep the touchable feel. It suits cozy family dinners and candlelit tables equally well.
14. Twisted Chignon with Brooch
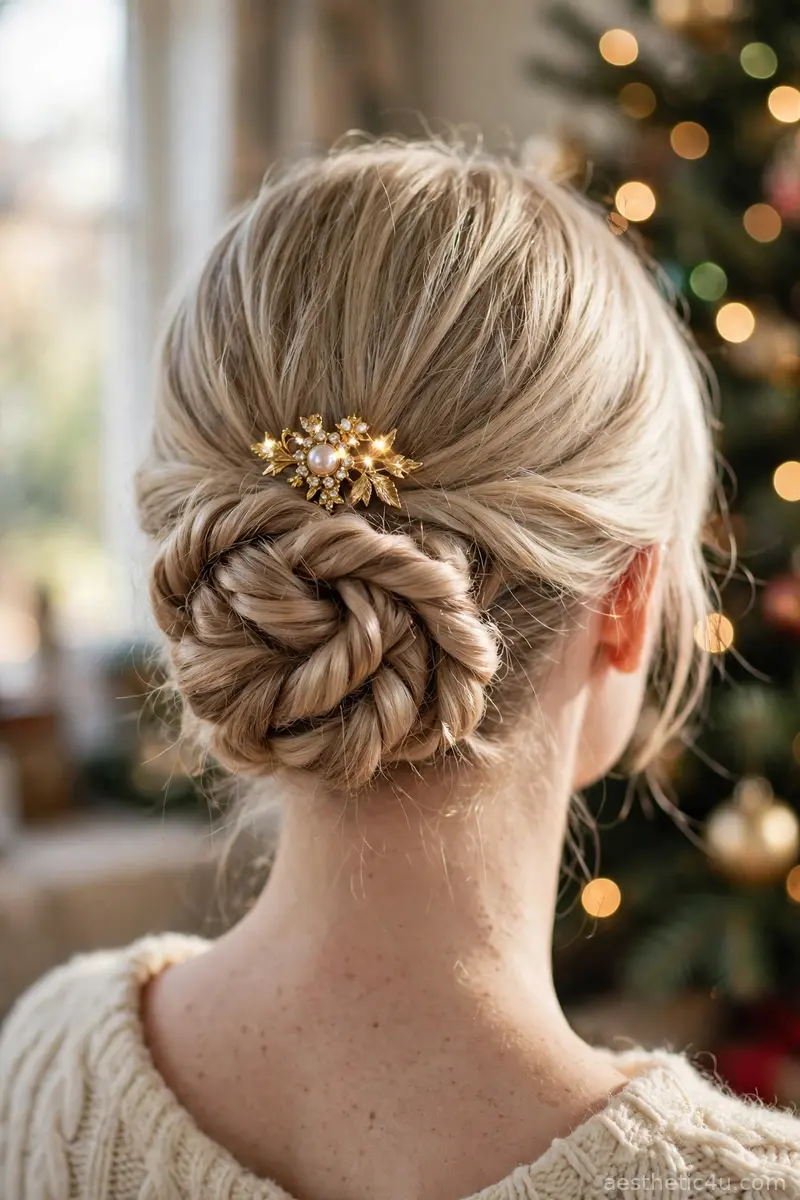
A low chignon built from twisted strands, finished with a vintage brooch: the twists give it texture, the brooch gives it personality. Divide into sections, twist each tightly, wrap together at the nape, pin securely, then pin the brooch slightly off-center where it catches the light. It takes 15 to 20 minutes, is beginner to intermediate, and one brooch is enough, so let it be the star. Mist each twist with a light-hold spray before wrapping so the texture stays defined.
This suits oval, long, and heart-shaped faces and works on medium to long hair. I’d pick this when I want an updo with character for a formal dinner. Honest caveat: a heavy brooch drags the style down, so choose a light to medium-weight piece and anchor it through the bun’s base, not just surface hair. It shows off earrings beautifully while the brooch adds personality.
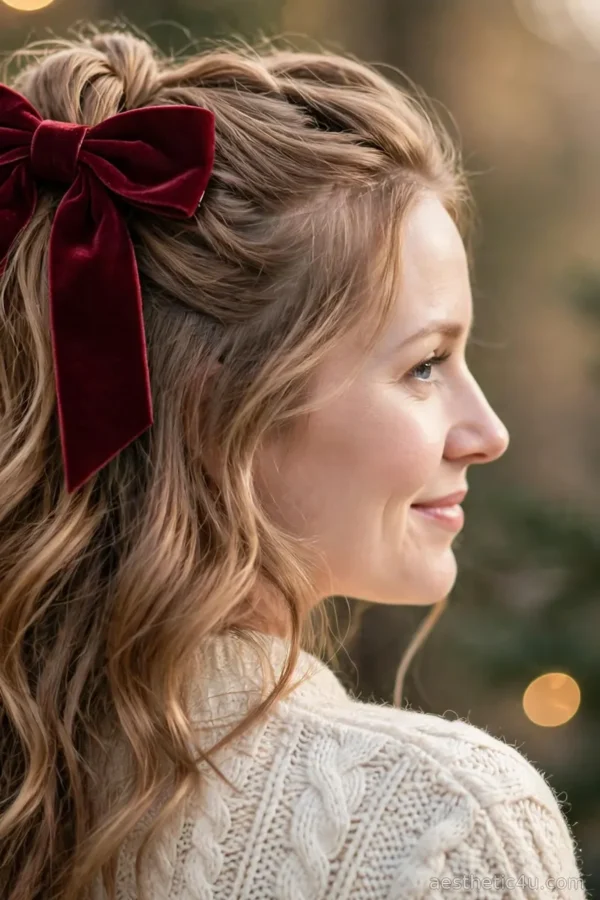
15. Half-Up Bow Knot
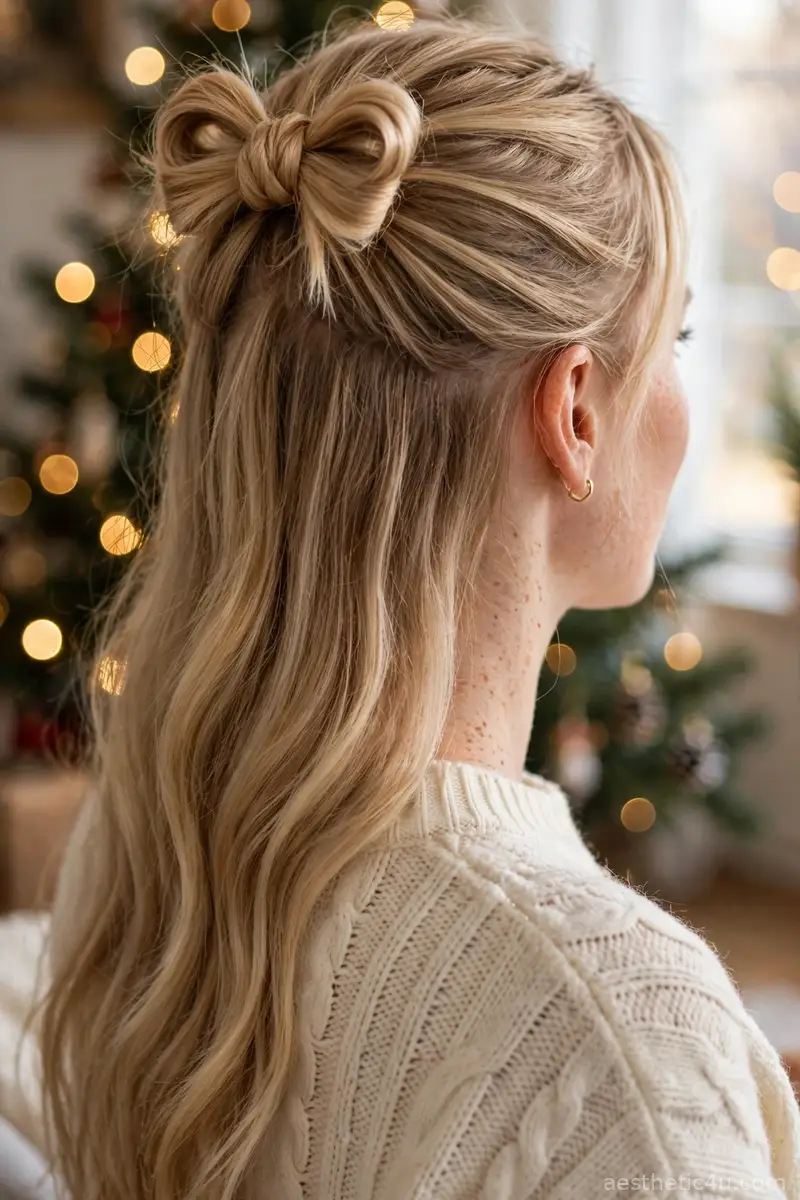
The top half of the hair tied into a small bow-shaped knot, the bow’s loops made from the hair itself, the bottom half staying loose. Gather the top half, form two loops like a bow, secure the center with a small section wrapped around it, and pin underneath. Smooth the loose lengths. It takes 15 to 20 minutes, is intermediate, and the hair bow is charming without looking childish when the rest is kept smooth. Secure the bow’s center tightly so the loops keep their shape all evening.
This suits oval and heart-shaped faces and works on medium to long hair. I’d pick this for a casual family dinner when I want something sweet and festive. Pro tip: keep the bow small and neat, and the loose hair sleek; an oversized messy bow is what tips this from charming into costume. Keep the loops small and even for the most elegant result.
Keep exploring: 18 Low Bun Hairstyles for Christmas That Look Effortlessly Chic
16. Sleek Low Bun with Middle Part
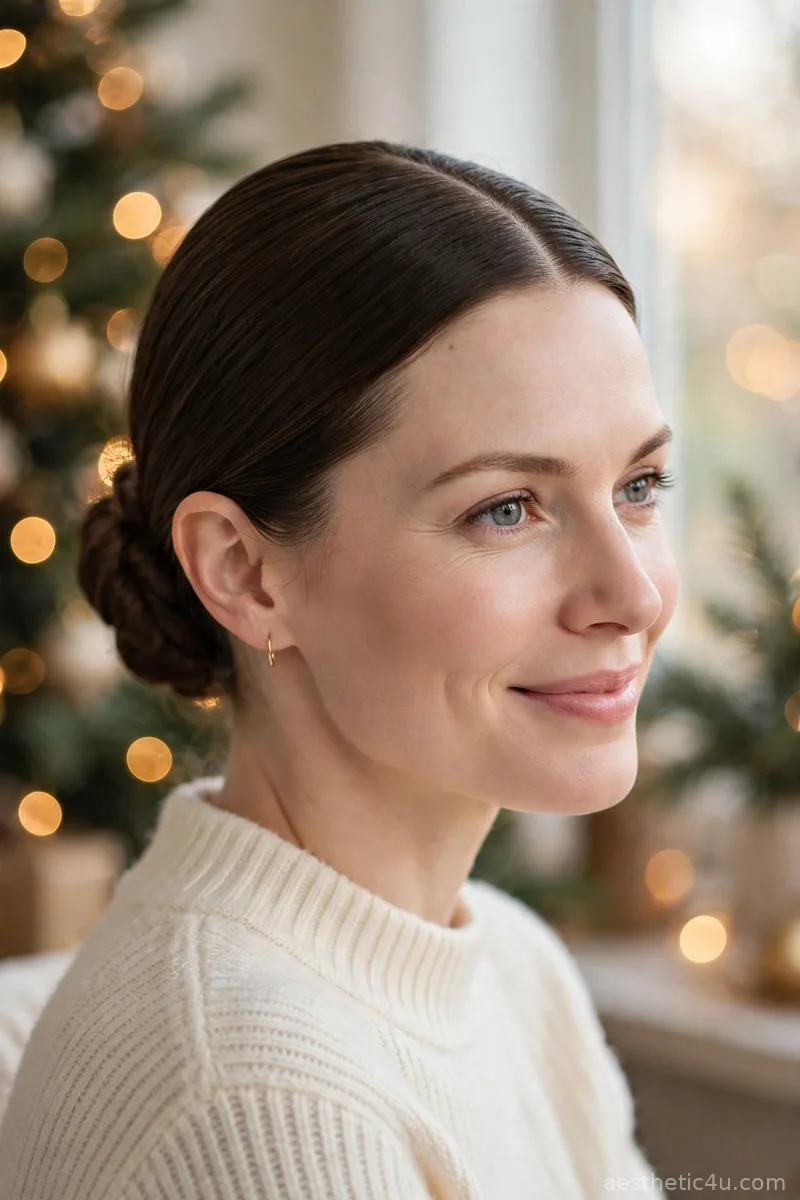
A smooth low bun with a precise middle part: the part sharp, the bun neat, the whole look symmetrical and calm. Create the middle part with a tail comb while damp, smooth both sides with serum, gather low, twist into a tidy coil, and pin flat. Set the part with a light gel. It takes 10 to 15 minutes, is beginner-easy, and it looks incredibly expensive in photos. Apply a light gel along the part with your fingertips to keep it crisp all night.
This suits oval and heart-shaped faces and works on medium to long hair. I’d pick this when I want modern minimalism. Honest caveat: a middle part emphasizes asymmetry in the face, so if your features are uneven, a soft side part will be more flattering; choose honesty over trend here. Check the part in the mirror from the front before heading to the table.
17. Elegant Scarf-Wrapped Updo
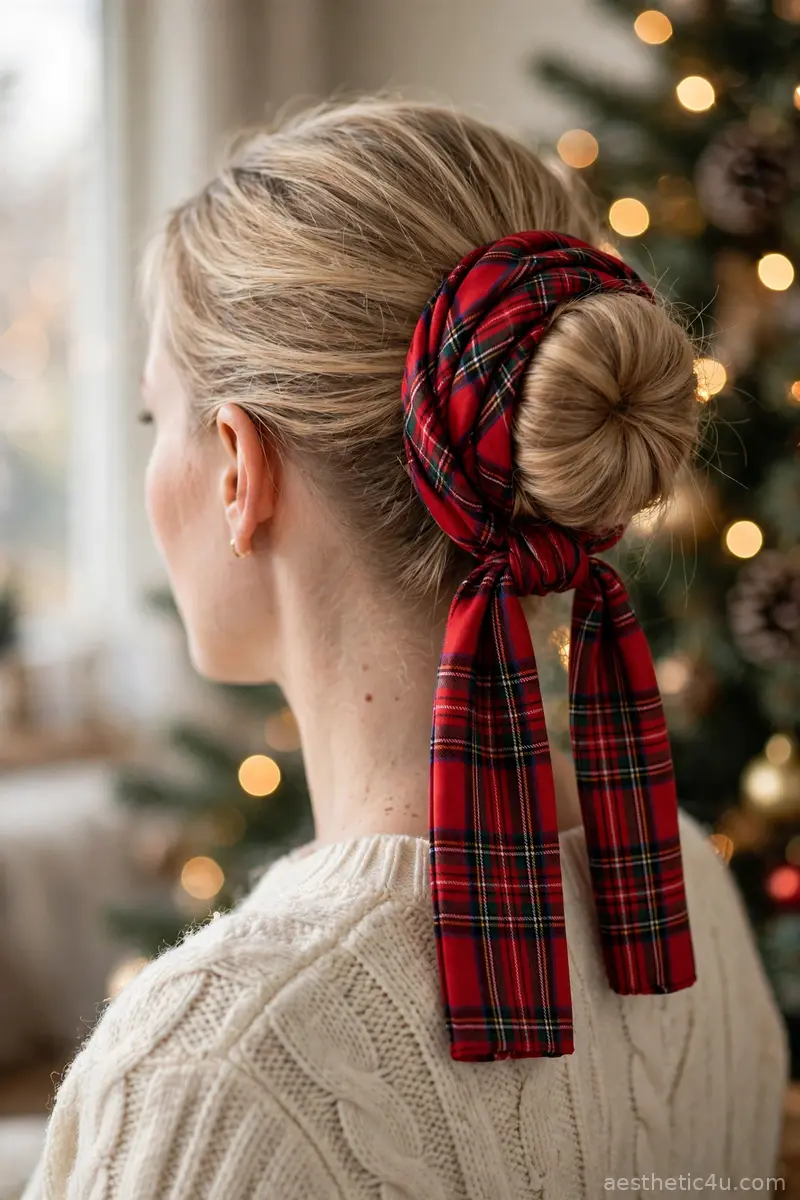
An updo wrapped with a silk scarf in a holiday print, the scarf weaving around the bun and tying neatly underneath while the print adds color and pattern. Build a simple low bun first, wrap a long scarf around its base two to three times, knot underneath, and arrange the ends. It takes 10 minutes, is beginner-easy, and it hides a simple bun while looking completely intentional. Arrange the scarf ends neatly, either tucked in or left to hang evenly.
This suits every face shape and works on medium to long hair. I’d pick a tartan or deep floral scarf for Christmas dinner when I want festive color without spending money. Pro tip: use a scarf at least 30 inches long for two full wraps plus a knot, and choose one with a little texture so it grips instead of slipping.
How to Choose the Right Christmas Dinner Hairstyle for You
Start with your role at the table. Hosting means your hair must survive cooking, serving, and hours of moving, so choose braided crowns, low buns, and wrapped styles that lock in and stay out of the food. Attending as a guest gives you freedom for looser waves and half-up looks. A formal dinner calls for polish: French twists, sleek chignons, and pearl or brooch accents. For face shapes, round faces gain from crown height and asymmetry, oval faces suit almost everything, heart-shaped faces love side-swept softness, and square faces soften with waves rather than severe center parts.
Then match your hair and your timeline. Fine hair needs grip: dry shampoo, texturizing spray, and styles with built-in hold like twists and braids. Thick hair needs strong elastics and long pins. Short hair looks dinner-ready with one good accessory, like a satin headband, while long hair carries chignons and crowns best. Be honest about skill and time: pick a ten-minute beginner style for the actual day, and save the French twist practice for the weekend before.
Styling Tips & Common Mistakes to Avoid
My dinner-table rules: first, the finish is everything, so smooth flyaways with a toothbrush misted with hairspray and press a shine serum through the ends; that polished surface is what reads expensive. Second, style on day-old hair or add dry shampoo at the roots, because grip keeps pins and twists in place through a long meal. Third, do a trial run a few days before, timed, so dinner day stays calm. Fourth, keep a tiny rescue kit nearby: three bobby pins and a travel serum handle almost any mid-dinner emergency.
The mistakes I see most: choosing a style that needs constant fixing, which pulls you away from your guests; piling on too many accessories until the hair disappears, when one hero piece is stronger; and skipping heat protectant in the rush, which leaves ends frizzy under dining-room lighting. The biggest one is touching your hair all evening: every touch adds oil and loosens the set, so style it, set it with a light mist, and then leave it alone and enjoy your dinner.
Final Thoughts
Those are my favorite christmas dinner hairstyles that look expensive without the salon bill, each one chosen to survive a real evening: cooking, toasts, photos, and second helpings. Pick the one that fits your evening, do a quick trial run, and enjoy dinner without a single hair worry. The best look is the one that lets you relax and be present with the people you love. Happy holidays, and enjoy every bite. Pick your favorite, practice it once, and enjoy every moment.
Follow Us On Pinterest: Easy To Find Next Style