Sana
Every December, my clients ask for the same thing: a hairstyle that looks festive in photos, survives a full day of cooking and hugging, and does not eat up their morning. This year, the answer I keep giving is the Christmas ponytail. Pinterest searches for holiday ponytails spike every November, and for good reason – the ponytail has quietly become the hardest-working style of the season. Sleek, romantic, playful, or full glam, there is a version for every plan on your calendar, from Christmas morning coffee to the office party.
This guide is for everyone. Fine hair or thick, straight or curly, beginners who own one elastic or braiders who can Dutch in their sleep – I picked 19 ideas across every skill level. You will learn how to pick the right ponytail for your face shape and hair type, the exact tools and products that make each one work, and the small mistakes that make a ponytail fall flat by noon. I have styled ponytails for over a decade, and I still think they are the most underrated holiday hairstyle there is.
So grab your elastics, a brush, and one festive accessory. By the end of this list, you will have at least three styles you can do with your eyes closed, and one showstopper for the big night. Let us make your ponytail the best-dressed thing in the room.
1. Classic High Ponytail with Velvet Ribbon

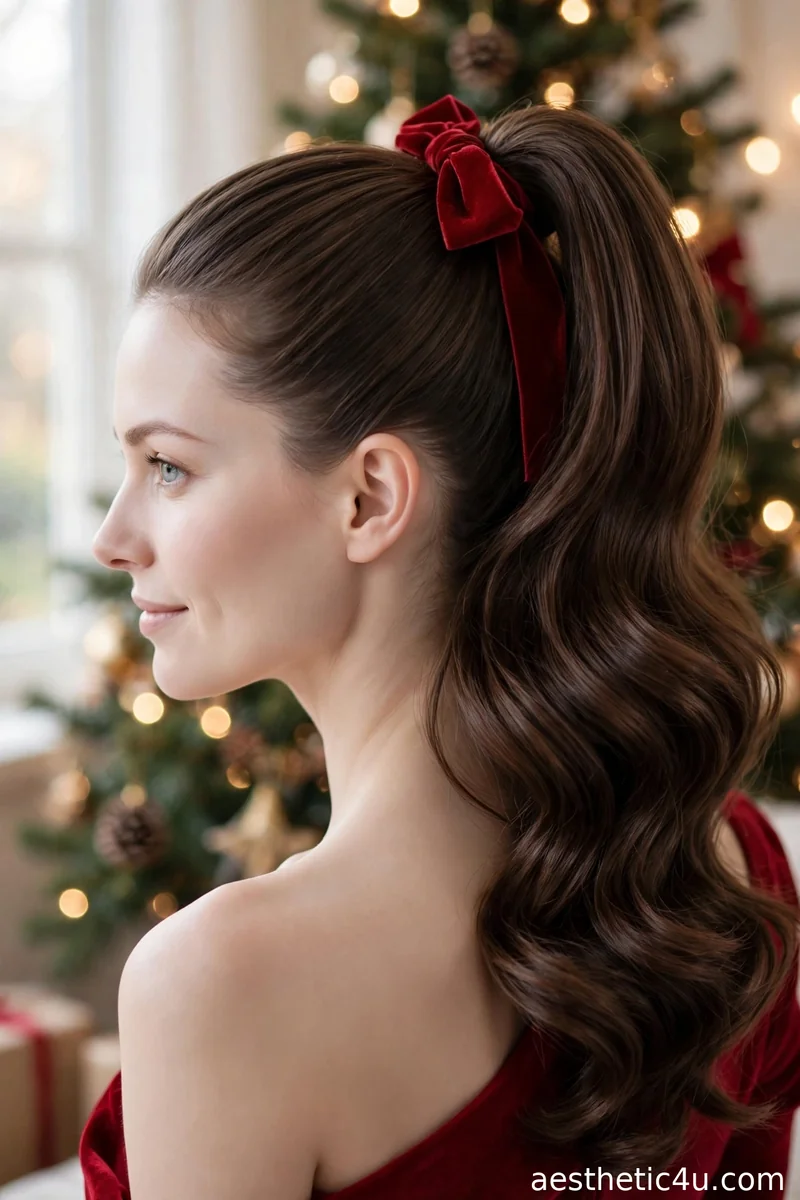
A sky-high ponytail pulled tight and smooth at the crown, ends curled into big soft waves, with a wide velvet ribbon in deep red or forest green tied into a full bow at the base. Flip your head upside down, brush everything up with a boar bristle brush, and secure with two stacked elastics. Curl the tail in 2-inch sections with a 1.25-inch curling iron, mist with flexible-hold hairspray, then tie the ribbon and fluff the bow. About 15 minutes, easy difficulty – the ribbon hides any imperfect smoothing.
This suits oval, heart, and long faces best, since crown height lifts and lengthens – on very round faces, sit the pony slightly lower to avoid fullness at the cheeks. It works on medium to long hair, straight or wavy. I would pick this for Christmas parties or photos with the tree, when you want maximum holiday energy. Caveat: a super-tight high pony can ache by midnight, so go snug, not strangling – the ribbon covers the base anyway.
2. Sleek Wrapped Low Ponytail

Hair brushed glass-smooth and gathered low at the nape, a thin strand wrapped around the elastic to hide it, the tail falling straight and polished. Start on dry, straightened hair – flat iron in small sections first, then smooth a pea-sized drop of shine serum through the lengths. Brush back with a paddle brush, secure low, wrap a half-inch strand from under the tail around the base, and pin it underneath. About 10 minutes, easy to medium – the sleek finish demands neatness, not speed.
I recommend this for oval and square faces – the low, clean line softens a strong jaw, and a center part keeps it balanced. It is ideal for straight or straightened hair, and my pick for the office party or dinner with the in-laws, where you want to look expensive without trying. Pro tip: on second-day hair, work dry shampoo into the roots first – it adds grip and kills the oiliness that ruins a glassy finish.
3. Voluminous Curled Ponytail
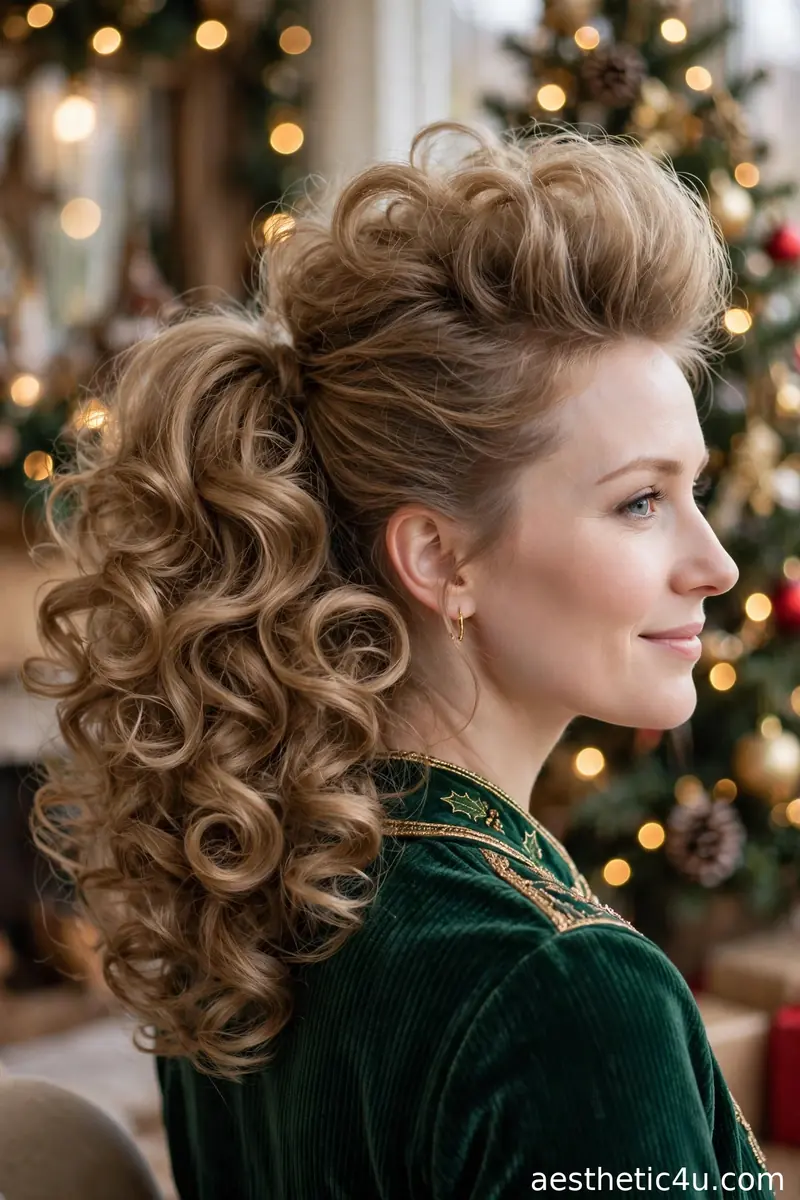
A mid-height ponytail with the tail curled in big bouncy sections, the crown gently teased so the whole shape looks full and lifted. Prep with volumizing mousse on damp roots and blow-dry upside down. Gather at mid-head, curl the tail with a 1-inch iron alternating directions, then backcomb the crown lightly with a teasing comb and smooth the top layer over. Finish with texturizing spray for airy separation. About 20 minutes, medium difficulty – the teasing is the only part that takes practice.
If your hair is fine, this is your best friend – curls fake thickness like nothing else, and I always tell clients this pony photographs beautifully from every angle. It flatters round and heart faces, since crown volume balances wider cheeks. Caveat: heavy curls can drag the pony down over hours, so anchor with two crossed bobby pins at the base and carry a travel hairspray for a mid-evening refresh.
4. Braided Base High Ponytail
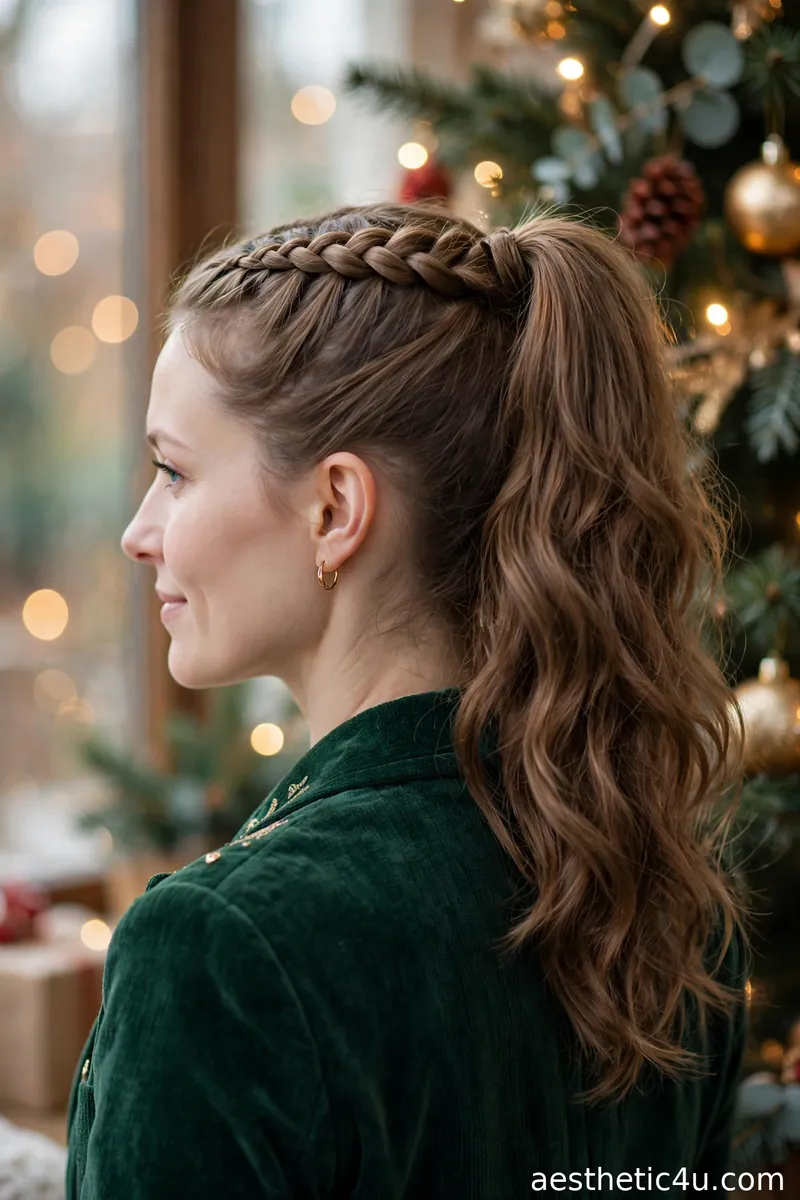
A high ponytail where the top section starts as a tight Dutch braid before flowing into the pony, adding raised texture at the crown. Section the front hair temple to temple, Dutch braid it back (crossing strands under), and secure the braid tail with the rest of the hair into one high elastic. Tug the braid edges gently – pancaking makes it look twice as thick. Style the tail straight or curled. Takes 15 to 20 minutes, medium difficulty if you can already Dutch braid.
This suits long faces – the braid adds width at the crown, balancing length – and active plans, since the braid anchors everything through dancing. It works on medium to long hair with some grip; very silky hair needs texturizing spray first. I would pick this for the office party dance floor. Caveat: Dutch braiding on yourself takes a mirror and patience, so trial-run it the day before, not an hour before the event.
5. Bubble Ponytail with Gold Cuffs

A high ponytail divided into puffy sections with small clear elastics, creating a bubble effect down the length, with tiny gold hair cuffs clamped on a few elastics. Secure a high pony, place elastics every 2 to 3 inches, and pull each section outward with your fingertips to puff it. Slide two or three lightweight gold cuffs over the bands and pinch closed. About 10 minutes, genuinely easy – the only skill is not pulling bubbles lopsided. Mist with flexible-hold spray so they do not deflate.
This is the fun one – playful but still pretty. It suits round and oval faces because the vertical bubbles draw the eye up and down, and works best on medium to long hair. I would pick this for a casual gift exchange or Christmas brunch. Pro tip: buy lightweight aluminum cuffs – heavy ones slide down and drag the bubbles flat by afternoon, and the gold still catches the light beautifully.
Keep exploring: 25 Christmas Hairstyles That Are Taking Over This Holiday Season
6. Side-Swept Hollywood Ponytail
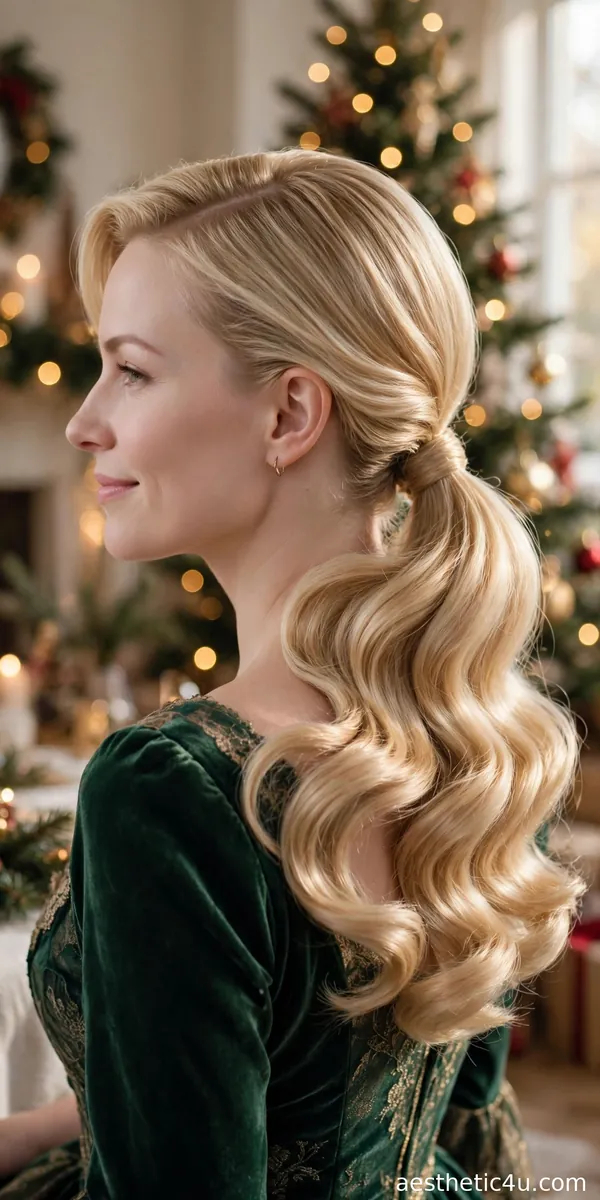
A deep side part with all hair swept over one shoulder into a low, glossy ponytail, big vintage waves giving an old-Hollywood finish. Make the deep part with a rat-tail comb, curl large sections with a 1.5-inch iron all in the same direction, then brush out with a boar bristle brush until curls merge into waves. Sweep to one side, secure low behind the ear, wrap a strand around the base, and smooth shine serum over the top. About 25 minutes, medium difficulty – uniform waves take control.
Pure glamour, and I am obsessed. It flatters heart and square faces – the side sweep softens a wide forehead and strong jaw – and shows off earrings like nothing else, so wear your sparkliest pair. Best on medium to long hair. I would pick this for Christmas Eve dinner. Caveat: brush the waves out while still warm for that seamless wave – once cooled, you get ringlets instead of Hollywood.
7. Textured Beach-Wave Ponytail
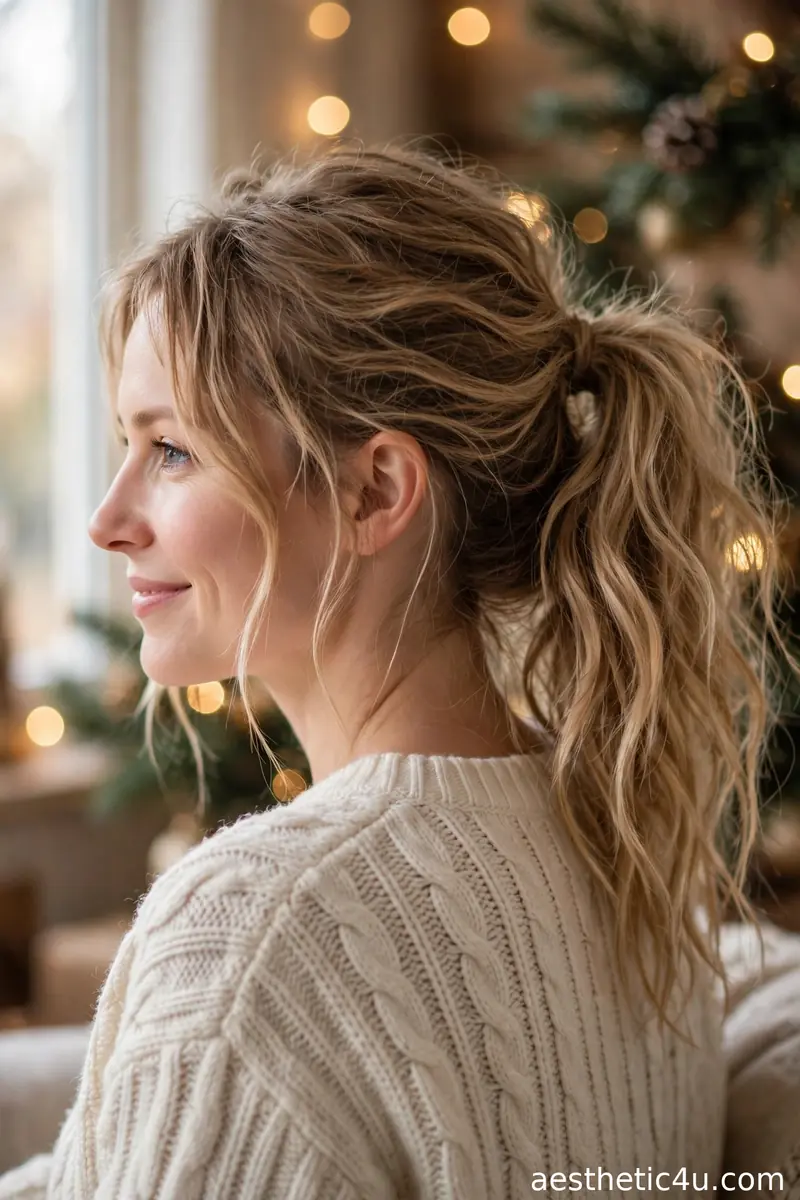
A relaxed mid-height ponytail with loose, undone waves and a few strands pulled free around the face. Best on second-day hair: work texturizing spray through dry hair, gather loosely at mid-head with a fabric scrunchie, leaving the crown slightly slack. Wave the tail with a 1.25-inch wand, alternating directions for natural movement, then pull two face-framing pieces free and tousle everything with your fingers. Ten minutes, easy difficulty – and honestly better when you do not overthink it, since perfection kills the effortless vibe.
Not every Christmas look must be polished, and this proves it. It suits every face shape – the loose pieces soften everything – and is kindest to wavy or curly hair with natural texture. I love this for Christmas morning; it looks effortlessly pretty in family photos. Pro tip: blast dry shampoo at the crown before gathering to freshen roots, and resist re-tightening the elastic hourly – the looseness is the style.
8. Twisted Crown Low Ponytail
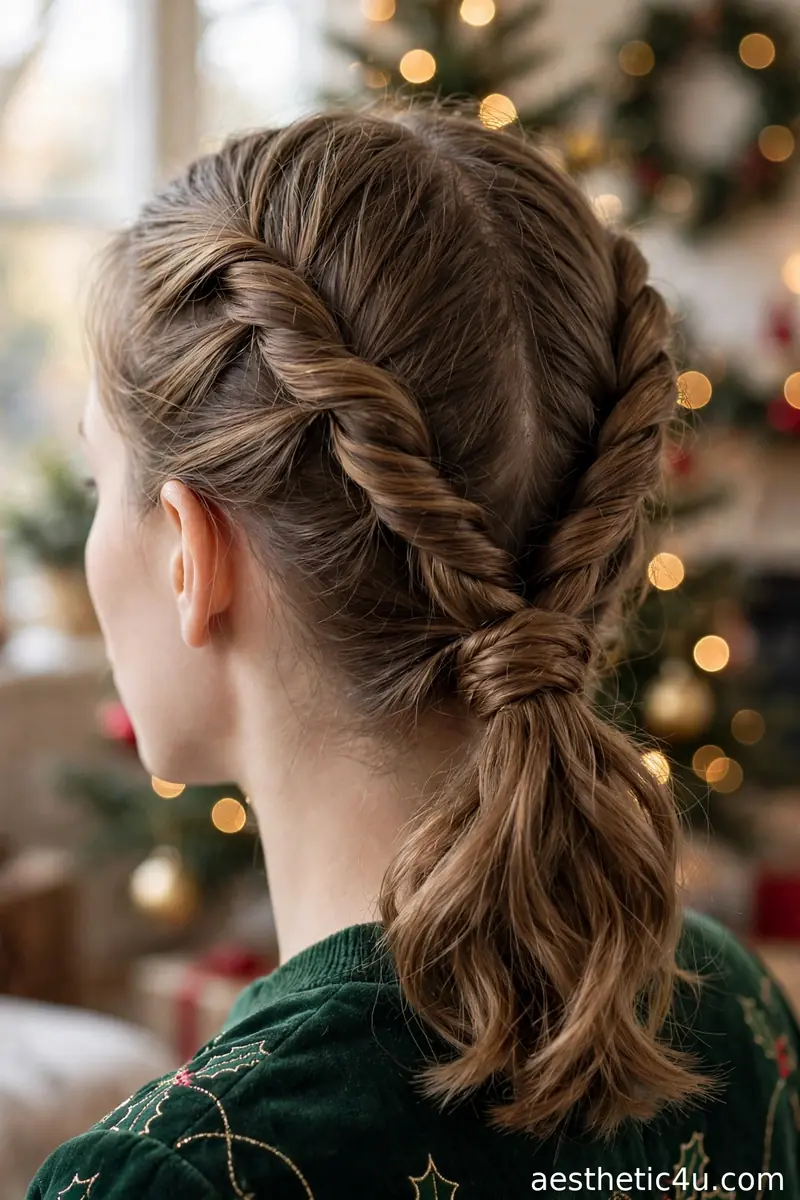
Two twisted sections, one from each side, meet at the back and merge into a low ponytail, creating a rope detail across the crown. Part down the middle, twist a 2-inch section back from each temple – adding hair as you go like a French twist – and join both with the remaining hair into a low elastic. Pin each twist’s end under the elastic so nothing unravels. About 10 minutes, easy – if you can twist hair, you can do this. A touch of smoothing cream tames flyaways.
This looks complicated but takes ten minutes, and nobody will believe you. It suits oval and long faces – the side twists add width where longer faces need it – and works on straight to wavy medium-plus hair. I suggest it for anyone wanting something different without learning a real braid. Pro tip: twist away from the face with even tension – uneven twists are what make this look homemade instead of polished.
9. Double Stacked Ponytail for Fullness
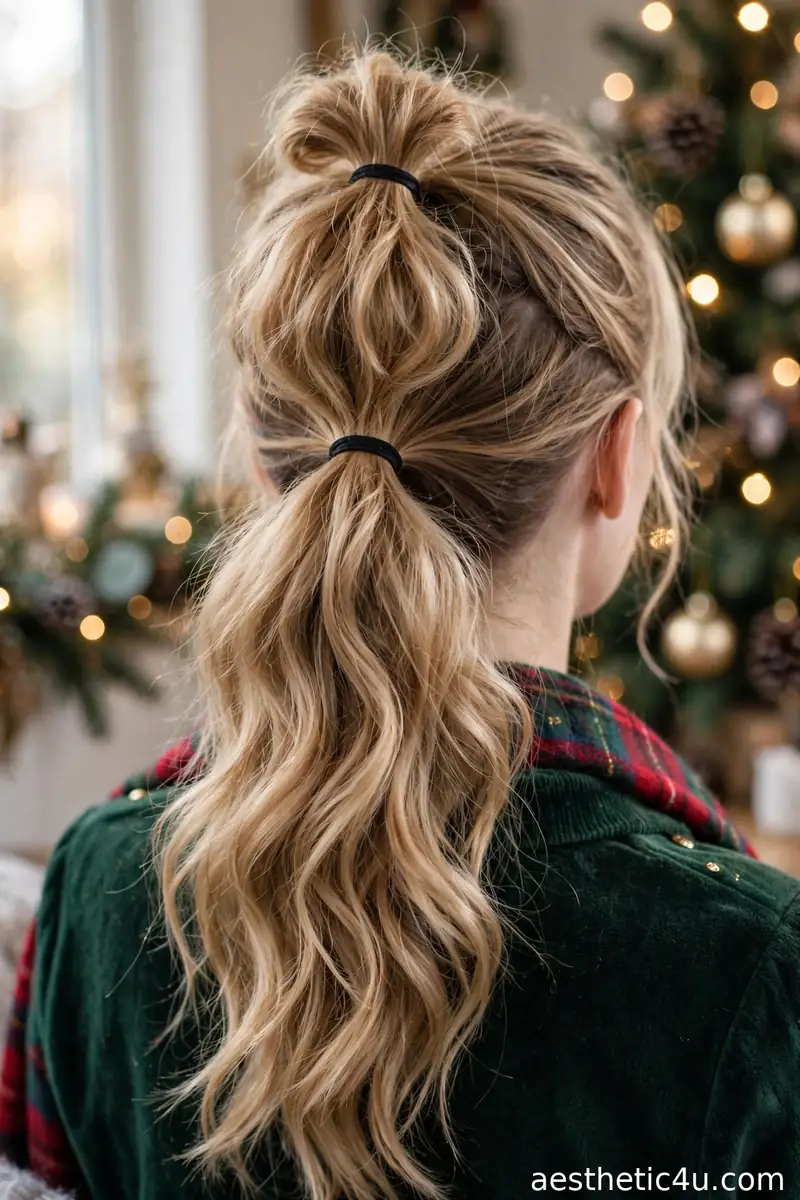
Two ponytails stacked one above the other – the top camouflages the bottom, reading as one incredibly thick pony from the front. Part ear to ear, gather the top two-thirds into a crown pony and the bottom third just below it. The top tail falls over the second elastic, hiding it. Curl both tails together with a 1.25-inch iron so they blend, and finish with texturizing spray. About 12 minutes, easy – matching the ponies’ positions takes one practice run.
My secret weapon for fine hair – the fullness is honestly shocking the first time. It suits all face shapes and rescues anyone whose single ponytail looks skinny in photos. Layer a ribbon over the base and it is instantly festive. Caveat: keep the top section the larger one, or the bottom elastic peeks out – and check the back view in a hand mirror before leaving.
10. Slicked-Back Wet-Look Ponytail

Hair slicked straight back with gel into a tight low ponytail with a high-shine wet finish, the tail left straight and sleek. Work a quarter-sized amount of strong-hold gel through damp roots, combing straight back with a fine-tooth comb – no part. Pull into a low elastic, smooth the crown again, flat iron the tail, and press a drop of shine serum over the top. Ten minutes on damp hair, easy – the product does the work; precision matters more than technique.
The fashion-editor ponytail – bold, modern, very cool. It suits oval and heart faces with strong bone structure, since everything is on display; on rounder faces, keep a whisper of crown volume instead of scraping flat. I would wear it with a red lip and call it a day. Pro tip: day-three hair holds this better than clean hair – the slicked finish hides everything, so skip the wash.
Keep exploring: 23 Christmas Party Hairstyles Everyone Will Be Copying
11. Loose Romantic Ponytail with Curtain Bangs
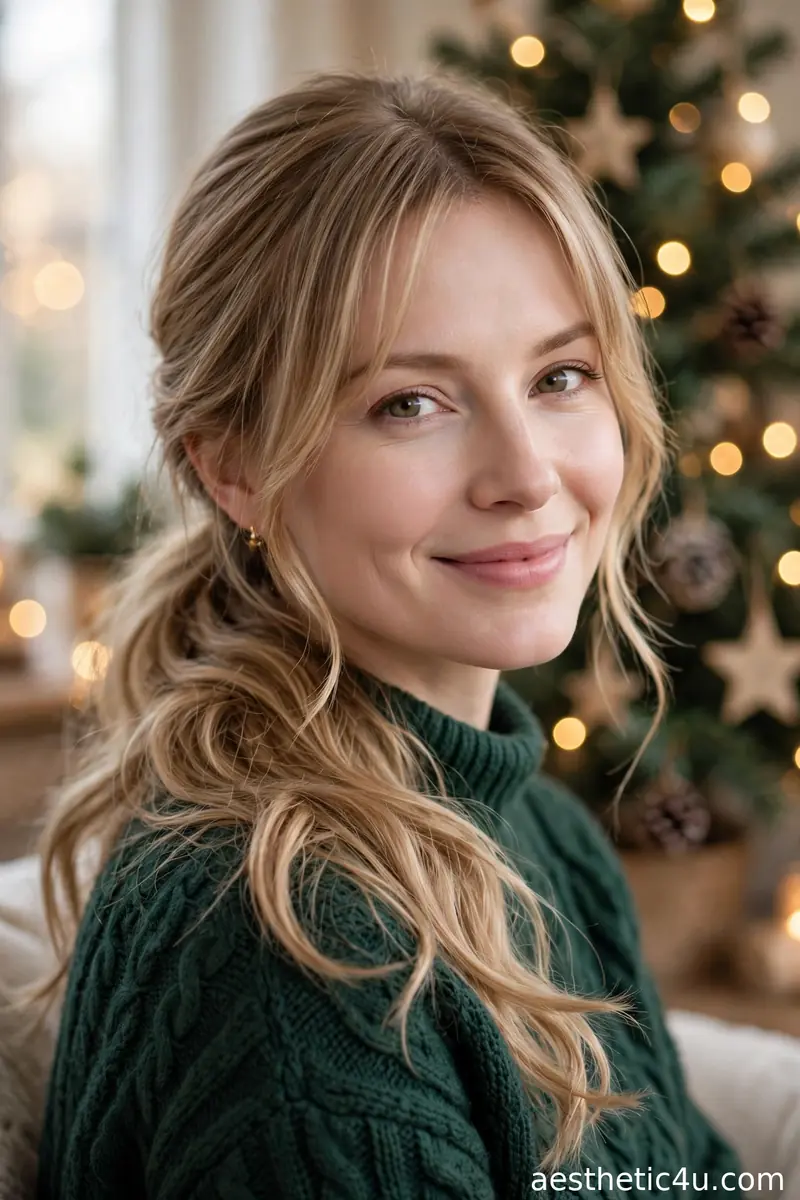
A soft low ponytail worn loose and undone, with curtain bangs framing the face and gentle bends – not tight curls – through the tail. Bend 2-inch sections around a 1.5-inch iron, leaving ends out for a modern finish. Gather loosely at the nape with a soft scrunchie, keeping the crown relaxed. Sweep the curtain bangs outward with a round brush and blow-dryer. About 15 minutes, easy to medium – the bangs need a little heat attention. Flexible-hold spray keeps the softness.
The romantic-comedy heroine of ponytails. It suits almost everyone – the sweeping bangs flatter square and heart faces especially, breaking up a strong forehead. Best on straight to wavy medium-plus hair. I would wear it to a cozy Christmas dinner – sweet without trying too hard. Caveat: curtain bangs fall flat in humidity, so pack a mini flat iron or a few bobby pins for a quick refresh before photos.
12. Flipped-End Retro Ponytail
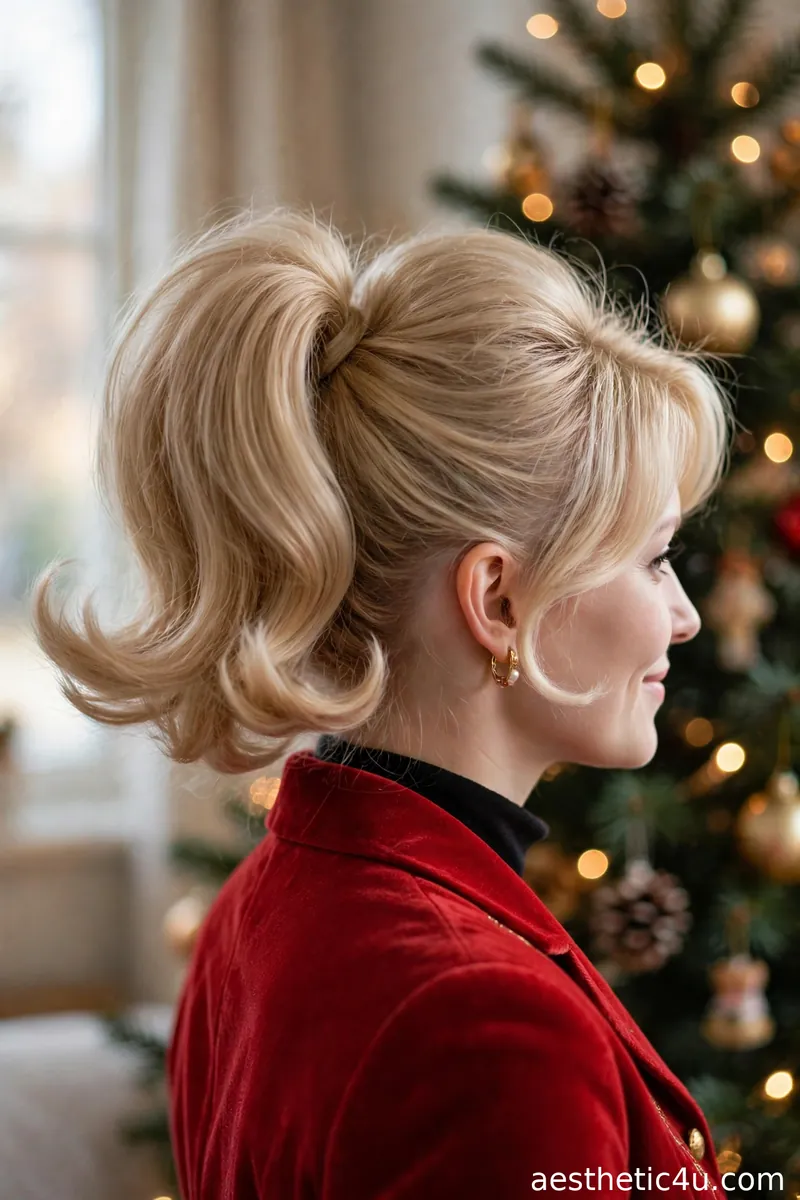
A bouncy high ponytail with the ends flipped outward in a playful retro flick, the crown smooth with a little lift at the front. Blow-dry the crown smooth with a round brush, gather high, then curl just the last 3 inches outward with a 1-inch iron – flip, do not curl under. Backcomb a small front section for the retro bump, smooth it over, and pin. Set with medium-hold spray. About 15 minutes, easy – imperfect flicks still look intentional.
Cheerful and a little bit vintage – it makes me smile every time. It suits oval and long faces: the flip adds width at the ends, the bump adds height, balancing both ways. I think it is perfect for retro lovers – pair it with a red headband and you are done. Pro tip: the flip holds best on freshly washed hair with light mousse at the ends; heavy conditioner makes the flick drop within the hour.
13. Low Ponytail with Braided Elastic Wrap

A simple low ponytail where a thin three-strand braid wraps around the base instead of a plain strand, the tail left sleek or lightly waved. Secure a neat low pony first. Braid a half-inch section from under the tail tightly to the end, fix with a tiny clear elastic, wrap the mini braid around the base, tuck the end under, and pin with two crossed bobby pins. About 10 minutes, easy – braiding the small section is the only fiddly part. Smooth the tail with serum for contrast.
Such a small change, such a big difference – the little braid makes the simplest pony look intentional. It suits every face shape, since the silhouette is just a clean low pony. I love this for December workdays when you still want to feel festive. Caveat: on very short or layered hair the braid may not reach around – use a thicker section or wrap once and pin where it ends; nobody will know.
14. Half-Up Ponytail with Satin Bow
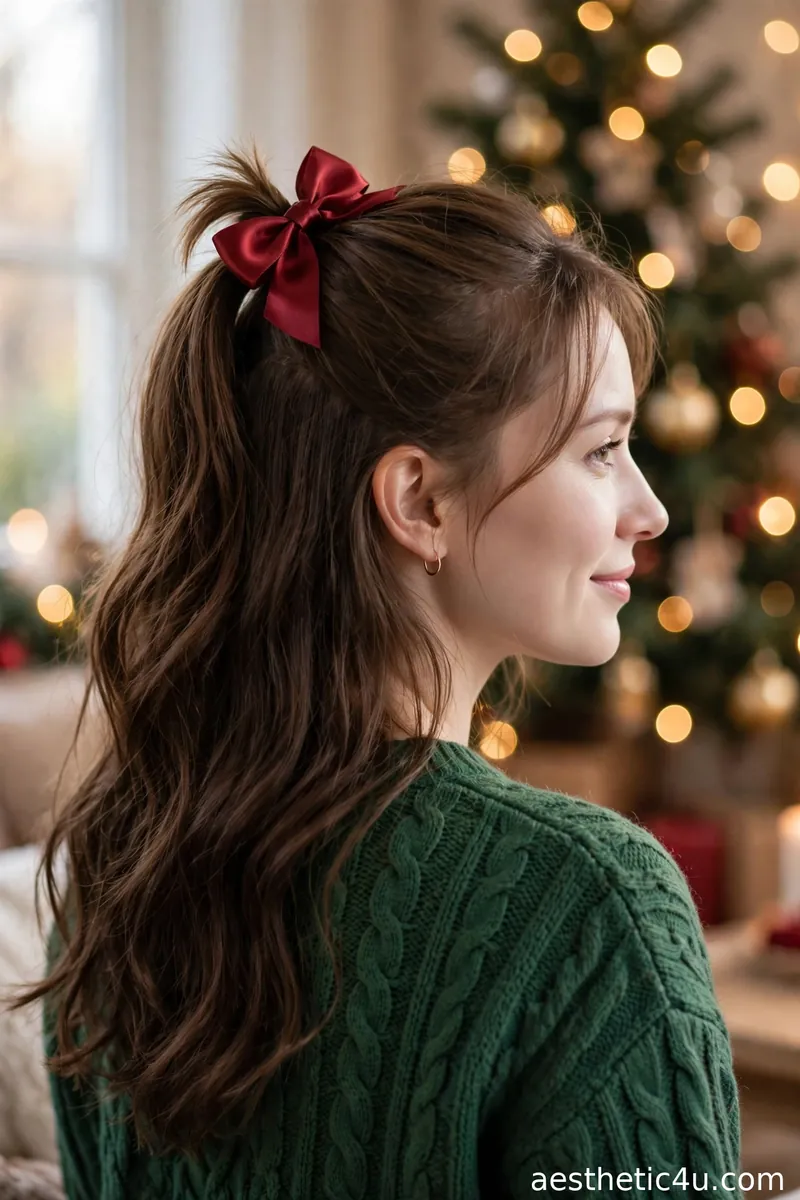
The top half of the hair pulled into a small ponytail at the crown, finished with a satin bow clip, the rest falling loose underneath. Section temple to temple, smooth the top back, and secure at the crown with a small elastic – neat but not scraped tight. Clip the satin bow over the elastic, tilted slightly for a natural look. Style the loose lengths with soft waves from a 1.25-inch wand. Ten minutes, easy. If the bow feels loose, anchor it with a bobby pin through its back loop.
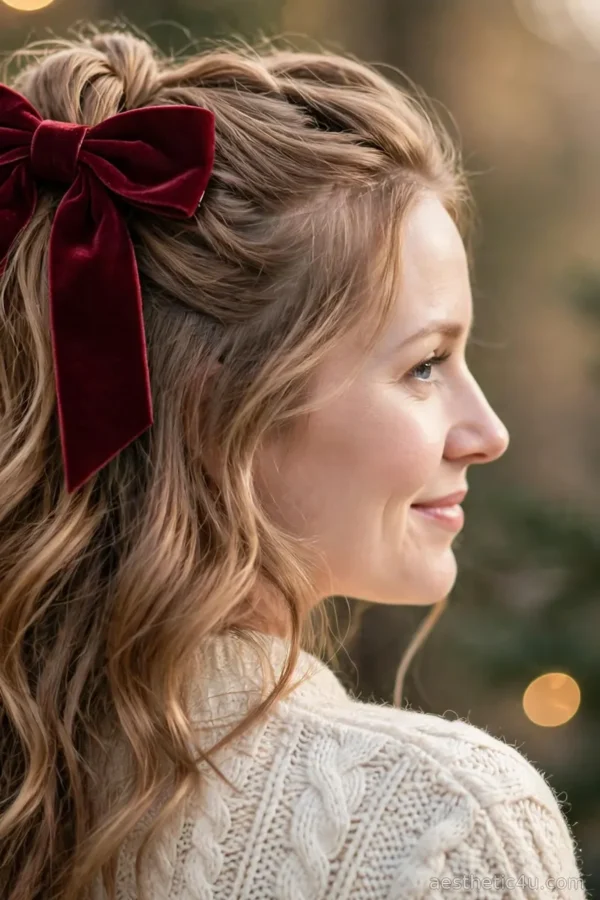
Half-up is my answer for anyone torn between up and down. It suits round and heart faces – crown height elongates, loose hair softens the jaw – and the bow is especially cute on medium-length hair. Pro tip: match the bow to your outfit’s undertone – warm reds and golds with warm outfits, silver and emerald with cool ones – and the whole look suddenly appears styled rather than thrown together.
15. Midi Ponytail with Twisted Sides

A ponytail at midi height – the middle of the head – with twisted sections from each temple feeding into it, adding side-view detail while the pony keeps things easy. Twist a 2-inch section back from each temple, clip temporarily, then gather everything into a back-center pony. Remove clips, smooth the crown, wrap a strand around the elastic, and wave the tail lightly with a 1-inch iron. About 12 minutes, easy – the midi placement is the most forgiving height, demanding no perfectly smooth crown.
Not too high, not too low – the midi height flatters just about every face shape. I like how the twists give structure while the pony keeps it easy. It works on medium to long hair, straight or wavy – a great all-rounder for any holiday plan. Caveat: the twists star in the side view, so check both sides in the mirror and even out any lopsided twisting before heading out.
Keep exploring: 21 Holiday Party Hairstyles That Steal the Spotlight
16. Swirled 60s Bouffant Ponytail

A voluminous bouffant crown swept up into a high ponytail, ends curled under in a swirl – very sixties, very dramatic. Section the crown temple to temple, backcomb the underside in 1-inch layers with a teasing comb, and smooth the top layer over. Gather high into a tight elastic – tension holds the bouffant up. Curl the tail under with a 1.5-inch iron, rolling ends inward for the swirl. Lock with strong-hold spray in two light layers. Takes 20 to 25 minutes, medium – backcombing is the learning curve.
For drama days, this delivers – the height is incredible in photos, and it suits round faces especially, since crown volume elongates beautifully. I would save it for the big night: New Year energy, but make it Christmas. Caveat: backcombing is rough on fine or damaged hair – use heat protectant, tease gently, and brush out with conditioner and a wide-tooth comb in the shower, never dry.
17. Messy Undone Ponytail with Pearl Pins

A deliberately messy low ponytail with texture and loose pieces, a few small pearl pins scattered near the base. Work texturizing spray through dry hair, gather loosely at the nape, and pull pieces free around the face and crown. Tug small crown sections outward for airy volume, then place 5 to 7 pearl pins asymmetrically around the base – odd numbers look natural. Ten minutes, easy; the hardest part is not over-fixing it. Flexible-hold spray keeps texture without gluing it down.
Messy on purpose is an art, and the pearls keep it elegant. I love this for a relaxed Christmas Eve at home that still deserves a cute photo – it looks like you woke up pretty. It suits every face shape and flatters curly and wavy textures especially. Pro tip: place pins after tousling, not before – early pins get buried when you pull pieces loose, and you will end up fishing through your own hair.
18. Sleek Long Ponytail with Blunt Ends

An ultra-smooth ponytail, high or mid, with blunt-cut ends so the tail looks thick and sharp – not a curl in sight. This starts at the salon: ask for a blunt, straight-across trim on the lengths. At home, flat iron the tail in thin sections, smooth the crown with a boar bristle brush, and secure firmly. Run shine serum down the tail and finish with light flexible-hold spray. About 15 minutes on straight hair, easy – but it demands healthy, even ends, so trim first if yours are wispy.
The power ponytail – clean, confident, striking. I think it looks best on long hair where blunt ends really show, and it suits oval and heart faces with its strong graphic line. Main-character energy, and I am here for it. Caveat: blunt ends expose damage mercilessly, so get that fresh trim first – and on very fine hair the tail can look sparse rather than sharp.
19. Low Ponytail with Chunky Glitter Scrunchie

An easy low ponytail finished with an oversized glitter or sequin scrunchie at the base – the hair stays simple; the scrunchie is the star. Gather low with a plain elastic first for security, smoothing the crown with a paddle brush. Wrap the glitter scrunchie around the base two or three times until it sits full and even. Leave the tail straight or add a few loose bends with a 1.25-inch wand – either works, since the scrunchie draws every eye. Five minutes, the easiest style on this list. Pony plus scrunchie – done.
Proof that one accessory can carry a hairstyle. I keep a glitter scrunchie in my bag all December – it turns a gym ponytail into a party ponytail in two seconds. It suits everyone: every face shape, every hair type, no wrong way to wear it. Pro tip: match the scrunchie to your holiday wardrobe – deep red, emerald, gold, silver – and pick one with a strong inner elastic, since cheap ones stretch out by the second wear.
How to Choose the Right Christmas Ponytail Style for You
Start with your face shape, because ponytail placement changes how your features read. High ponytails add length, flattering round faces and short necks; low ponytails add width and calm, suiting long faces and strong jawlines. Midi ponytails suit almost everyone – when in doubt, go midi. Next, be honest about your hair. Fine hair needs volume tricks: teasing, curling, or the double-stacked method. Thick hair needs control: smoothing serum, strong elastics, wrapped bases. Curly hair already brings texture, so lean into loose, undone styles instead of fighting it straight. Then match the style to the occasion and your skill level. Work parties call for polished – sleek wrapped or Hollywood ponies. Casual brunches allow playful – bubbles, twists, glitter scrunchies. Big evenings deserve drama – bouffant, velvet bows. My stylist rule: pick a style one level below your max skill on event day. If you can barely Dutch braid, debut the twisted version instead of the braided-base pony. Confidence in the style matters more than the style itself.
Styling Tips & Common Mistakes to Avoid
First: prep is everything. Mousse for volume, smoothing cream for sleekness, texturizing spray for grip – prepped hair styles in half the time. Second: stack two elastics for high ponytails, or use one thick fabric-covered band for low ones; thin rubber bands snap and crease. Third: always wrap the base – a strand of hair, a ribbon, a scrunchie – anything hiding the elastic reads salon-done. Fourth: set the crown, not just the tail. Most ponytails collapse because the crown was never secured – a mist of hairspray or two crossed bobby pins at the base buys hours. Now the mistakes. The biggest: scraping hair so tight it aches and harshens the hairline – snug holds, strangling causes breakage over time. Loosen a quarter inch and smooth flyaways with serum instead of tension. Second: ignoring the back view. Every ponytail has one, and photos will find it – check with a hand mirror. Third: overloading product. Too much gel or spray reads wet and heavy, not polished. Start with half what you think you need; you can always add more.
Final Thoughts
Ponytails deserve so much more credit than they get, and I hope this list proved it. Whether you go sleek, romantic, or full retro, there is a Christmas ponytail here for your plans, your hair type, and your morning schedule. My advice: pick one everyday style and one party style, practice each once before the event, and keep a festive accessory in your bag for emergencies. Add a ribbon, check the back view, and go enjoy the holidays – your hair is officially handled.
Follow Us On Pinterest: Easy To Find Next Style